Maestro Dash and Random Ramblings.
Moderator: Robsey
Re: Maestro Dash and Random Ramblings
Sorry guys...
Jumping subject matter alert.
Back to the Maestro Digi-Dash again.
Another step closer to getting everything to work in the dash.
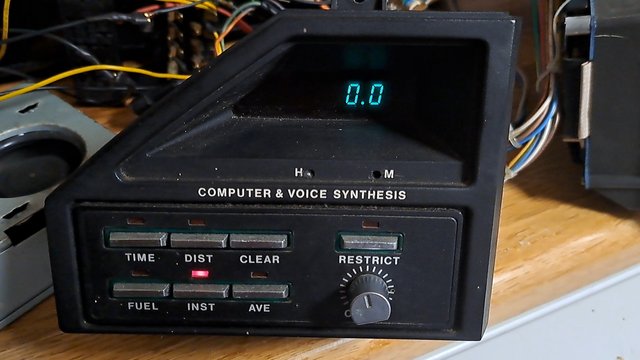
Due to lack of space, I had no way of mounting the trip computer next to the instrument cluster on the van dash.
The only suitable place is by the driver's knee, under the dash, next to the A pillar.
There is just enough space next to the Corsa EPS motor.
Only option was to extend the wires from the cluster to the two computer plugs by a metre.
Some thin-wall wire rated at 11 amps kept the job compact, and staggering the solder joints at inch intervals reduced the bulk of the cables at the joints.
My eyes and hands are nowhere near as good as they used to be, initially giving some rough looking solder joints, but a bit of persistence got me there in the end.
About nineteen wires and and two hours of cutting, soldering and sleeving later - job done.
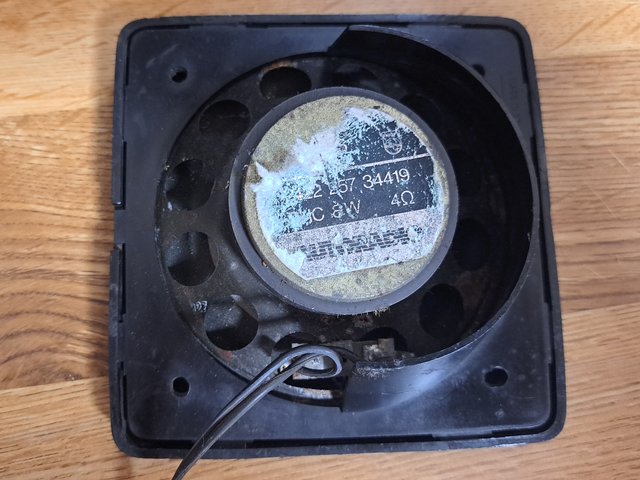
A bench test showed everything working, but sadly my 80s philips speaker was all but dead. Crackling and muffled as it spat out garbled warning messages.
Hopefully the speedometer adapter / link shaft will be made soon - it is being 3D printed due to the square-drive bores in the ends.
I should then be able to spin up the front left wheel, and see the speedo gauge react.
Fingers crossed, I will get some video up in a couple of weeks. With audio.
Just need another dash speaker, and a few more bits of wiring for the win.
Re: Maestro Dash and Random Ramblings
I am just going through the voice unit wiring for the extras -
Permanent live, ground, door pin-switch and fuel flow transducer.
All done using the proper Lucas connectors to avoid damaging the wiring any more than necessary.
________________________
I sussed out the speaker bit.
It was me all along - looking back a few pages, and I should have realised that the speaker negative wire needs to go to ground.
I have wired up all the wiring for the voice synthesis unit, except the fuel flow meter.
Really that is just a live supply and the speaker plus wires to the white 5-pin plug
Nothing else on that plug as they would be the wires to and from the radio. Which I am not connecting up.
More for tidiness rather than laziness.
And on the black 9-pin plug, there is the battery live, ground, and door dip-switch wire.
The fuel flow transducer is only three wires, when I dig it all out and I am able to measure the cable length from the engine bay to the driver's side A pillar.
The main cluster is all wired up except for the speed transducer and the dimmer rheostat.
Happy days.
- Envoy CDX
- Club Admin
- Posts: 9887
- Joined: Sun Sep 23, 2007 3:51 pm
- Location: Jarrow, Newcastle Upon Tyne
Re: Maestro Dash and Random Ramblings
Excellent Rob, some nice (or is that nICE) upgrades there. .
Re: Maestro Dash and Random Ramblings
I have put my continuity tester on the wires for the back lighting.
The relevant wires all have continuity, so this leads me to think that I have one or more defective bulbs.
Only standard T5 / 286 12volt 1.2 watt capless bulbs, but soldered captive in their holders.
I have no desire to go down the LED route even though fleabay is full of them.
I would have to faff with another pulse width modulation unit to dim the LEDs..
Nah... stick to what Austin Rover used originally. Captive 286's.
Thinking of PWM, I have two 100k ohm rheostats for the Corsa EPS system.
I am planning to use one of those idiot-proof gps controllers for my EPS, so these are now surplus to requirement.
So I can use one of them for my Dash dimmer switch.
The dimmer wheel on the van's light switch has no effect on brightness.
A perfect rheostat would be 10k ohms, but there is enough range on the 100k units to make them useable.
UPDATE -
Rheostat wired and soldered in.
This just leaves the speed pulse and turn signals from the main cluster (3 wires obviously).
And the fuel flow unit from the fuel computer loom.
Instrument controlled 12 volts - (yellow/grey)
Flow-rate pulse signal. - (yellow/pink)
And ground wire - 0 volts.- (yellow/white or black)
Re: Maestro Dash and Random Ramblings
I have finalised all the wiring connections to get everything working.
(Except fuel flow transducer at this stage).
So just for info... or the deranged.
Here are the wiring Diagrams in VW format for the main cluster...
Ignition Live and Ground
Illumination
Sensors and switches.
And the fuel computer / voice unit layout.
Easy when you know how.
(Except fuel flow transducer at this stage).
So just for info... or the deranged.
Here are the wiring Diagrams in VW format for the main cluster...
Ignition Live and Ground
Illumination
Sensors and switches.
And the fuel computer / voice unit layout.
Easy when you know how.
- Envoy CDX
- Club Admin
- Posts: 9887
- Joined: Sun Sep 23, 2007 3:51 pm
- Location: Jarrow, Newcastle Upon Tyne
Re: Maestro Dash and Random Ramblings
You're mental, but it's brilliant all the same
Re: Maestro Dash and Random Ramblings
A little more pee'ing about tonight confirmed that the illumination issue was no less than four burnt out bulbs.
Swapping bulbs around showed that back-lighting was indeed working with the ignition live on.
And a second test gave night brightness for the instruments when the rheostat was set to virtually shorted to earth.
Confident about most of the wiring, I re-plumbed in the main dash loom around the steering column and up through the dash.
I will be wiring up the speed transducer, indicators and handbrake connections this week.
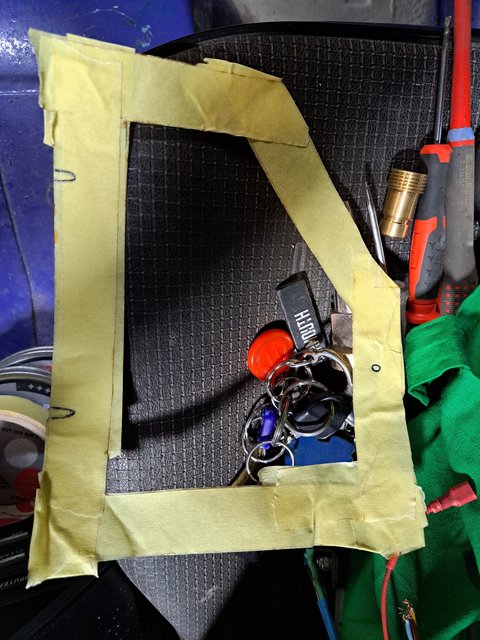
After making a masking-tape template, I plan to make up a holder for the voice unit, so that it sits neatly under the end of the dash.
- Envoy CDX
- Club Admin
- Posts: 9887
- Joined: Sun Sep 23, 2007 3:51 pm
- Location: Jarrow, Newcastle Upon Tyne
Re: Maestro Dash and Random Ramblings
Kool, that's some creativity.
Re: Maestro Dash and Random Ramblings
I am not sure what happened to my cardboard template.
It must have been thrown out.
I made a plastic hanger for the top, and a convaluted plastic panel for the underside.
Generously donated 3mm abs pinseal sheet from work.
(We don't do in-house manufacturing anymore).
It's position is quite tidy, and mostly out of the way.
But it is close to your right leg when pressing on the noisy pedal. - very close.
- Envoy CDX
- Club Admin
- Posts: 9887
- Joined: Sun Sep 23, 2007 3:51 pm
- Location: Jarrow, Newcastle Upon Tyne
Re: Maestro Dash and Random Ramblings.
Grin factor of 11 I hope, looks good.
Re: Maestro Dash and Random Ramblings.
It looks impressive,
And sounds "impressively" muffled 80s.
Bizarre, because it sounds electronic.
BL called it synthesised, but all the warnings are actually recorded and digitised. So not synthetic at all.
I think that I have wasted too much time faffing with it, rather than proper stuff on the van - but that is a totally different topic.
- ilovedmymantas
- Registered user
- Posts: 1240
- Joined: Sat Jan 12, 2013 2:54 am
Re: Maestro Dash and Random Ramblings.
I don't think you've wasted time. You're getting on really well with the van and we all need a change of pace occasionally, it's still van related after all
" It's not rust. It's age-related patina "
1980 vauxhall cavalier MK1 1.6L, 1982 opel manta berlinetta 1.8s, 1985 opel manta 2.0 gte, 1990 cavalier 2.0 gl ,1994 cavalier sri x20xev
-1995 cdx x20xev
---------------
Matt
1980 vauxhall cavalier MK1 1.6L, 1982 opel manta berlinetta 1.8s, 1985 opel manta 2.0 gte, 1990 cavalier 2.0 gl ,1994 cavalier sri x20xev
-1995 cdx x20xev
---------------
Matt
- Envoy CDX
- Club Admin
- Posts: 9887
- Joined: Sun Sep 23, 2007 3:51 pm
- Location: Jarrow, Newcastle Upon Tyne
Re: Maestro Dash and Random Ramblings.
You're doing something though, you're not just sat at home binge watching TV programs. Regardless of it being something electronics, or panel work, it's progress.Robsey wrote: ↑Wed Oct 09, 2024 10:54 pm It looks impressive,
And sounds "impressively" muffled 80s.
Bizarre, because it sounds electronic.
BL called it synthesised, but all the warnings are actually recorded and digitised. So not synthetic at all.
I think that I have wasted too much time faffing with it, rather than proper stuff on the van - but that is a totally different topic.