Down At The Unit

Anything not covered by the other topics in 'The Lounge'. Keep it clean...!

Moderator: Robsey

User avatar
Robsey
Club Admin
Posts: 11031
Joined: Fri Dec 12, 2008 1:42 pm
Location: East Manchester

Down At The Unit

Post by Robsey »

It may sound like my camper van thread has been a bit quiet recently, but I am actually doing more hours than before.
Two evenings per week, which is much better than 2 1/2 hours per month in August and September.

Anyway - doing more of a partnership effort with Troy.
In otherwords, I do some jobs on vehicles for Troy, and in return, he will do some welding on the van.

Recent jobs have been:-
Rebuild / Swap the guts on a motorcycle fuel tank lock.
To save him a fiddly job. Five low-flying springs to add to the fun.

Next - prepare the painted bumper panel for a crafter van to remove scuffs and key the surface for a fresh paint job.

Next - rebuild the bumper inserts. one of which was literally torn apart. I managed to reform this with careful heating followed by a bit of plastic welding to close up a lot of the splits.

Image

Image

This last week, I did some work on his pride and joy, so I am obviously trusted.
This comprised completely cutting out his offside inner wing / wheel arch so that I could separate out his suspension turret.

Followed by making up two repair patches for the rear valance.

After that, I started making repair patches for the passenger footwell on my van.
User avatar
Robsey
Club Admin
Posts: 11031
Joined: Fri Dec 12, 2008 1:42 pm
Location: East Manchester

Re: Down At The Unit

Post by Robsey »

I have been quiet on this thread for a while... still been bumbling along with various things.

Things have been quite busy on the unit front...
Multiple jobs on the go at present.

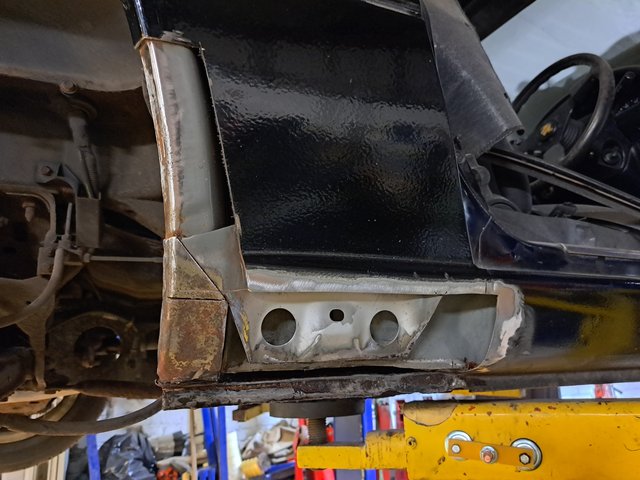
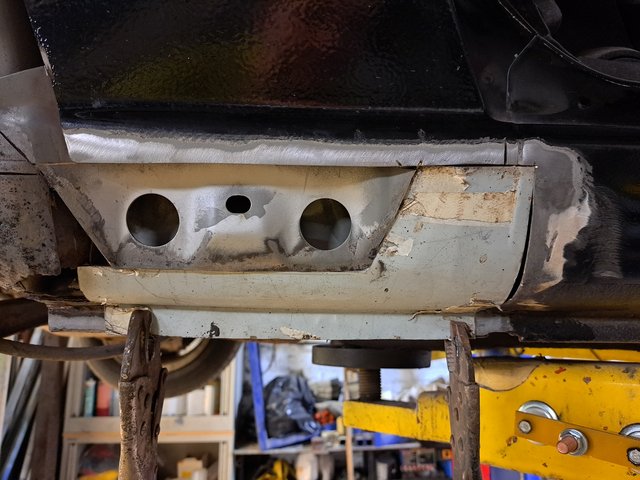
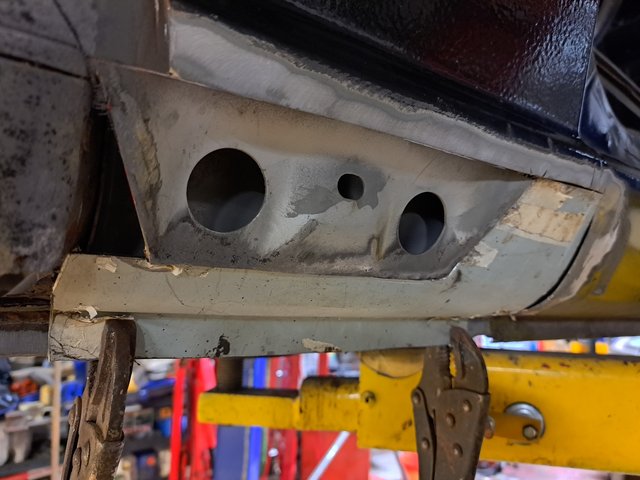
Recent work has been body repairs on a Cavalier, coming to a thread near you soon.

Image

Image

Now drawing to a close, but it has given me the mental boost to start preparing to fix my own Cavalier.

There was also a Nova...
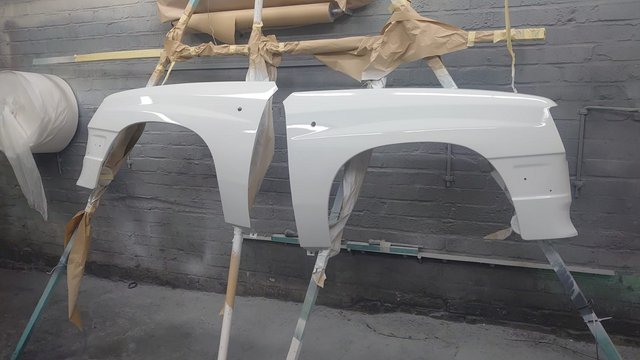
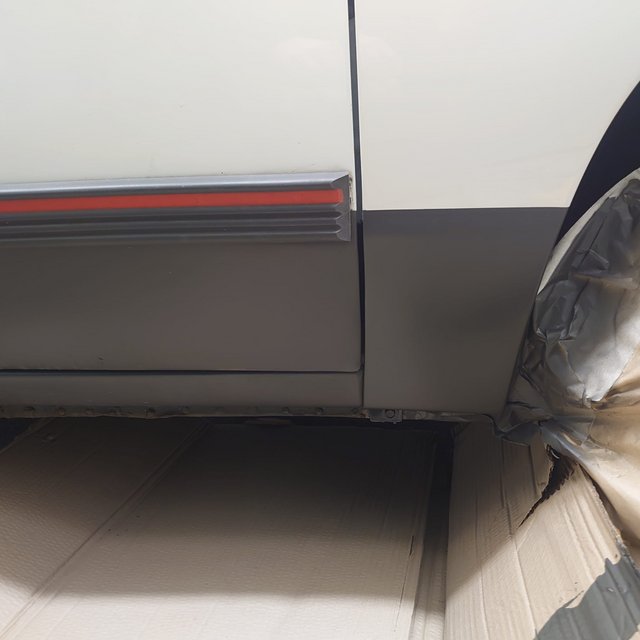
New wings, side repeaters and aerial to fit.
Not too shabby if you ask me.

Image

Image

Image

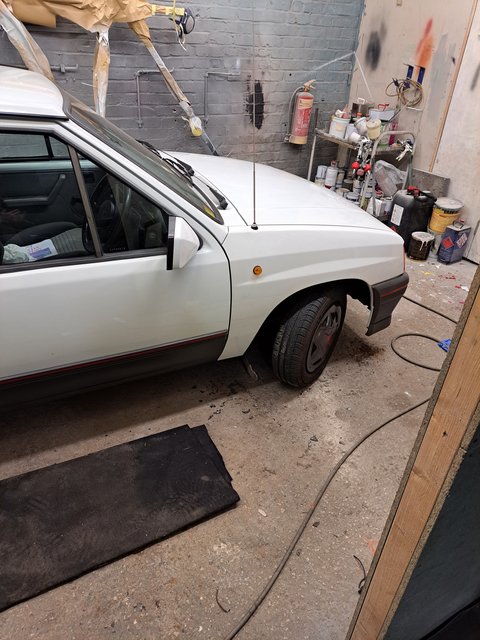
As usual, I left the bodywork to the expert, I just assisted with the fiddley bits...
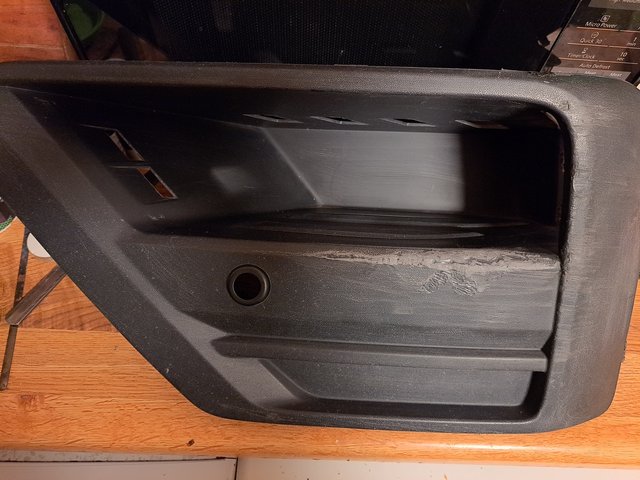
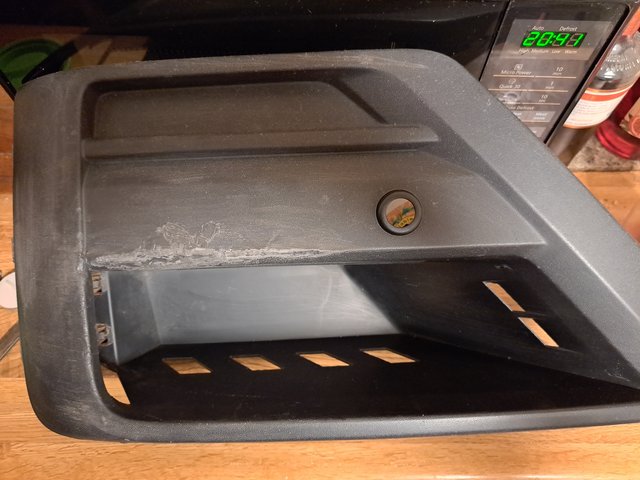
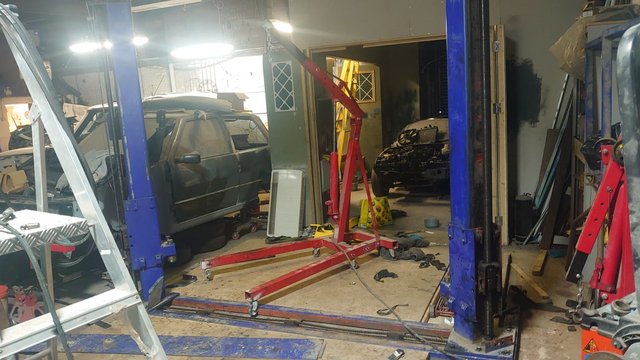
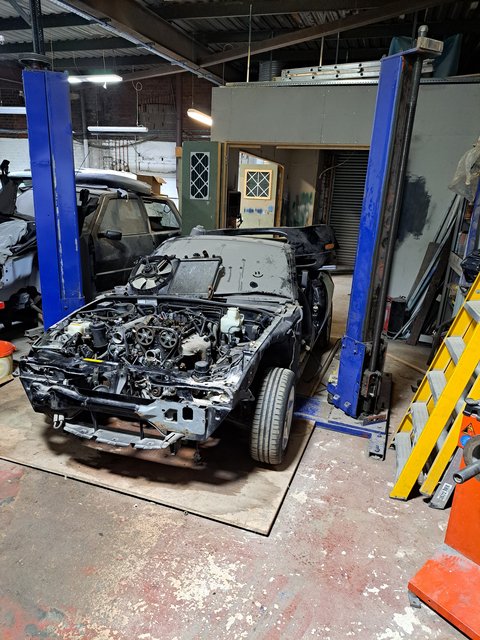
Current job is....
Well, lets see if any clever clogs can spot the car...
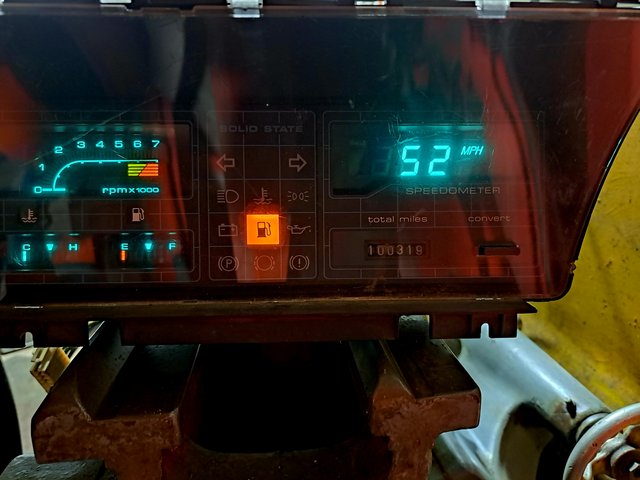
Or what is left of it.

Image

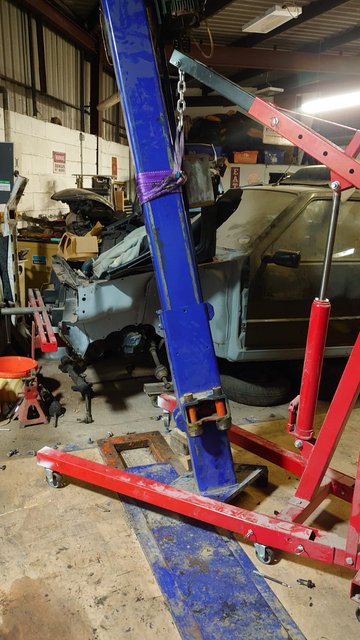
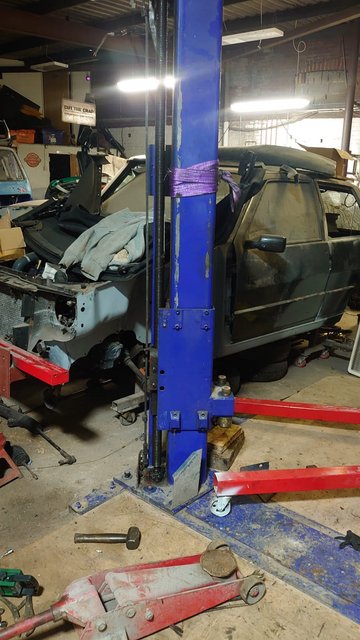
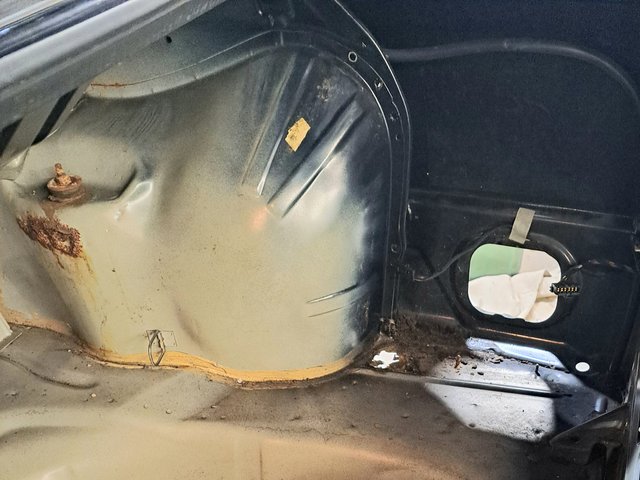
The car has been stripped for a full respray.
As usual, I volunteered for the fiddley annoying jobs, whilst Troy does the precision stuff.

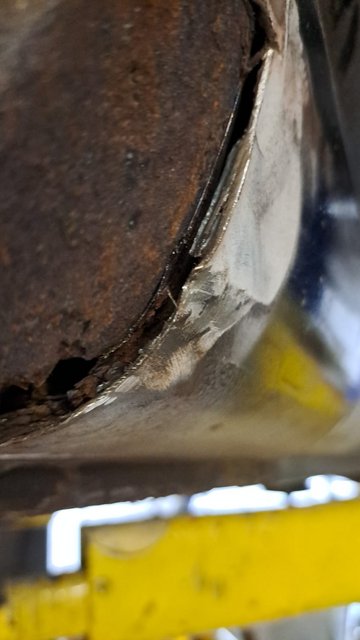
On this car, there is something called a 'belt line'.
This needs to be removed to allow a proper paint job.
The issue here is the need to remove the soft-top, and then a rain guard from the rear of the cockpit.

Thirteen 10mm nuts (M6) across the curved periphery followed by countless trim clips, four peg bolts and six 14mm nuts to get the soft-top out.
Followed by another eight 10mm nuts to remove the belt line. About an hour, all in.
Quite a respectable time.

Image

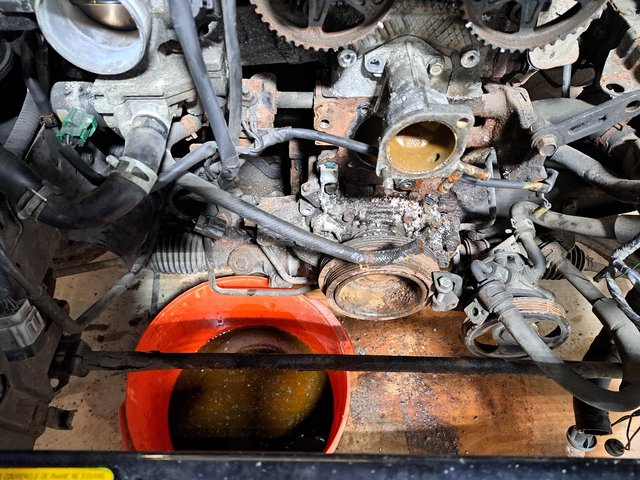
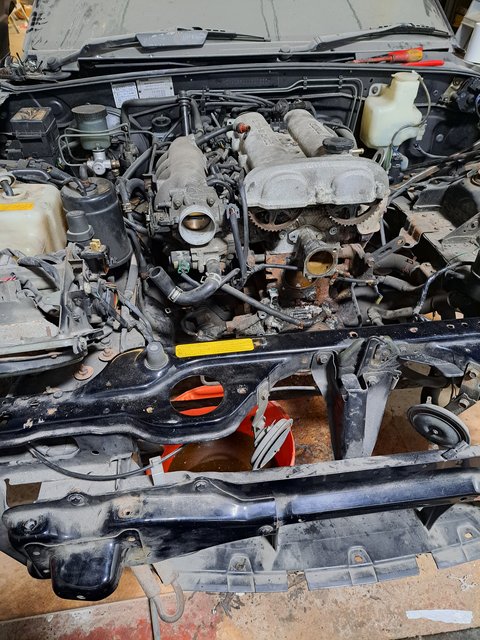
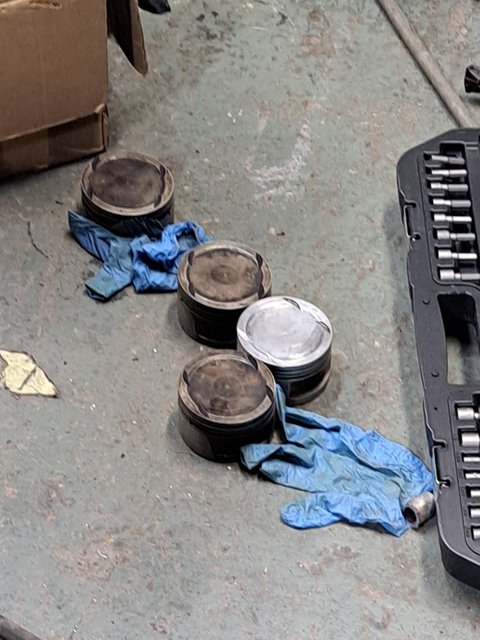
Next job to get the alternator out.
Something sounds really rough, and the engine felt very tight during cranking.
A couple of hours moving an engine mount and trying to loosen the alternator bolt ensued.

Image

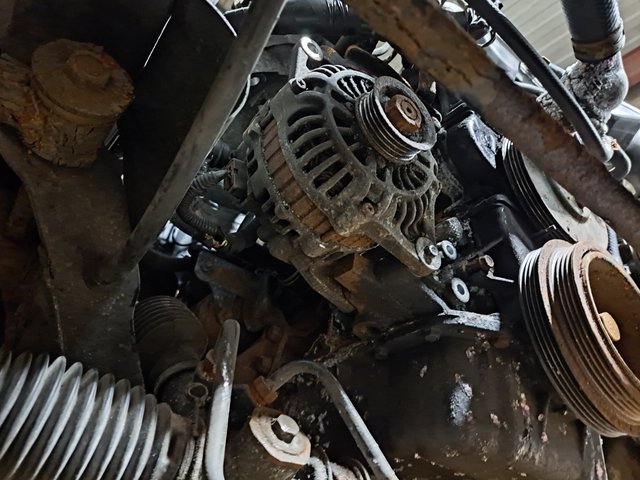
Eventually the bolt loosened, but not before shearing off it's tip.
It is assumed the previous owner's mechanic had tried to knock the bolt through resulting in a peened over thread, no way that was coming out, without drilling...
My job for tomorrow night no doubt.

Not sure what it is on this model, but the engines all look like a mass of rust, and white powdery aluminium oxide.

We have come to the conclusion that it is the water pump, not the alternator causing the roughness.
There is some water seapage at the front of the engine.

Looking at how rubbish the previous garage must have been, the plan is to do a full timing belt and tensioner change - along with a new water pump.
User avatar
Robsey
Club Admin
Posts: 11031
Joined: Fri Dec 12, 2008 1:42 pm
Location: East Manchester

Re: Down At The Unit

Post by Robsey »

More work on the black soft top tonight...

First job, loosen the road wheel nuts, jack up the car and place on axle-stands.
Then nuts and wheels off.

Intended plan for tonight - to finish removing the alternator.

This required draining the coolant, the removal of the radiator and lowering of the anti-roll bar from the chassis so that I had a clear line to drill out the remnants of the old bolt.

Due the tightness of the engine and an apparent water leak, we concluded a potential water-pump issue.

What a total nightmare to remove the water-pump.

The timing belt had to come off, along with a rear pulley cover, which in turn needed the cam-shaft sprockets removing
Oh lordy!!!

In conclusion three hours of engine stripping left us with this....

Image

Image

Oddly, with the belts removed, we could not feel any roughness in any of the bearings. Just a bit of noise on the exhaust side belt roller and the water-pump.

The water pump is fitted within a huge casting covering about 1/3 of the front of the engine block.

Plan next week is to fit a replacement starter motor along with a timing belt kit and water-pump assembly.
Should be good fun :D
User avatar
James McGrath
Club Admin
Posts: 2934
Joined: Tue Aug 11, 2009 11:35 am
Location: East Sussex

Re: Down At The Unit

Post by James McGrath »

Mazda mx5?
User avatar
Robsey
Club Admin
Posts: 11031
Joined: Fri Dec 12, 2008 1:42 pm
Location: East Manchester

Re: Down At The Unit

Post by Robsey »

James McGrath wrote: Sat Feb 18, 2023 12:16 am Mazda mx5?
Have you been talking to Troy? - lol

Yep, it is his partners next toy...for this summer.
A Miata in yank-land.

Bought as another project with front end crash damage a few years ago.
Front rebuilt and then left to collect dust.
Until now...

It is a real work out for the brain. Every time we start on a different make or model, you have to learn a new way of thinking.
To work out what the manufacturer was thinking when they designed the car.
User avatar
James McGrath
Club Admin
Posts: 2934
Joined: Tue Aug 11, 2009 11:35 am
Location: East Sussex

Re: Down At The Unit

Post by James McGrath »

:lol: I saw mazda on the engine and thought the mx5 was about the right size.

I couldn't tell you what generation mx5 it is!
User avatar
Robsey
Club Admin
Posts: 11031
Joined: Fri Dec 12, 2008 1:42 pm
Location: East Manchester

Re: Down At The Unit

Post by Robsey »

It is a mk1 - you can tell by the bug-eye pop-up headlamps.

1997 (R reg).

UPDATE - After this week, my Thursday night jaunts are moving to Friday night.

Recently motorway traffic is a nightmare, so I am having to get up and go to work an hour earlier.
I have my own Rehabilitation Engineer clinic every Friday - all day :(
At least on a Saturday morning, it doesn't matter if I get up late.
User avatar
Robsey
Club Admin
Posts: 11031
Joined: Fri Dec 12, 2008 1:42 pm
Location: East Manchester

Re: Down At The Unit

Post by Robsey »

Oh my lordy...
I think I have found one of the trickiest jobs to do on this Mazda.

The starter motor
Two of the bolts are accessed by squeezing in between the bell housing and the firewall in the engine bay.

Troy tells me that I have large hands, and that is why I struggle with jobs like this.
Either way, approx 2 1/2 hours to get the starter off.

I started to put the replacement starter in, but it was not playing ball.
So it is likely that I will be spending Tuesday fiting the starter.
User avatar
Robsey
Club Admin
Posts: 11031
Joined: Fri Dec 12, 2008 1:42 pm
Location: East Manchester

Re: Down At The Unit

Post by Robsey »

We had some lathe action tonight.

Wired up the PC power supply.
It looks like a mass of spaghetti, but it is quite safe.

Image

I then put the transducer into the tool holder, and linked the transducer spindle to the chuck using the 3mm bore vacuum pipe.

Image

Powered it all up and tested the speedometer at the eight spindle speeds.

Results were very impressive - very close to my calculated speeds in the table from earlier this month.

Image

Most speeds fluctuated but only by 1mph.

1 ) - 45rpm - Est = 3.62 - Actual = 0 (too slow to register)

2 ) - 64rpm - Est = 5.15 - Actual = 5 / 6.

3 ) - 100rpm - Est = 8.04 - Actual = 8 / 9.

4 ) - 156rpm - Est = 12.55 - Actual = 13 / 14

5 ) - 289rpm - Est = 23.24 - Actual = 23 / 24.

6 ) - 409rpm - Est = 32.89 - Actual = 33 / 34.

7 ) - 639rpm - Est = 51.39 - Actual = 52 / 53.
(See photo above).

8 ) - 1000rpm - Est = 80.42 - Actual = 77 (?)
That had me a bit puzzled...

Table from 3 weeks ago.

Image
User avatar
Robsey
Club Admin
Posts: 11031
Joined: Fri Dec 12, 2008 1:42 pm
Location: East Manchester

Re: Down At The Unit

Post by Robsey »

On Tuesday, I put my 1985 apprentice head on and did some 'proper' engineering.

I stripped, cleaned, refitted and adjusted the gear selection linkages and the clutch / brake assembly on the Harrison lathe.
The clutch arm had a huge arc of operation, instead of about 45°.
And the brake was all but non-existant.

Two hours later, the gearbox levers are still very notchy, but I presume that is just how they are with a crude interlock cut out in the linkage brackets.

But the clutch is now much more positive, and the brakes do stop the chuck a lot quicker.. .

Next job will be the saddle and lead-screw, so that I can get the screw-cutting function to work.
User avatar
Robsey
Club Admin
Posts: 11031
Joined: Fri Dec 12, 2008 1:42 pm
Location: East Manchester

Re: Down At The Unit

Post by Robsey »

After repairing Troy's lathe...

Image

It was full of swarf in the feed / traverse gearbox.
A good clean out and lube soon got the feeds etc working properly.

Image

... I finished cutting the thread for the speed transducer adapter.

Image

Image

I may shorten the threaded part by approx. 5mm so that it looks tidier.

Image

All it needs now is a 3D printed square-drive shaft link-rod.
As soon as I get a speedo cable and measure the drive-cable size at the dash plug end.
User avatar
ilovedmymantas
Registered user
Posts: 1264
Joined: Sat Jan 12, 2013 2:54 am

Re: Down At The Unit

Post by ilovedmymantas »

Nice lathe work. I miss my engineering apprenticeship days, creating something from nothing with 1-2 thou tolerances. Happy times :D

First rule of apprentice school- always check the oily coolant nozzle isn't directed towards you when you switch the power on :lol:
Robsey wrote: Sat Jul 01, 2023 5:26 pm I can see it being a 'fun' gimick at first, but I am sure that it wouldn't take long before I would be turning the audible-warning volume off.

Amazingly the wife is totally unaware of my antics, or that I even have the digital dash - despite the dash being in a box in the kitchen.

I could understand if I was doing my experiments in the unit 6 1/2 miles away. - but she is never more that 20 feet away from it - lol
I'd be the same but at least there's an off switch :). Perhaps you could loop the warnings for shows?

I think i'd describe my missus as oblivious, she wants to be driven everywhere but the eyes glaze over as soon as a problem occurs and I want to explain it to her :roll:
" It's not rust. It's age-related patina " ;)

1980 vauxhall cavalier MK1 1.6L, 1982 opel manta berlinetta 1.8s, 1985 opel manta 2.0 gte, 1990 cavalier 2.0 gl ,1994 cavalier sri x20xev

-1995 cdx x20xev

---------------
Matt
User avatar
Robsey
Club Admin
Posts: 11031
Joined: Fri Dec 12, 2008 1:42 pm
Location: East Manchester

Re: Down At The Unit

Post by Robsey »

Oh lordy yes.
Apprenticeship days...

My training was done at Ferranti PLC via a Youth Training Scheme. (1984 / 1985).
Anyone else old enough to remember those in the 80's.?

Our first lathe rule was do not leave the chuck key in the chuck.

Followed by no long sleeves, no ties, and no hippy-colars or anything else that you could get sucked into the machine by.
------

My thought is -
Respect anything that could rip your arm off in a heartbeat.

-------

All we need now, is a nice simple milling machine, dividing head, and a few other useful accessories.
chrisp
Registered user
Posts: 191
Joined: Sun Nov 19, 2017 11:25 am
Location: Cumbria

Re: Down At The Unit

Post by chrisp »

"Our first lathe rule was do not leave the chuck key in the chuck"

Ah yes, I remember doing just that on the lathe in my school metalwork workshop. The chuck key shot out, narrowly missing me and landed some distance away, luckily not hitting anything or anyone in the process.
The whole class was then ordered to gather round me and the lathe for a "learning point" from the teacher, and I was duly chastised. I didn't make that mistake again!
1993 Cavalier V6 Auto in Smoke Grey Metallic
User avatar
Robsey
Club Admin
Posts: 11031
Joined: Fri Dec 12, 2008 1:42 pm
Location: East Manchester

Re: Down At The Unit

Post by Robsey »

Last night at the unit, I took the lead and decided to get started on the Mazda up on the ramps.
We are both easily distracted and guilty of a significant amount of procrastination.

We had fixed the ramps a few weeks ago - the safety blocks needed to be replaced - Troy did 95% of the work, but he just needed the motivation to get started.
I provided the nudge and a smidge of assistance.

Image

Image

Image

Image

----------------------------

I am glad that I don't do vehicle bodywork for a living.
Especially when someone has been there before.

We knew that the rear corners of the sills were a known rot-spot. Same as many other makes and models.

So I cut away the rear corner to reveal a 'bodgit and scarper special'.
Good metal lap jointed and welded over a rotten panel.

Image

Image

** shakes head in disbelief **

The amount of filler was immense - 1/4" (6mm) thick in patches.

Image

A hot air gun soon softened the filler enough to scrape it off.

I didn't dare go any further until Troy had made an appraisal for himeslf.

He arrived at the unit a while after me...
He was in a philosophical and light mood, and promptly sliced away the whole of the over-laid patch.

Image

As he was so engrossed, I fitted two new A77 drive belts to the lathe. Tensioned them up, fitted the end covers and tested my handy work.
- another job ticked off the list.
No more flappy-slappy frayed drive belts.
Just some clutch / brake anti-rattle springs to identify, procure and fit.

Image

Anyway - he went off to do some painting, and so I returned to cleaning up the remnants of the Mazda sill.

Image

There is still a fair bit of weld to grind off the bottom of the sill.
Looks like I know what I am doing on Friday night.
User avatar
Robsey
Club Admin
Posts: 11031
Joined: Fri Dec 12, 2008 1:42 pm
Location: East Manchester

Re: Down At The Unit

Post by Robsey »

Tonight's escapades...
Started out by fitting some anti-rattle springs to the clutch discs on the lathe.

This is Matt Chivers doing his on Youtube.
Image

Most videos show only 3 springs being needed, but in typical Robsey style, all six clutch plate location pins required an anti-rattle spring.
But it was worth the effort.
In neutral, the lathe was amazingly quiet.
Even Troy was pleasantly surprised.
---------------------

With that done, I moved onto fabricating an inner sill repair panel.

I do like the fabrication work, although it does take a bit of time to achieve a shape I am satisfied with.

A very silly shape that lines up with the curved outer sill to the right. Joggles back, then has an angular taper to meet the section you see with the round holes.
And then a bend across the bottom to line up with the flat vertical edge.

Here you go - tonight's efforts.

Image

Image

It should be possible to tweak the panel as it is tacked into place.
My welding isn't that good yet, so you can guess who will be doing that bit.
User avatar
Robsey
Club Admin
Posts: 11031
Joined: Fri Dec 12, 2008 1:42 pm
Location: East Manchester

Re: Down At The Unit

Post by Robsey »

After a long break from Unit fun...

I decided to migrate my antics from my random thread, and created a thread about vehicles and stuff that I do not own.
_______________________________

For the past two weeks I have been working with Troy on a Corsa-C EPAS column for his "fun" car.
After blowing a piston, his car has finally come off the road for a major overhaul.

As with many 80s cars, his jalopy has no power steering.
And such an option was never available.

As it happens, I had a spare column, for the van.
This was my first EPAS column, but it is still factory original.

My second column was converted for my van by MantaSport a good few years ago.
And until recently had been fitted to the van.
________________________________

Back to the story - lol

The manual column, and the unmolested EPAS column were laid side by side for comparison of features and points of interest.

Overall length
Relationship of steering wheel, ignition lock and various column components, including mounting arms.

Then at the other end -
distance from the top of the column to proposed universal joint shaft etc.

Towards 1am this morning, I had parted off the top and bottom parts of the manual column.

The bottom splined section of the EPAS column had to be parted-off too.
But this needed a "lathe steady rest" to support the column due to in-built flexibility in the driven gear area.
_____________________________
After I went home at silly o'clock in the morning,
Troy soldiered on with the columns.
Keen to get it done.

The botton universal joint section from the manual column had to be turned down to fit inside the bottom of the EPAS column.

This morning he sent me a picture of the UJ shaft heated and press-fitted into the EPAS column.

Image

From the sound of things...
Mainly just assembly work from here.

Just for info, did you know that in the 80s, Vauxhall used tiny plastic pins to link the sleeved rods and tubes within the columns. Doesn't sound very strong, but Troys 1988 column still looked perfectly fine apart from minimal age related patina.
User avatar
Envoy CDX
Club Admin
Posts: 9980
Joined: Sun Sep 23, 2007 3:51 pm
Location: Jarrow, Newcastle Upon Tyne

Re: Down At The Unit

Post by Envoy CDX »

Nice!
Check the Rules!

Raw 8v Power! - Bad Cav, Naughty Cav... Cav want's to do 90!

The How2 Index
User avatar
Robsey
Club Admin
Posts: 11031
Joined: Fri Dec 12, 2008 1:42 pm
Location: East Manchester

Re: Down At The Unit

Post by Robsey »

As promised, for a change some Cavalier related action.

After throwing a con-rod and smashing a piston crown in a suped-up Nova.
It has become necessary to strip and rebuild a C20XE engine.
Yep - a good old red-top.

Troy has already stripped the head from the block, and the con-rods complete with the pistons.

Inspection showed a big end bolt stretching,
Image

allowing the piston to slap around, ripping a chunk out of one piston crown in the process.

Image
__________________________

Rolling up to tonight.

This mainly comprised cleaning engine parts...

I had little to do with the reworking...
Not as much as hoped.

I did help with some honing of the cylinder bores.
Troy being Troy, had to get a proper honing tool with fine, medium and course abrasion fingers.

Image

There was a tangible wear lip around the top 3 or 4 mm of each cylinder bore. But after reworking, we were able to virtually eliminate this.

Image

Of course, we completely cleaned out any dust and grit from the whole of the block, finishing off with a good blast of the air-line in all the oilways and bores.
------------------------

After this, Troy decided to polish his pistons.
His belief being a better, quicker swirl will result with smoother piston tops.

Image

Spot the difference... one down, three to go.
User avatar
Robsey
Club Admin
Posts: 11031
Joined: Fri Dec 12, 2008 1:42 pm
Location: East Manchester

Re: Down At The Unit

Post by Robsey »

When I left at 1:00am,
Troy was manually cleaning and polishing all the crankshaft journals.

My job before this, was to clean up, service and callibrate his 2 to 3 inch micrometer.
The zero marker was a mile out, before I worked my magic.
It is nigh on 30 years since I last callibrated a micrometer.

Of course it all came flooding back, and a useable micrometer was achieved.

Image

This afternoon he confirmed that the crank was mostly done...

Image

And then this evening the bearing shells were in, and so was the crank.

Image

I presume he will inform me when the engine is assembled a bit further.
User avatar
Envoy CDX
Club Admin
Posts: 9980
Joined: Sun Sep 23, 2007 3:51 pm
Location: Jarrow, Newcastle Upon Tyne

Re: Down At The Unit

Post by Envoy CDX »

Nice one Rob. It'll fire up again soon no doubt.
Check the Rules!

Raw 8v Power! - Bad Cav, Naughty Cav... Cav want's to do 90!

The How2 Index
User avatar
Robsey
Club Admin
Posts: 11031
Joined: Fri Dec 12, 2008 1:42 pm
Location: East Manchester

Re: Down At The Unit

Post by Robsey »

At risk of bouncing between different sub-topics,

I received an image to say that all the Nova parts had been turned down to allow Troy to assemble the EPS column. :geek:

Image

This then allowed him to refit the stalk switch mountings. 8-)

Image

Image

From the sound of it, Tuesday will be a busy night, with us both juggling between XE and EPS jobs. :lol:

I believe I also have some lathe work to do too.
Sheesh!! :shock:
User avatar
Envoy CDX
Club Admin
Posts: 9980
Joined: Sun Sep 23, 2007 3:51 pm
Location: Jarrow, Newcastle Upon Tyne

Re: Down At The Unit

Post by Envoy CDX »

That's some impressive machining. Wonder how well its going to work when assembled, how responsive it will be on the track (the nova is a track toy isn't it?)
Check the Rules!

Raw 8v Power! - Bad Cav, Naughty Cav... Cav want's to do 90!

The How2 Index
User avatar
Robsey
Club Admin
Posts: 11031
Joined: Fri Dec 12, 2008 1:42 pm
Location: East Manchester

Re: Down At The Unit

Post by Robsey »

If it is set up correctly, it should feel the same as a Corsa-B or C.
Hopefully a good midpoint between lighter steering whilst retaining a good feel of the road.

The Nova is used for all fun driving activities, with the occasional track day thrown in.
User avatar
Envoy CDX
Club Admin
Posts: 9980
Joined: Sun Sep 23, 2007 3:51 pm
Location: Jarrow, Newcastle Upon Tyne

Re: Down At The Unit

Post by Envoy CDX »

I've never had the pleasure of electronic steering in a B, just good old fashioned fluid based PAS. Didn't realise it started that early to be honest.

Should be a cracking beast once completed and rebuilt.
Check the Rules!

Raw 8v Power! - Bad Cav, Naughty Cav... Cav want's to do 90!

The How2 Index
Post Reply