1992 Cavalier Turbo 4x4

Show off your pride and joy! All Mk3 Cavaliers are welcome (please post only one thread per car)
lem0nmonkey
Registered user
Posts: 60
Joined: Tue Apr 07, 2009 5:21 pm
Location: Bournemouth Dorset

Re: 1992 Cavalier Turbo 4x4

Post by lem0nmonkey »

cheers, bit more done today to the manifold

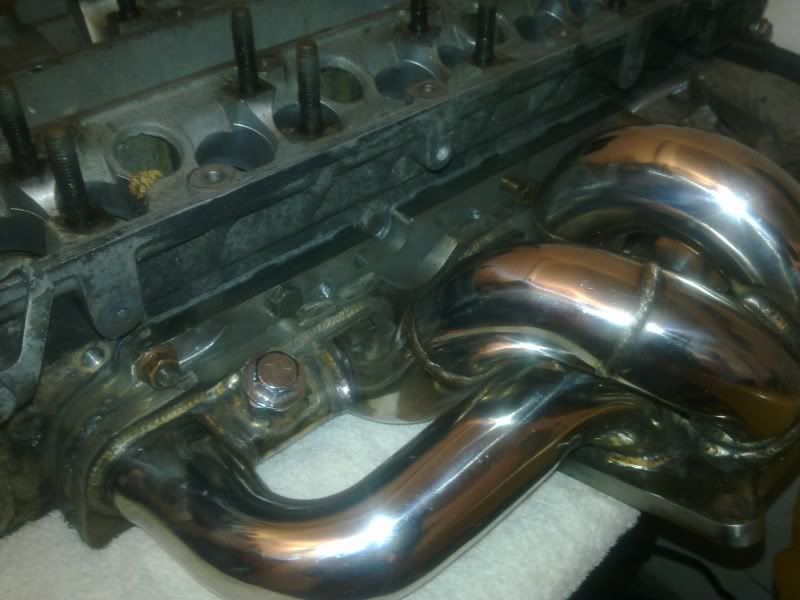
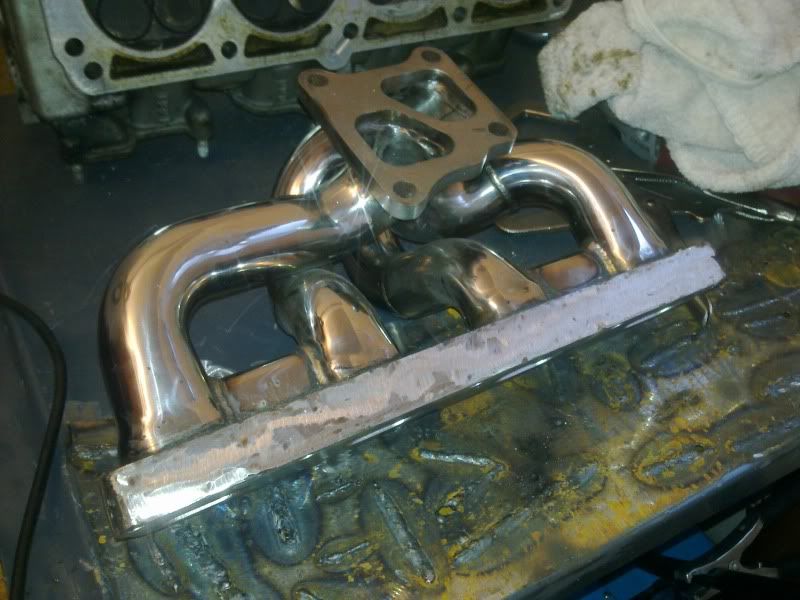
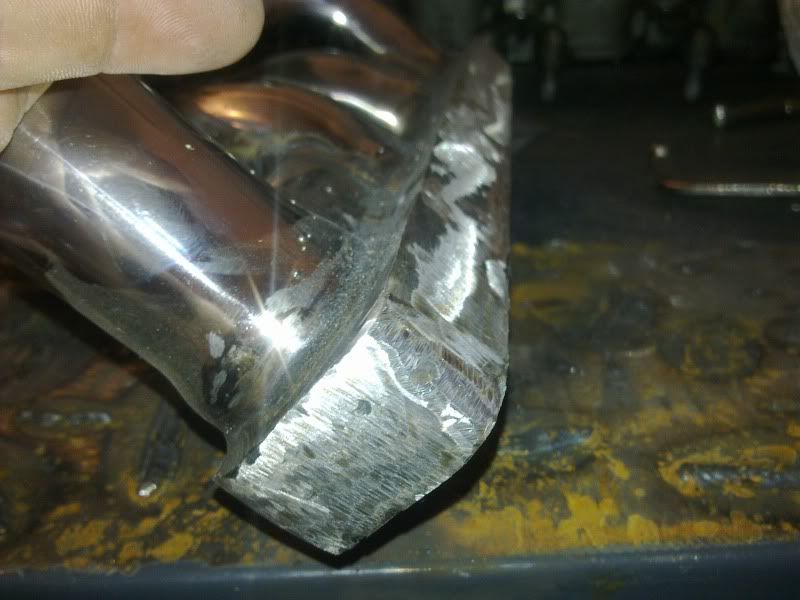
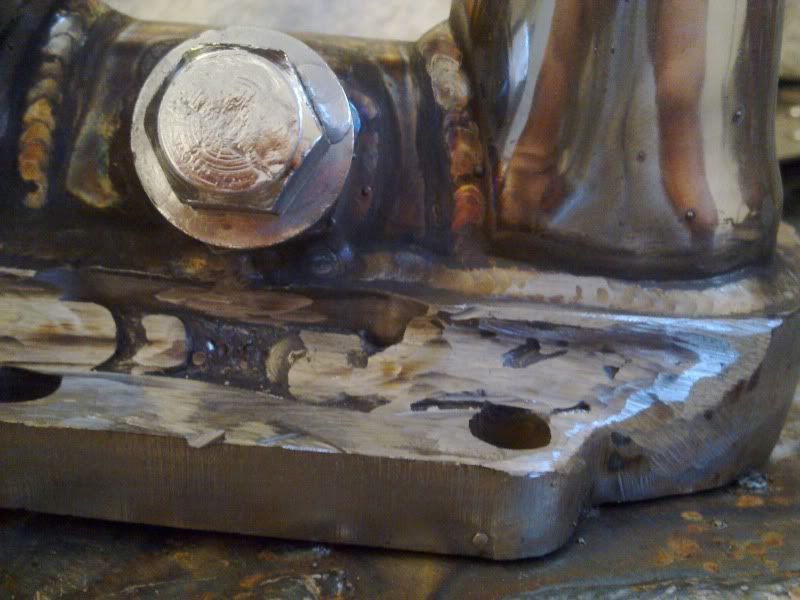
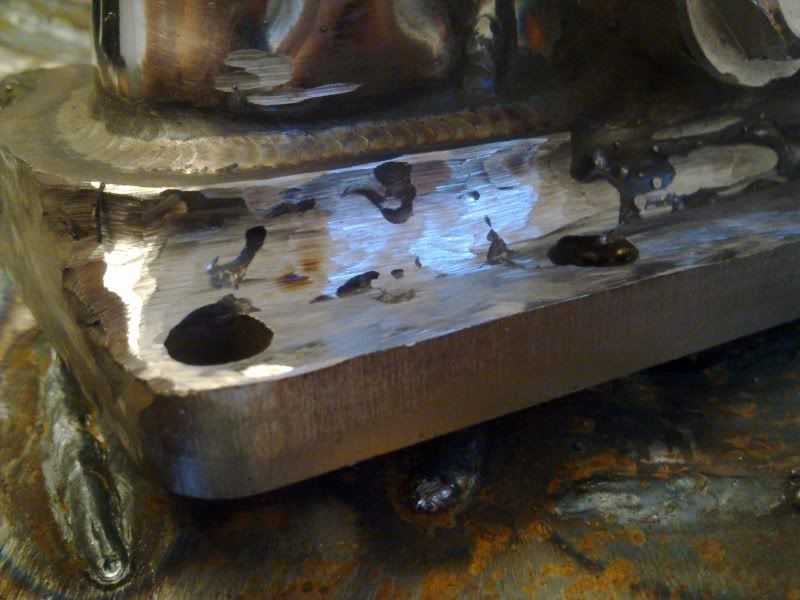
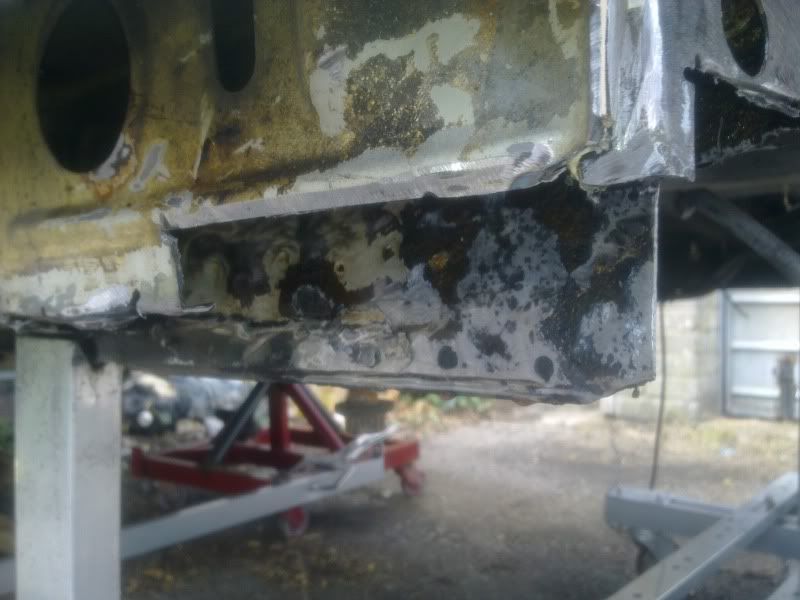
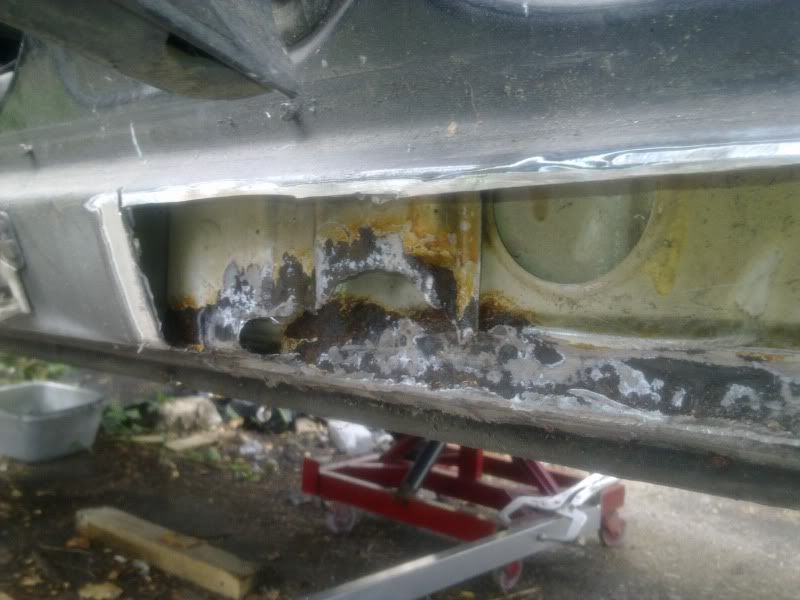
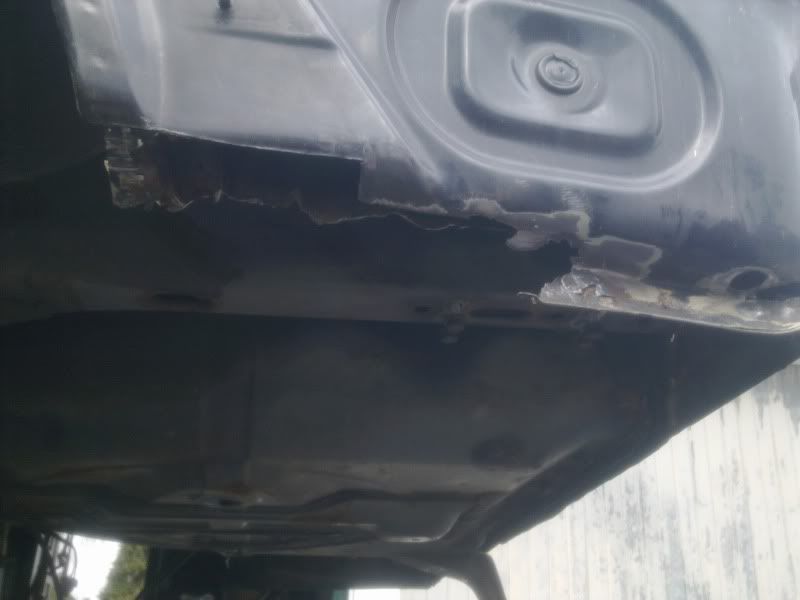
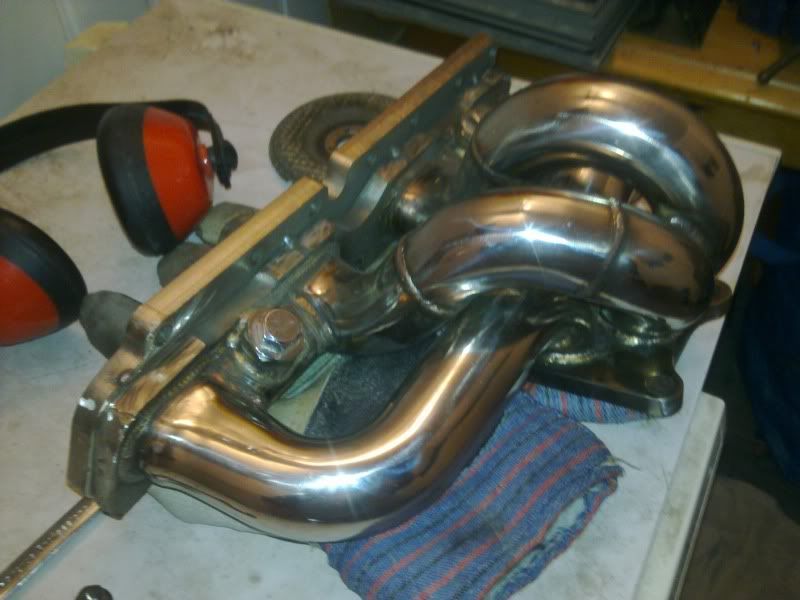
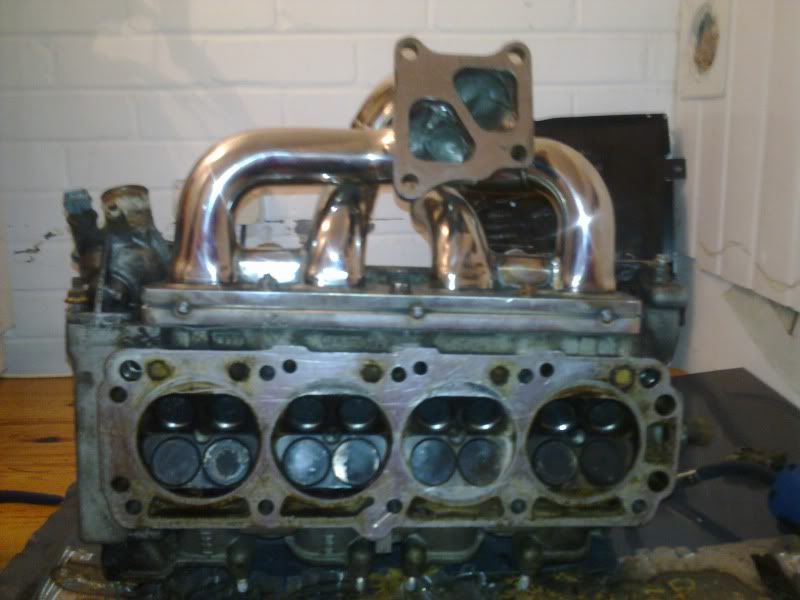
trimmed a little more away for the evo flange to allow better space for the nuts,
Image
Image
Image

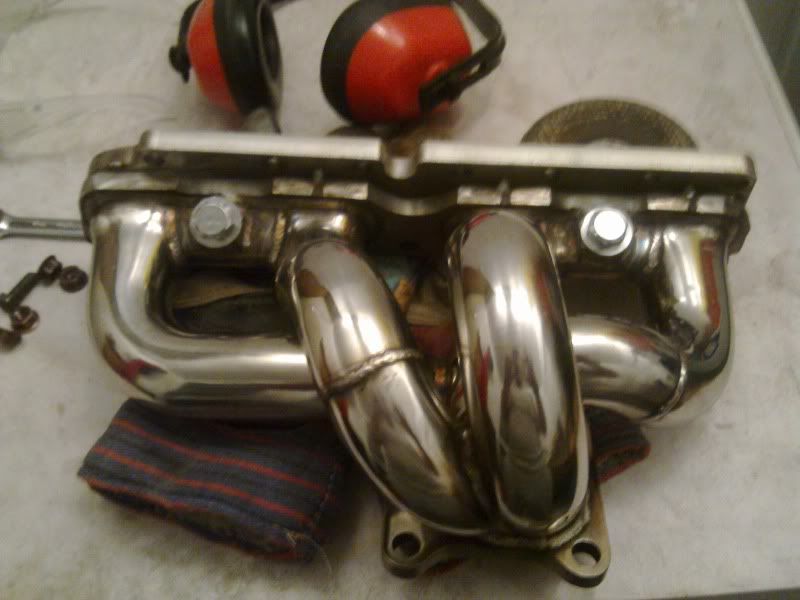
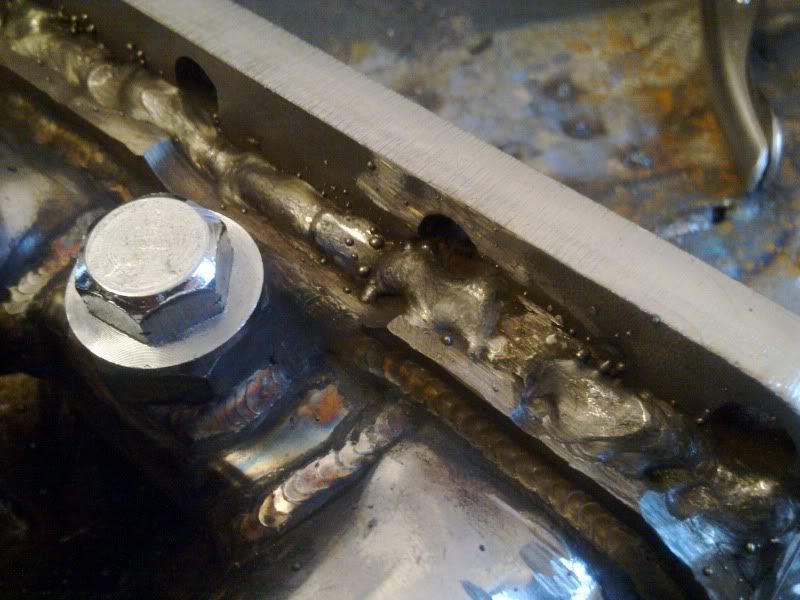
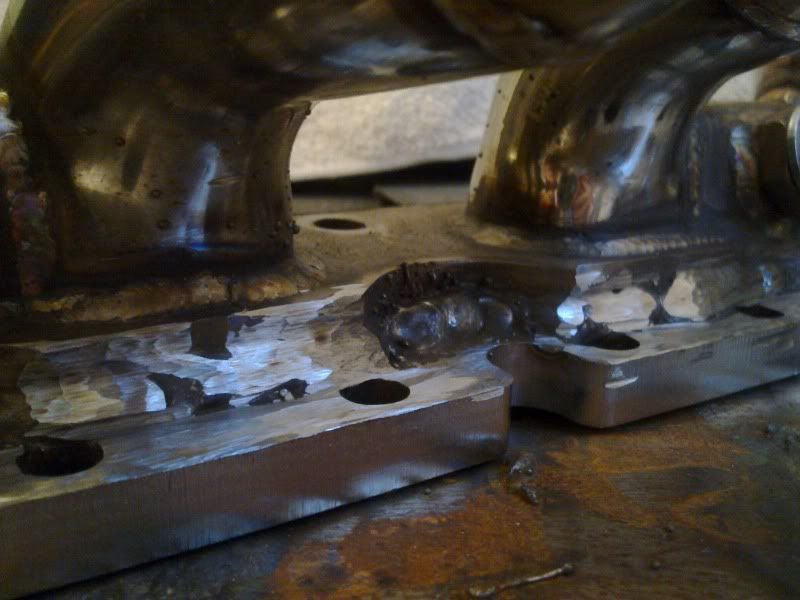
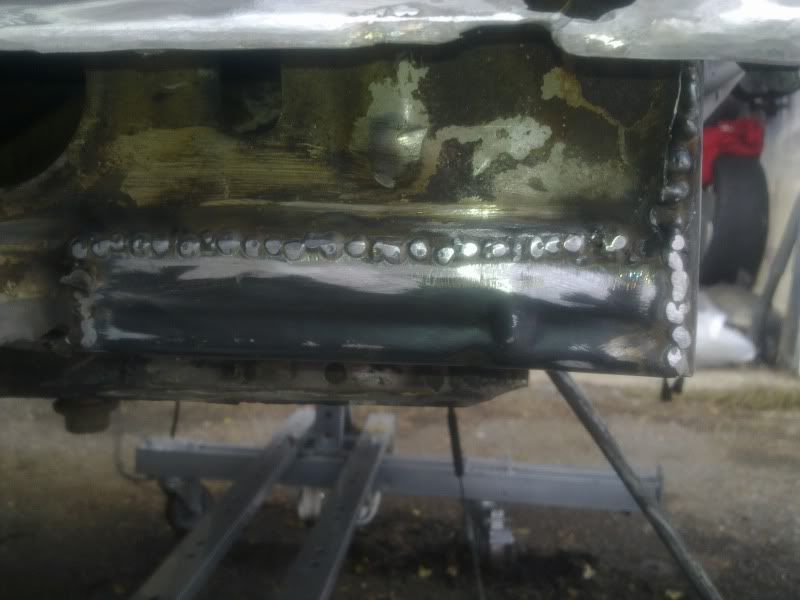
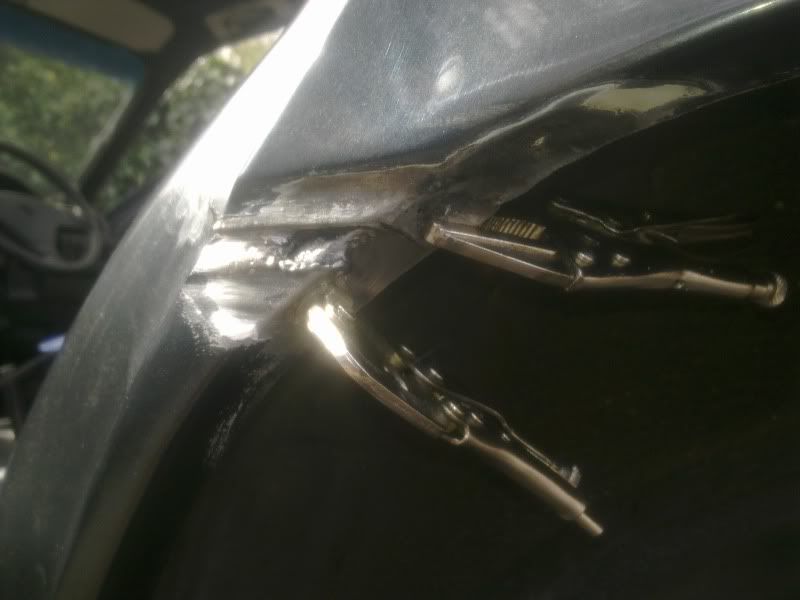
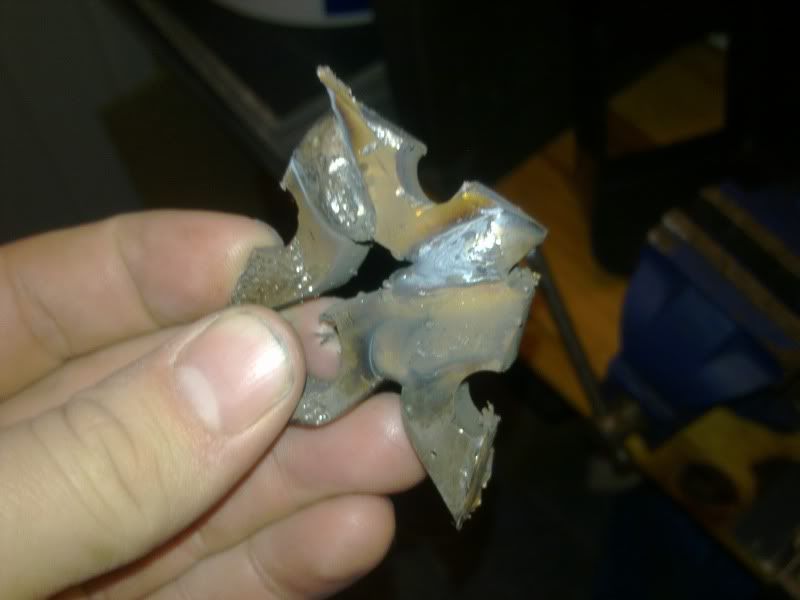
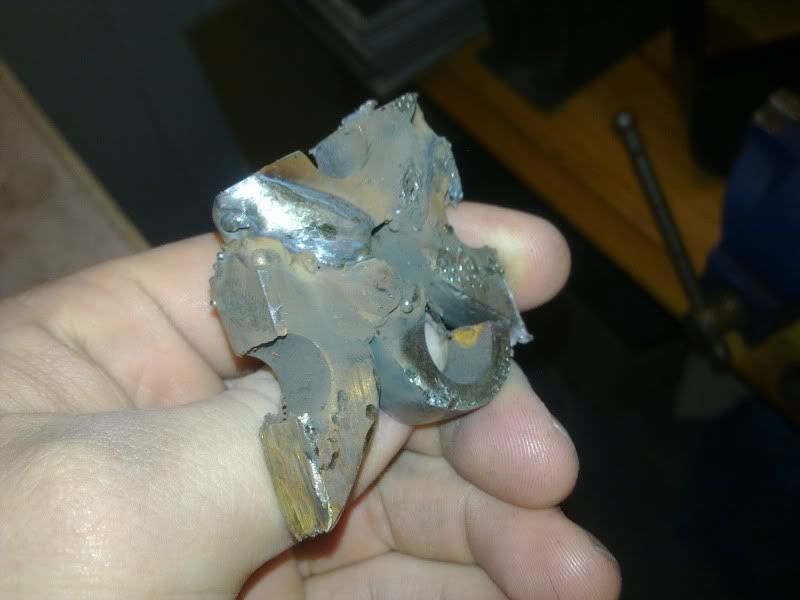
then i started tacking together some of the off cuts to get a feel for welding the stianless and work out the wire speed, and check the penetration was good enough to hold everything together

Image
Image

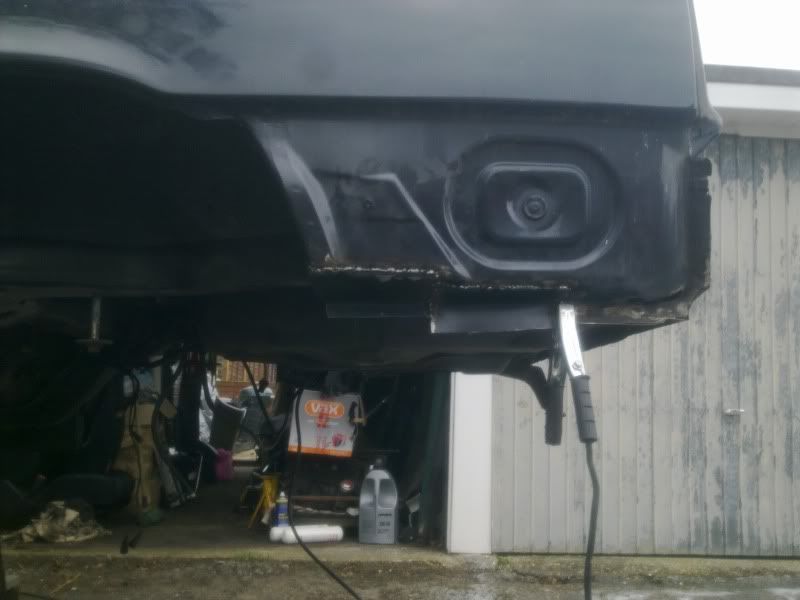
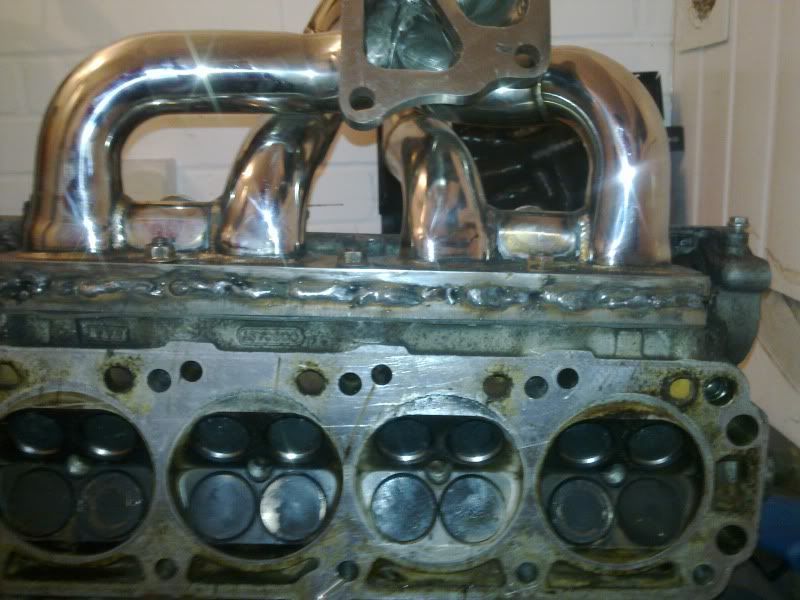
happy wth that so i got my spare head in and bolted the manifold to it to stop it warping once its being welded
Image
Image

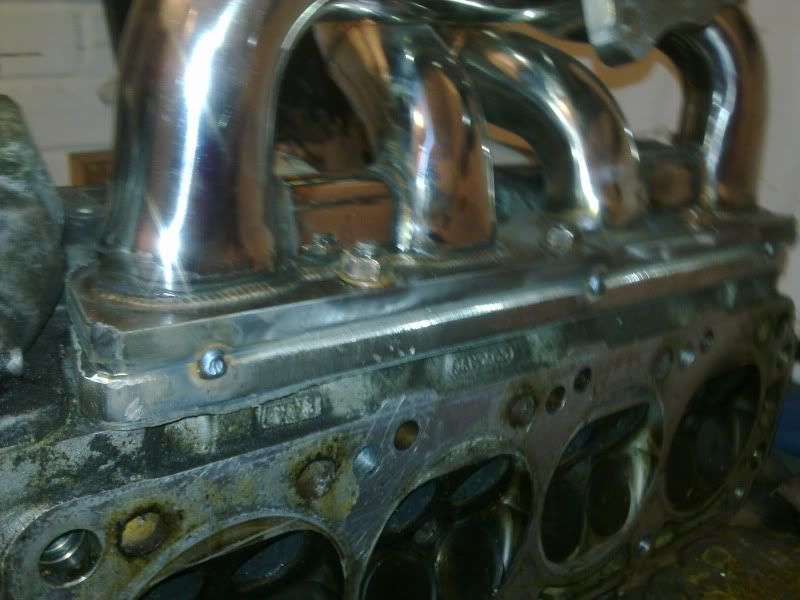
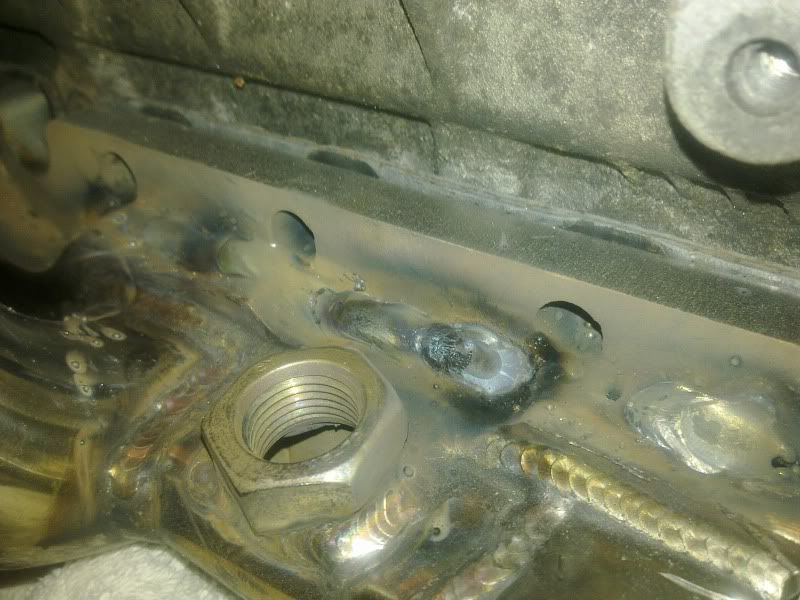
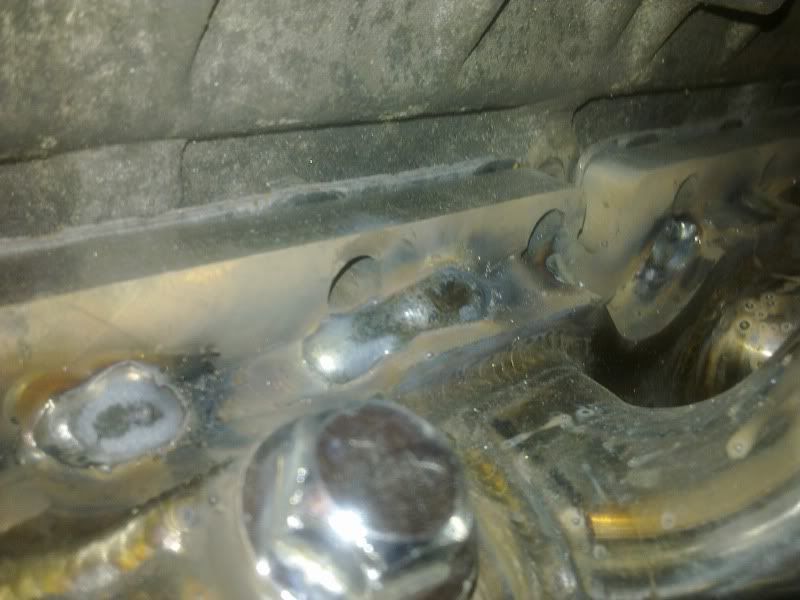
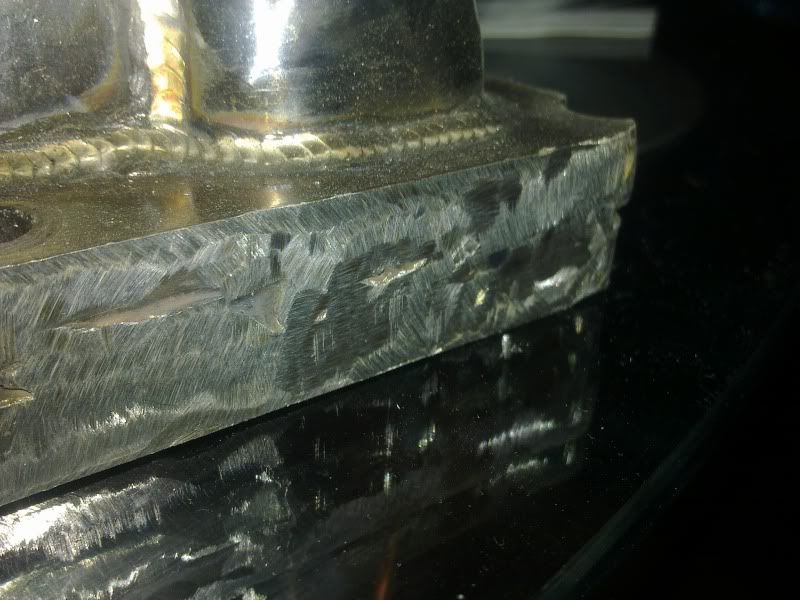
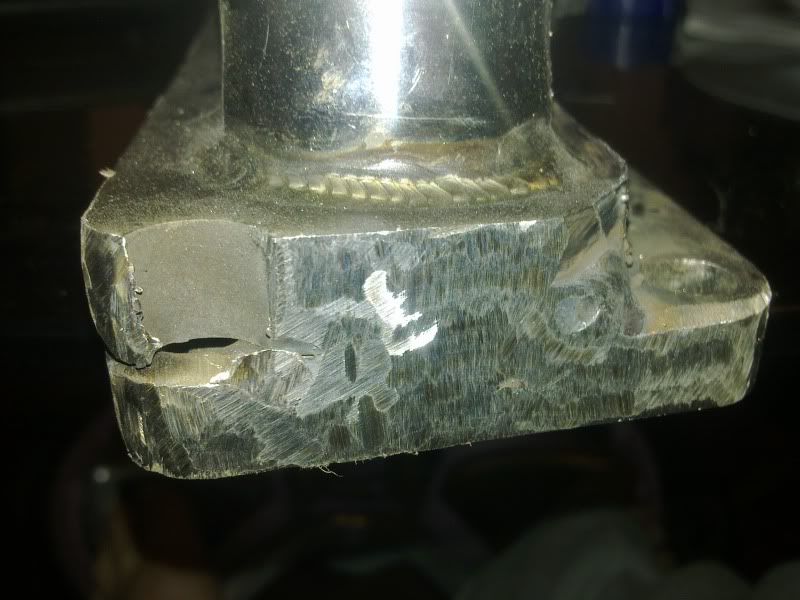
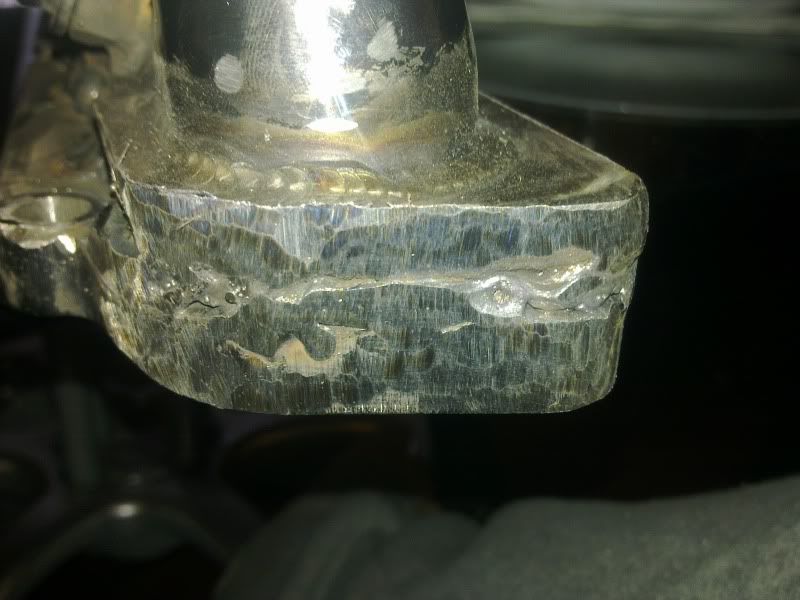
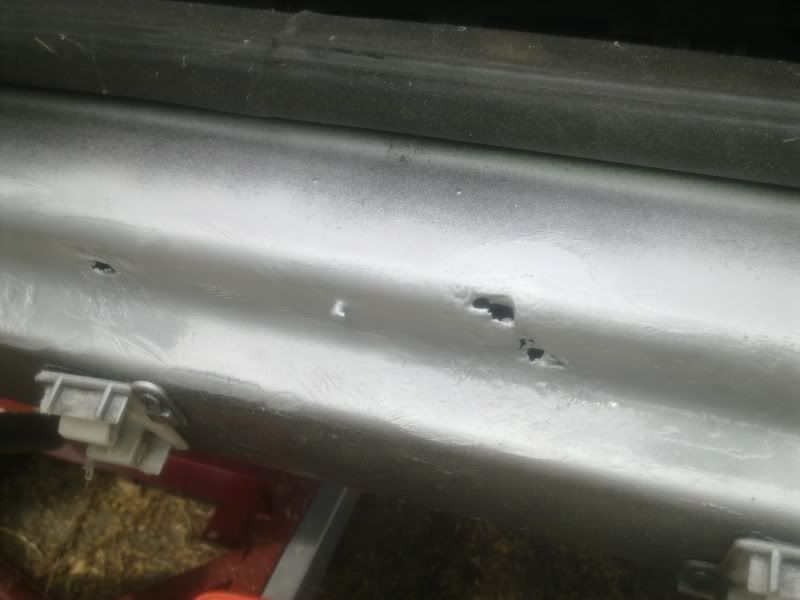
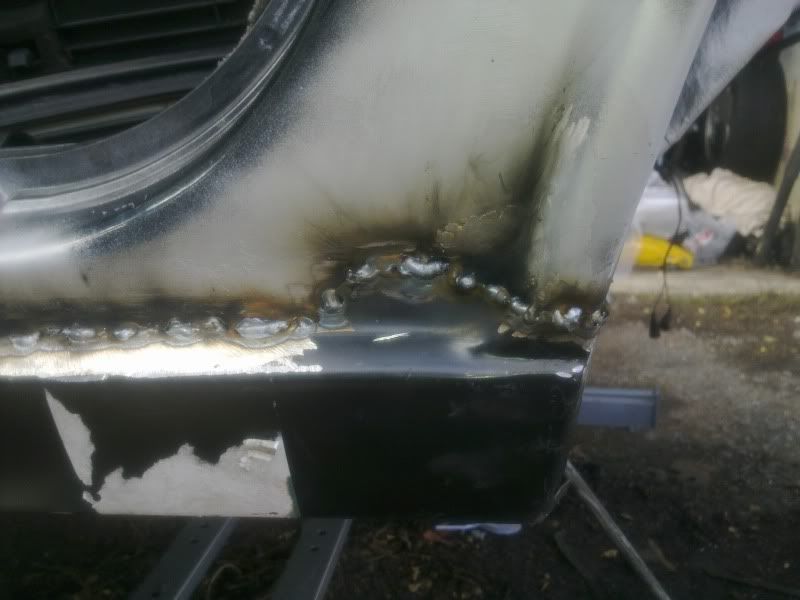
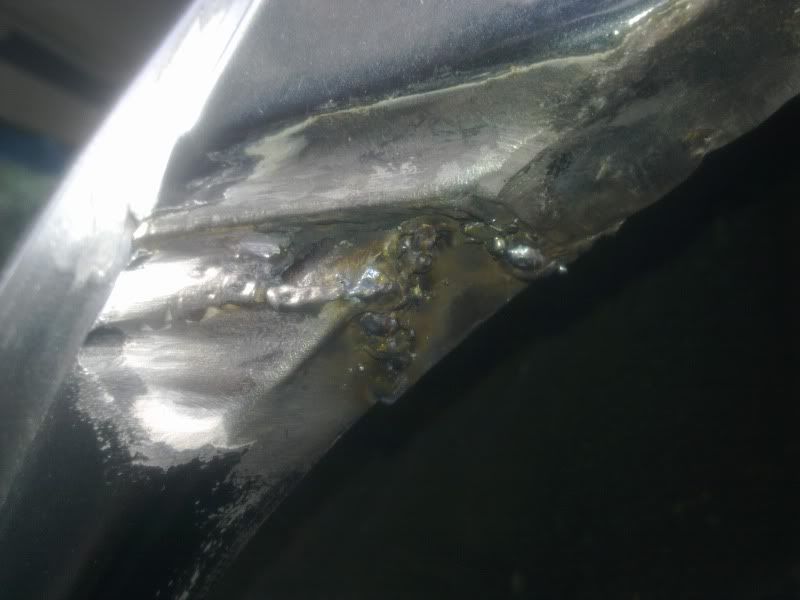
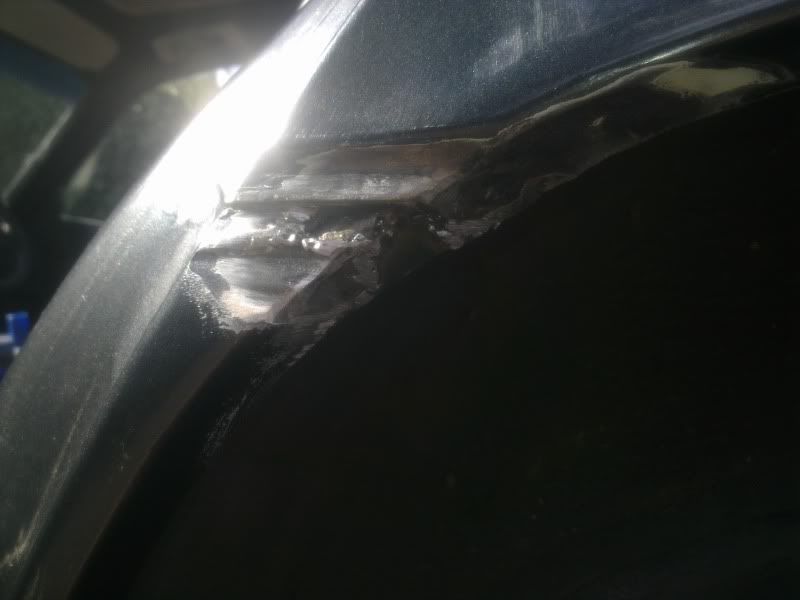
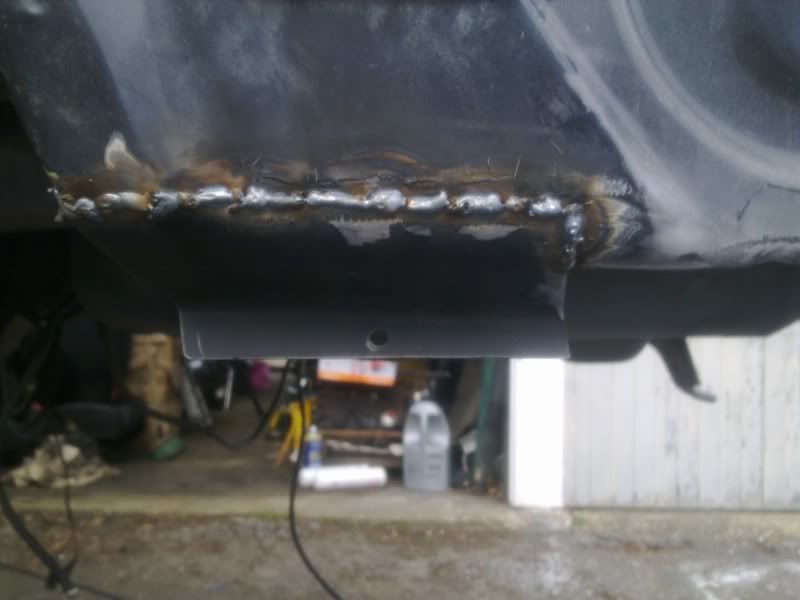
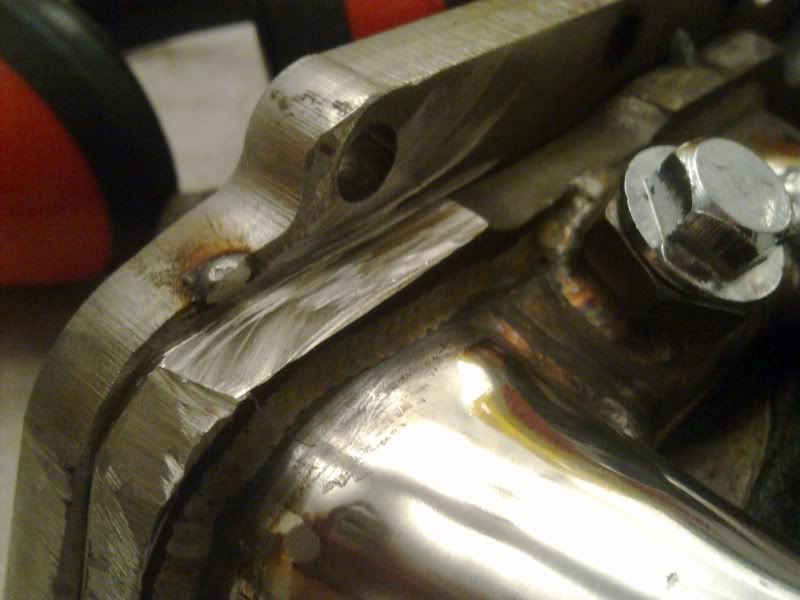
and cracked on with the first pass, its a little wobbly as i did it in staggered short runs to minimise the heat, and also the arc seemed brighter on this as i was running a higher voltage i guess so even with an autodarkening helmet it seemed quite bright, gonna run a darker shade when i do the top run,

Image
Image
Image
Image

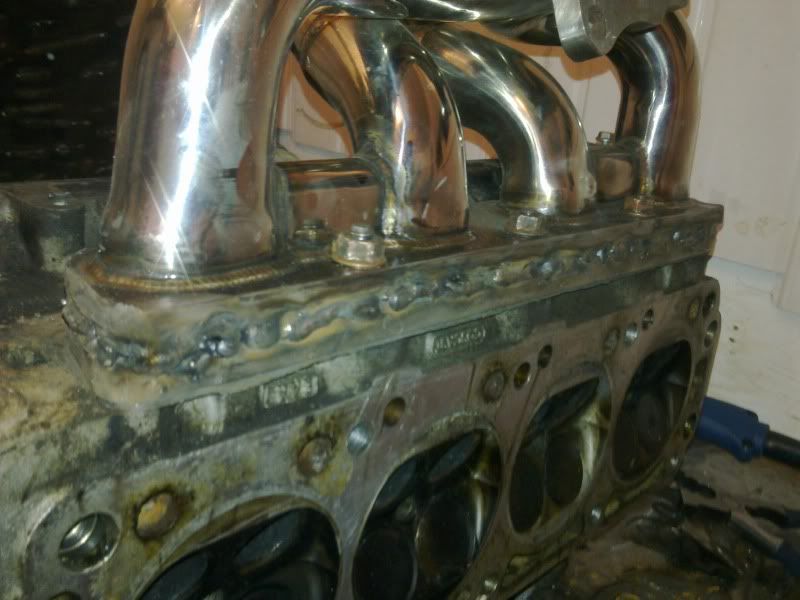
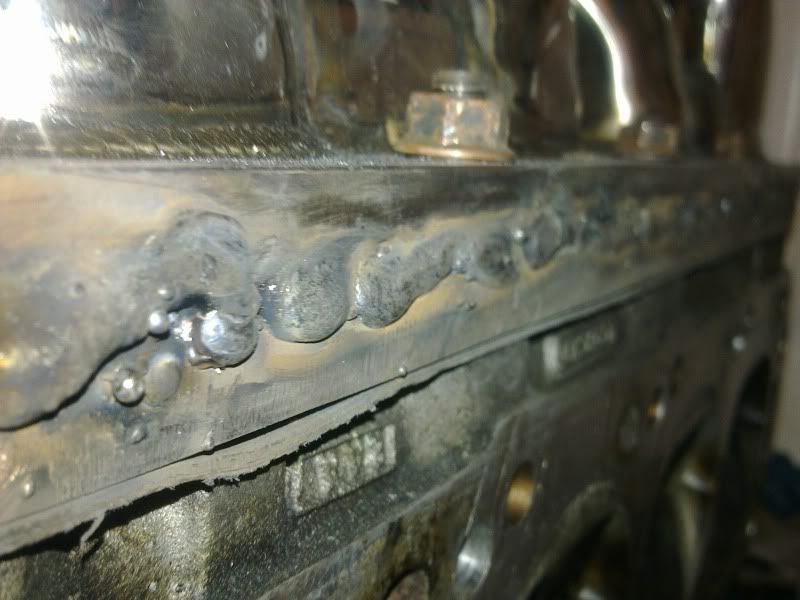
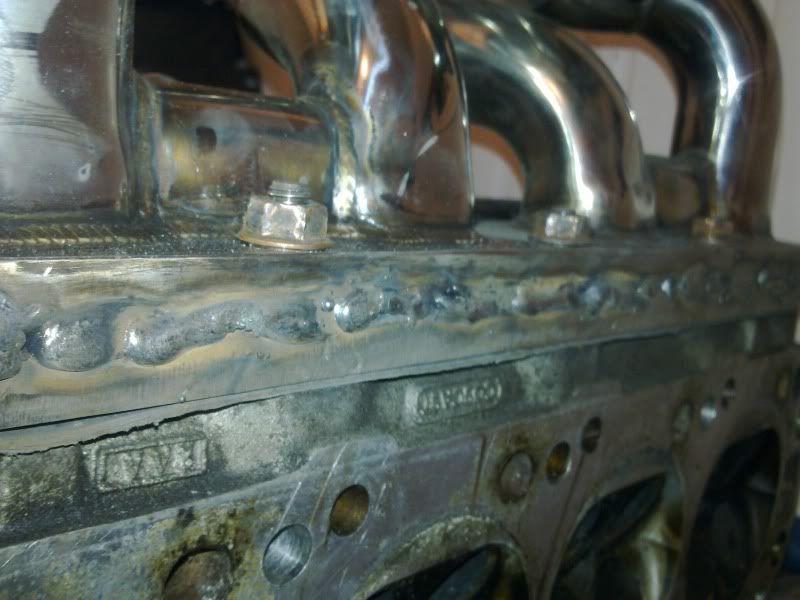
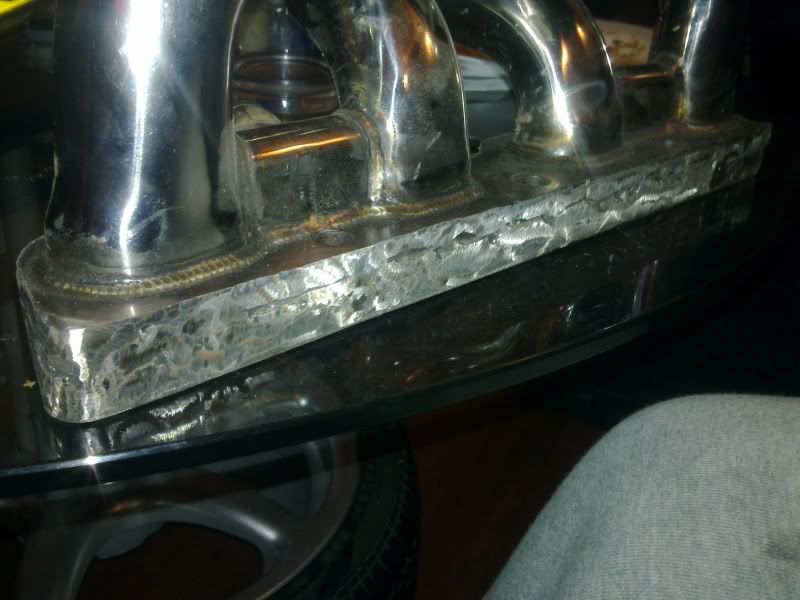
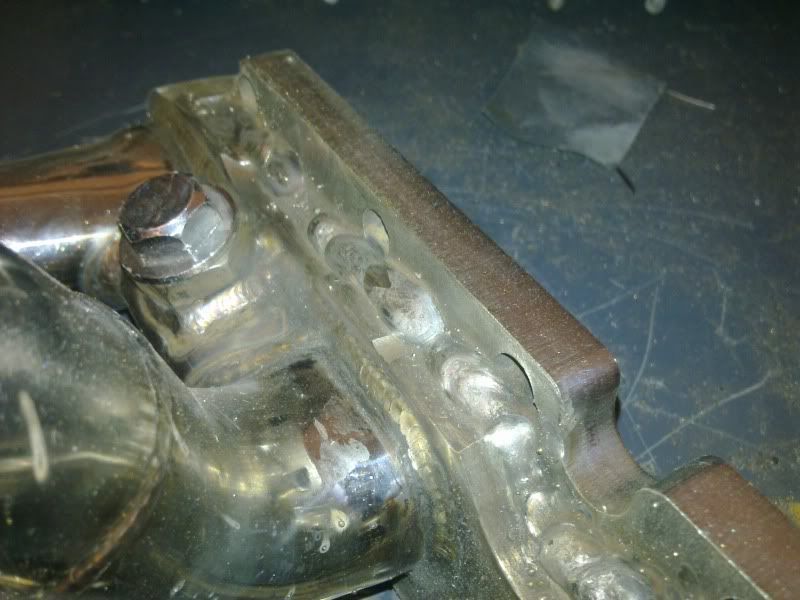
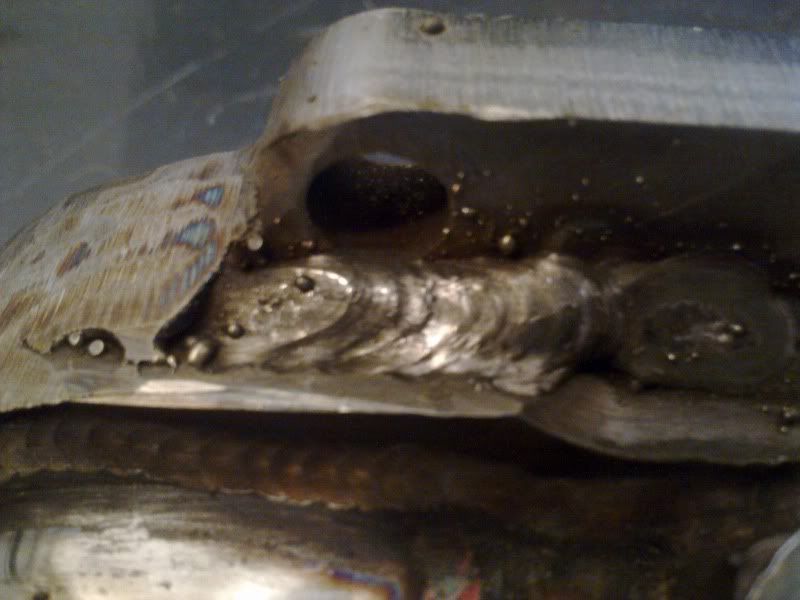
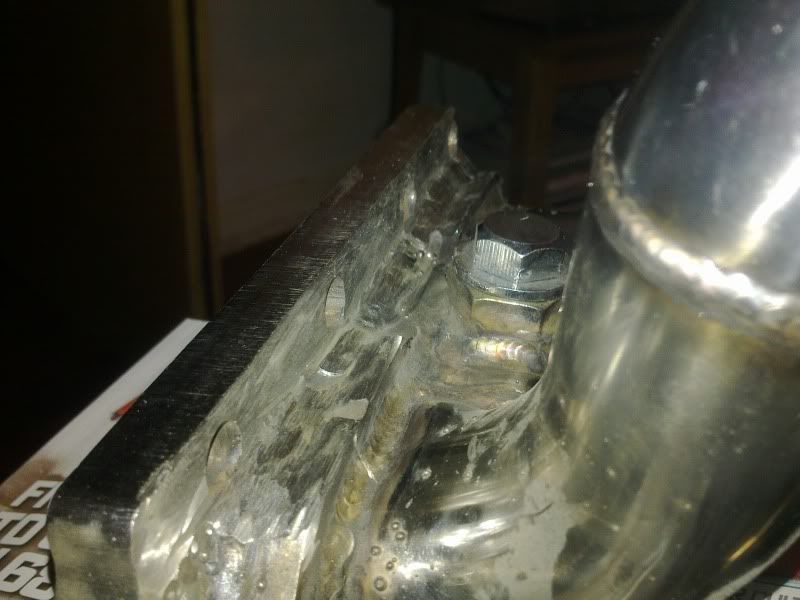
gonna grind all this back and run a second pass tomorrow, to fill in any gaps and make sure its properly sealed, pleased with how its going though :D:D
Colorado
Registered user
Posts: 1756
Joined: Thu Sep 11, 2008 7:18 am

Re: 1992 Cavalier Turbo 4x4

Post by Colorado »

Wow! great job
User avatar
Gaz
Registered user
Posts: 6985
Joined: Sat Sep 22, 2007 1:05 pm
Location: Manchester

Re: 1992 Cavalier Turbo 4x4

Post by Gaz »

when its done thats going to be bloody amazing.
Image
User avatar
Greig Sri
Registered user
Posts: 1123
Joined: Fri Oct 31, 2008 8:20 pm
Location: Elgin, North East Scotland

Re: 1992 Cavalier Turbo 4x4

Post by Greig Sri »

Your welding on stainless is looking good. When I once had a got at welding it I made a arse of it. Its not as easy to weld as steel is.


Greig
1993 Cavalier SRi C20XE (off road till better weather comes)
Astra SRi XP 150 estate 1.9 (the run around)
lem0nmonkey
Registered user
Posts: 60
Joined: Tue Apr 07, 2009 5:21 pm
Location: Bournemouth Dorset

Re: 1992 Cavalier Turbo 4x4

Post by lem0nmonkey »

cheers, yeah stainless does react different to the mild steel, not going to bad though!

continued the welding tonight,

ran beads along the top section, all was going well until the wire burned back and welded itself to the tip, so need to buy a new set to finish the last few bits,

Image
Image
Image
Image

anyhow after the welding i decided to grind away at the welds and started tidying up the joins, see where needed laying extra beads.

Image
Image
Image
Image

seems to have penetraited quite well, at least enough to seal, as long as the turbo is well braced shouldnt cause any problems, time will tell once its been in the car for a while.
User avatar
Envoy CDX
Club Admin
Posts: 9980
Joined: Sun Sep 23, 2007 3:51 pm
Location: Jarrow, Newcastle Upon Tyne

Re: 1992 Cavalier Turbo 4x4

Post by Envoy CDX »

looks very very good! will you be getting the sides polished too? or just leaving it as is?
Check the Rules!

Raw 8v Power! - Bad Cav, Naughty Cav... Cav want's to do 90!

The How2 Index
lem0nmonkey
Registered user
Posts: 60
Joined: Tue Apr 07, 2009 5:21 pm
Location: Bournemouth Dorset

Re: 1992 Cavalier Turbo 4x4

Post by lem0nmonkey »

will be getting somethigh called a flap disc for thw grinder to give a slightly smoother finish than on there at the mo.
User avatar
Envoy CDX
Club Admin
Posts: 9980
Joined: Sun Sep 23, 2007 3:51 pm
Location: Jarrow, Newcastle Upon Tyne

Re: 1992 Cavalier Turbo 4x4

Post by Envoy CDX »

lem0nmonkey wrote:will be getting somethigh called a flap disc for thw grinder to give a slightly smoother finish than on there at the mo.
Handy things flapper discs :)
Check the Rules!

Raw 8v Power! - Bad Cav, Naughty Cav... Cav want's to do 90!

The How2 Index
lem0nmonkey
Registered user
Posts: 60
Joined: Tue Apr 07, 2009 5:21 pm
Location: Bournemouth Dorset

Re: 1992 Cavalier Turbo 4x4

Post by lem0nmonkey »

more welding done today,

finished the second passes on the underside and the sides of the flange and grinded all the welds smooth
Image
Image

also finished the top side, and started to grind those welds smooth, need a dremel or die grinder or something though as the angle grinder cant really fit in the space.

Image
Image
Image
Image
Image
Image
Image
Image
Image
lem0nmonkey
Registered user
Posts: 60
Joined: Tue Apr 07, 2009 5:21 pm
Location: Bournemouth Dorset

Re: 1992 Cavalier Turbo 4x4

Post by lem0nmonkey »

Didn't realise how long since I had been on hear! Lots changed so I will update to where I am now!!

bit more progress, finished the front stands,
Image
all painted, diablo red lol
Image

rear one is almost finished, just need to cut the uprights to size
Image

bit more painting on the block and mounts,
Image
Image
Image

hopefully should have the stands finished this weekend and be able to get the shell up and on them and start stripping the underside down ready for stripping welding and recoating.
lem0nmonkey
Registered user
Posts: 60
Joined: Tue Apr 07, 2009 5:21 pm
Location: Bournemouth Dorset

Re: 1992 Cavalier Turbo 4x4

Post by lem0nmonkey »

more progress this evening,

few pics of the stands
Image
Image

wheels off
Image
Image

then i started stripping away the kit to reveal the task that lay ahead
Image
Image
Image
off side sill needs replacing from the b pillar back
Image
near side needs a pit of patching and tidying, may replace a more of it, depends on how much i can get an outer sill for

and how she was left tonight
Image

will crack on tomorrow with the suspension etc then reweld all that needs doing, however its fairly tidy
lem0nmonkey
Registered user
Posts: 60
Joined: Tue Apr 07, 2009 5:21 pm
Location: Bournemouth Dorset

Re: 1992 Cavalier Turbo 4x4

Post by lem0nmonkey »

can get full sills for £16 so gonne buy one for each side and replace what ever needs replaceing, otherwise the underside is very tidy, little bit of welding needed on the rear of the arch where it meets the boot, but otherwise about as solid is you can expect for a 17year old car,

spent this evening stripping off the fuel tank etc and the rear subframe diff etc
Image
Image
Image

tomorrow i shall get the front end stipped down and the centre of the prop, then start with the fixing of what ever needs doing,
lem0nmonkey
Registered user
Posts: 60
Joined: Tue Apr 07, 2009 5:21 pm
Location: Bournemouth Dorset

Re: 1992 Cavalier Turbo 4x4

Post by lem0nmonkey »

cracked on with the sills today,

cut and grinded out all the old rust and steel, inner and outer sill and the dog leg need replacing

Image
Image
Image

some surface rust to grind off
Image
Image

gave it all a coat of weldable zinc primer, to make sure any areas that are later hidden get some protection
Image
Image

started cutting checking and measuring for the inner box section of the sill, that was then plug welded and seam welded along the bottom
Image
Image
Image

then trimmed that down and started on the end cap of that part,
Image

then placed the other panels in place and closed the door to check clearences etc
Image
Image

also started raining towards the end, interesting welding in the rain!!
Image
lem0nmonkey
Registered user
Posts: 60
Joined: Tue Apr 07, 2009 5:21 pm
Location: Bournemouth Dorset

Re: 1992 Cavalier Turbo 4x4

Post by lem0nmonkey »

cracked on with the rest of the sills and dogleg today,

trimmed down the dogleg, taking special care to separate the outer and inner skin of the arch so i could keep the arch looking as original as possible,
Image

once all measured and trimmed, clamped and tacked the arch on and slowly worked stitching along,
Image

checked with the door shut to make sure the panel gap is still all ok,
Image

then max ground down the welds
Image

then i cut and welded on the remainder of the sill on and grinded back the welds
Image

checking for all the panels gaps to be ok and that the door still shuts ok
Image

then gave the whole thing a coat of zinc primer and a blow over of diamond black to stop it rusting if it rains
Image
Image
Image
Image
Image

close ups of the swag lines,
Image
Image
lem0nmonkey
Registered user
Posts: 60
Joined: Tue Apr 07, 2009 5:21 pm
Location: Bournemouth Dorset

Re: 1992 Cavalier Turbo 4x4

Post by lem0nmonkey »

yeah, that sounds about right,

dry day today so i started working on the other sill.

looked like this to start
Image

inner sill seemed faily solid, only the outer skin and the underside that had gone rotten,

where the bottom of the arch meets the sill had been replaced at some point, badly! seemed to be a lot of filler in there,

Image
Image
top of teh dog leg where it meets the second skin needs attention
Image

then startd to cut away the rest and was lift with this

Image

Image

cut and ground away what surface rust i could then appllied some treatment to deal with the rest,
Image
Image

whilst that was doing its thing i went on a little shopping trip and purchased some more grinding discs and flap disc as one of these
Image

amazing at getting rid of old rust, just strips away the paint and old rust and leaved the good metal, gonne invest in a few more when i start working on the floorpan! makes a lot of mess though so deffo one for suiting up!!

used it on the old repair to take away asmuch filler as possible and the rust that had started to work its way through and was left with this
Image

and on the front sill these to holes to deal with,
Image

my working area, no nice warm workshop for me!!
Image
lem0nmonkey
Registered user
Posts: 60
Joined: Tue Apr 07, 2009 5:21 pm
Location: Bournemouth Dorset

Re: 1992 Cavalier Turbo 4x4

Post by lem0nmonkey »

ok, once all the rust was dealt with i started on the welding,

first i wanted to put a bit more metal in where the arch had been repaired before, as the old sill and the newer arch had stared to seperate, filled with some weld

Image

then ground that away witha flap disc to take the beads dwon slightly, much stronger and will mean the panels arent held together with filler!!

Image

then i stared patching up the inner sill,

Image
Image

then gound down slightly,
Image

gave it all a coat of zinc primer, and thats it for today!!
lem0nmonkey
Registered user
Posts: 60
Joined: Tue Apr 07, 2009 5:21 pm
Location: Bournemouth Dorset

Re: 1992 Cavalier Turbo 4x4

Post by lem0nmonkey »

continued with the sill today, whilst it wasnt raining!!

started by grinding and flapdiscing away the paint and primer to get nice clean metal to weld to, and clamped the cutdown sill into place

Image

tacked that into place

Image

and slowly worked way round the sill welding small seams along, trying not to put to much heat through!

Image
Image
Image

then ground down the welds and applyed some zinc primer and some diamond black just to stop it rusting,

Image
Image

need to tidy up parts of the arch next then filler and spray proper, most of it will be hidden by the sill cover but still want it to look as factory as possible,

then start on the underside of the car!!
lem0nmonkey
Registered user
Posts: 60
Joined: Tue Apr 07, 2009 5:21 pm
Location: Bournemouth Dorset

Re: 1992 Cavalier Turbo 4x4

Post by lem0nmonkey »

only a small update today,

top of the dog leg needed tidying and patching slightly,

Image

so gound and wirebrushed away all the crap and paint, cut a small piece to fit in behind the missing metal and tacked on

Image
Image

then once tacked in ground down the welds and primed and painted,

will go over the top with filler to get the shape at a later date,

Image
Image

also took a little trip to pic my new seats up, recaros from a lancia delta intergrale hf turbo, bargian at £30 for the whole interior!! now need to decide what colour to retrim them!!

Image
lem0nmonkey
Registered user
Posts: 60
Joined: Tue Apr 07, 2009 5:21 pm
Location: Bournemouth Dorset

Re: 1992 Cavalier Turbo 4x4

Post by lem0nmonkey »

While the sun is shining, and i have a week off some work is happenning on TOY!!

small amount of rust need dealing with behind the bumper, prob made worse by the impact, so while its off its all getting sorted, little more welding tomorrow then the underside gets stripped and stonechip sheilded!!

Image
Image
Image
Image
Image
Image

Also the other reason toy is taking a little longer is these!

Corbuea Buckets, From purple cloth to red and black leather!
Image
lem0nmonkey
Registered user
Posts: 60
Joined: Tue Apr 07, 2009 5:21 pm
Location: Bournemouth Dorset

Re: 1992 Cavalier Turbo 4x4

Post by lem0nmonkey »

In between showers i got the rest of the major rust chopped out and nice fresh steel welded in today!

Image
Image

Image
Image

Image
Image

Image

Slow but steady progress, tommorow the underside starts to get stripped back to bare metal and recoated in stonechip!!
lem0nmonkey
Registered user
Posts: 60
Joined: Tue Apr 07, 2009 5:21 pm
Location: Bournemouth Dorset

Re: 1992 Cavalier Turbo 4x4

Post by lem0nmonkey »

so started with wire brushing off all the crap and surface rust today

Image

then once all back to good metal a coat of stoneguard! ready for overpainting at a later date!

Image
Image
lem0nmonkey
Registered user
Posts: 60
Joined: Tue Apr 07, 2009 5:21 pm
Location: Bournemouth Dorset

Re: 1992 Cavalier Turbo 4x4

Post by lem0nmonkey »

Image
Image
Image
Image
lem0nmonkey
Registered user
Posts: 60
Joined: Tue Apr 07, 2009 5:21 pm
Location: Bournemouth Dorset

Re: 1992 Cavalier Turbo 4x4

Post by lem0nmonkey »

Engine bay gets fresh paint!
Image
Image
Image

and gearbox and transfer box get washed
Image
Image

And the important part starts going back together!
Image
Image
lem0nmonkey
Registered user
Posts: 60
Joined: Tue Apr 07, 2009 5:21 pm
Location: Bournemouth Dorset

Re: 1992 Cavalier Turbo 4x4

Post by lem0nmonkey »

"Cough Cough"

Image
Image
Image
lem0nmonkey
Registered user
Posts: 60
Joined: Tue Apr 07, 2009 5:21 pm
Location: Bournemouth Dorset

Re: 1992 Cavalier Turbo 4x4

Post by lem0nmonkey »

not a massive update but bits are still going in slowly surely and all with a coat of paint

Image
Image
Image
Image
Post Reply