Subject: ddohertys... 1.7 Isuzu Cavalier Project *pic heavy*

Show off your pride and joy! All Mk3 Cavaliers are welcome (please post only one thread per car)
User avatar
ddoherty406
Registered user
Posts: 54
Joined: Wed Jun 29, 2011 11:23 am
Location: Northern Ireland - Derry

Re: Subject: ddohertys... 1.7 Isuzu Cavalier Project *pic he

Post by ddoherty406 »

I got the high pressure hose made up yesturday. Very happy with how it turned out as I wasnt sure if it would even work. The reason I needed new ones, is because now that ive removed the battery tray support and moved the powersteering bottle, the old pipes and hoses looked very out of place bending around things that were no longer there.

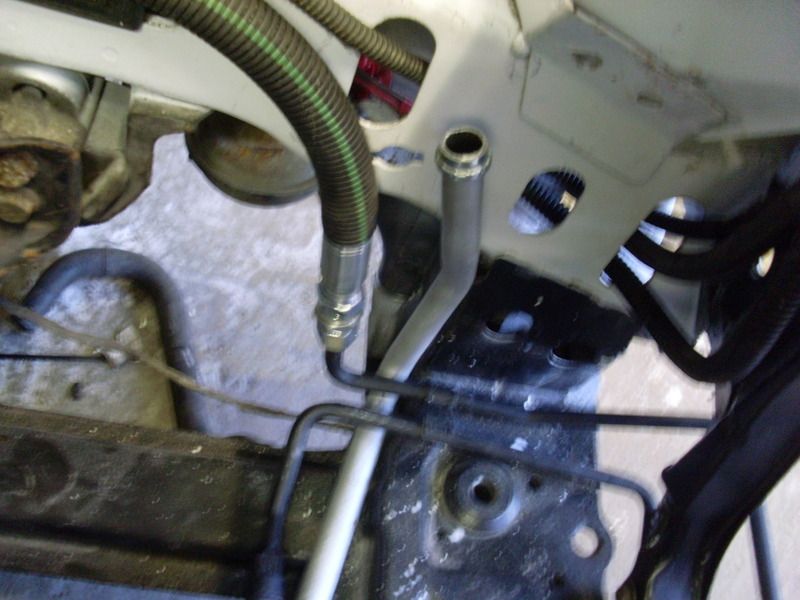
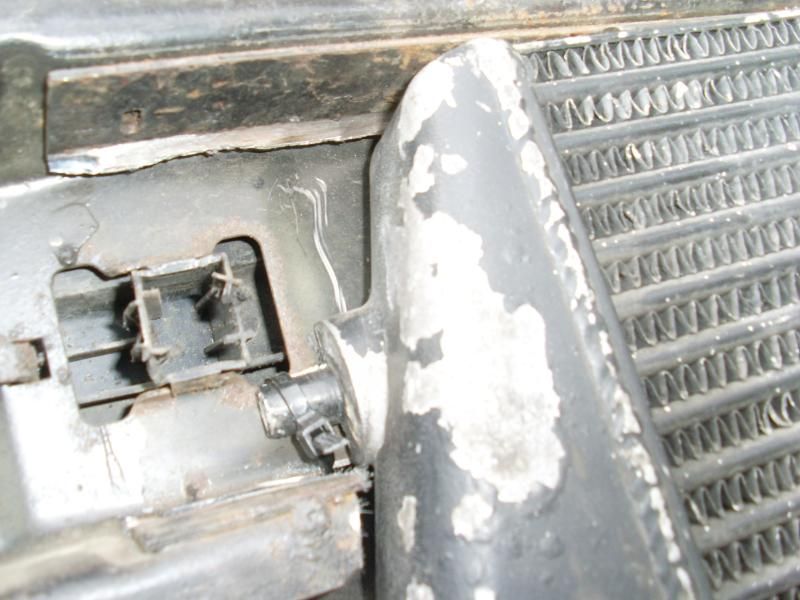
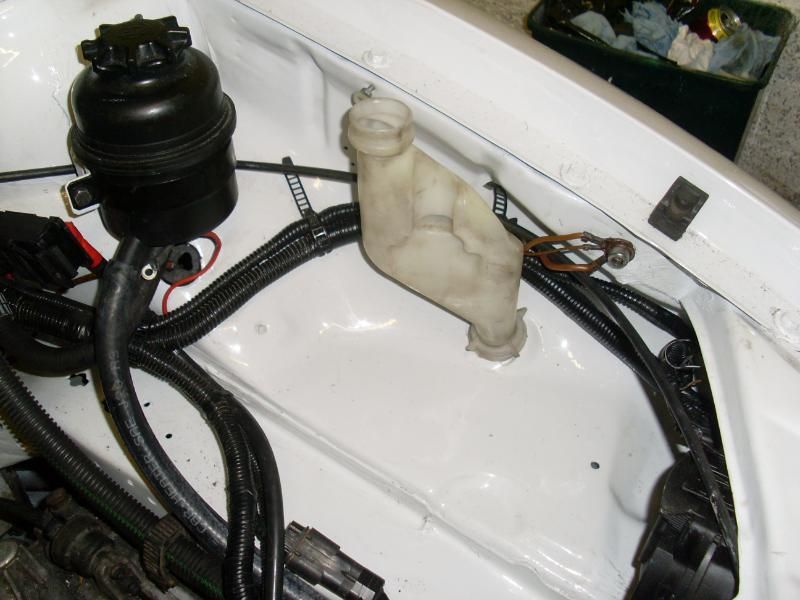
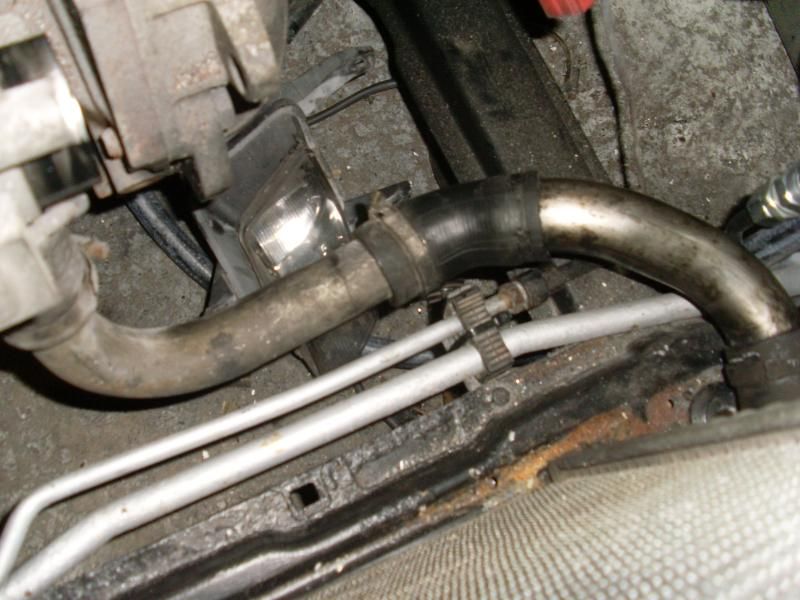
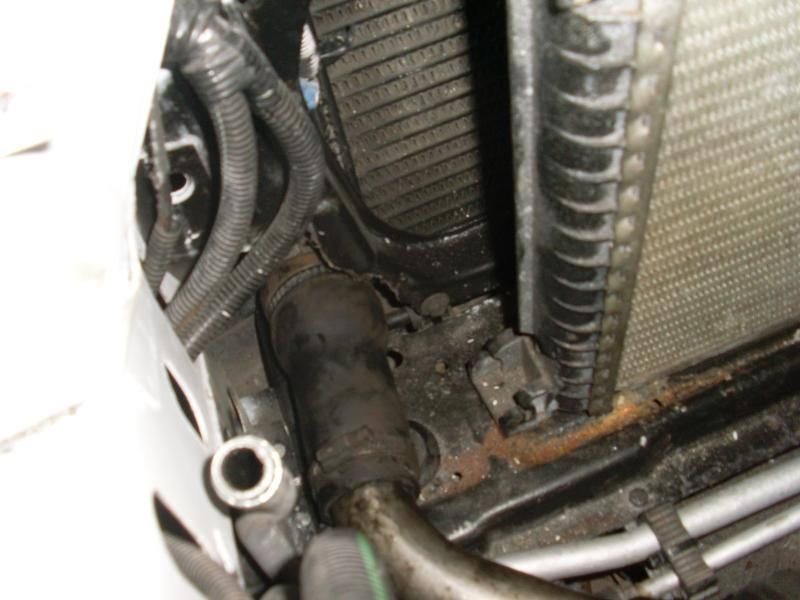
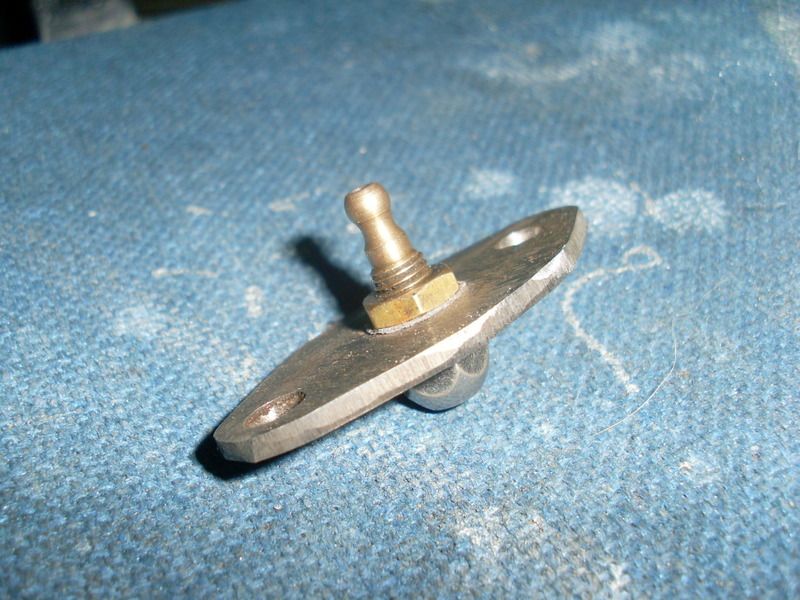
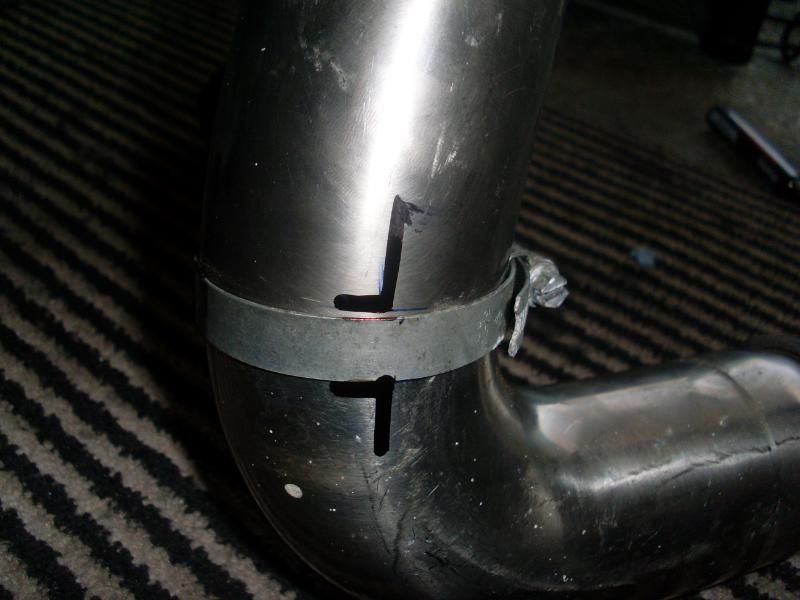
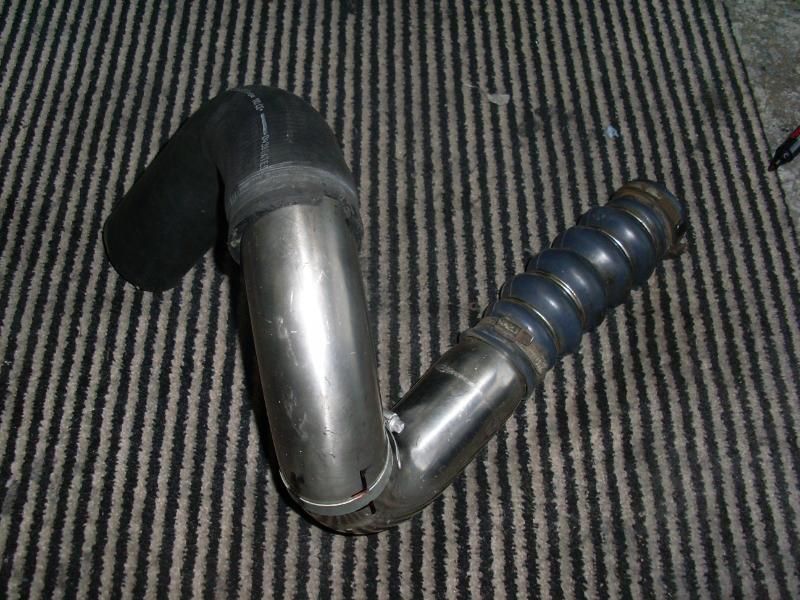
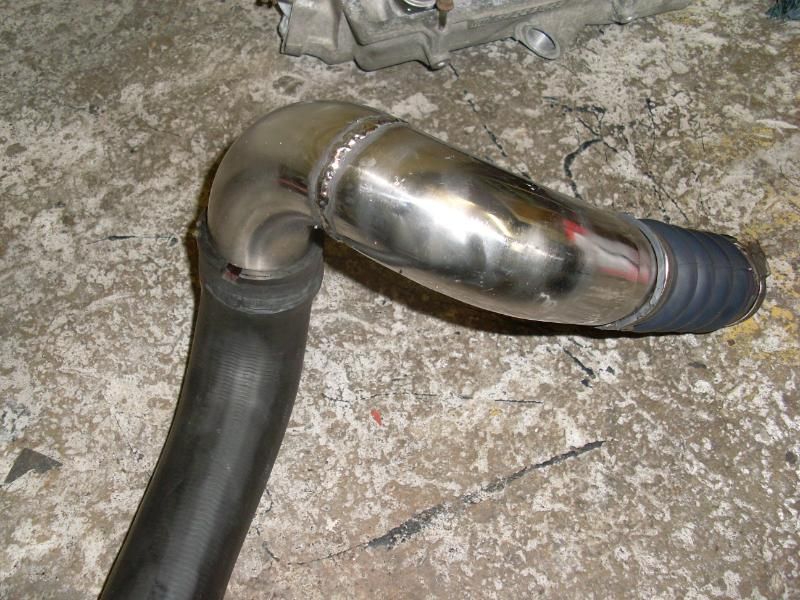
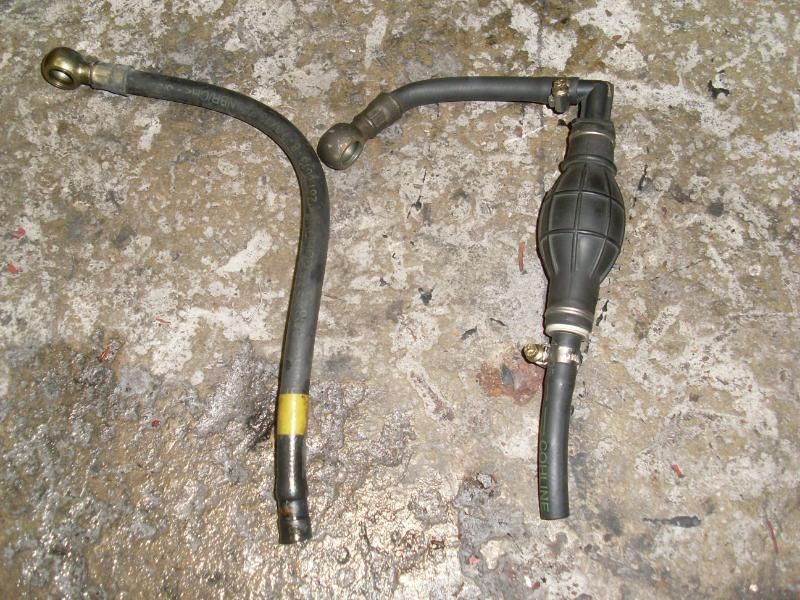
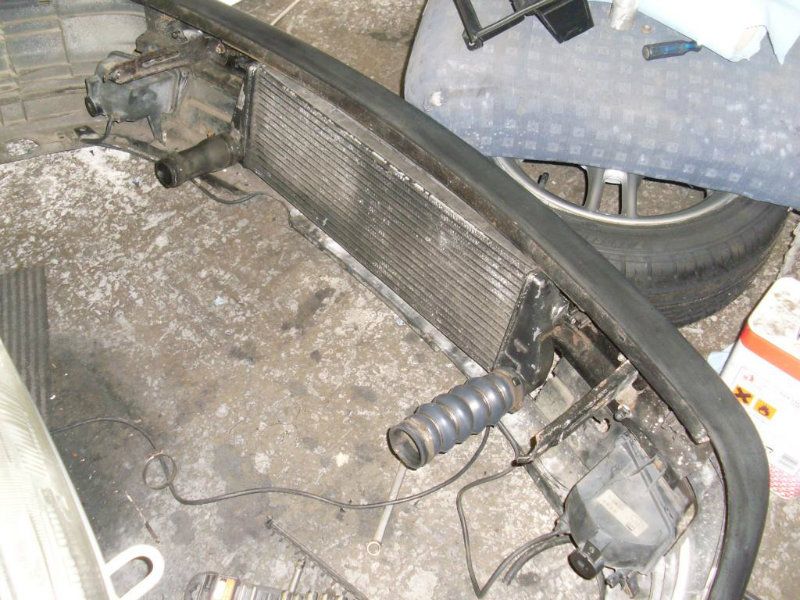
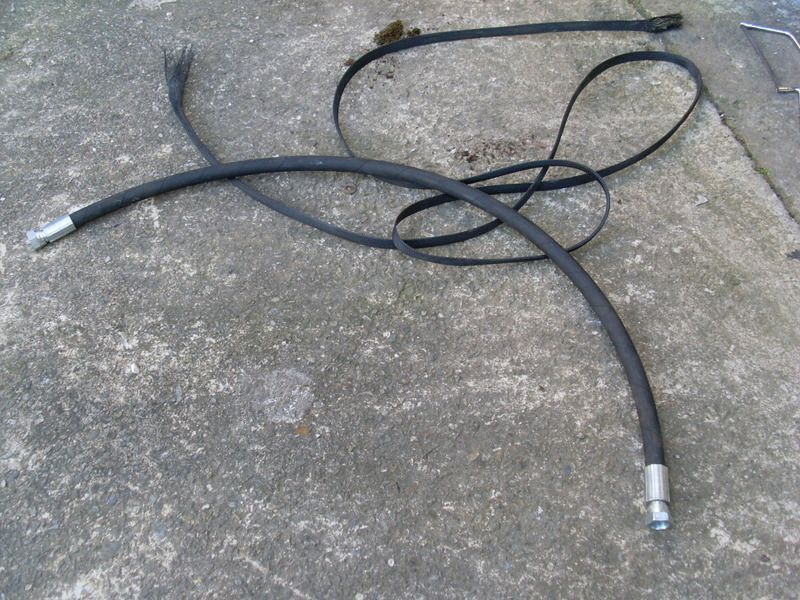
Compression Fitting added so that I can attach the new hose...
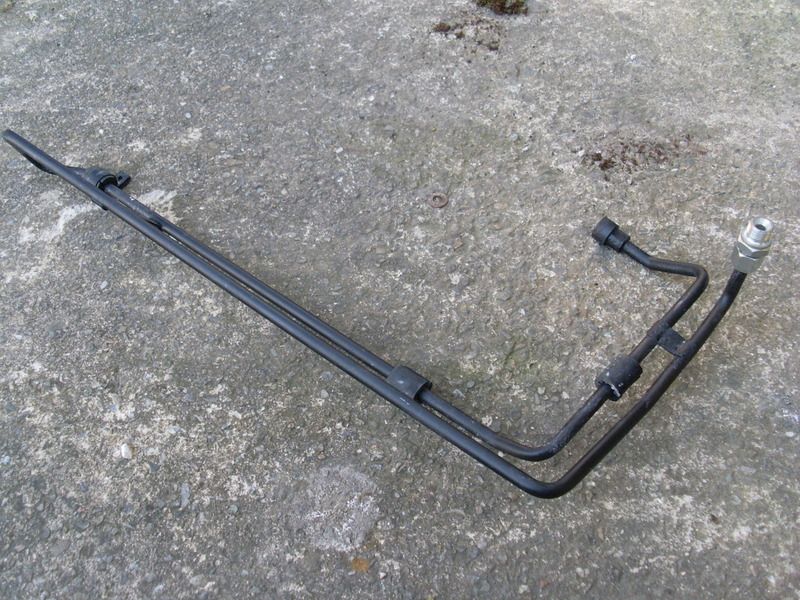
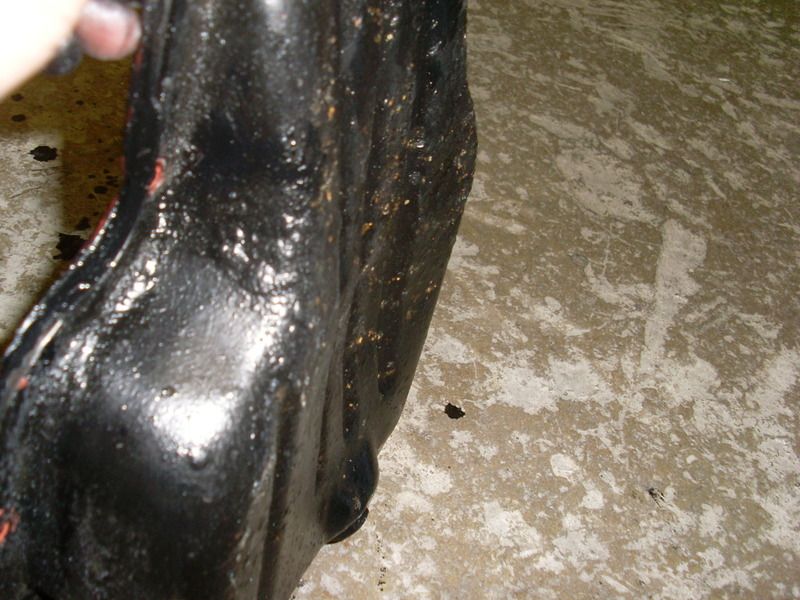
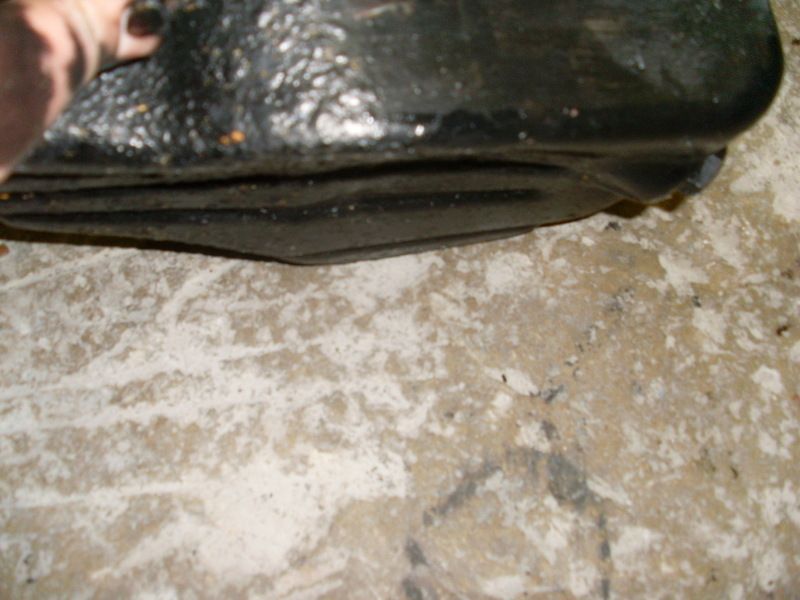
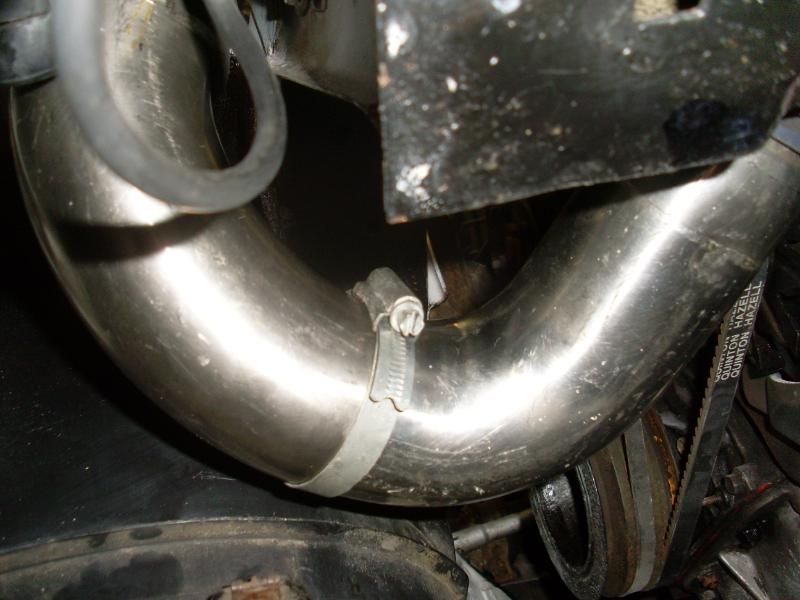
Image

Image

New Hose...

Image

Image

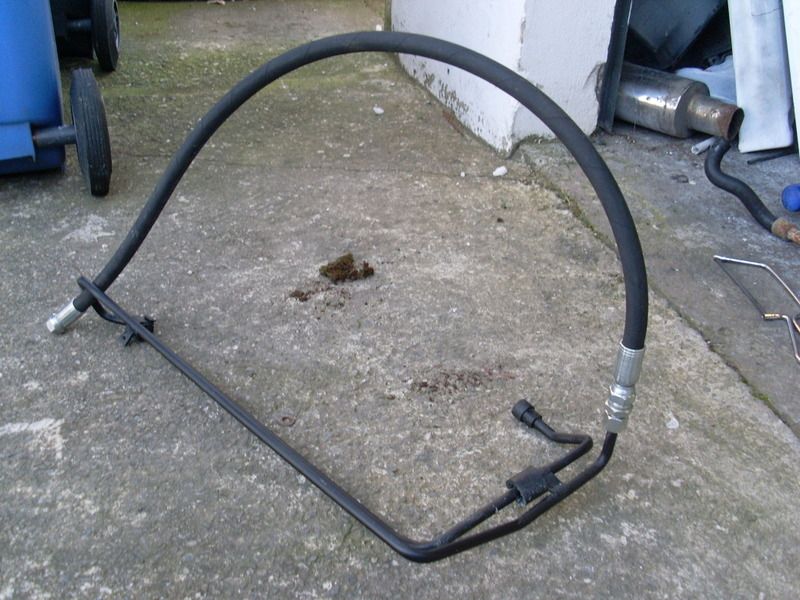
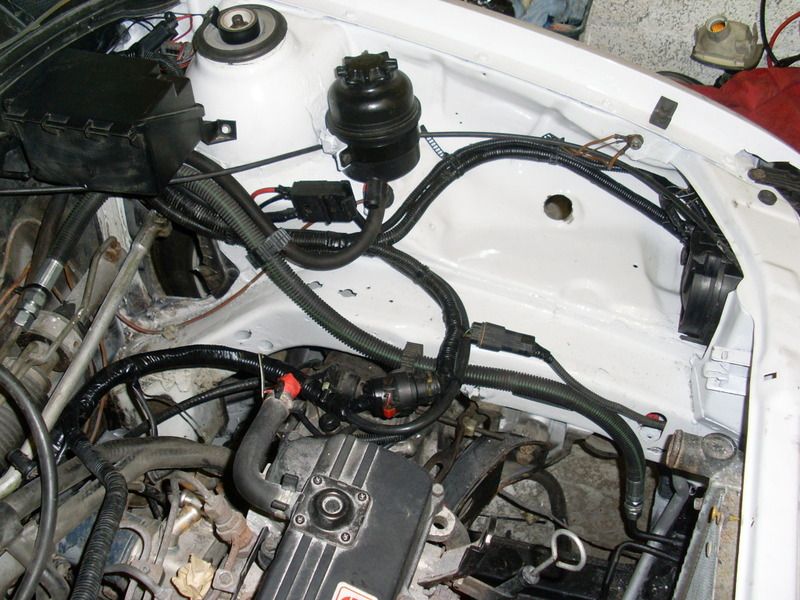
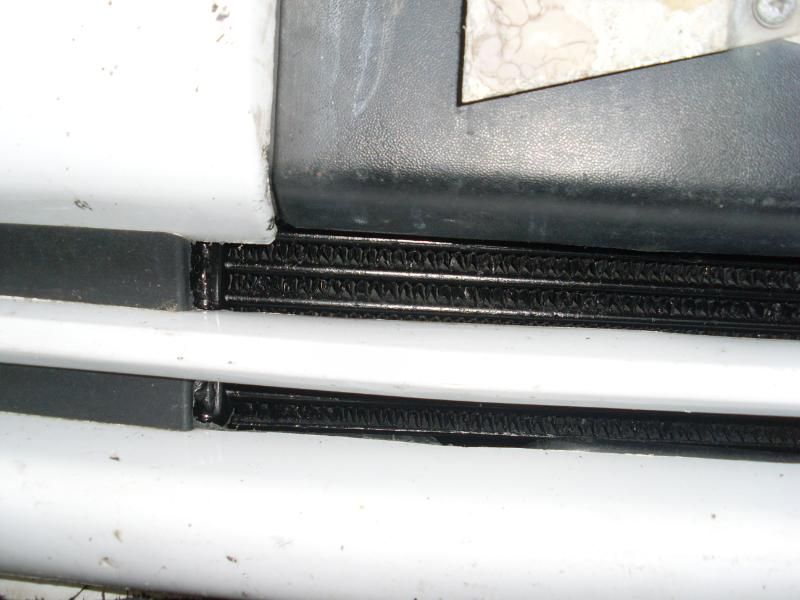
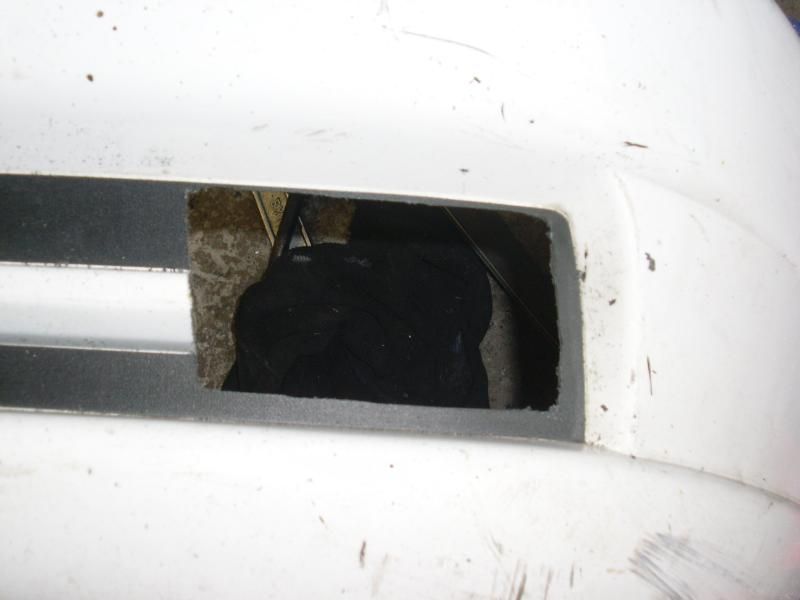
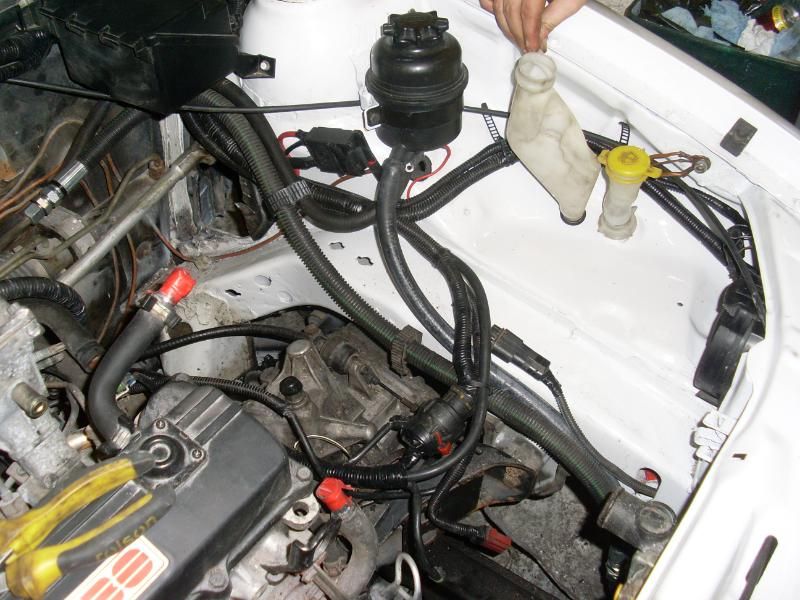
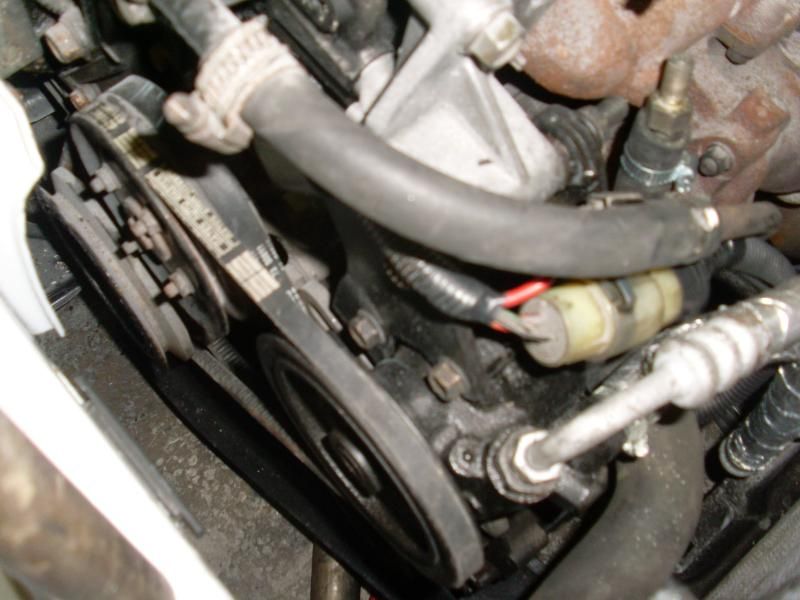
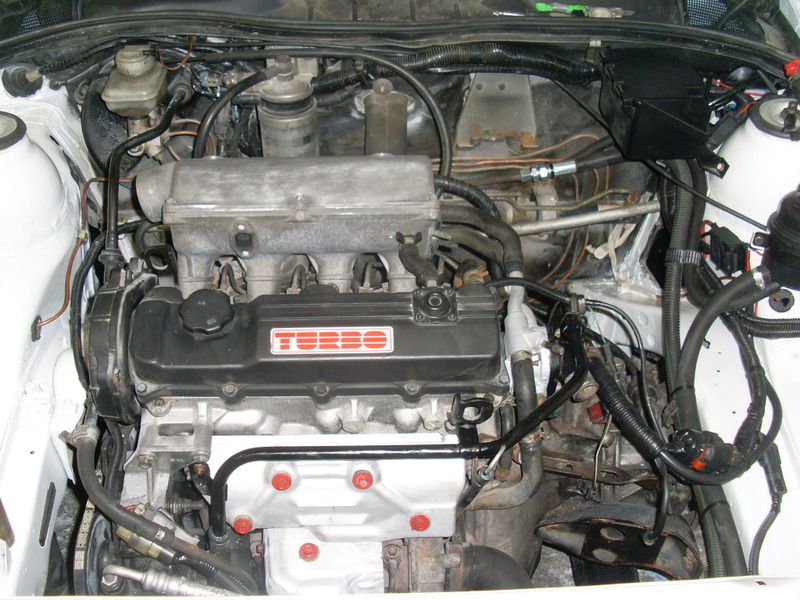
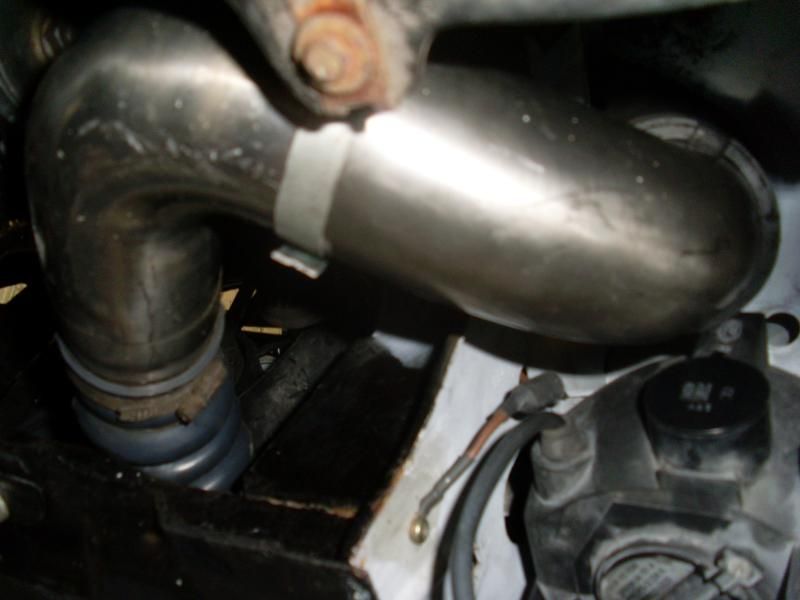
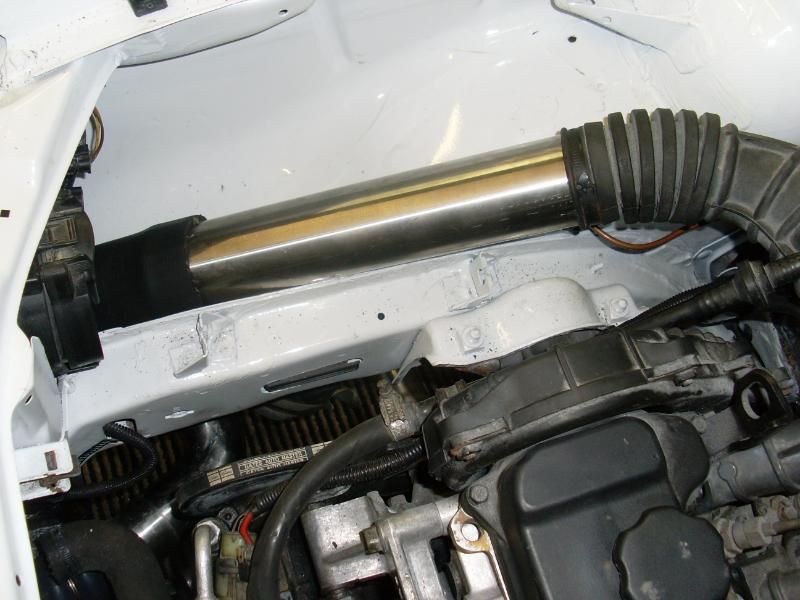
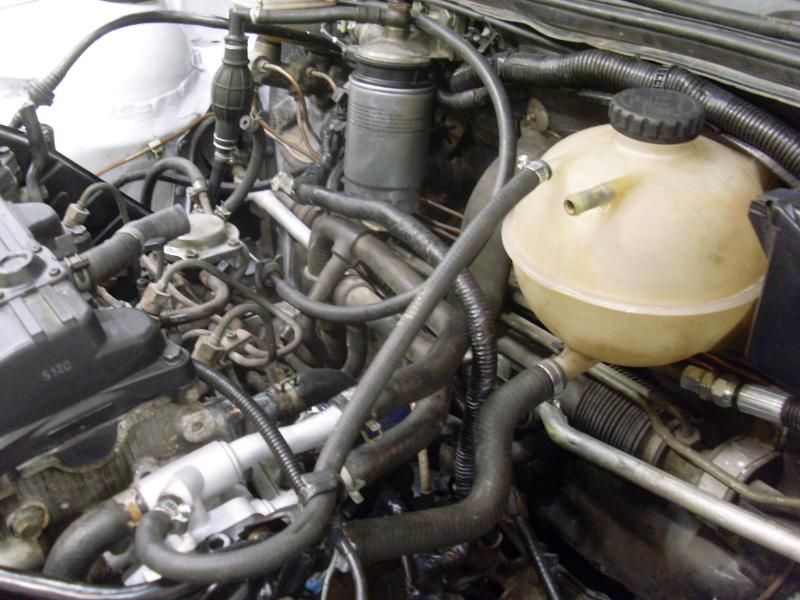
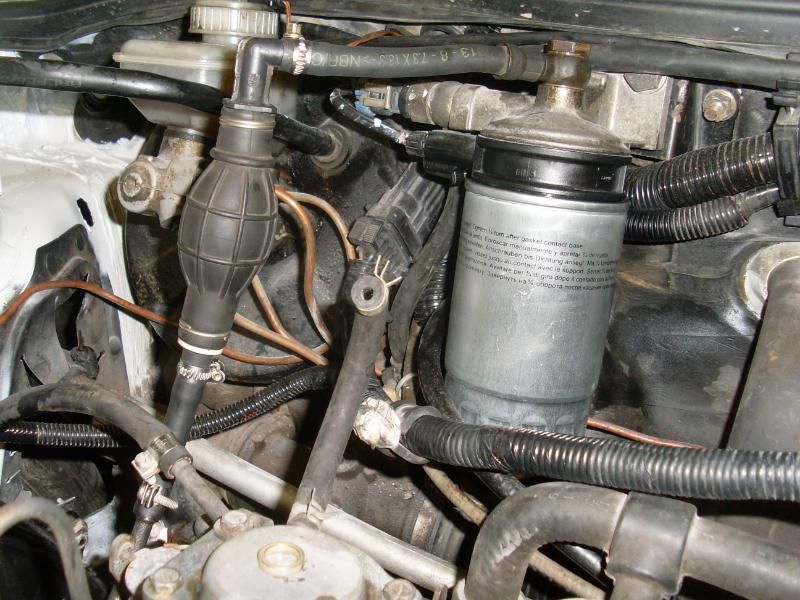
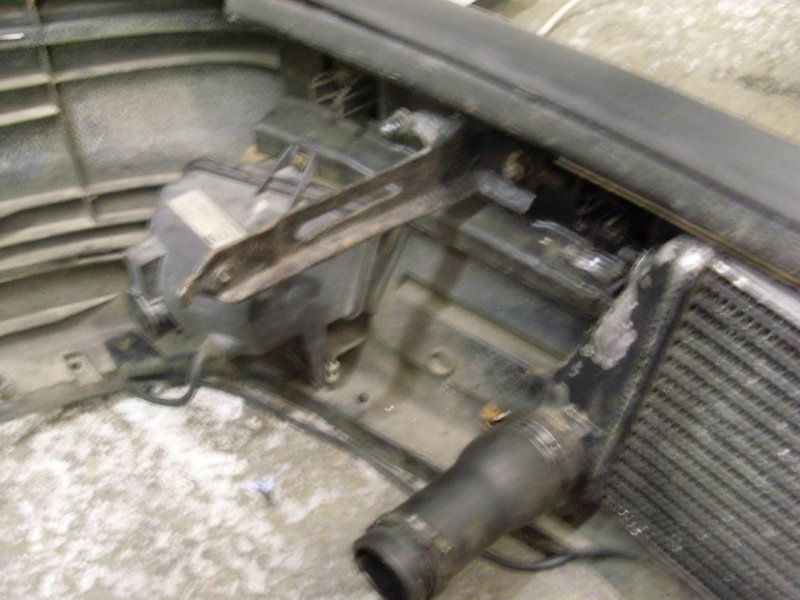
When I fitted it into the car I decided to wrap it with the plastic as it has white writing printed on the rubber.

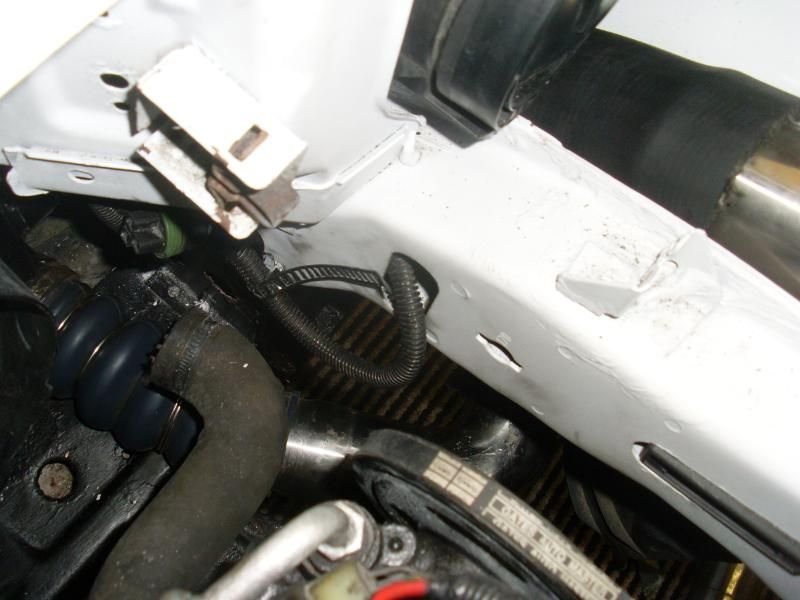
Just have to buy a bit of hose today for the low pressure side to finish it off...

Image

Image

Image
User avatar
ddoherty406
Registered user
Posts: 54
Joined: Wed Jun 29, 2011 11:23 am
Location: Northern Ireland - Derry

Re: Subject: ddohertys... 1.7 Isuzu Cavalier Project *pic he

Post by ddoherty406 »

Fairly productive weekend. Radiator, alternator, starter and powersteering pump put back in yesturday. Today I made a start on trying to make the intercooler fit, ended up taking alot longer than I expected.

After an hour of double checking that the outlets were going to line up I started cutting the bumper support and inner skin of the bumper. I managed to save most of the bumper bar so its still rigid...

Image

Image

and after alot of cutting, checking, cutting, checking its back on...

Image

Image

Painted it black to keep it hidden and look standard from a far...

Image

Image

Old vs new...

Image


I was very happy with how it had turned out until I went about fitting the foglights, it ended up needing a lot of small cuts around the edge of the intercooler so that the outer skin would sit tight against the inner part.

Image

Image

Image

Small piece from my spare sri bumper...

Image

Image

Back on again with the fogs in. As you can see below the left fog light was set to far back as the outer skin is held out by the edge of the intercooler. Below you can see where ive cut out around the edge so that it sits flush.

Image

Image

Image

Image

Well thats all for now. Unfortunitly I have to strip it all off again tomorrow so that the outer skin can be painted. The garage also needs a big clean up. lol
User avatar
ddoherty406
Registered user
Posts: 54
Joined: Wed Jun 29, 2011 11:23 am
Location: Northern Ireland - Derry

Re: Subject: ddohertys... 1.7 Isuzu Cavalier Project *pic he

Post by ddoherty406 »

After a long time looking I managed to get the larger washer bottle thanks to a member DAN90 on here, so glad to see it in. Now that the battery is out of the bay, the original filler looked messy, so ive used the one from a Vectra B which looks alot neater.

Walking through the yard last week I spotted an intercooler pipe lying on the ground, just knew it would be perfect. I think it was from a mondeo.

Ive just to do the IC outlet to inlet manifold now. Gona take a bit more thought.

Image

Image

Image

Image

Image

Image

Image

The pipes will be taken off again and cleaned when I know for sure they are holding boost. Wee pic of the engine built up with new belts.

Image
User avatar
ddoherty406
Registered user
Posts: 54
Joined: Wed Jun 29, 2011 11:23 am
Location: Northern Ireland - Derry

Re: Subject: ddohertys... 1.7 Isuzu Cavalier Project *pic he

Post by ddoherty406 »

Just realised its been a month since I last updated this and unfortunitly there hasnt been a whole lot done in that time. If I was putting the engine back to the standard setup I reckon this would be on the road, but since I have gone for a rerouted intake and the larger FMIC ive ended up making a lot more work for myself.

Since the last update ive only been tidying up a few loose ends and repainting under the wheel arches etc. not worth taking pictures of it again.

I wasnt going to bother but in the end I decided to remove the sump and fix it before the exhaust goes on. At some point in the past someone must have jacked the car up on the sump with out using timber and left it dented, it never caused any problems, just anoyed my happiness looking at it. :L

So off, straighten, cleaned, painted and back on with some gasket sealant...

Image

Image

Image

Image

Image

Image

Image
User avatar
ddoherty406
Registered user
Posts: 54
Joined: Wed Jun 29, 2011 11:23 am
Location: Northern Ireland - Derry

Re: Subject: ddohertys... 1.7 Isuzu Cavalier Project *pic he

Post by ddoherty406 »

Bit more done this afternoon. New oil and filter, now 100% leak free!... I hope. Full standard exhaust back on, heat sheilds and gearbox inspection plates also fitted. Water housing cleaned, painted and most of the water pipes back on. Just needy get this intercooler piping sorted so I can get it started for the 1st time in nearly a year.

Engine bay coming together...

Image

Image

Image
User avatar
ddoherty406
Registered user
Posts: 54
Joined: Wed Jun 29, 2011 11:23 am
Location: Northern Ireland - Derry

Re: Subject: ddohertys... 1.7 Isuzu Cavalier Project *pic he

Post by ddoherty406 »

I havent had the get up and go to finish it off recently, its not far away but its wee stupid things that need doing which has slowed things down. I should have just put the engine setup back the way it was originally. Anyway another step in the right direction...

1.7 Straight D izuzu inlet with egr valve. Polish arrived today so alot of sanding and buffing to get it shiney before its fitted...

Image

Firstly because this is for a straight diesel it didnt have a fitting for the hose to the fuel pump which means I wouldnt be getting any extra fuel when its on boost. So I bodged together this wee part which will cap the hole where the egr valve was and allow me to run a hose to a boost gauge and the pump. This is only a MK1 verson, Il be polishing a bit of aluminium for the final article...

Image

Image

Image

Image

Another hole which had some sort of plastic tank attached. This will be removed and either capped or I may try and fit the heater that was in the orignal manifold...

Image

Lastly the nipple on and a sneak peak at the new routing.

Image

Image
User avatar
ddoherty406
Registered user
Posts: 54
Joined: Wed Jun 29, 2011 11:23 am
Location: Northern Ireland - Derry

Re: Subject: ddohertys... 1.7 Isuzu Cavalier Project *pic he

Post by ddoherty406 »

At first I wished I never started this next update but after tonight Im glad I did as I never would have done it once it was all back together...

Polished inlet manifold - Still needs a few more hours spent on it to finish it...

Image

Image

Image

Another job ive been putting off that was holding everything up was the new intercooler piping. This evening I got it all roughly put together so just a matter of tiding up and fixing it all in place.

Been on the hunt the past month for a few suitable pieces of stainless - Nice right angle and reducer...

Image

Flexy from the intercooler to 90 and then another 90 to put it up through the orignal hole in the inner wing...

Image

I used a jubilee clip to hold the pipes in place as I adjusted them so that it all lined up...

Image

Image

Image

The finished piece. Not sure weather to get it welded rigid or have some sort of clamp setup like on an exhaust so that it'll be easier to fit/remove...

Image

Then a flexable rubber 90 from the second Stainless 90 to a straight piece up to the inlet.

Image

Image

Image

Image

Image

Image

Next up I have to make a radiator bracket as the orignal intercooler used to keep it inplace. Plan is to have it double up as a cold air feed directed to a large cone filter where the battery was, connected directly to the turbo.
User avatar
ddoherty406
Registered user
Posts: 54
Joined: Wed Jun 29, 2011 11:23 am
Location: Northern Ireland - Derry

Re: Subject: ddohertys... 1.7 Isuzu Cavalier Project *pic he

Post by ddoherty406 »

Water Works

When taking things apart I decided to take out the small thermostat which connects the oil cooler to the head. I didnt realise at the time it would be so hard to replace, vauxhall wanted £67.80 for the wee smashed bit on the right. Anyway one turned up in work yesturday so I cleaned the housing and fitted it. Also fitted the other hoses along with a bit of silicone to be sure. Very tempted to buy a new expansion tank because after bleaching its still yellow.

Image

Image

Image

Image

Few other wee things... intercooler pipe welded and some new gearoil...

Image

Image


Lastly new fuel filter on and I modified the fuel line to the pump with a primer bulb from a 406...

original...

Image


old & new

Image

New filter, new hose and for the hawk eyed of you out there will have already noticed the white ring has been removed.

Image
McFall1984
Registered user
Posts: 547
Joined: Tue Sep 07, 2010 1:13 am
Location: Northern Ireland

Re: Subject: ddohertys... 1.7 Isuzu Cavalier Project *pic he

Post by McFall1984 »

Great work Dave
bet your glad now its nearly over
User avatar
ddoherty406
Registered user
Posts: 54
Joined: Wed Jun 29, 2011 11:23 am
Location: Northern Ireland - Derry

Re: Subject: ddohertys... 1.7 Isuzu Cavalier Project *pic he

Post by ddoherty406 »

cheers Gary, half of me is half of me isnt, I dont want to bring it out to this harsh weather. lol I read somewhere you got yours through the mot. Good job.
User avatar
ddoherty406
Registered user
Posts: 54
Joined: Wed Jun 29, 2011 11:23 am
Location: Northern Ireland - Derry

Re: Subject: ddohertys... 1.7 Isuzu Cavalier Project *pic he

Post by ddoherty406 »

I changed the blanking plates to aluminium so that I can polish them to match the inlet better. Small problem that I came across is that the TD fuel lines must be a different shape, as the blanking plate I made for the right side wont go on without removing the inlet again. I think im going to modify the plate instead. it'll make it easier to add the inlet heater in the future.

Image

Image

Next up...

Bumper removed to secure intercooler hoses and attach fog lights, just have to paint the outer skin and its ready to go back on for the last time.

Image

Image

Lastly something a few of you were asking about. I know they wont be to everyones taste but they are something different to the usual fanblades or speedlines. They are a 16 inch Alessio Wheel that I cannot mind the name of, but they are freshly painted and I think they suit it...

Image

Image

4 brand new tyres...

Image

and on the car...

Image

Image
User avatar
HAIRIBO
Registered user
Posts: 2496
Joined: Thu Sep 27, 2007 3:28 am
Location: Sunderland

Re: Subject: ddohertys... 1.7 Isuzu Cavalier Project *pic he

Post by HAIRIBO »

Lovely project this.

Be intresting to see what all this dose to the Power/torque and also the MPG.

As the 50mpg of a the TD sounds very tempting.
C30XE
McFall1984
Registered user
Posts: 547
Joined: Tue Sep 07, 2010 1:13 am
Location: Northern Ireland

Re: Subject: ddohertys... 1.7 Isuzu Cavalier Project *pic he

Post by McFall1984 »

liking the wheels
as you say different :thumb

ps, passed mot saturday
User avatar
planetc
Registered user
Posts: 6258
Joined: Wed Oct 20, 2010 9:59 pm
Location: Eating cake in Bexhill On Sea
Contact:

Re: Subject: ddohertys... 1.7 Isuzu Cavalier Project *pic he

Post by planetc »

Would it be easier to remove the studs and bolt that plate on, no need to remove the inlet or change anything then?
"No the temperature gauge doesn't work........
we've driven 150 miles today........
the heater went cold last Thursday........
they check the level when it's serviced don't they?"
User avatar
ddoherty406
Registered user
Posts: 54
Joined: Wed Jun 29, 2011 11:23 am
Location: Northern Ireland - Derry

Re: Subject: ddohertys... 1.7 Isuzu Cavalier Project *pic he

Post by ddoherty406 »

Im not expecting massive power gains from this as its still got the standard turbo, but i am curious myself to see exactly how much, if any at all difference compared to before with just the std intercooler setup. MPG will be down but compared to my daily 406 2.0 turbo petrol this should be easier on the pocket.

Never even thought about replacing the studs, but looking at the photos again it looks like the simple solution. Infact they will probably be the same as the ones for the front plate.
User avatar
Lowrider Dave
Club Admin
Posts: 2993
Joined: Wed Dec 22, 2010 10:00 am
Location: Southampton
Contact:

Re: Subject: ddohertys... 1.7 Isuzu Cavalier Project *pic he

Post by Lowrider Dave »

Some excellent work going on there! Love projects that are backed up with photos rather than just text. Nice alloys too.
Lowrider Dave.

Archer 2.0 GLS
User avatar
humbucker
Club Admin
Posts: 9298
Joined: Tue Aug 19, 2008 10:42 pm
Location: Cobra Kai Dojo
Contact:

Re: Subject: ddohertys... 1.7 Isuzu Cavalier Project *pic he

Post by humbucker »

Good work, looks very tidy, lots of effort going on here.
User avatar
ddoherty406
Registered user
Posts: 54
Joined: Wed Jun 29, 2011 11:23 am
Location: Northern Ireland - Derry

Re: Subject: ddohertys... 1.7 Isuzu Cavalier Project *pic he

Post by ddoherty406 »

Well another thing ive been putting off for a while...

Image

Its hard to see from the photos but 12years on our roads has really battered this bumper. 100s of stonechips and scratches all needing filled and smoothed. I wasnt looking forward to it but now ive started its not all that bad. About 5 hours spent getting one side to the standard below. I put it on a spare bumper support to stop it flopping all over the place.

Scratches and chips...

Image

Image

Image

Image

Image

Image

Image

Then after alot of sanding, primer, flattening and so on...

Image

Image

Image

Image

Image

Next up do the middle and otherside to the same standard and then a full coat of white primer.
gsi pie
Registered user
Posts: 3769
Joined: Tue May 10, 2011 7:24 pm
Location: blackwood south wales

Re: Subject: ddohertys... 1.7 Isuzu Cavalier Project *pic he

Post by gsi pie »

love this cav :thumb
My valver brings all the boys to the yard, dam right its cammed and carbed, dam right it pops and farts, I would show you but the fuker won't start!
User avatar
ddoherty406
Registered user
Posts: 54
Joined: Wed Jun 29, 2011 11:23 am
Location: Northern Ireland - Derry

Re: Subject: ddohertys... 1.7 Isuzu Cavalier Project *pic he

Post by ddoherty406 »

Well, im not doing anymore bumpers for a long time. Spent as much time and effort doing the following pieces as doing the rest of the car. So many dents scrapes and chips, but in the end Im pretty happy to see them done and on the car. Finally everything is painted and theres an end in sight. All the intercooler piping and radiator had to come out again and it'ill have to stay off till i get the vinyl for the bumper. The drivers fog light has to come out so I can slide in a cap and the new intercooler pipes block access to the fog. Should have had the vinyl sitting ready :rage:

Front bumper...

Image

Image

Image

Image

Image

Image

Back bumper...

Image

Image

Image

Few bits and bobs...

Image

Everything hanging for painting...

Image

Image

Image

Image

Image

Image

Image

Then today I carefully fought with them to get them all fitted together and back on the car, wee tip heat the plastic trims for the stripe before forcing them onto the outer skin. :doh: split my orignal one but luckliy I had a spare, hence the green. Ive order new red tape for all round.

Image

Image

Image

Image

Image
marcia
Registered user
Posts: 525
Joined: Sun Jan 10, 2010 8:57 am
Location: Corby,Northants

Re: Subject: ddohertys... 1.7 Isuzu Cavalier Project *pic he

Post by marcia »

Well done on what you have achieved, excellent looking Cavalier you have. :thumb

William
PRESENT CAR;1995(N) Vauxhall Cavalier GLS, 2.0 litre, 16 Valve Automatic in Smoke Grey.
Owned since August 2006
Ricky180b
Posts: 41
Joined: Sat Oct 06, 2012 10:04 pm

Re: Subject: ddohertys... 1.7 Isuzu Cavalier Project *pic he

Post by Ricky180b »

alot of dedication there. I take it you are using an air compressor for spraying, cant see it
cavvyv6
Registered user
Posts: 105
Joined: Sat Dec 10, 2011 5:54 pm
Location: flintshire n.wales

Re: Subject: ddohertys... 1.7 Isuzu Cavalier Project *pic he

Post by cavvyv6 »

very nice that mate id be proud of that well done
jimmy
Registered user
Posts: 690
Joined: Sat Jul 09, 2011 8:44 pm
Location: shropshire

Re: Subject: ddohertys... 1.7 Isuzu Cavalier Project *pic he

Post by jimmy »

Lot of hard work gone into this and got to be worth it fella looks awesome I look forward to the post that says its on the road an how its turned out ;) :thumb
[center]Image
[/center]
User avatar
Stoater85
Registered user
Posts: 730
Joined: Mon Jan 02, 2012 10:05 am

Re: Subject: ddohertys... 1.7 Isuzu Cavalier Project *pic he

Post by Stoater85 »

Love it. Excellent work. Can't beat a fresh coat of white all laquered up.
Image
Post Reply