My Cavalier Turbo ( 2005 to Present )

Show off your pride and joy! All Mk3 Cavaliers are welcome (please post only one thread per car)
Yanayaya
Registered user
Posts: 100
Joined: Mon Jun 18, 2012 7:24 pm

My Cavalier Turbo ( 2005 to Present )

Post by Yanayaya »

Hello,

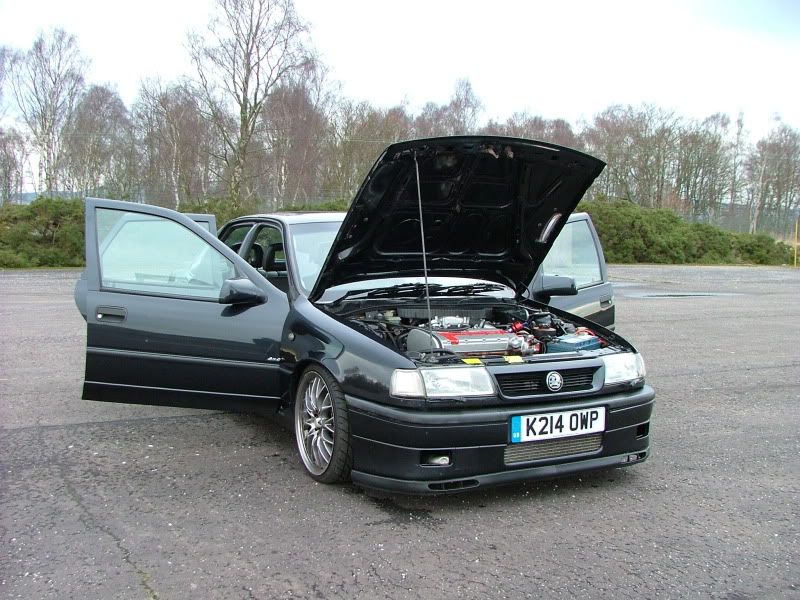
Right, before I bound off into the history of the car here is some information about when I bought it and its age etc as well as her current spec.

Car Details
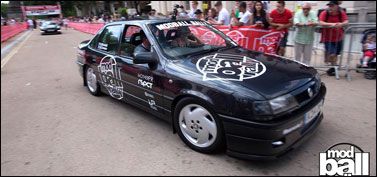
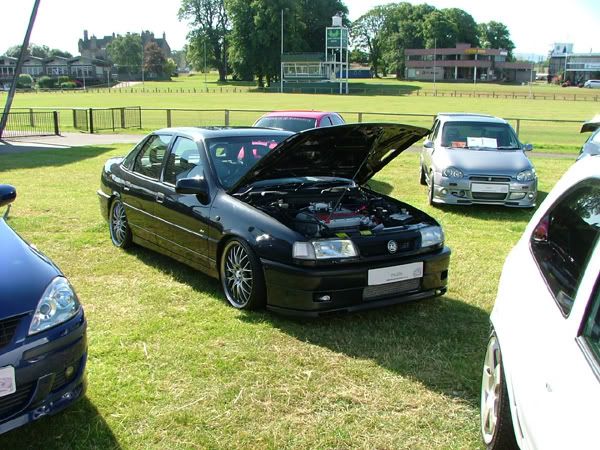
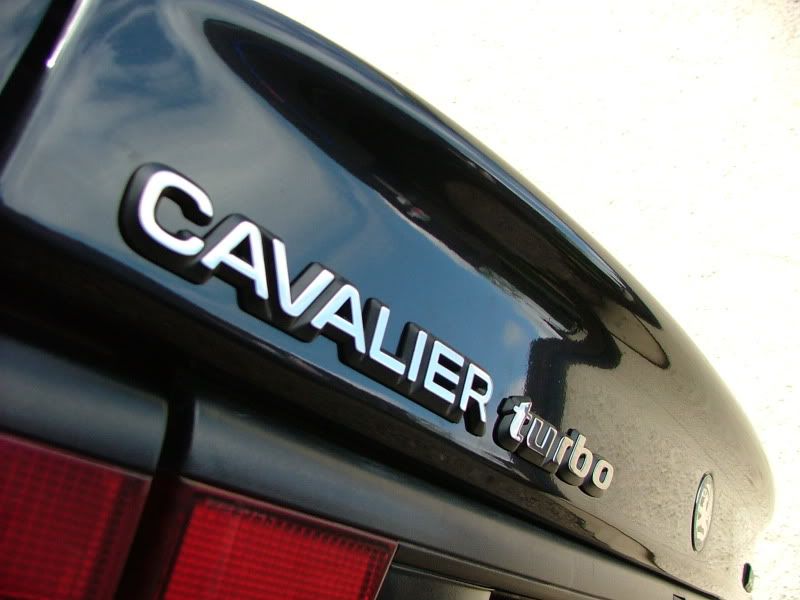
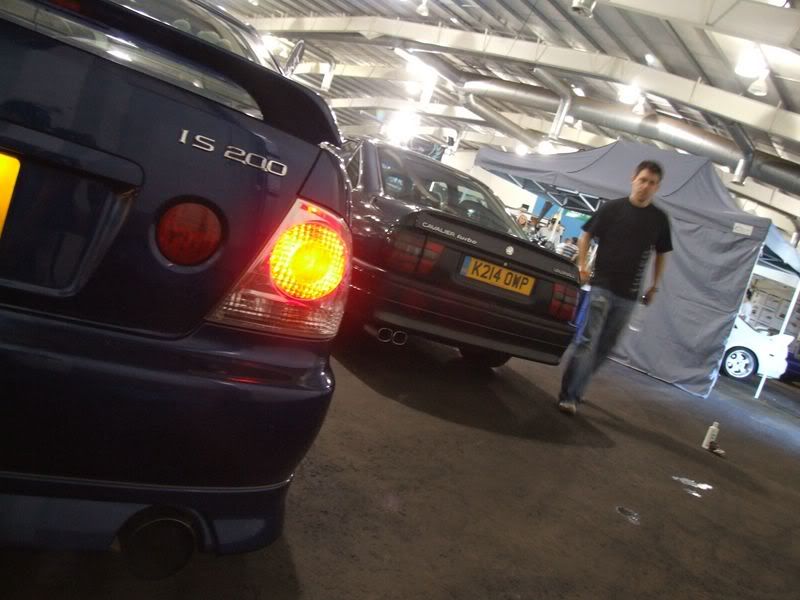
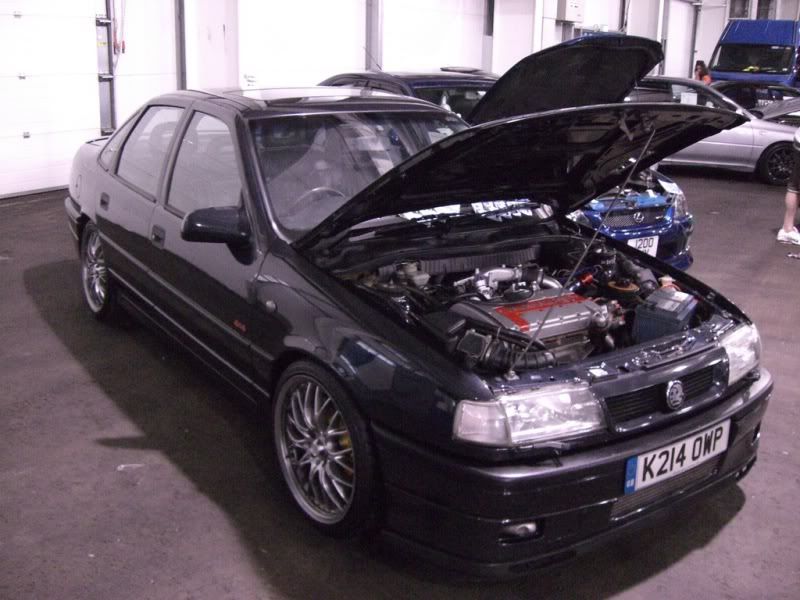
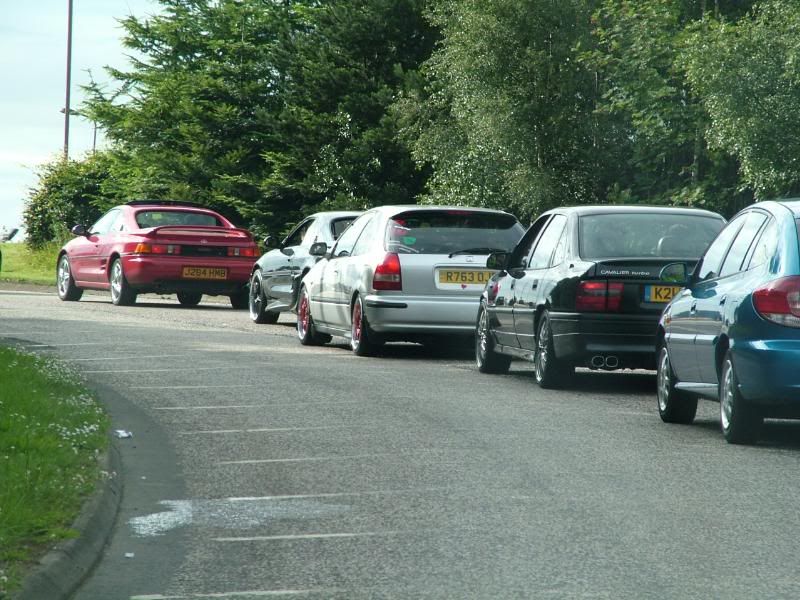
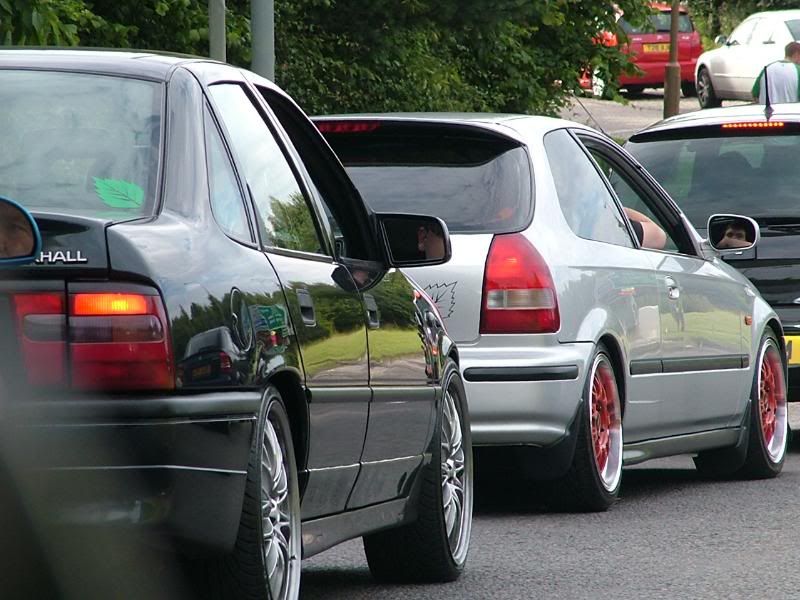
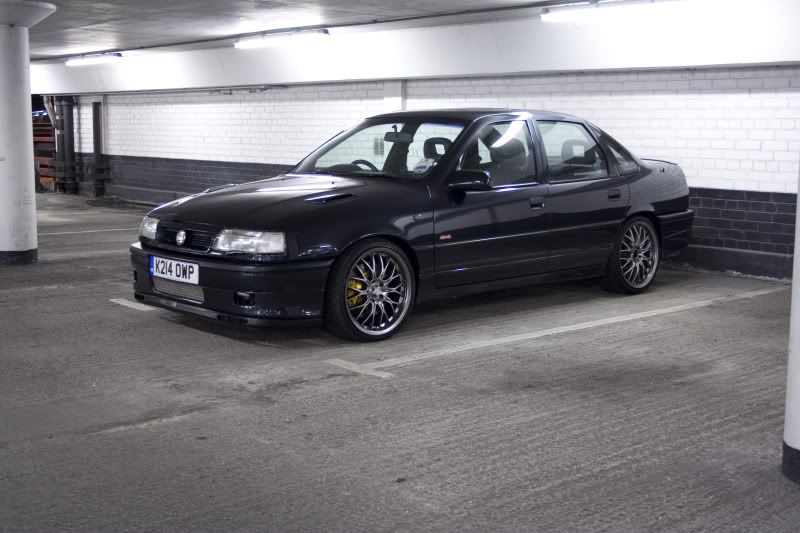
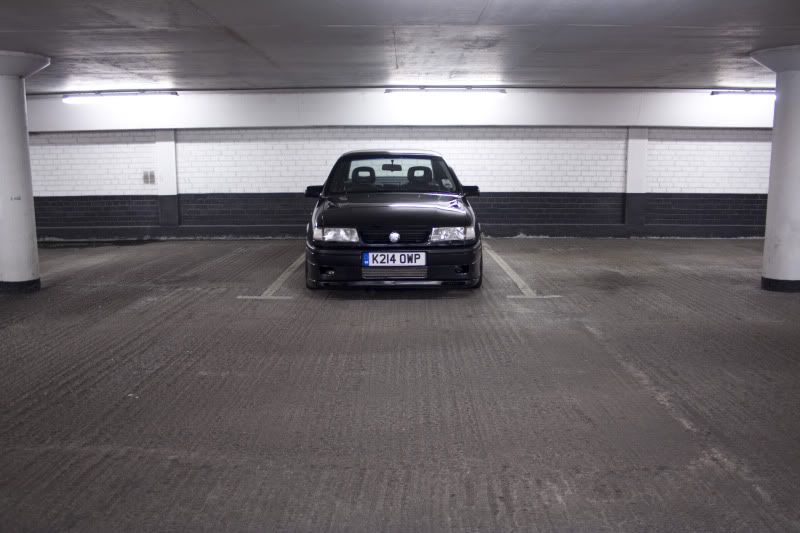
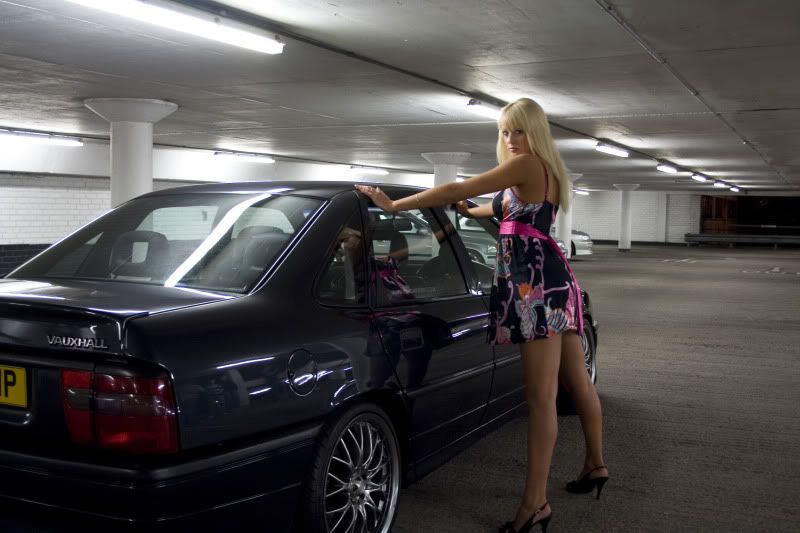
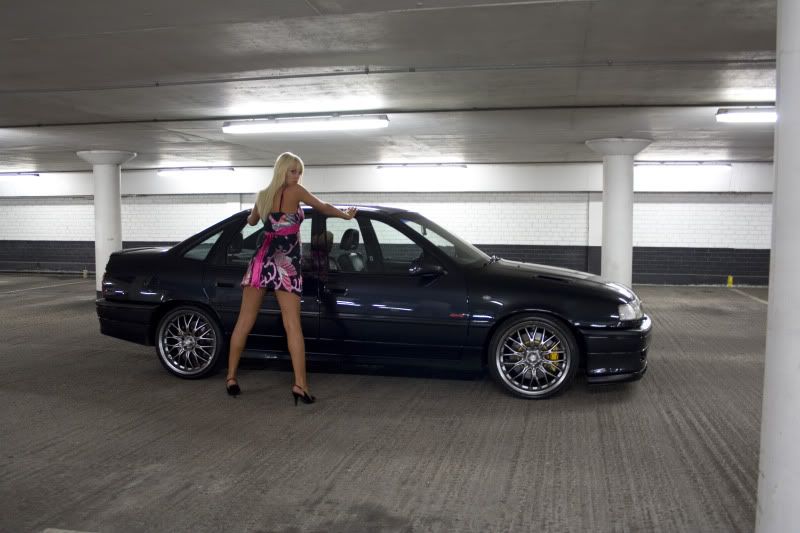
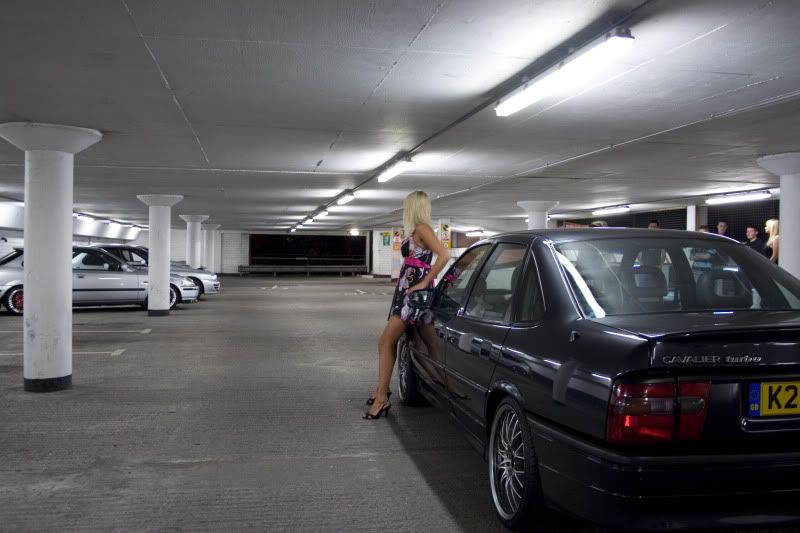
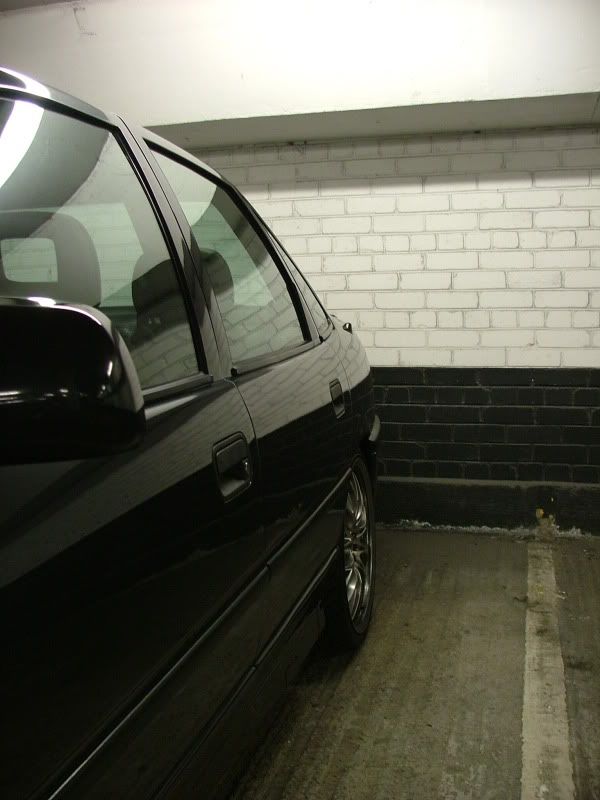
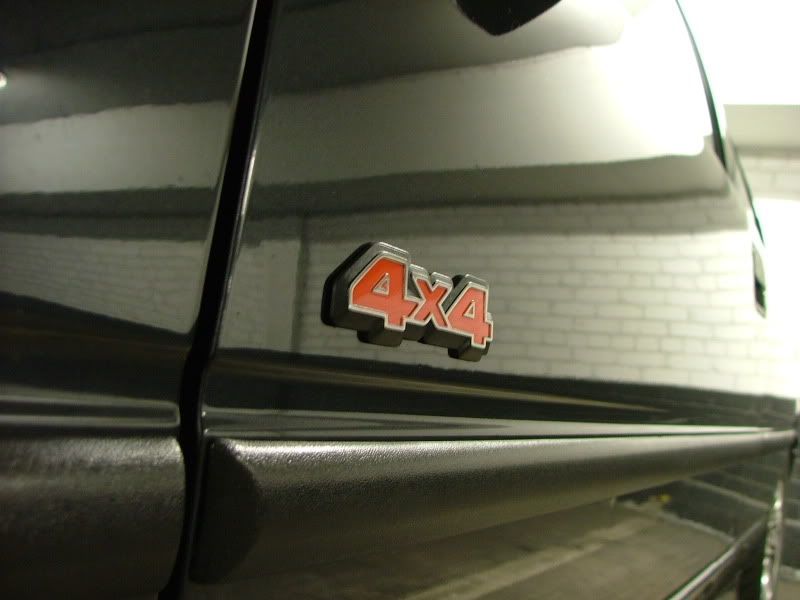
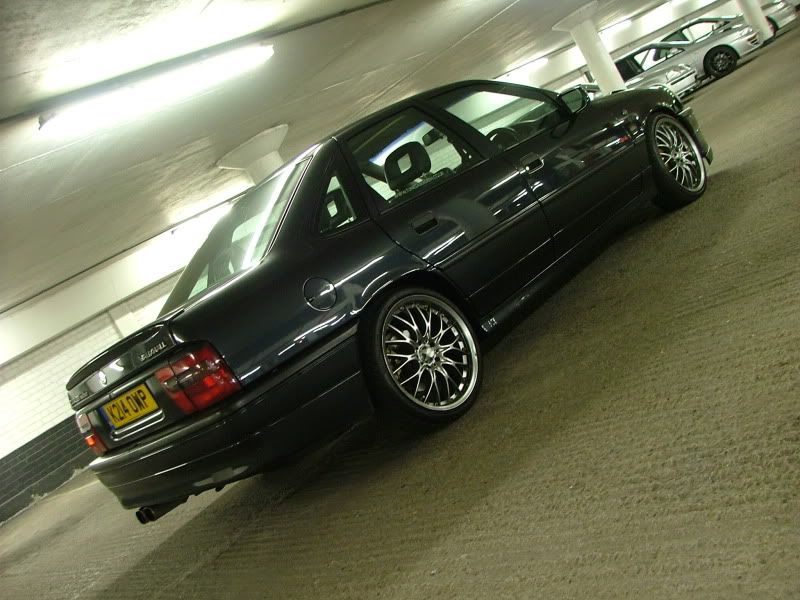
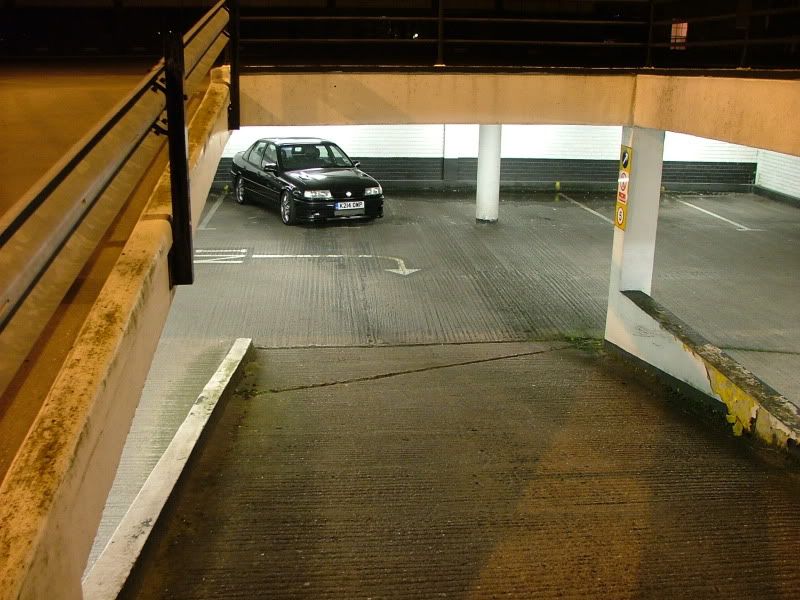
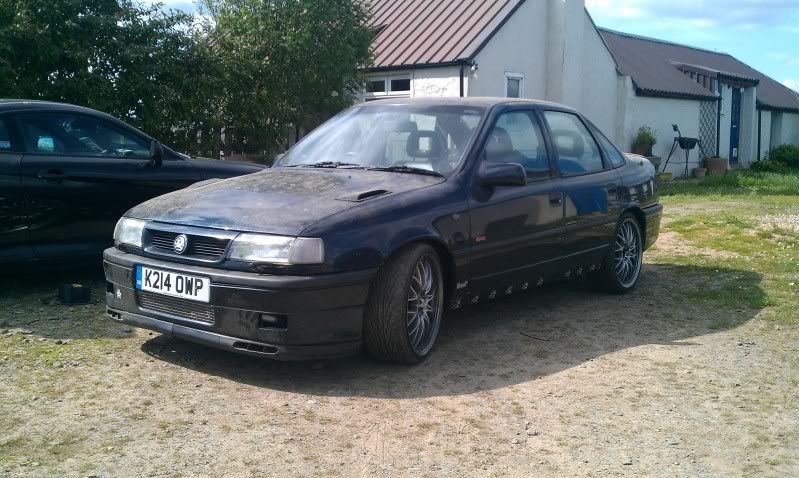
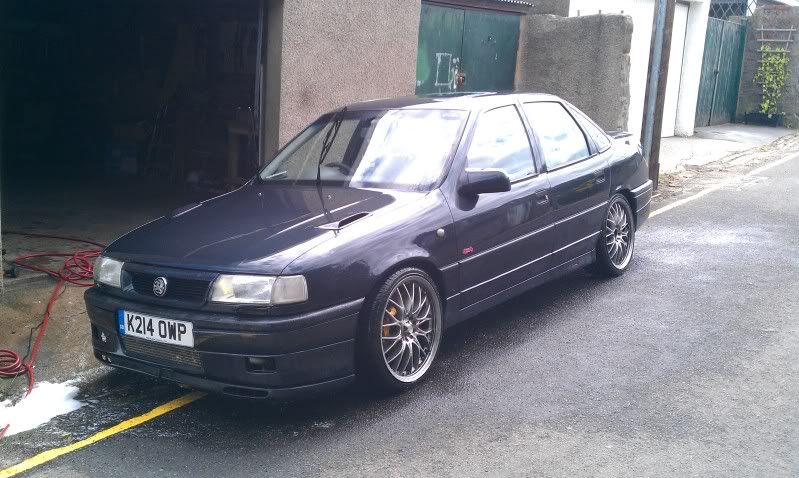
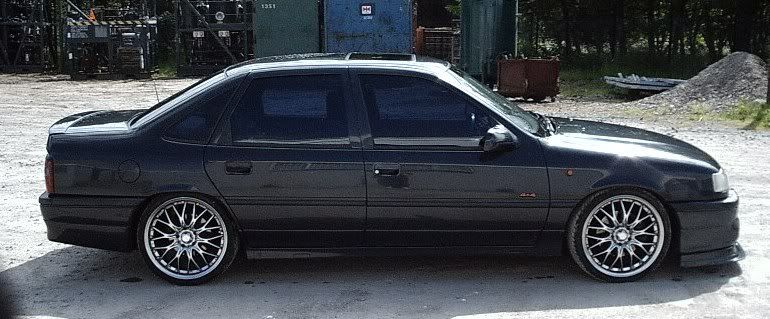
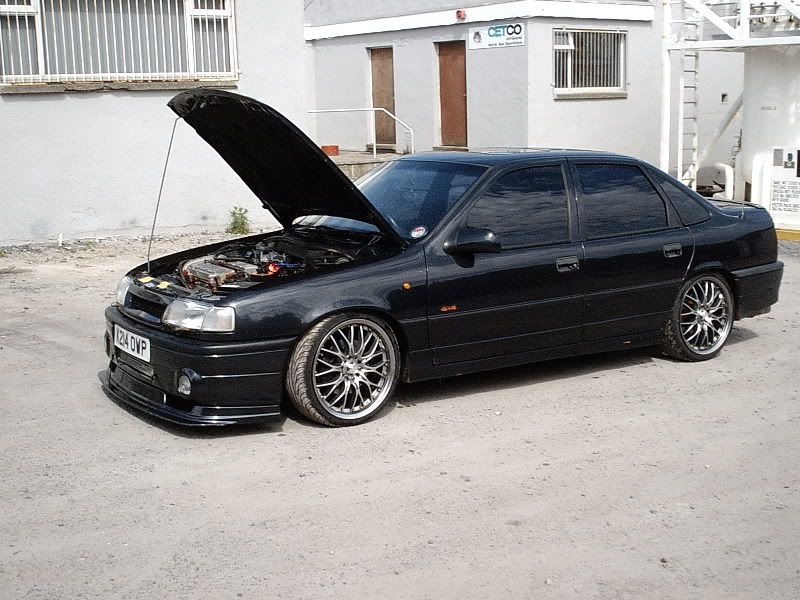
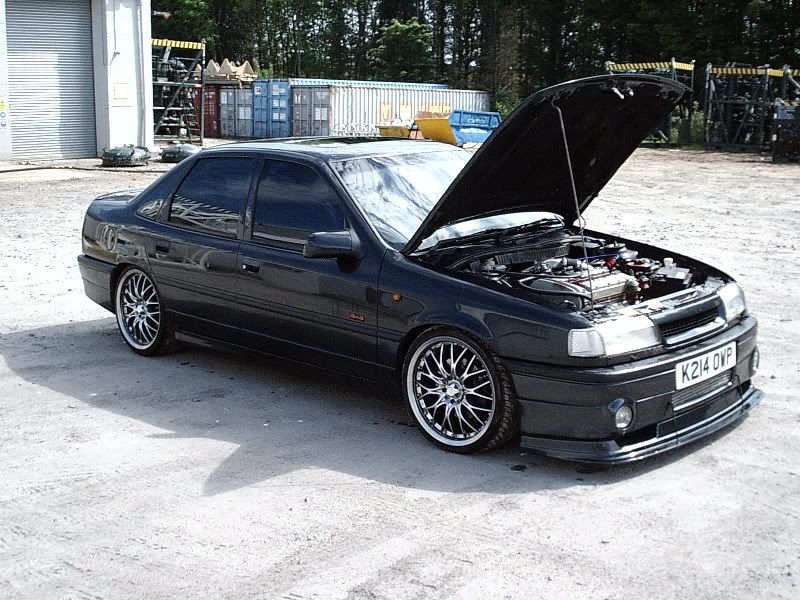
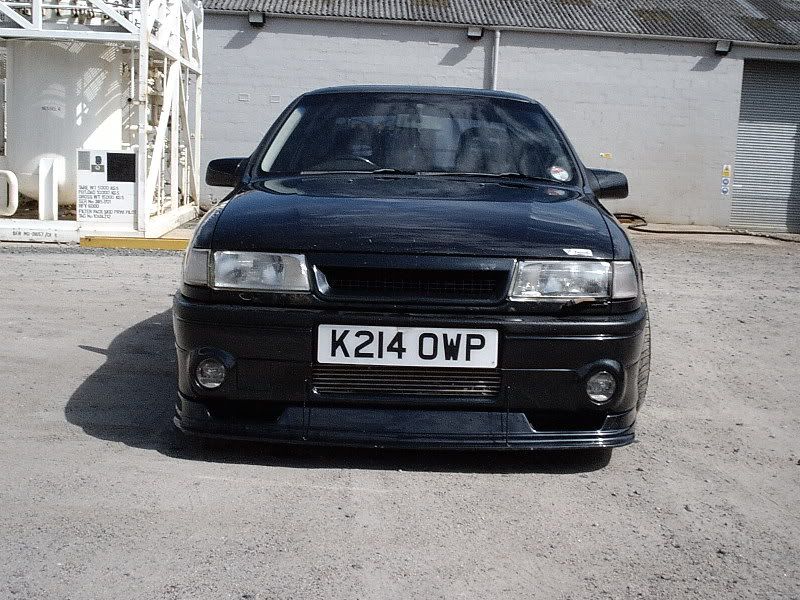
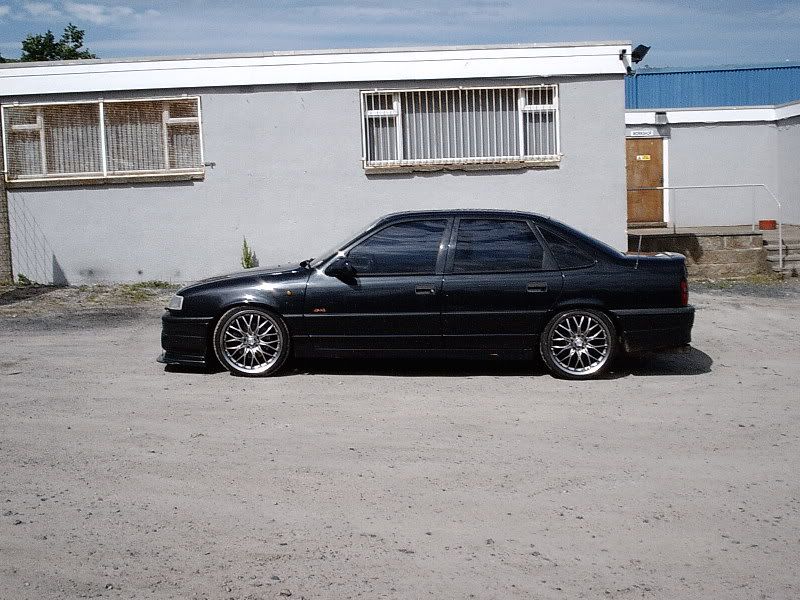
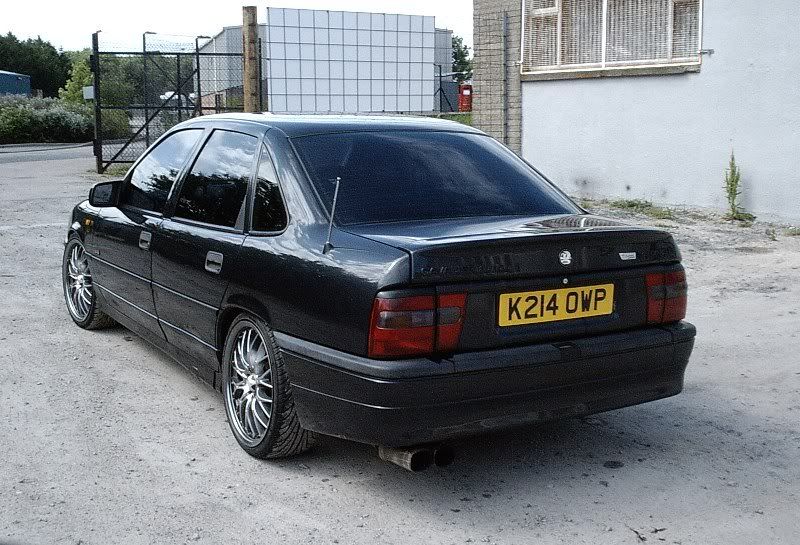
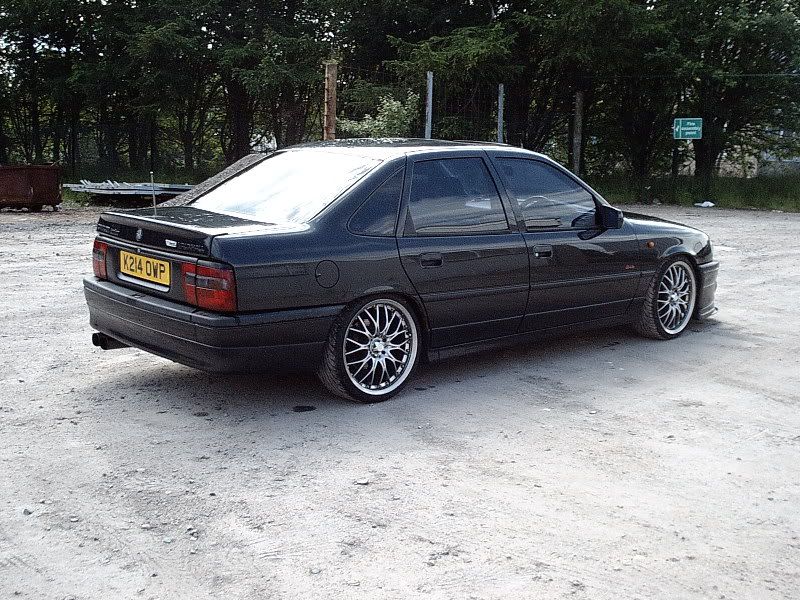
Model: Vauxhall Cavalier Turbo 4x4
Year: 1993 (K) registered
Colour: Diamond Black
Purchased: Bought mid 2005
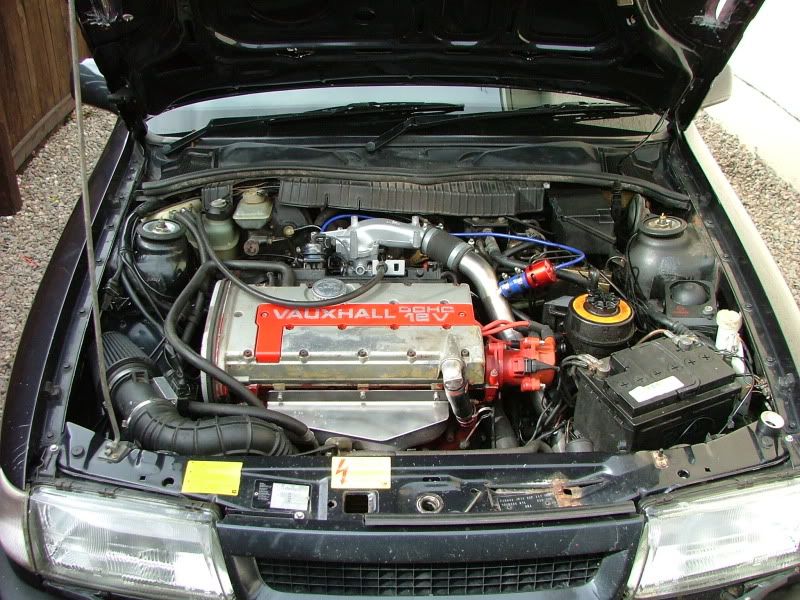
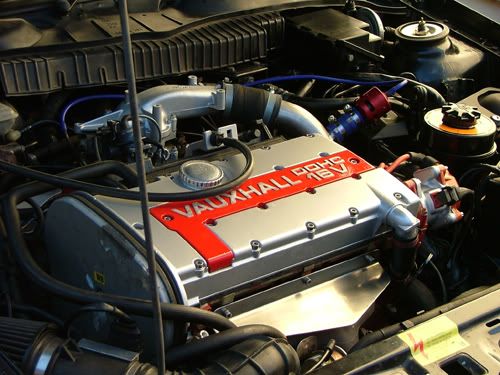
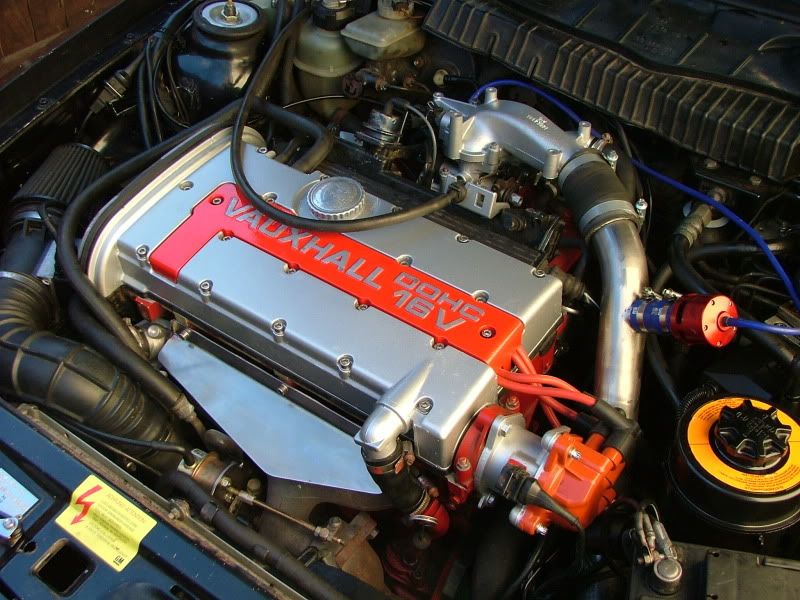
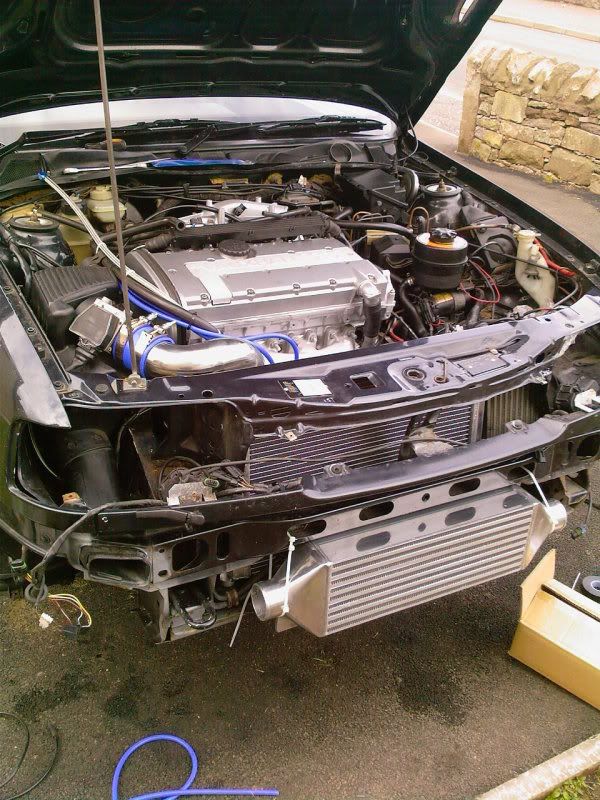
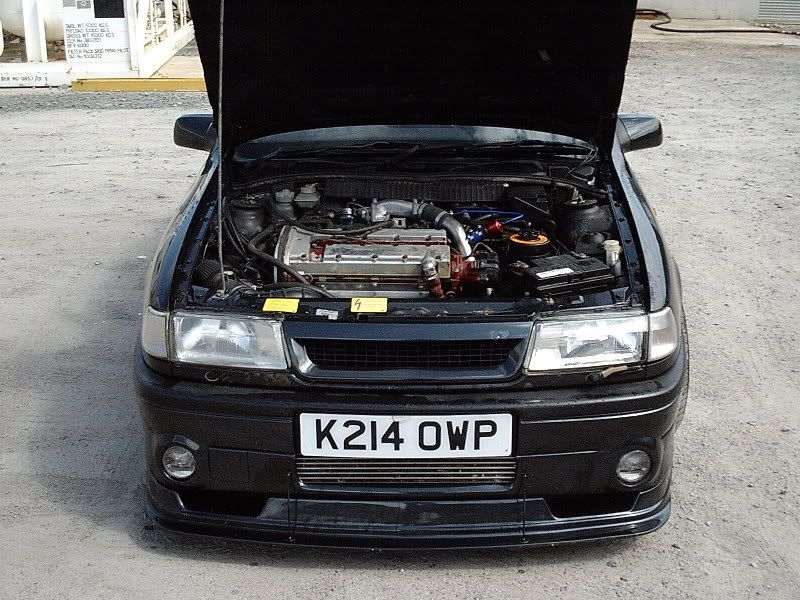
Engine
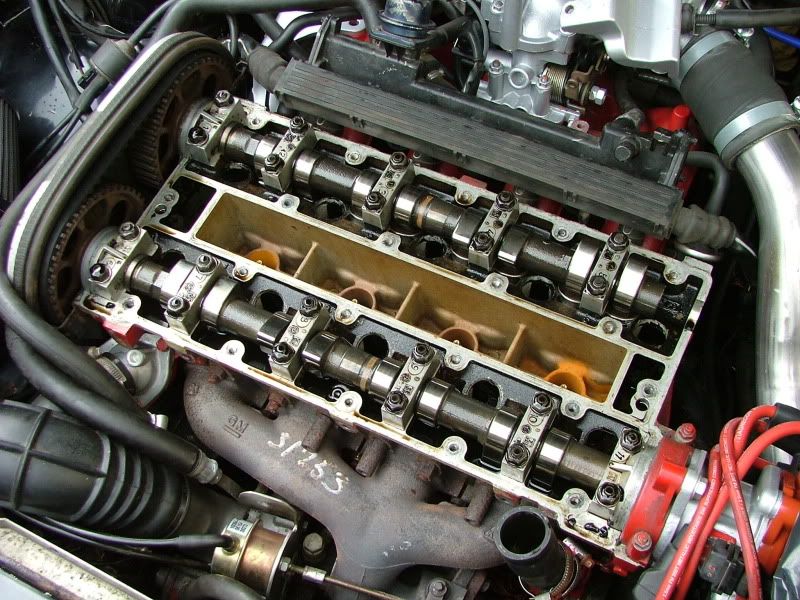
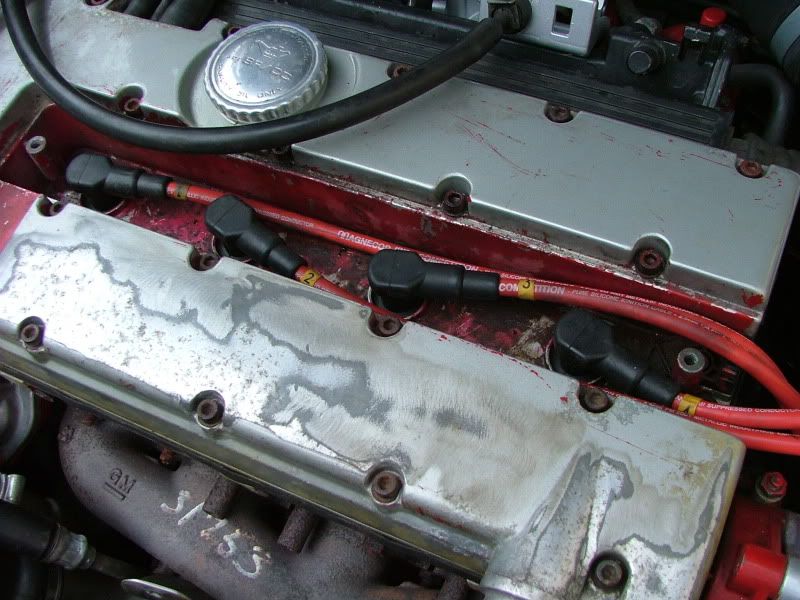
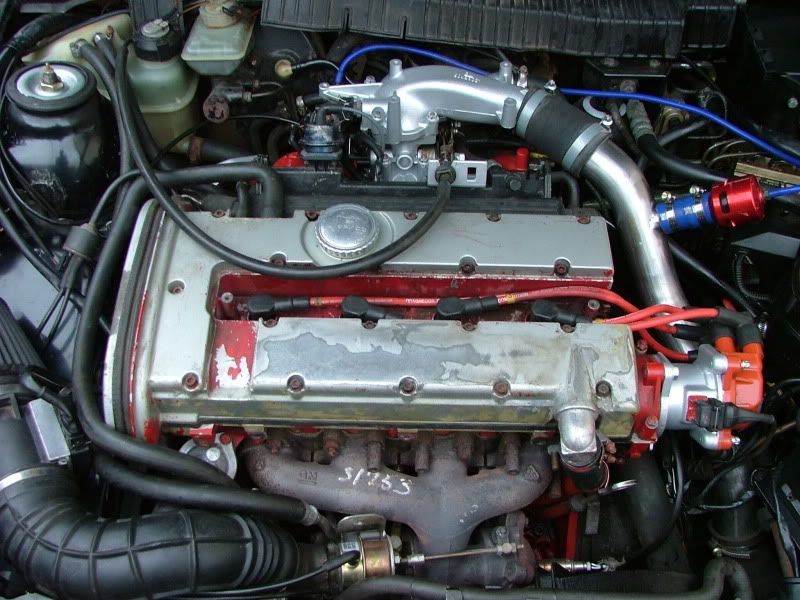
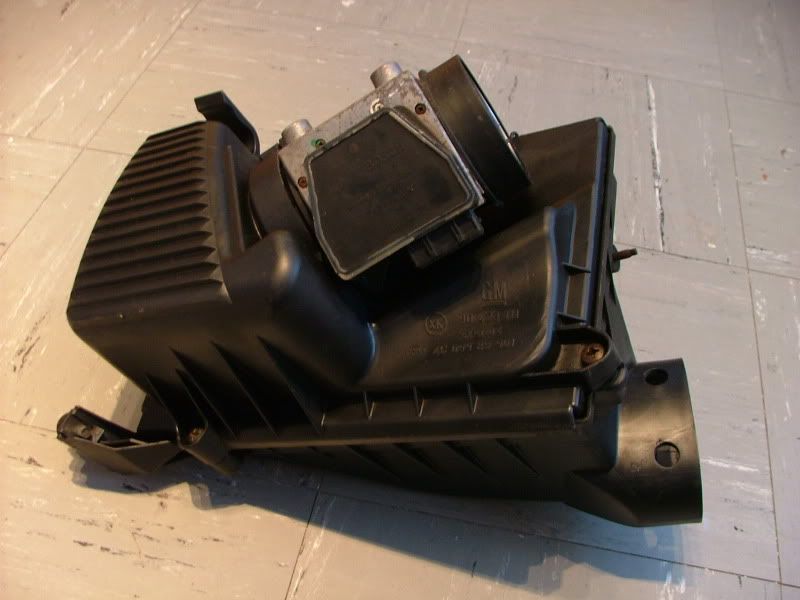
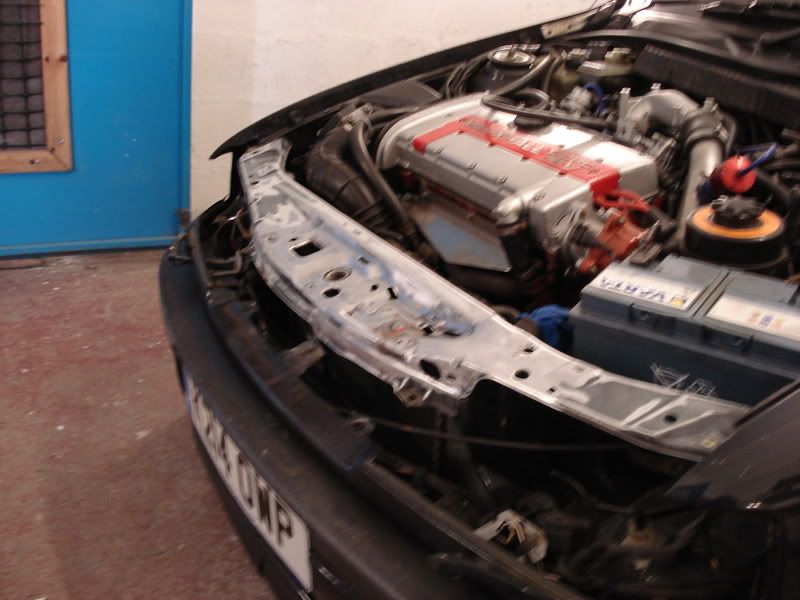
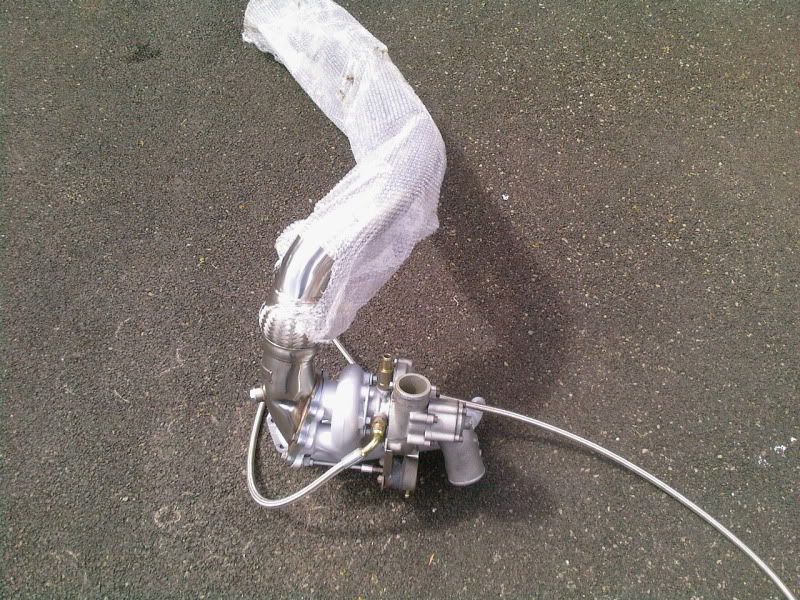
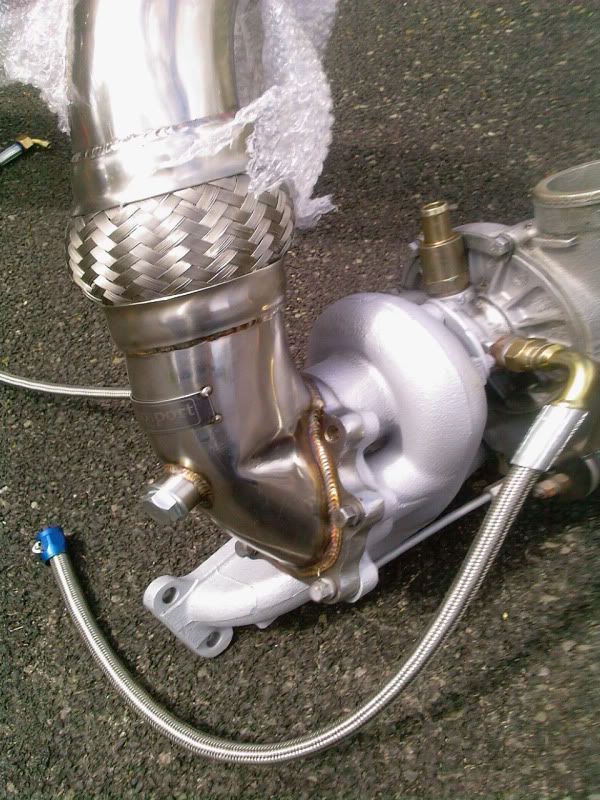
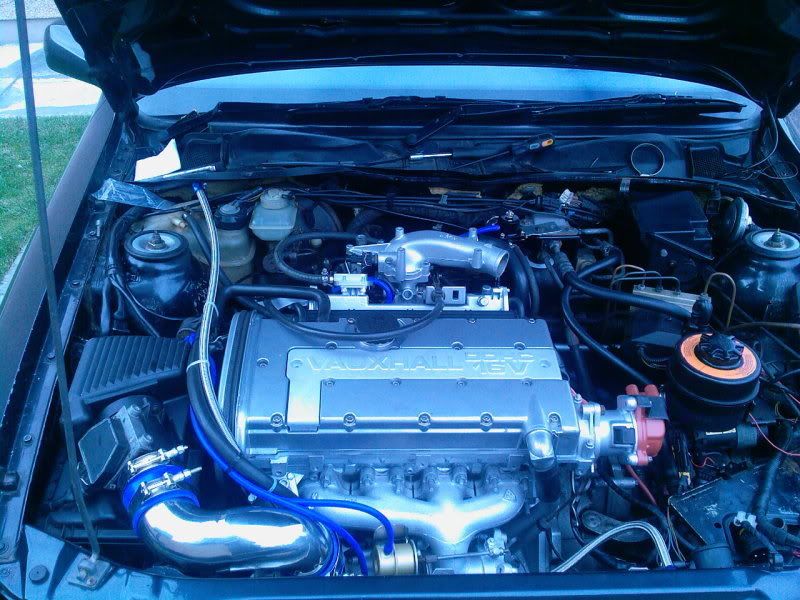
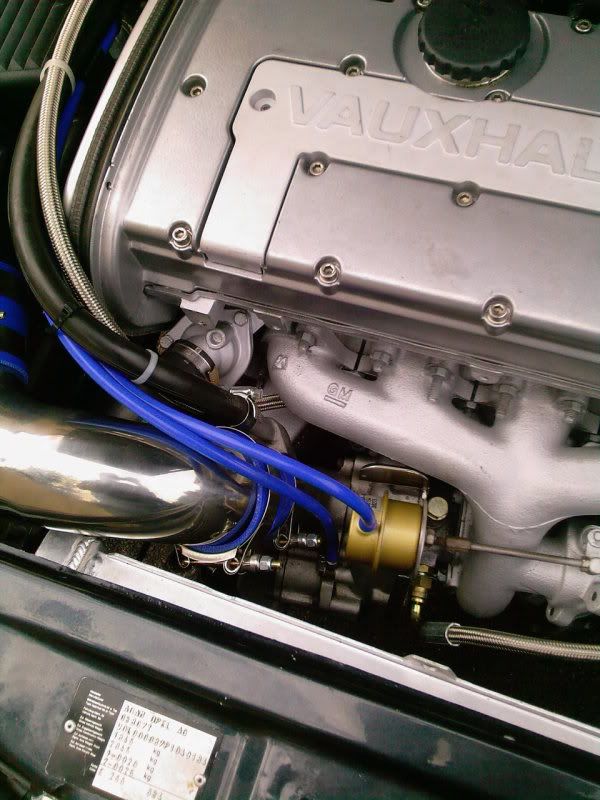
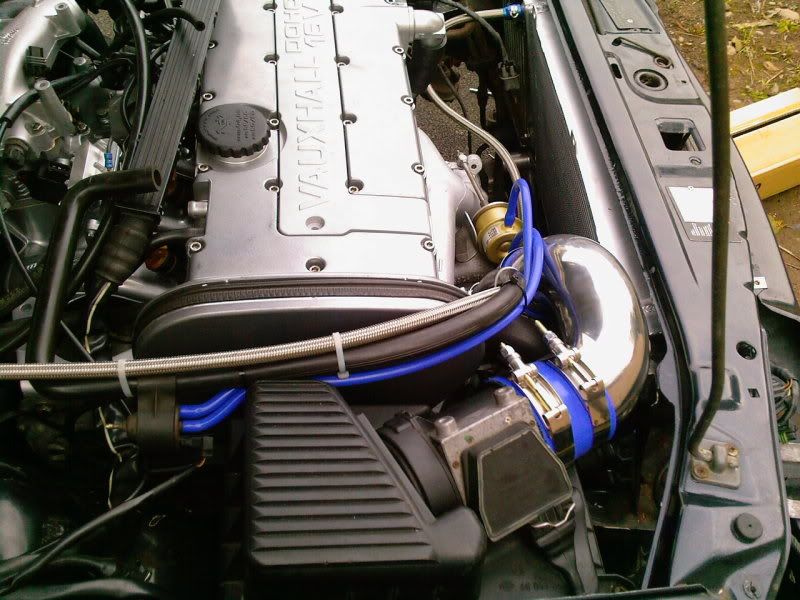
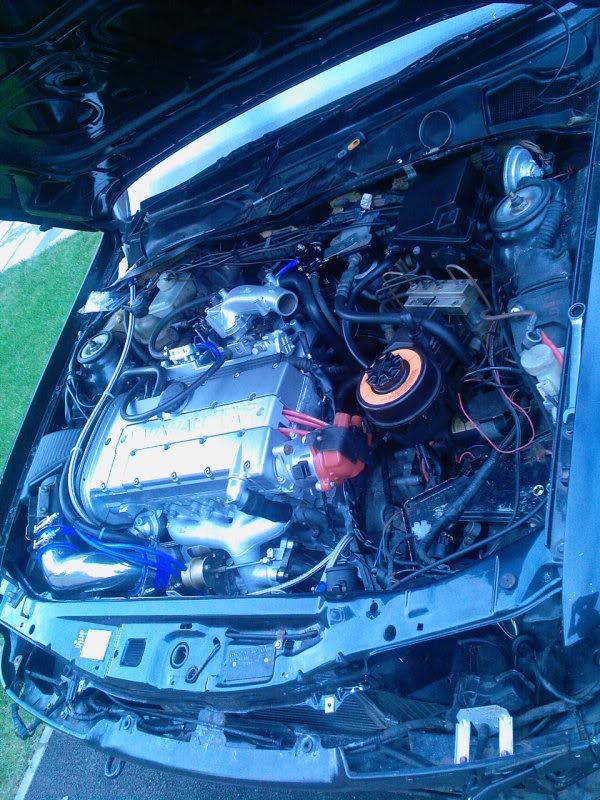
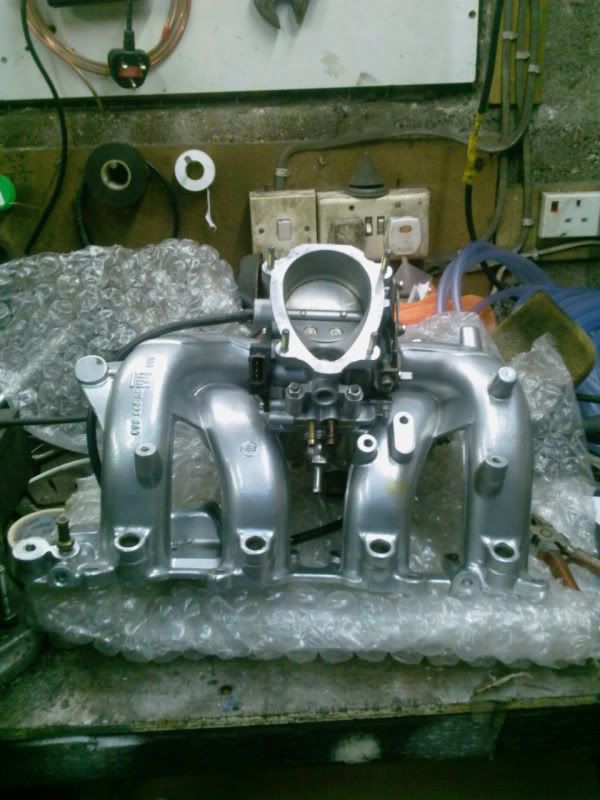
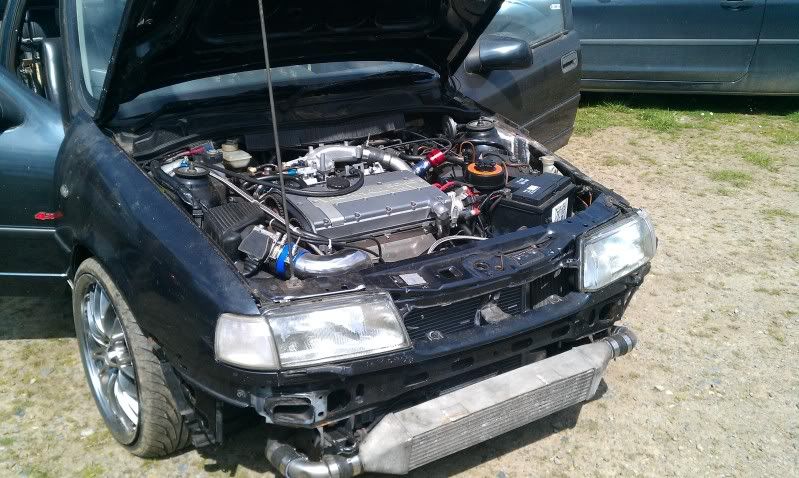
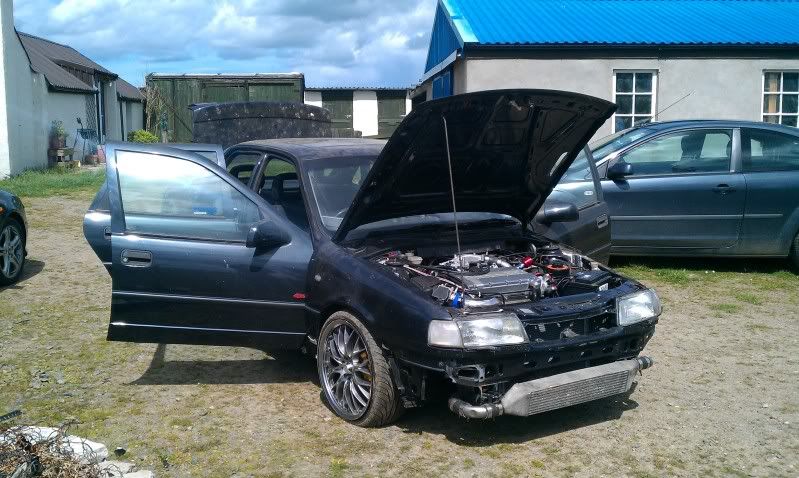
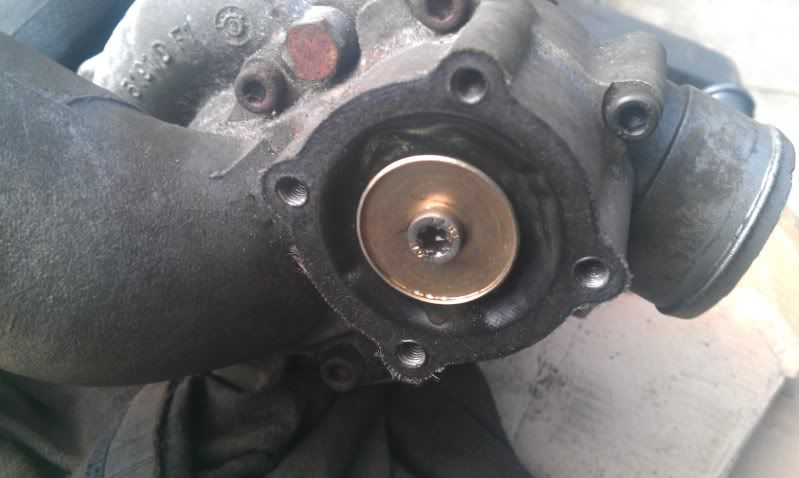
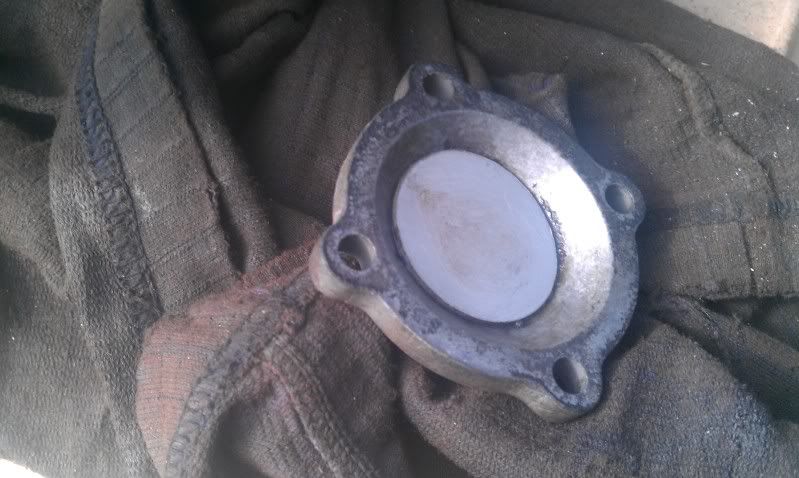
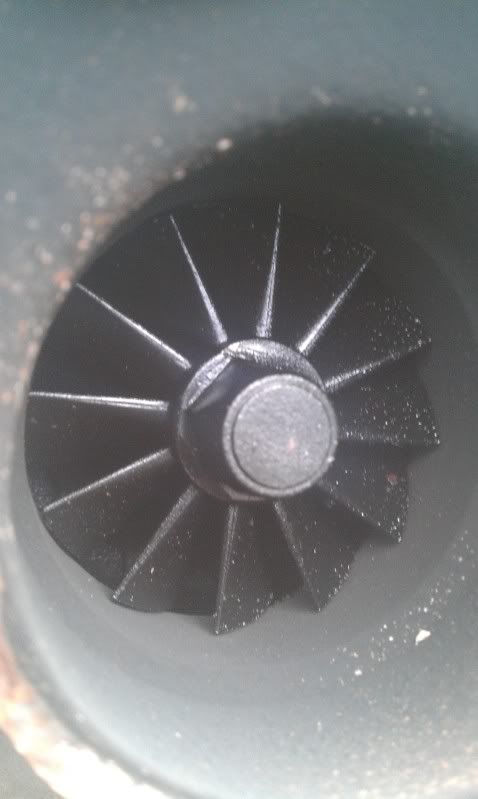
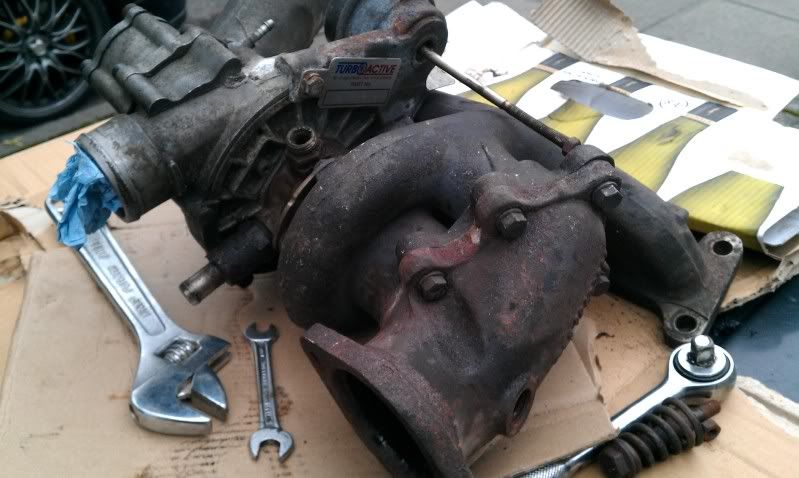
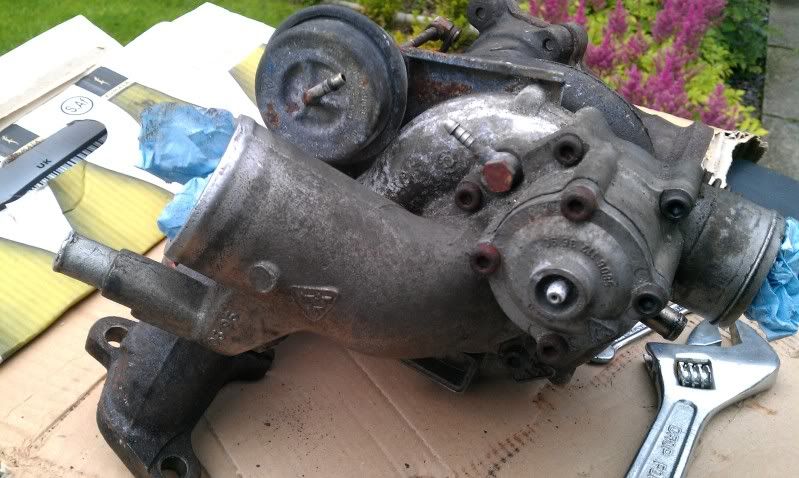
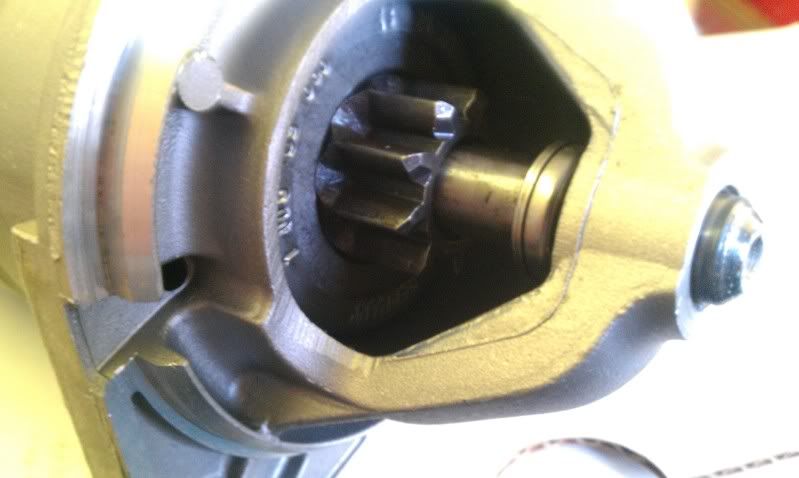
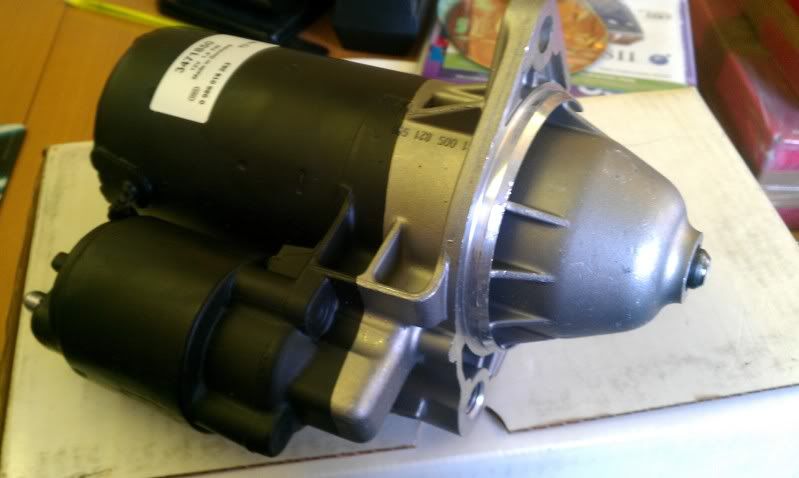
2.0 16v (C20LET, Early Type) with rebuilt KKK16 Turbo
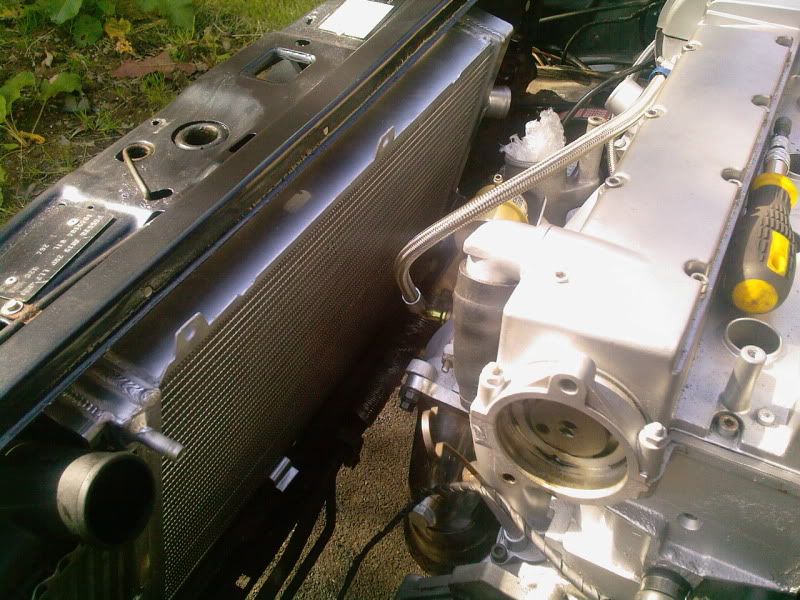
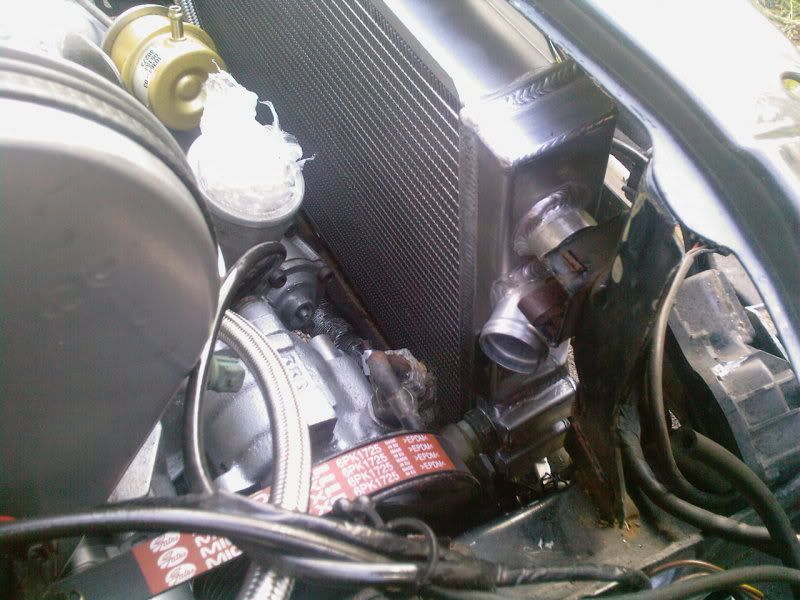
TX Autosport 50mm Twin Core Aluminium Alloy Radiator.
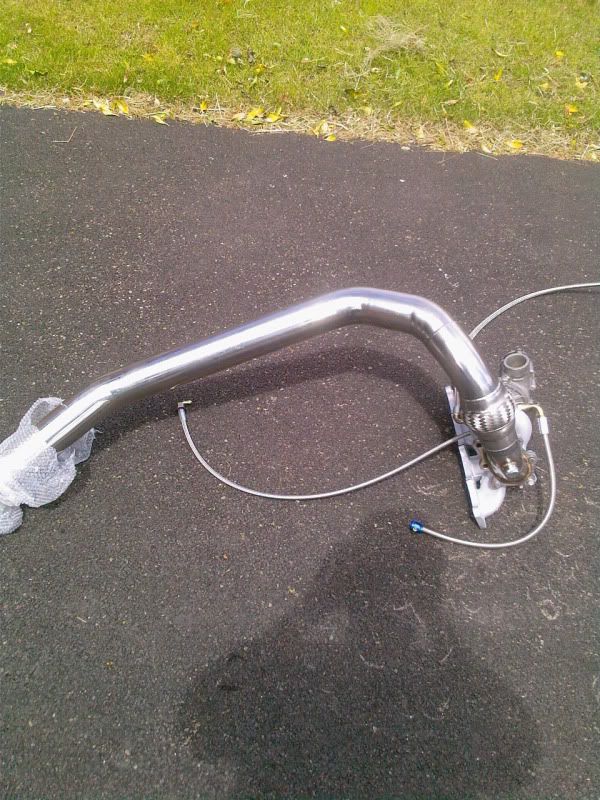
TX Autosport 76mm (3”) Stainless Steel Downpipe.
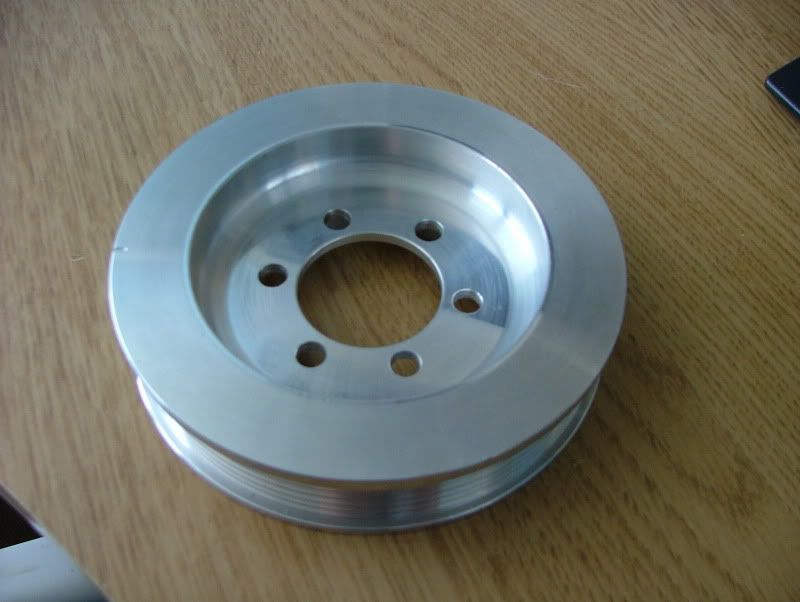
TX Autosport Alloy bottom end pulley.
Forge Motorsport Intercooler - Type 08 (Core: 500x60x175mm) 63.5mm Inlet.
Forge Motorsport Uprated Actuator.
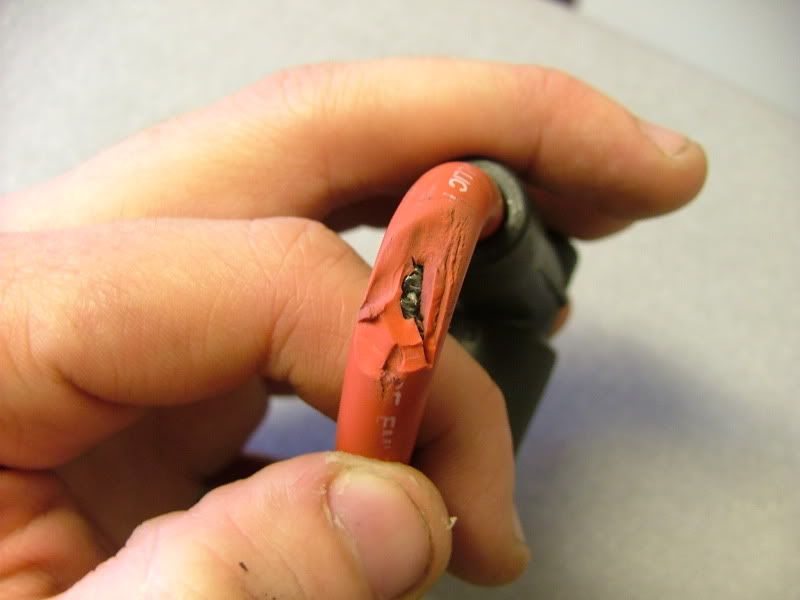
Braided Turbo Charger Oil Lines.
Braided Turbo Charger Water Lines.
Enlarge Top Hat 3" 76mm.
Full Scorpion Stainless Steel Exhaust System.
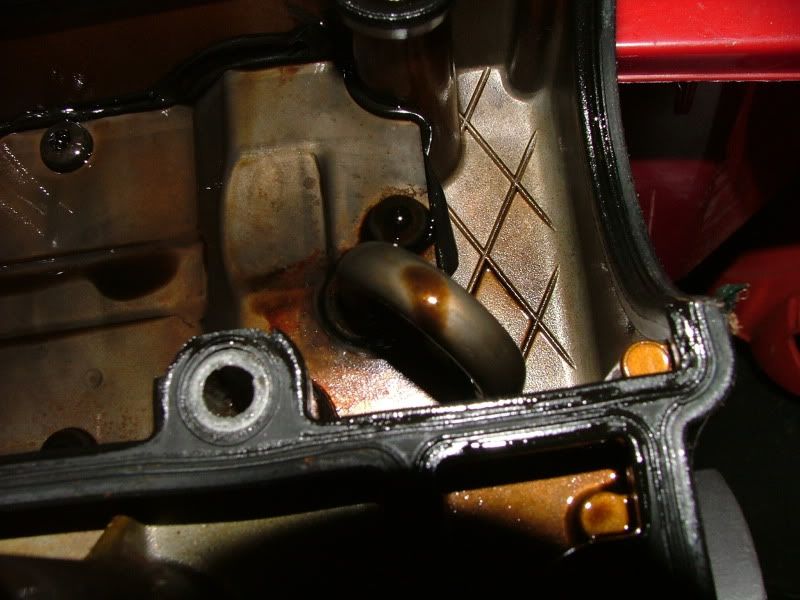
Regal Autosport Sump Gasket.
Apexi AVC-R Electronic Boost Controller.
TX Autosport 76mm (3”) Turbo Inlet Pipe.
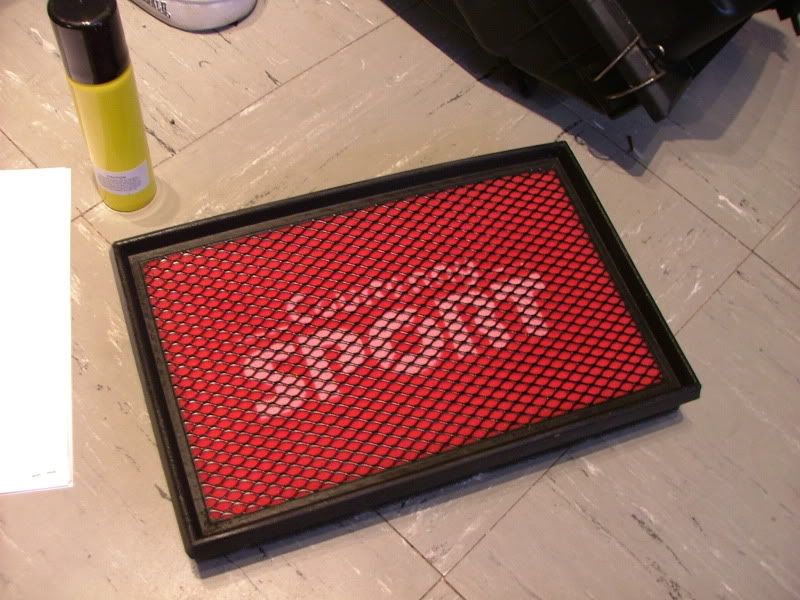
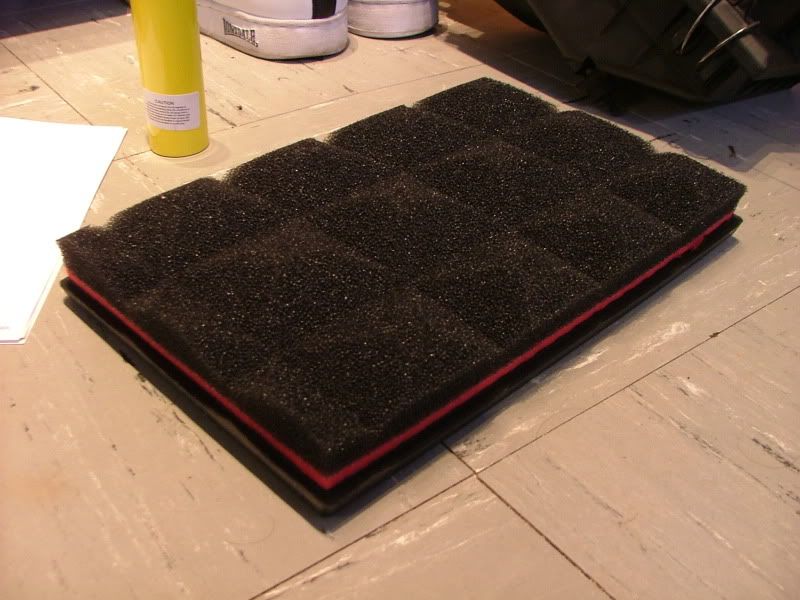
Courtenay Sport High Flow Panel Filter.
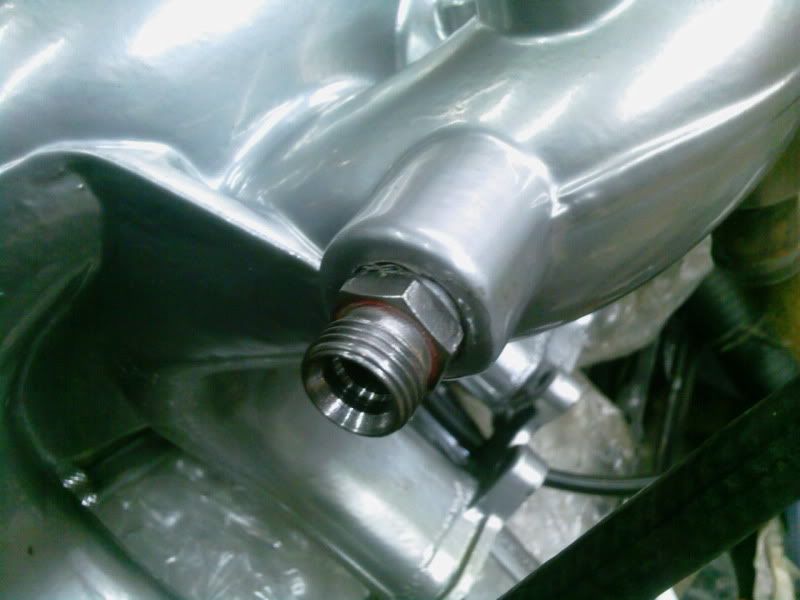
3.5 Bar Weber Alpha Fuel Regulator.
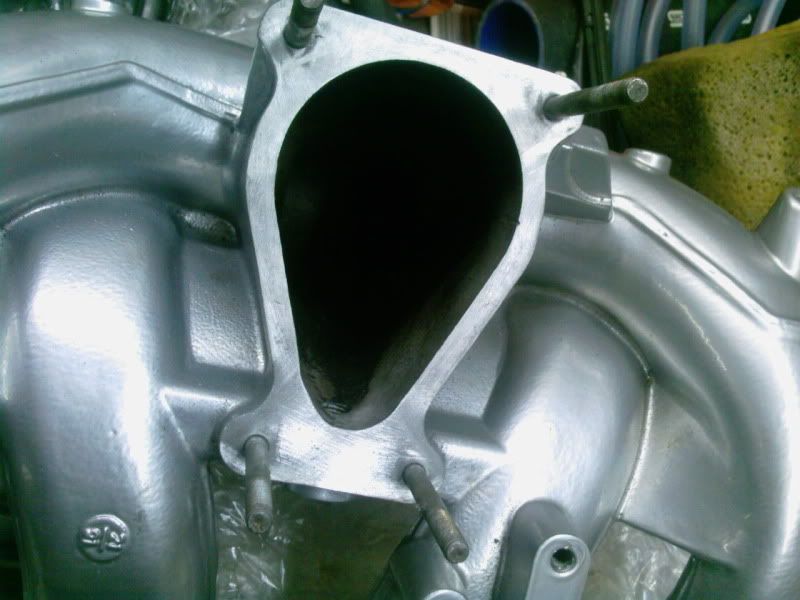
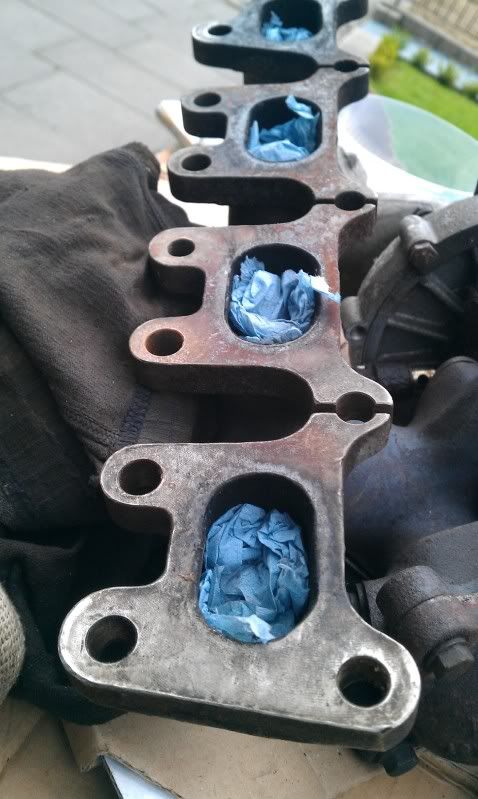
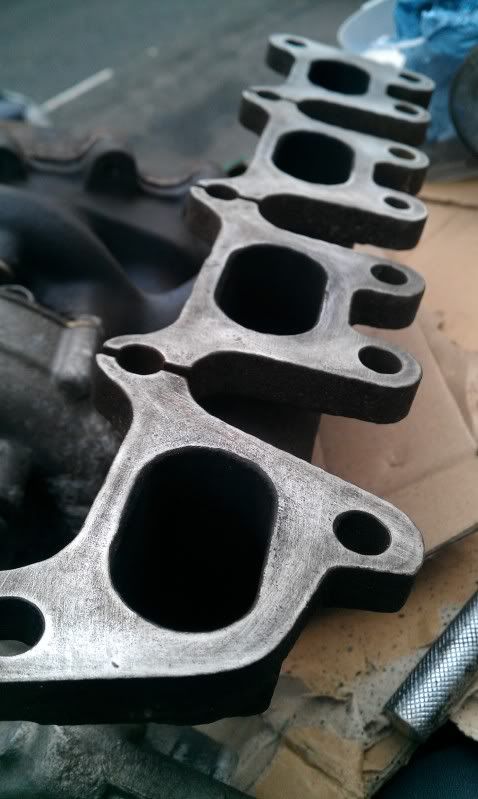
Coscast Cylinder Head.
ARP Conrod Bolts.
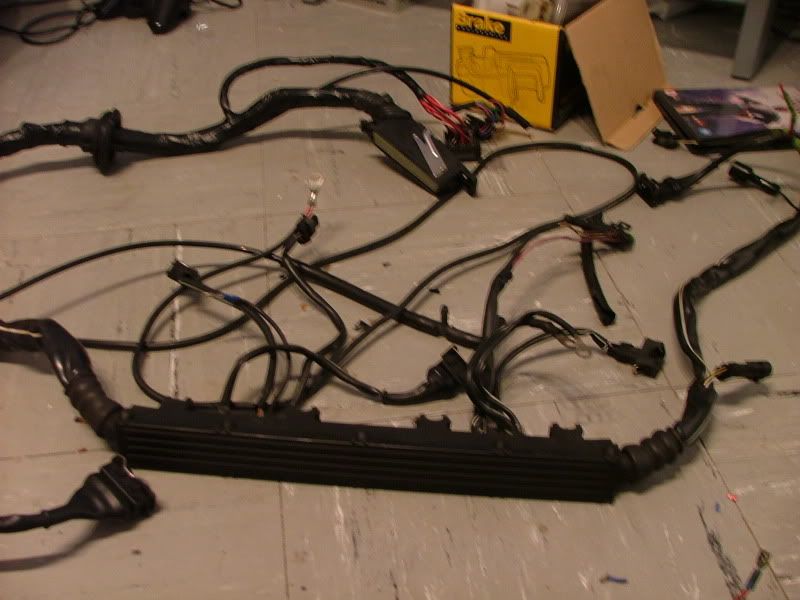
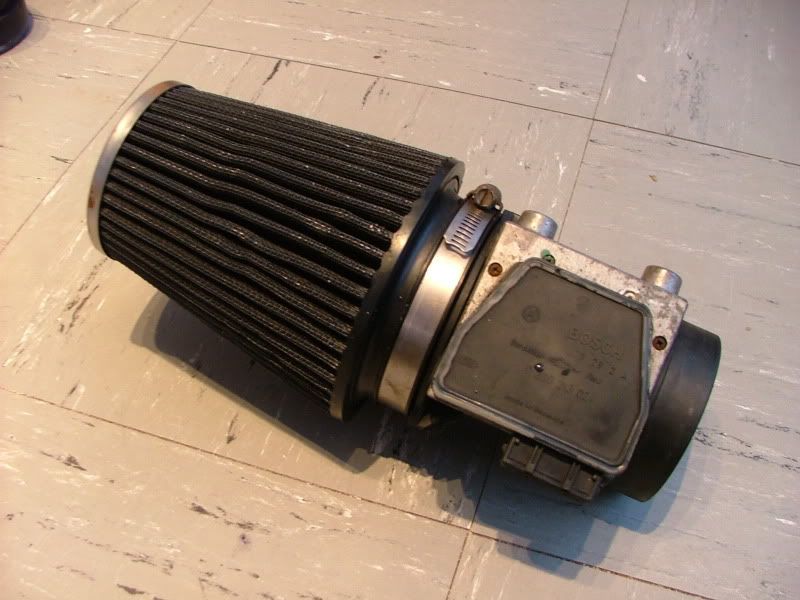
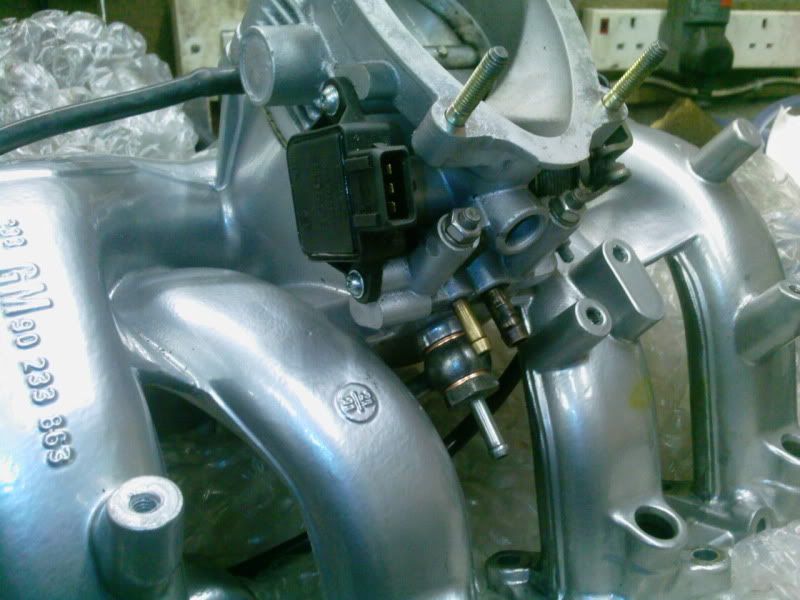
Phase 2 EDS Software on Motronic 2.7 ECU.
TX Autosport Slimline Radiator Fan 14".
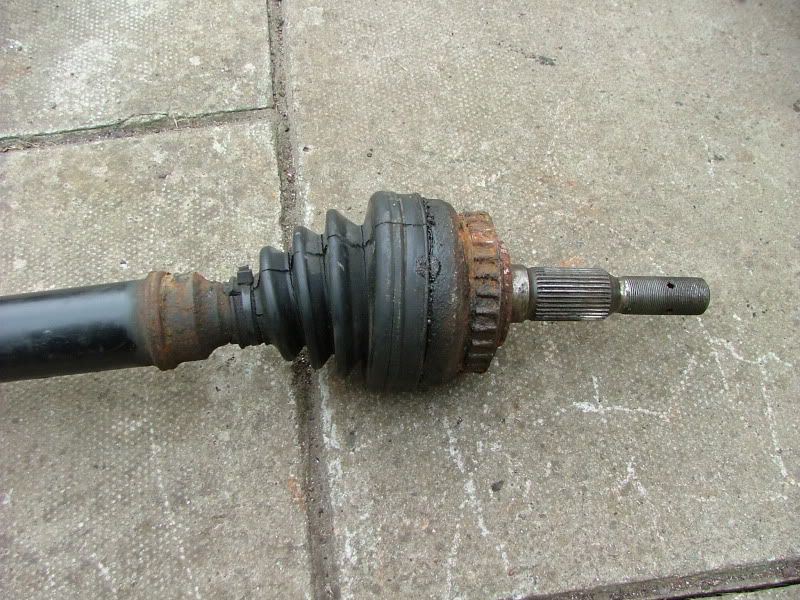
Transmission
Standard F28 6-speed gearbox.
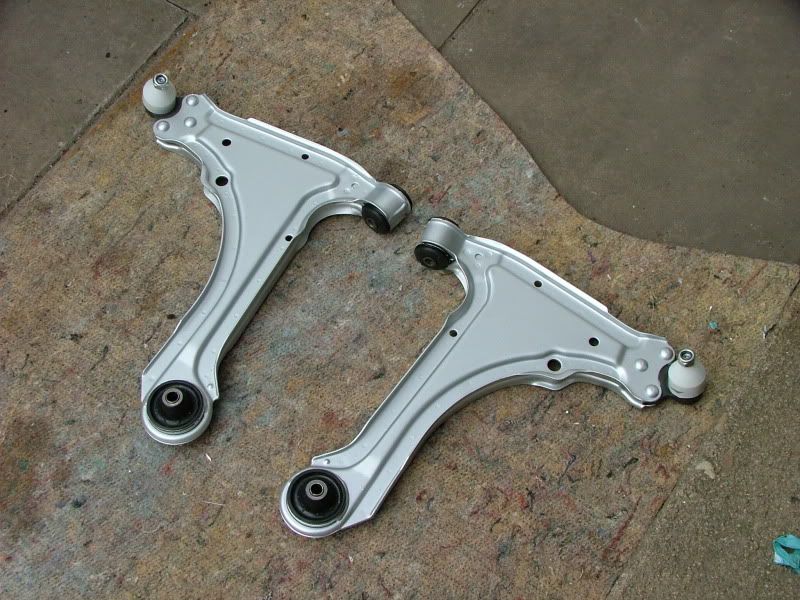
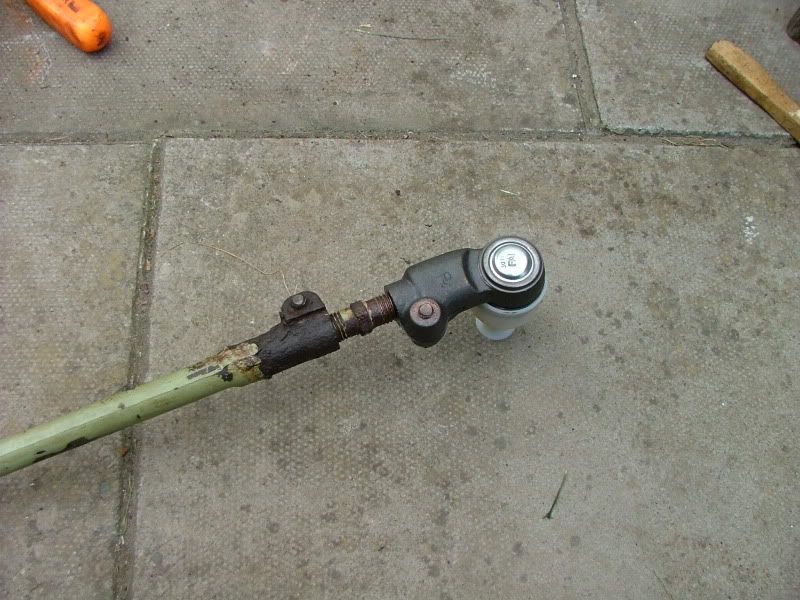
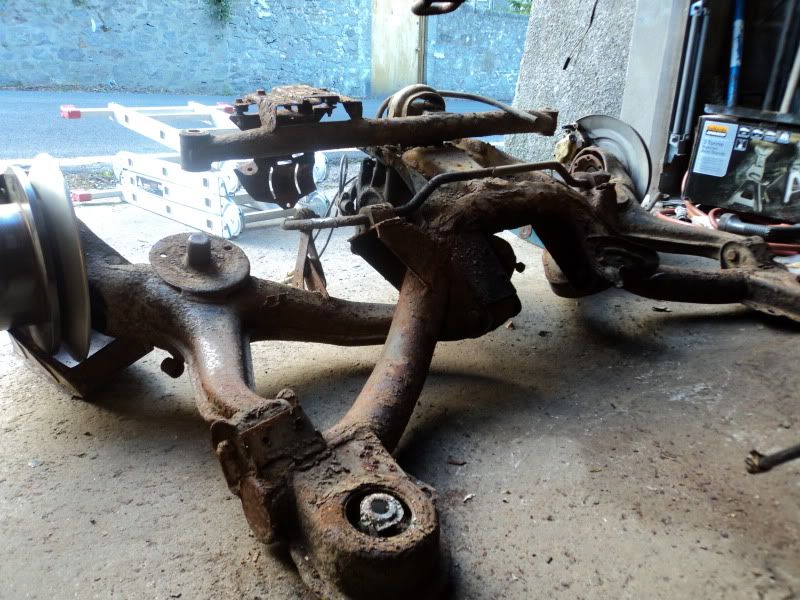
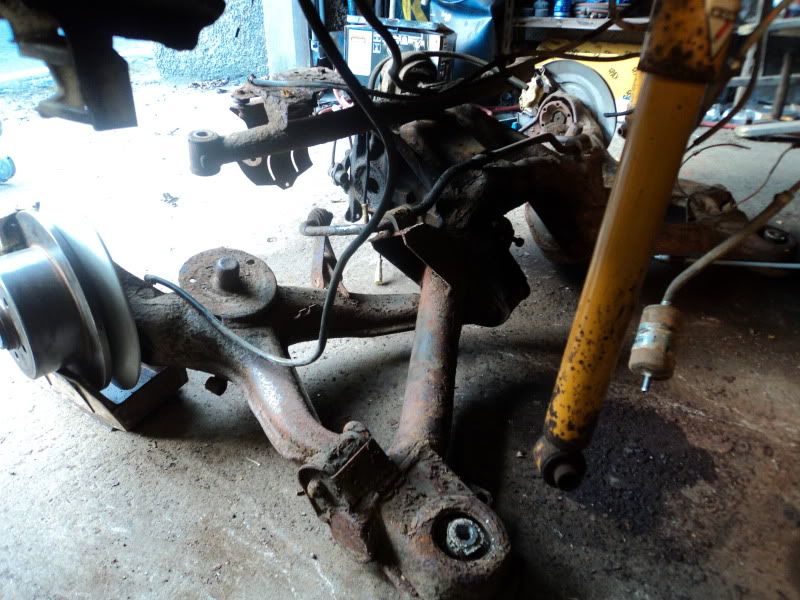
Suspension
Koni Adjustable Suspension.
GMAX -35mm Lowering Springs.
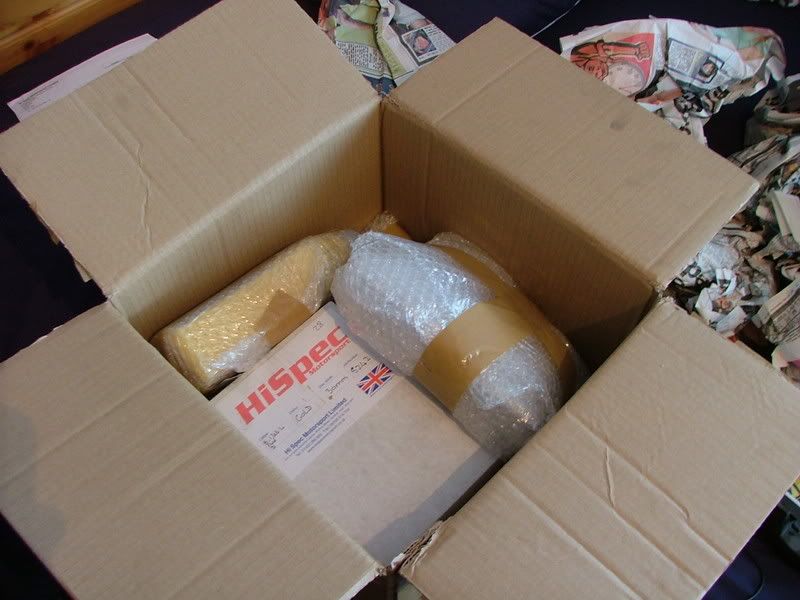
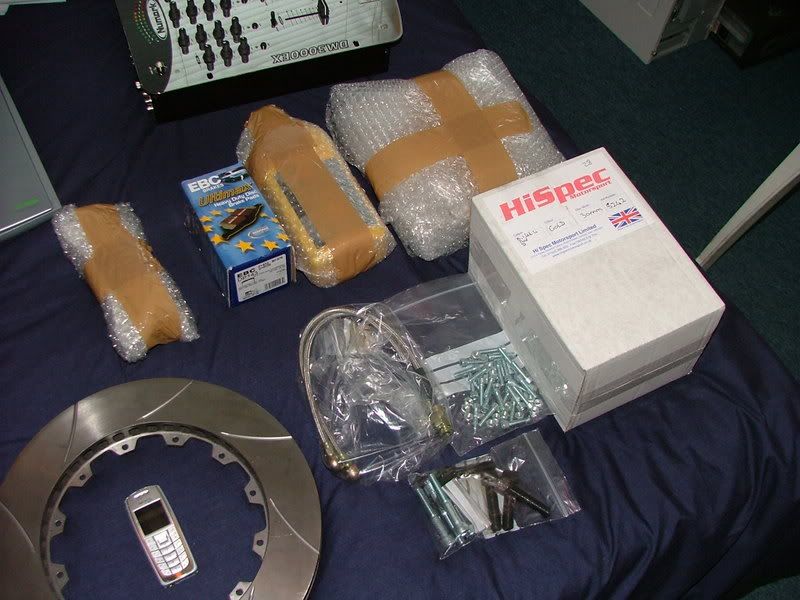
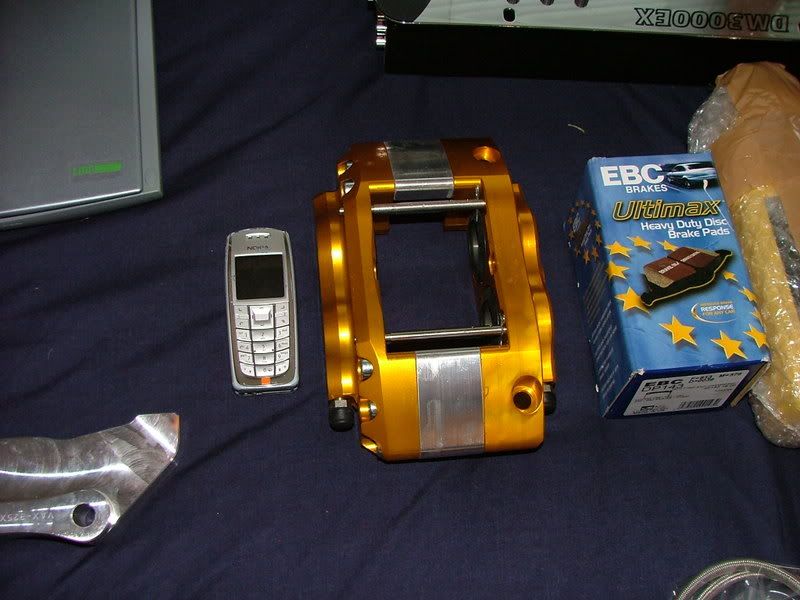
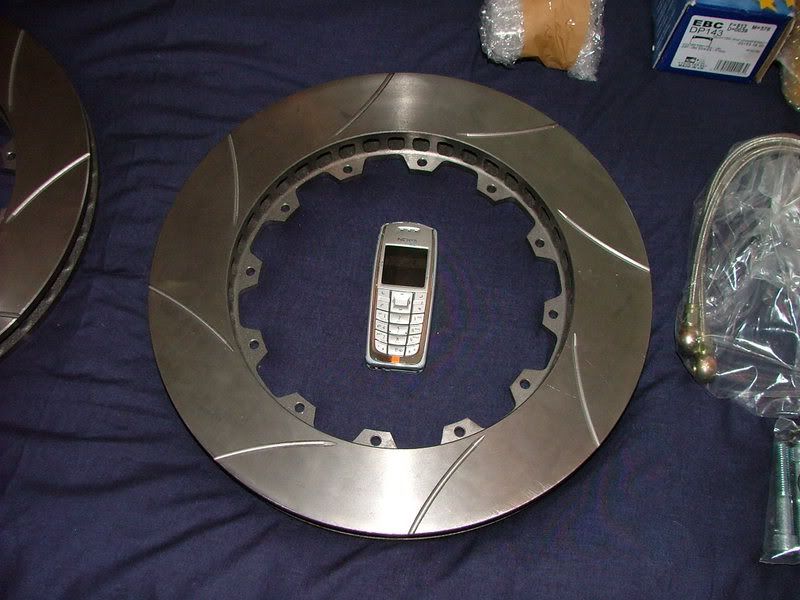
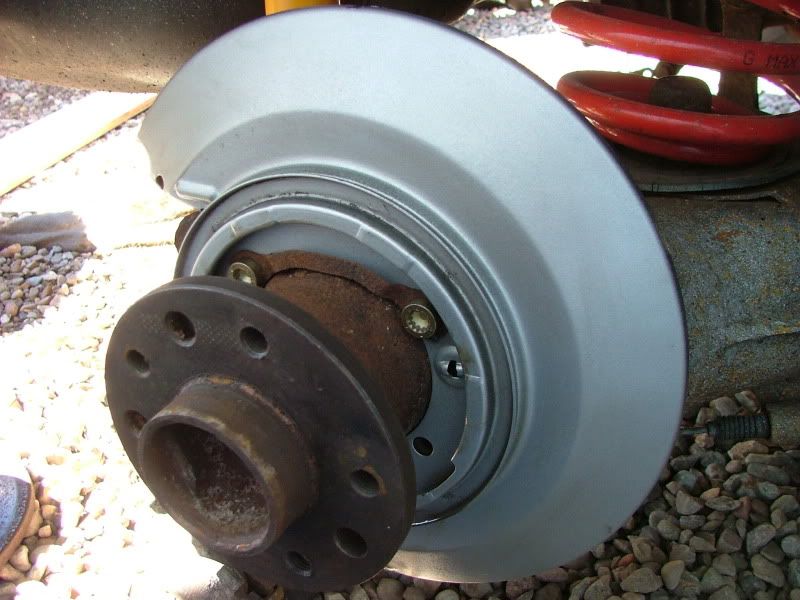
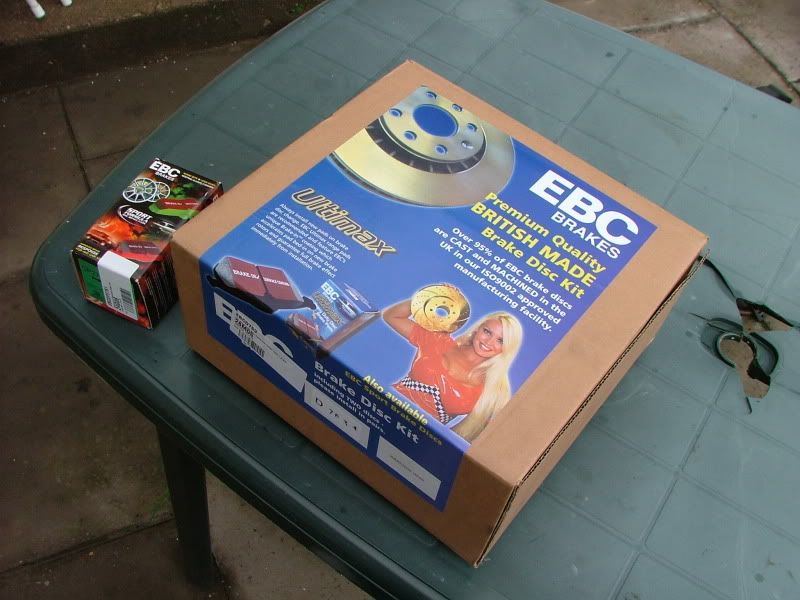
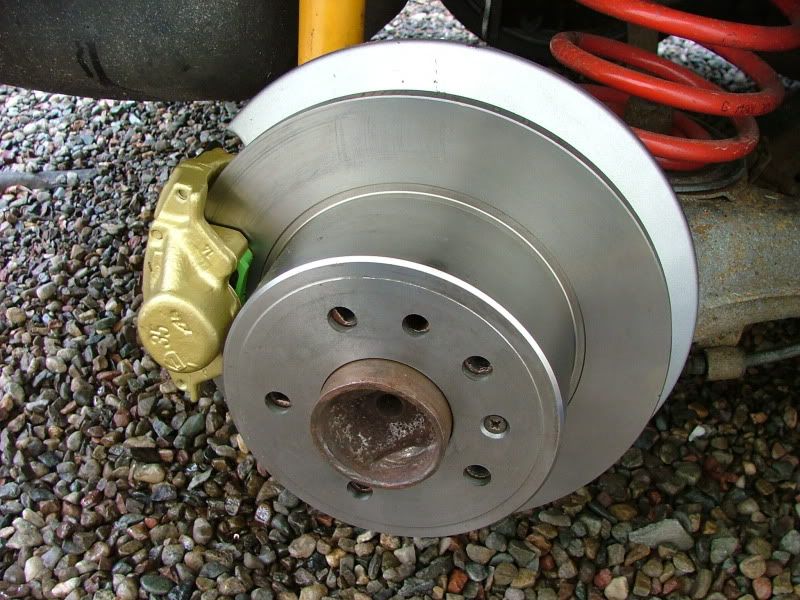
Brakes
Front Hi-Spec Brakes 325/30mm Rotors. - Removed
Billet 4 Pot Callipers. - Removed
HEL Braided Brake Lines all round.
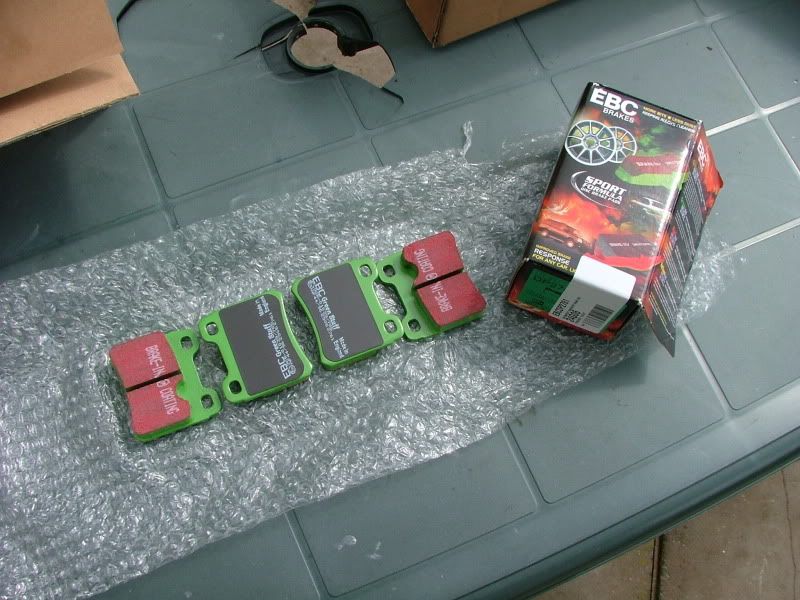
EBC Front and Rear "Green Stuff" brake pads.
DOT 5.1 brake fluid.
Standard refurbished brakes running EBC pads all round.
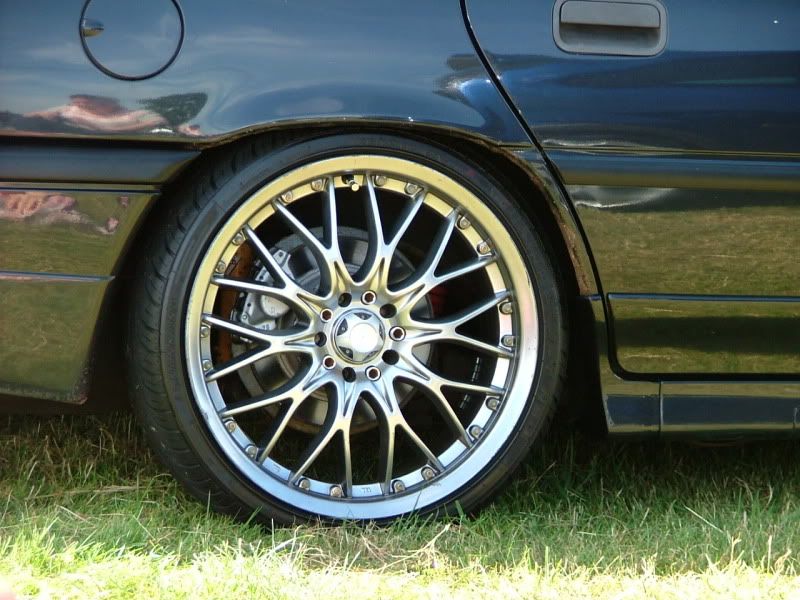
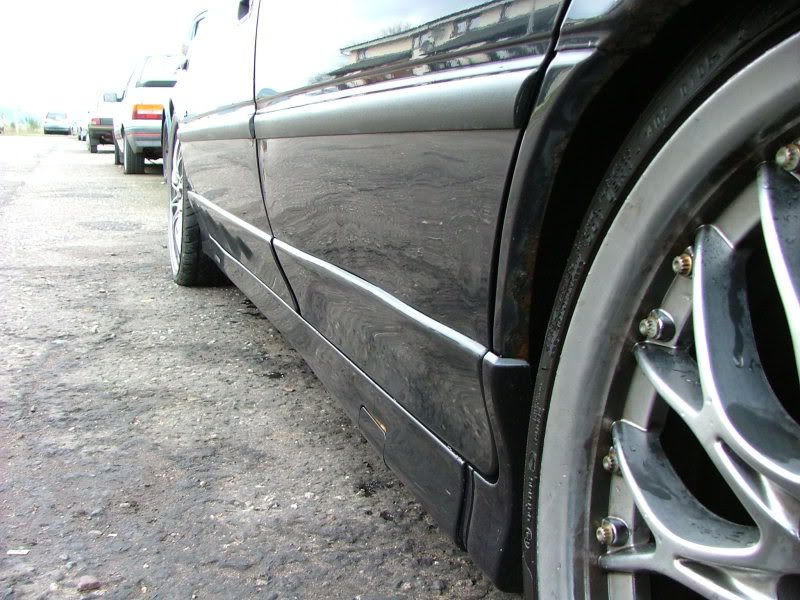
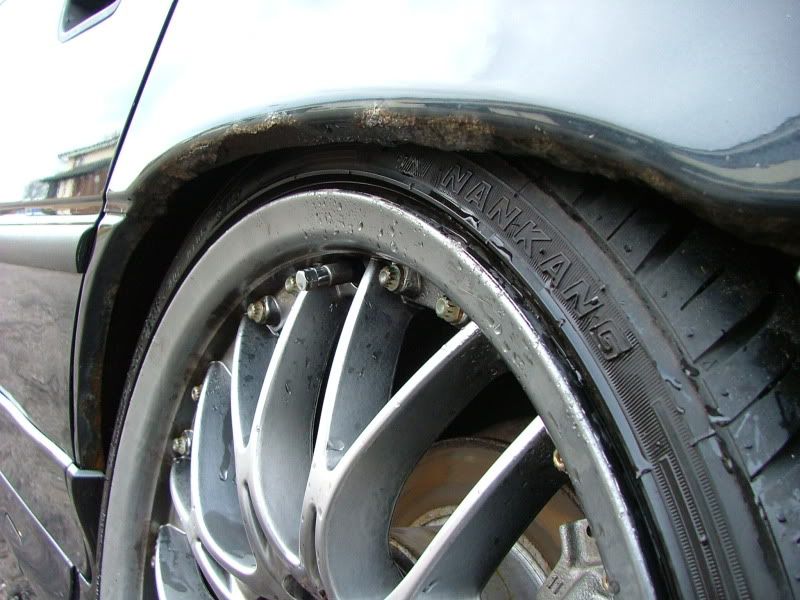
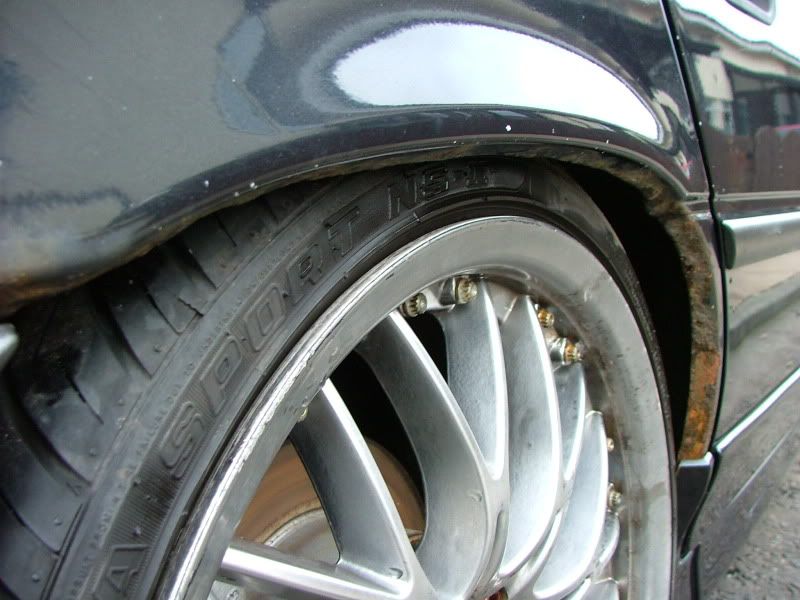
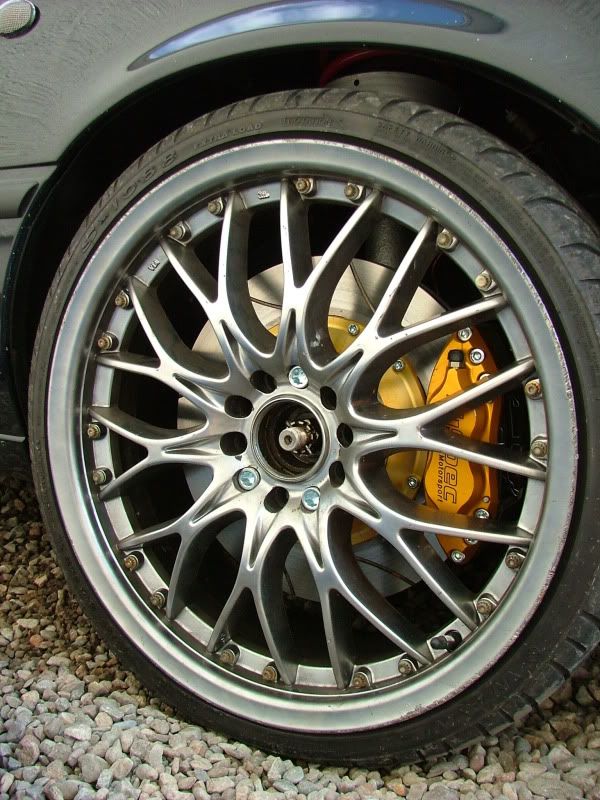
Wheels & Tyres
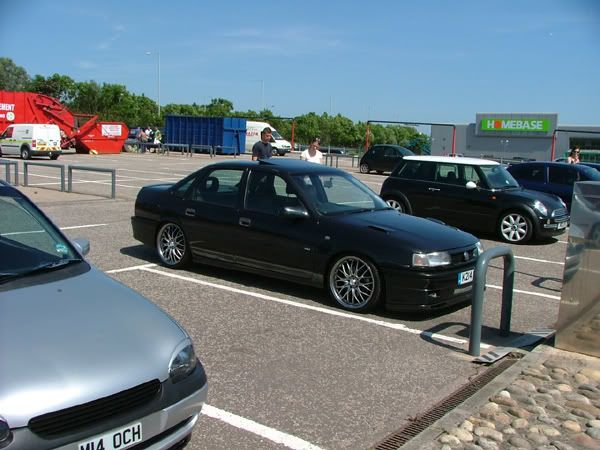
BK 18" Alloy Wheels. - Removed
215/35/ZR18 Tyres. - Removed
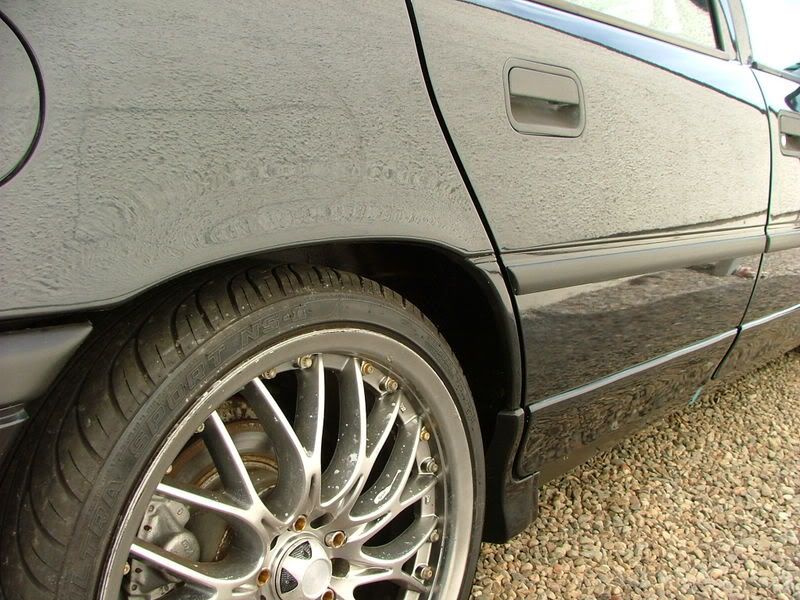
Standard Turbo alloy wheels with Kumho tyres.
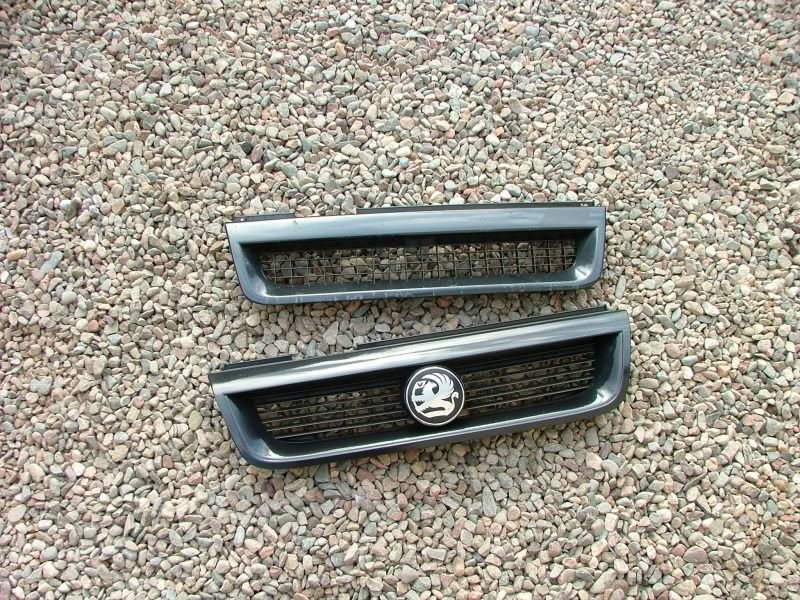
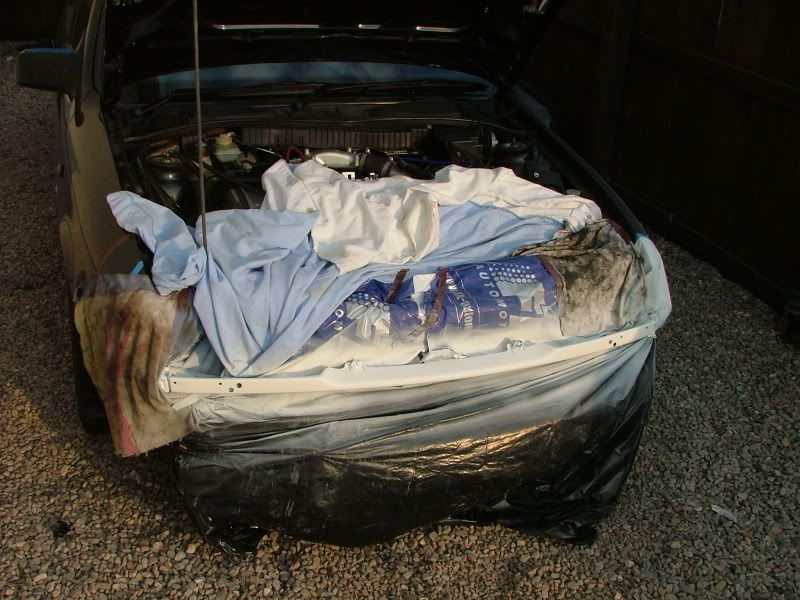
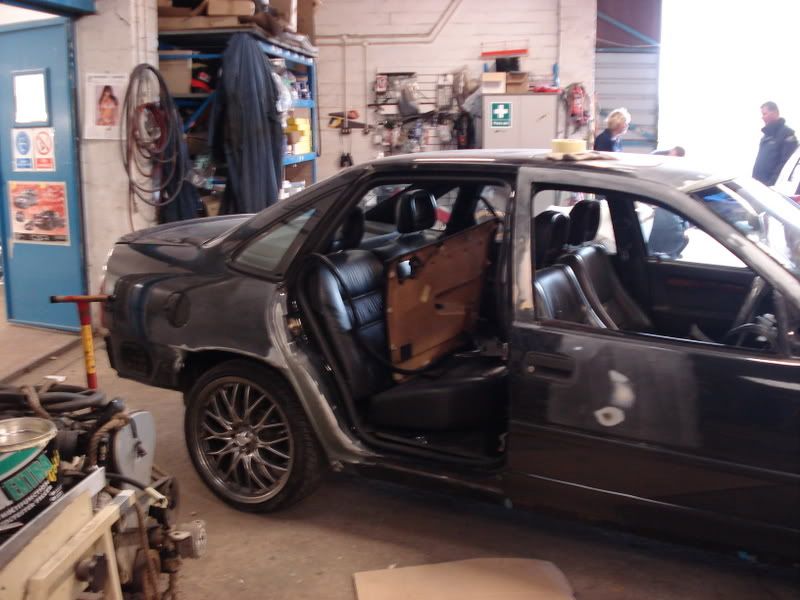
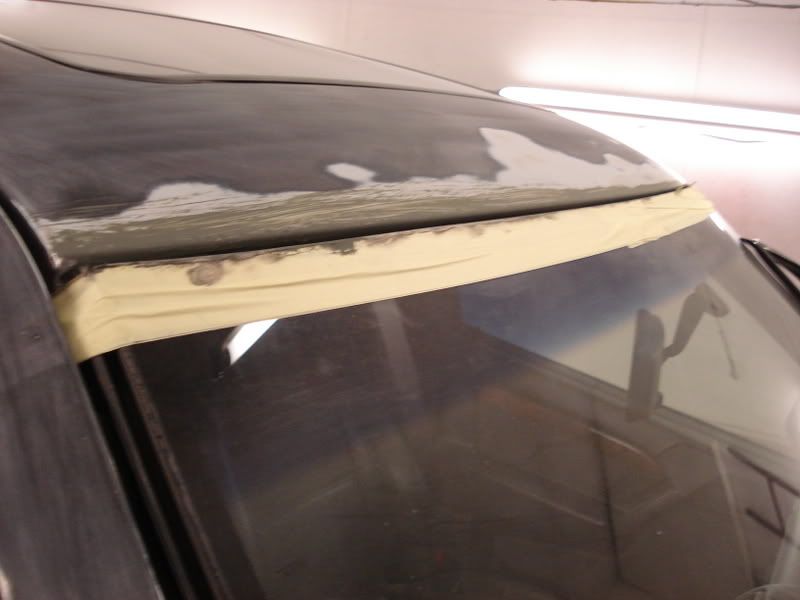
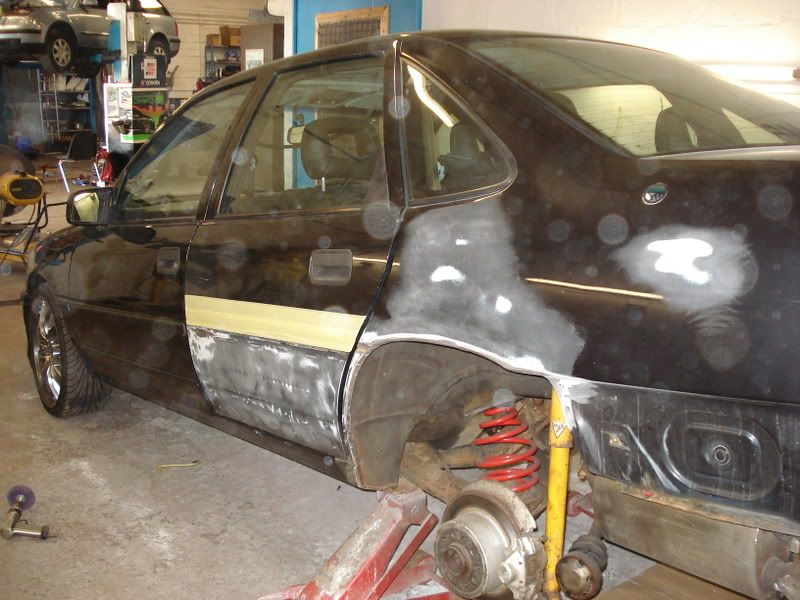
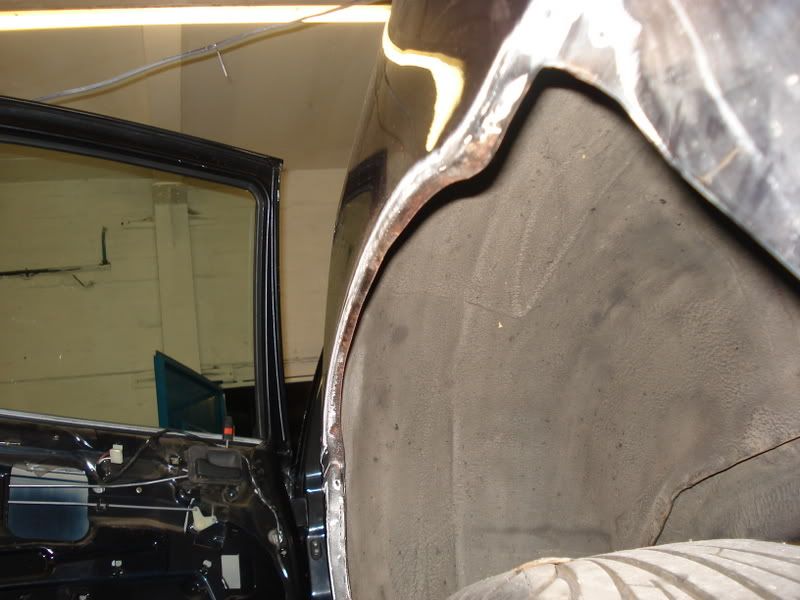
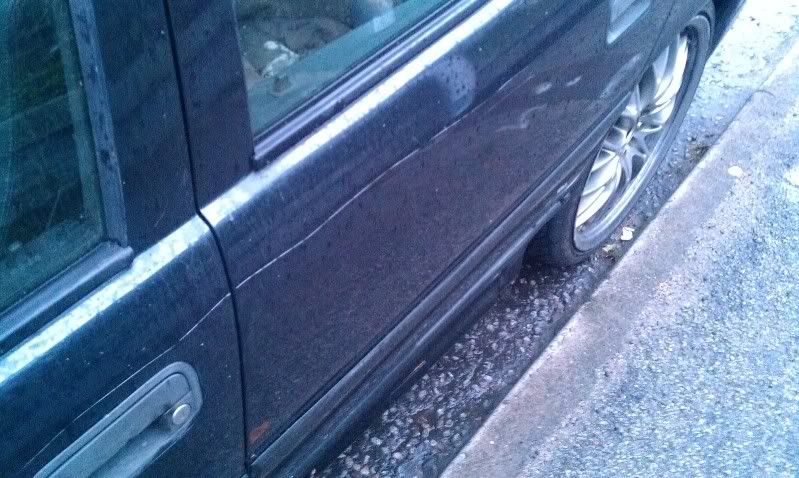
Body
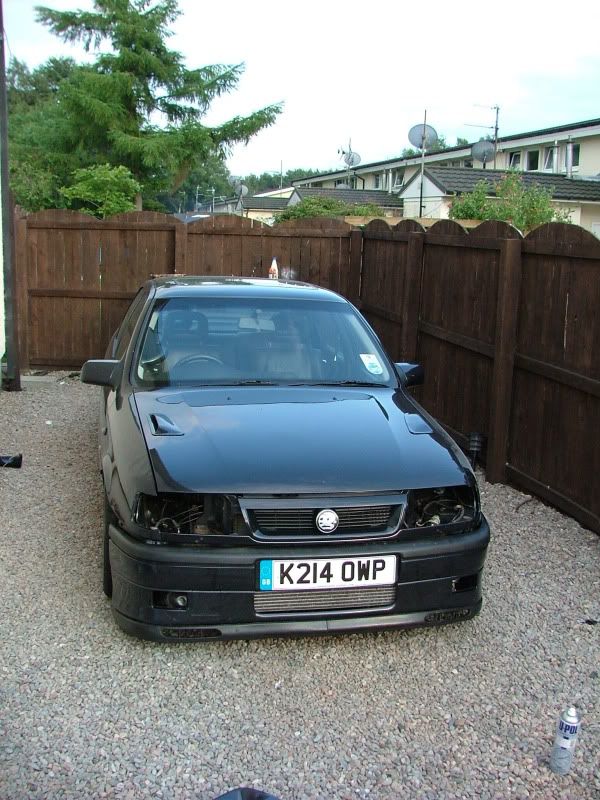
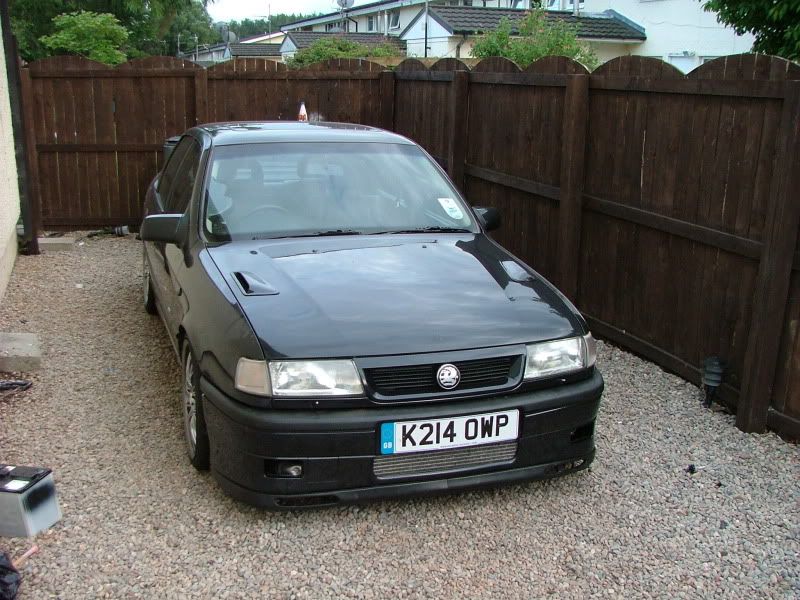
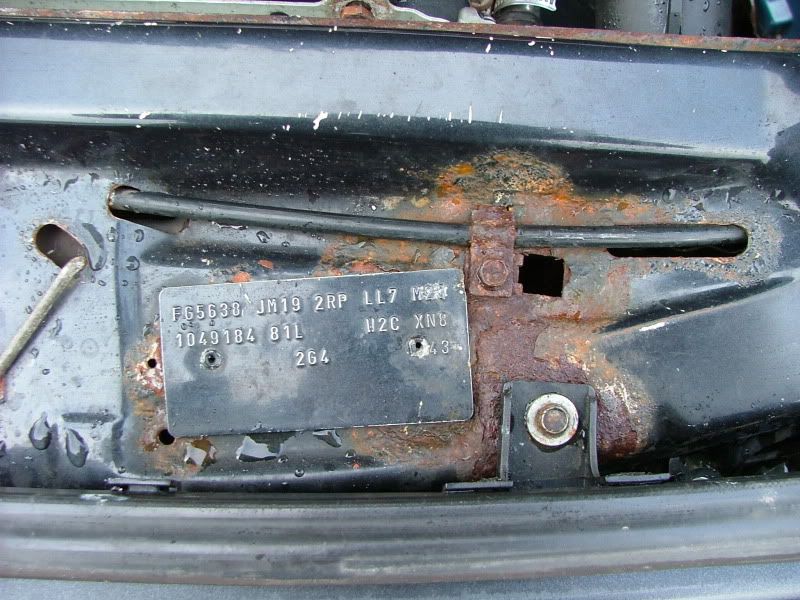
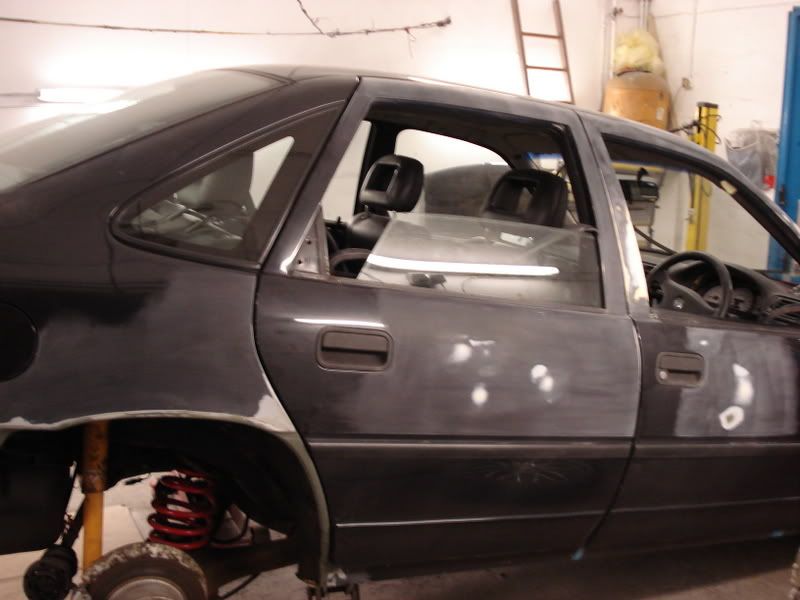
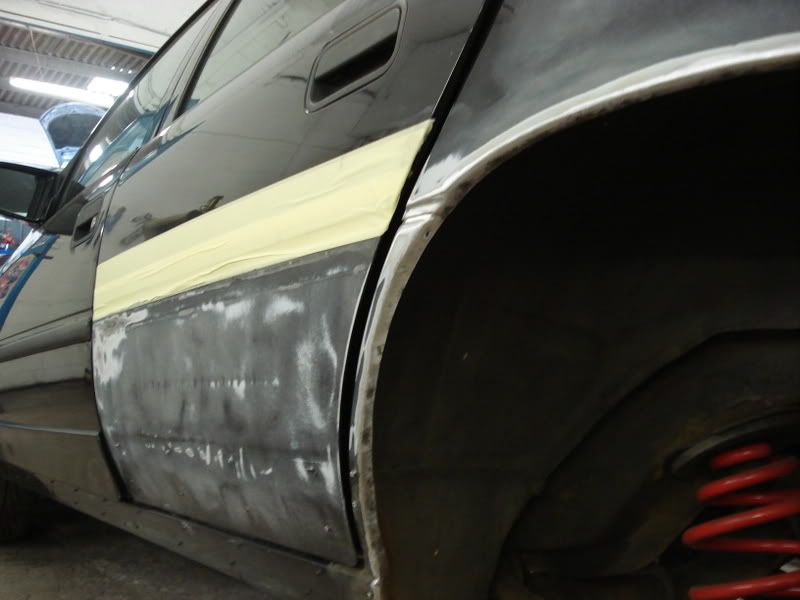
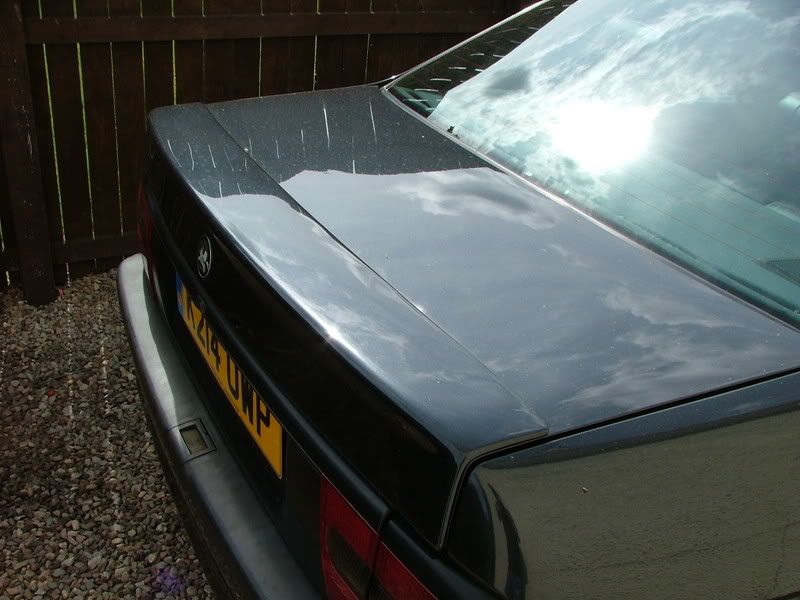
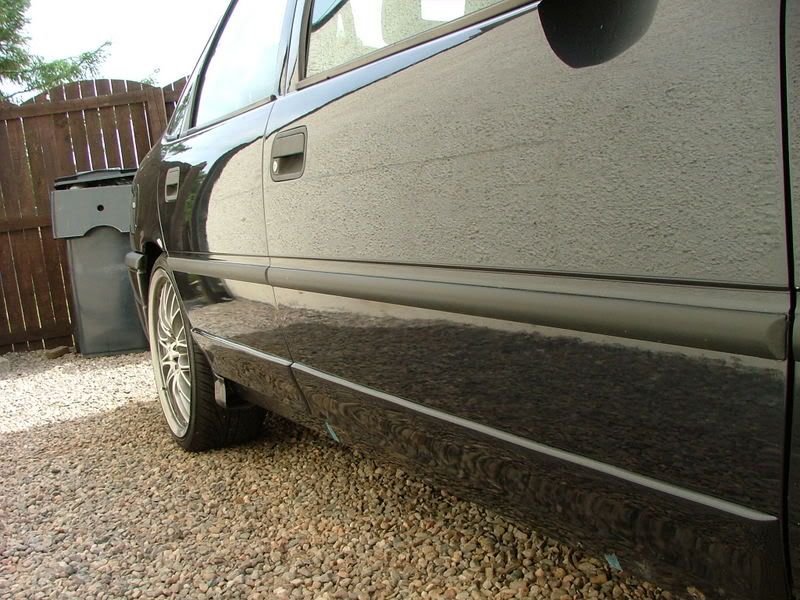
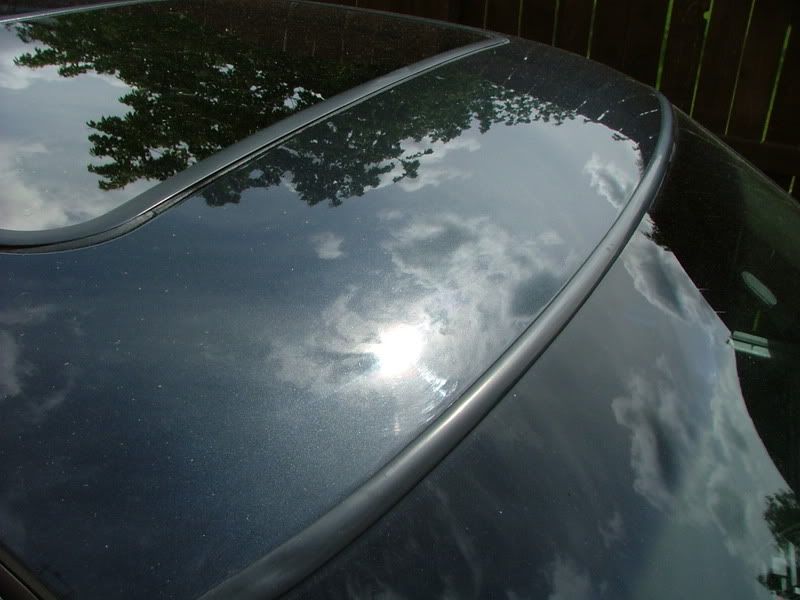
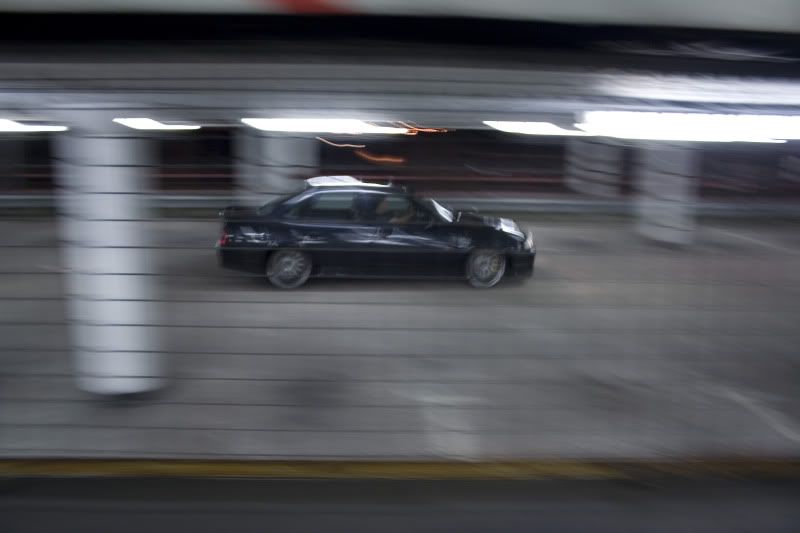
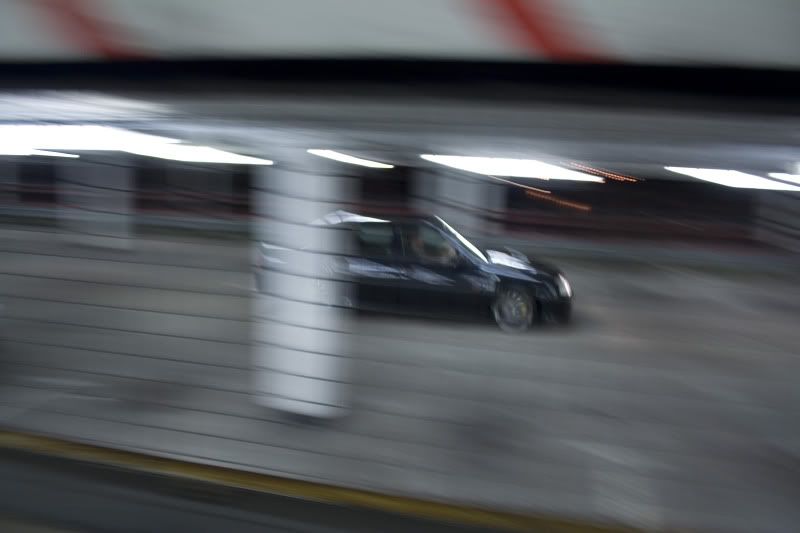
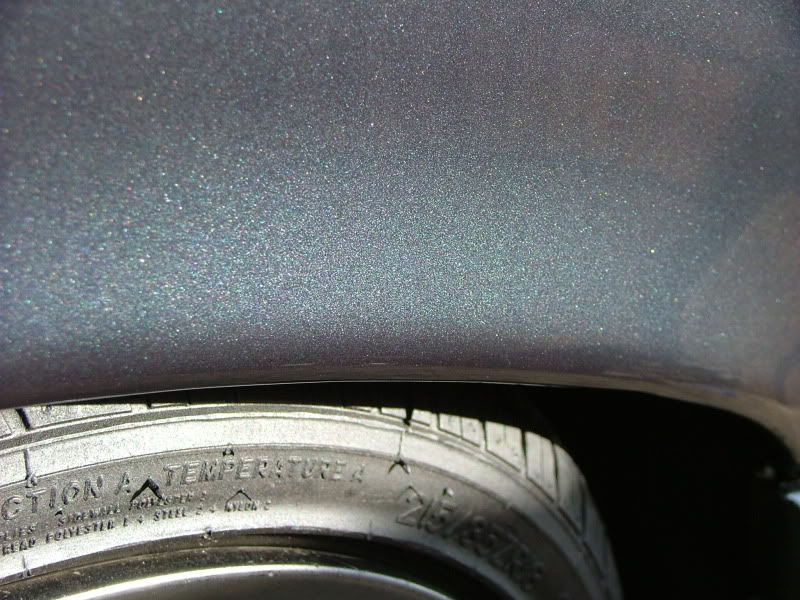
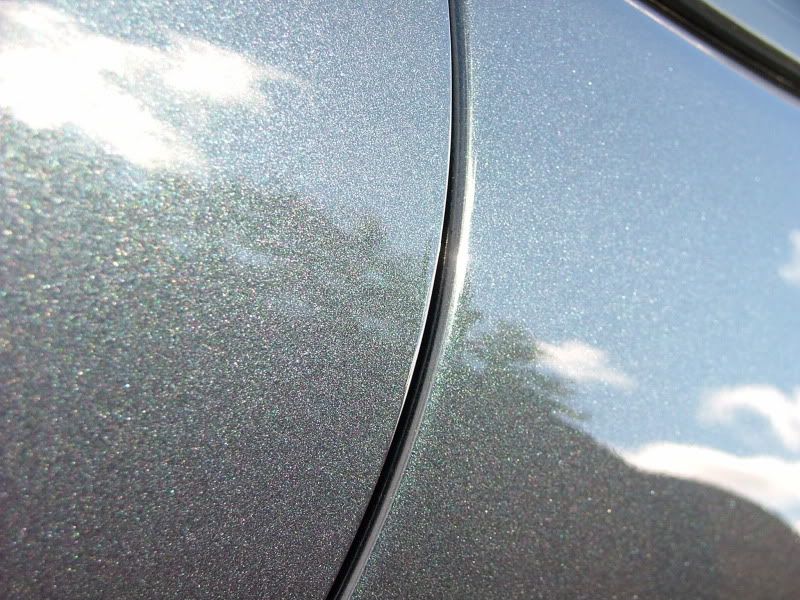
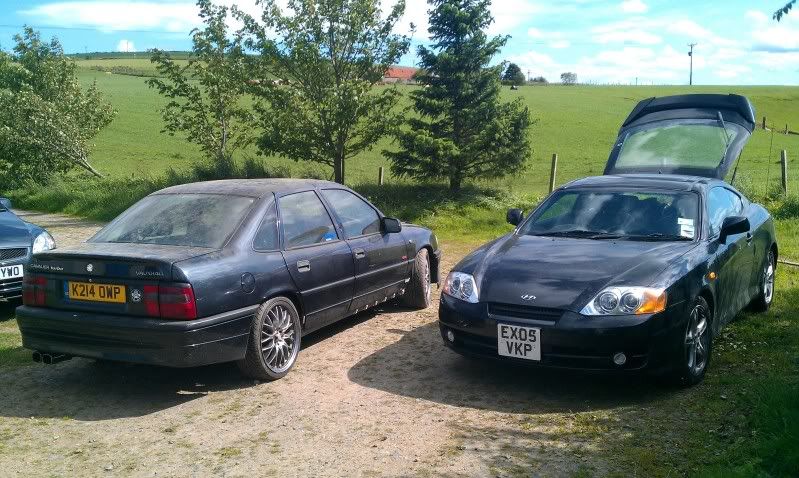
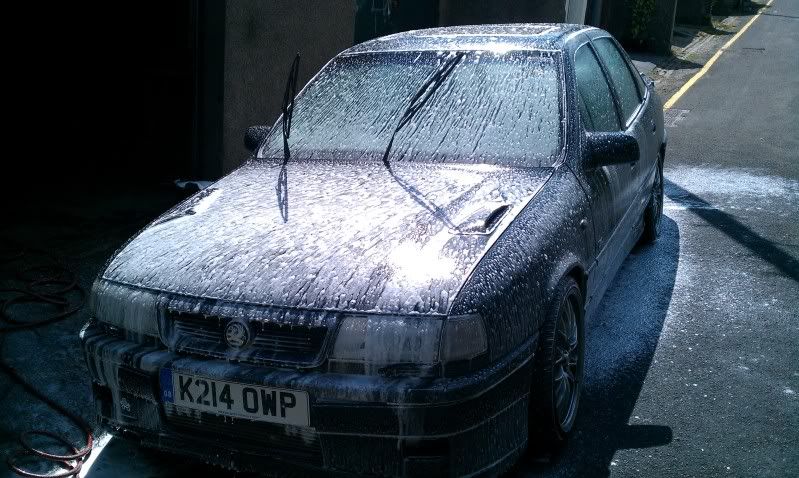
Standard 1993 Cavalier turbo shell, resprayed in 2008 (same colour, Diamond Black).
Laguna front splitter.
Smoked side repeaters.
Smoked indicator.
New Vauxhall badges and door mouldings.
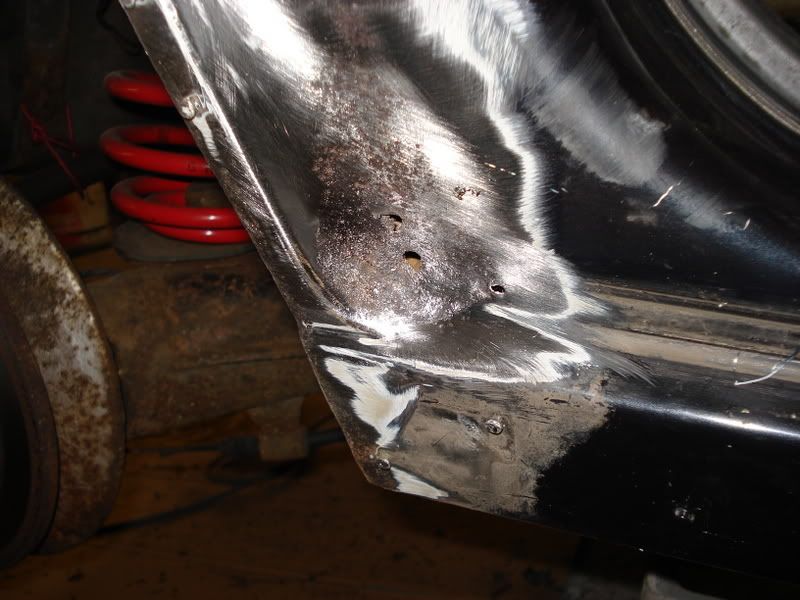
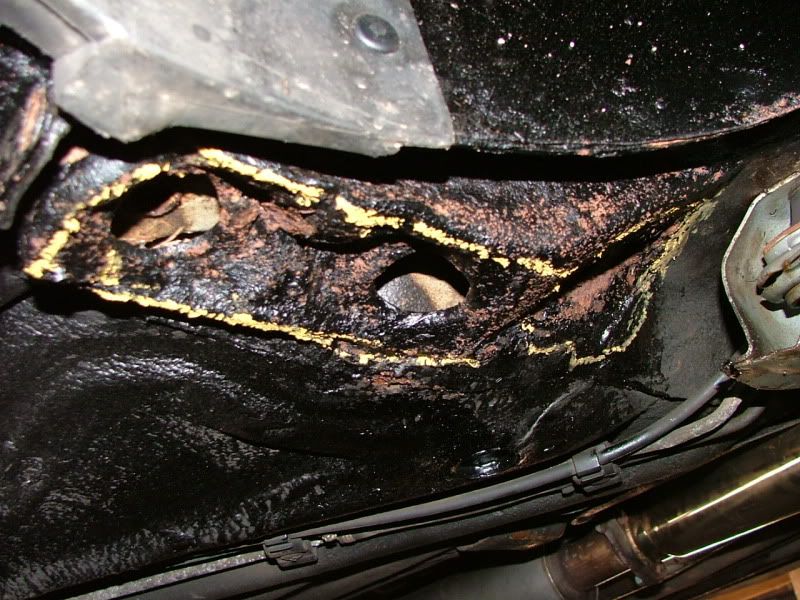
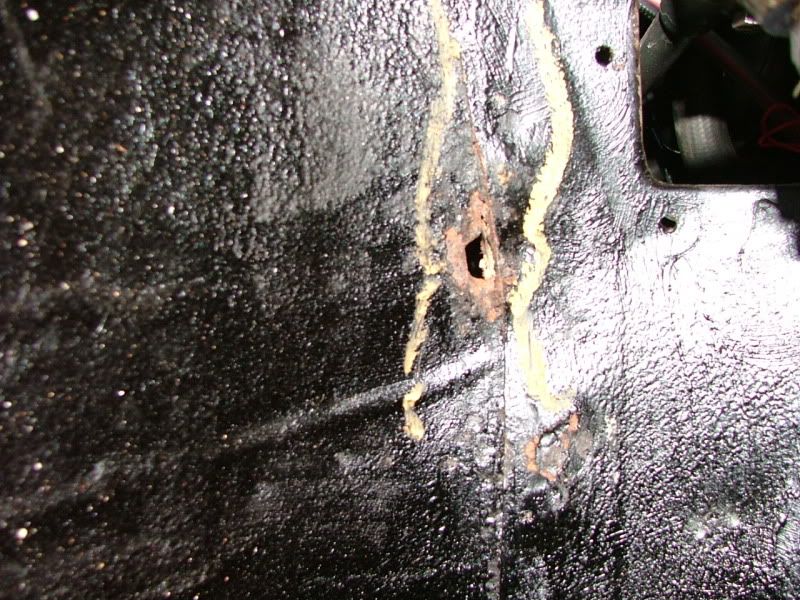
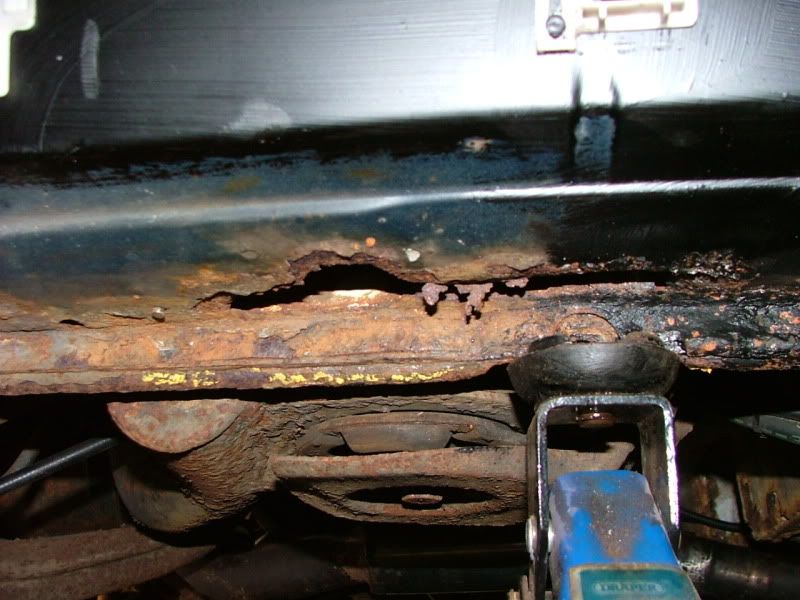
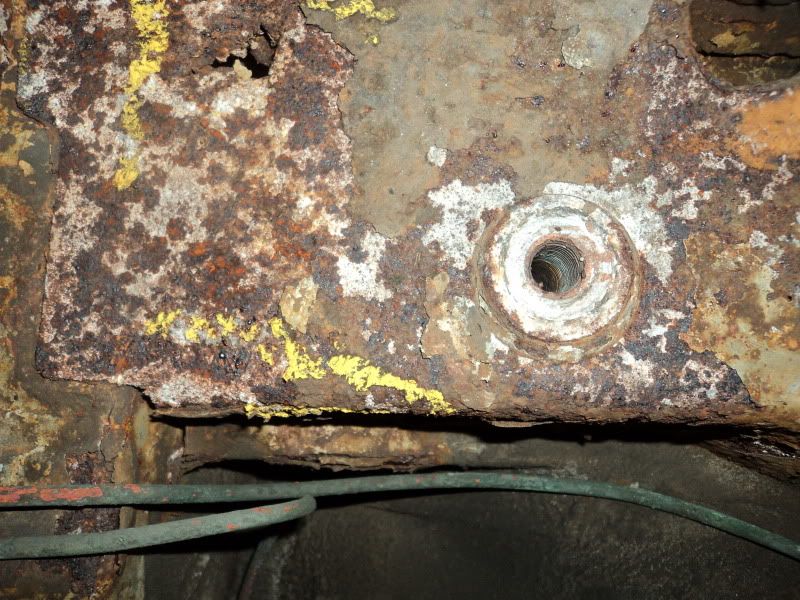
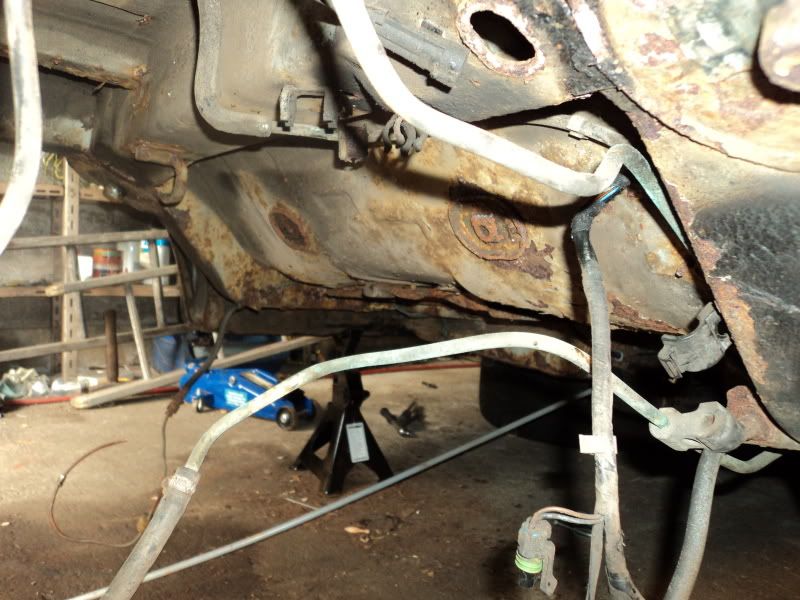
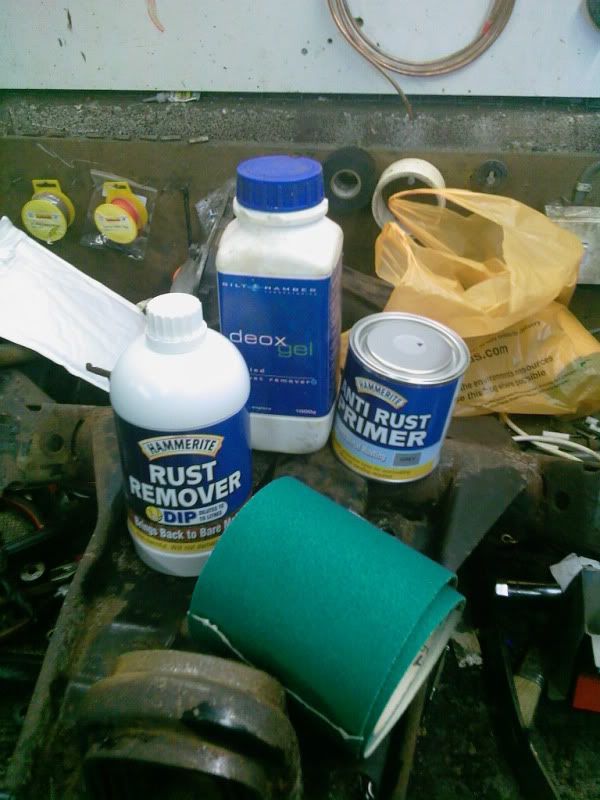
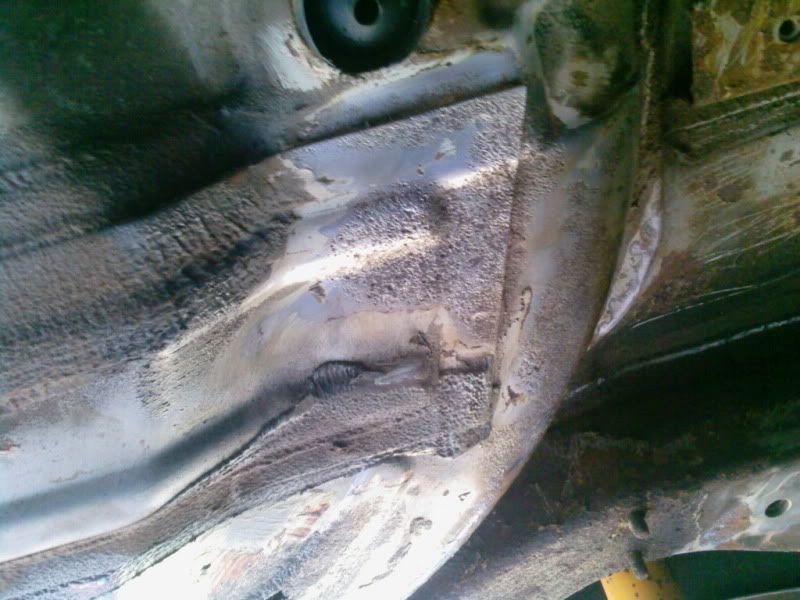
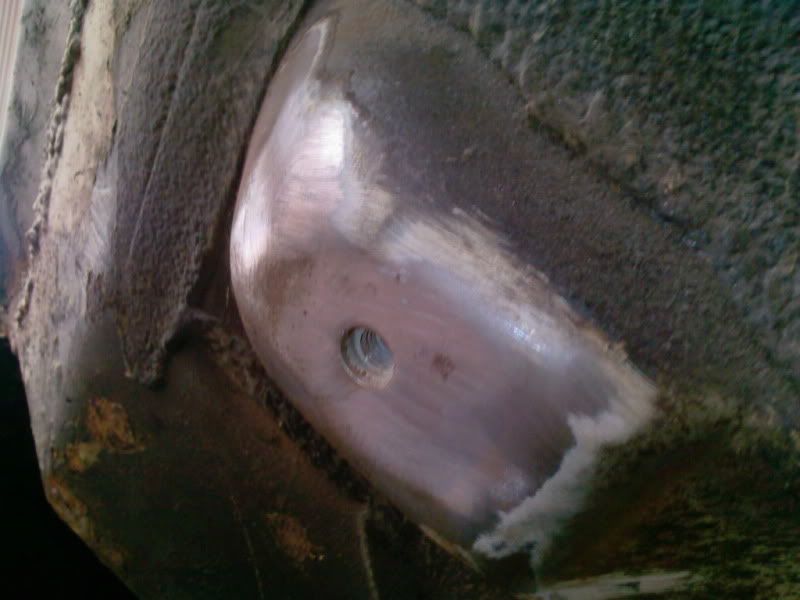
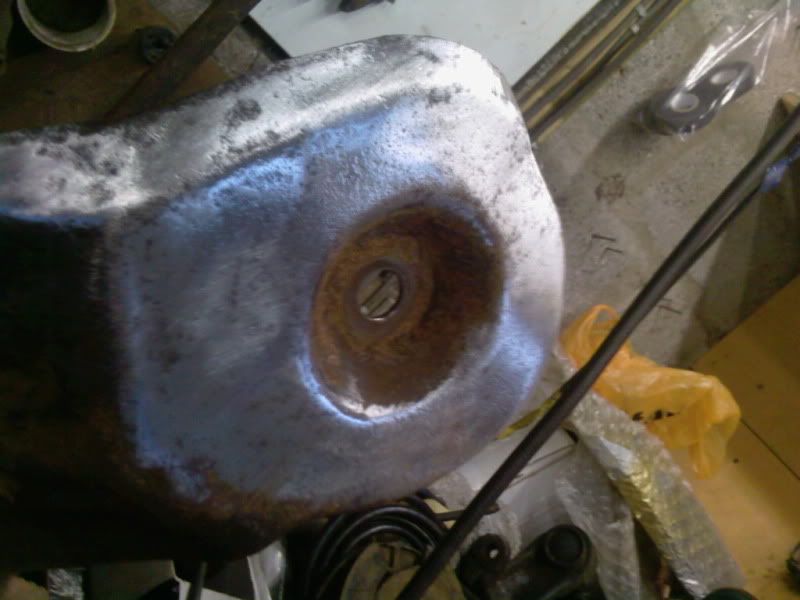
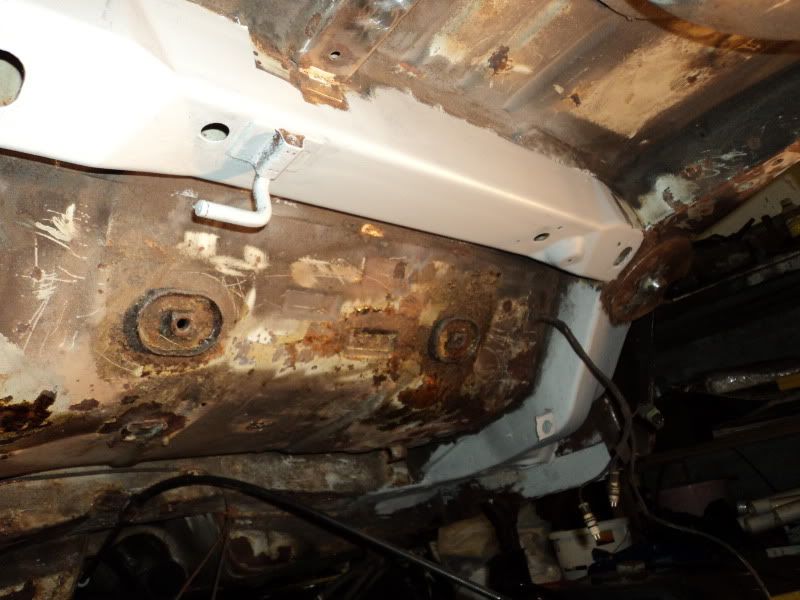
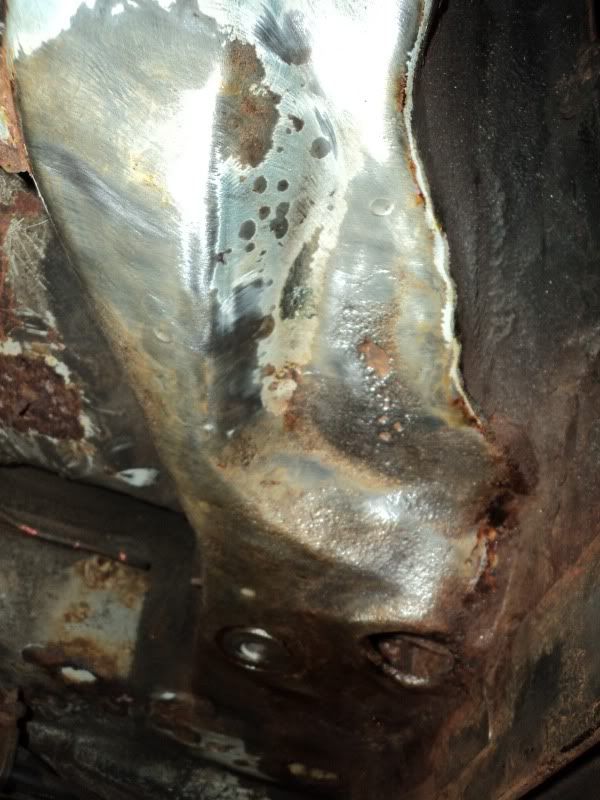
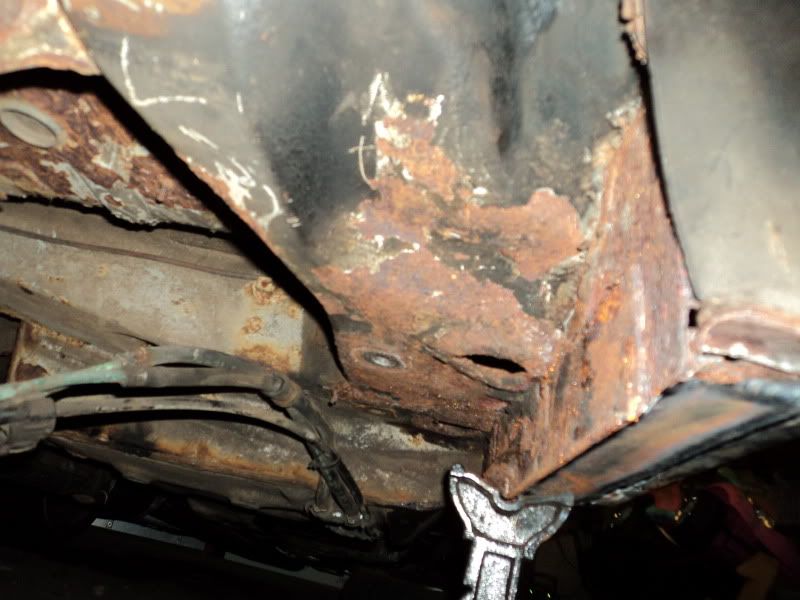
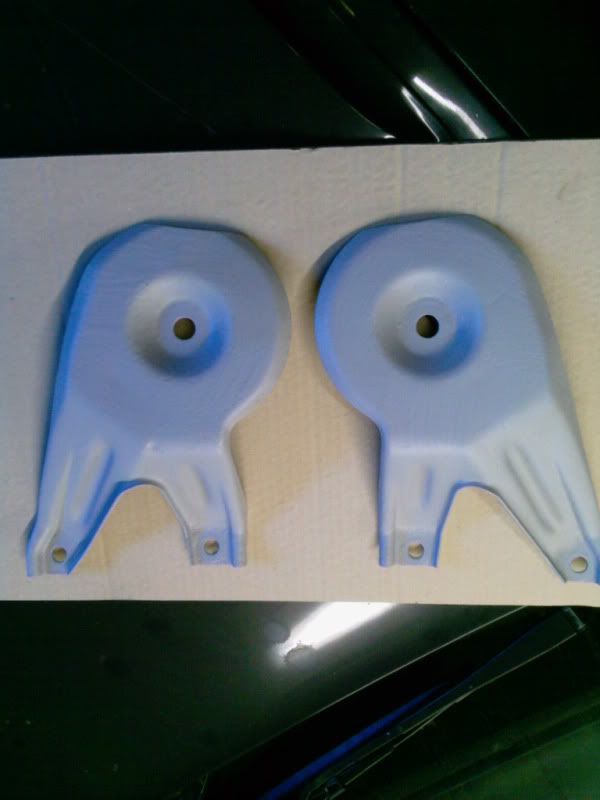
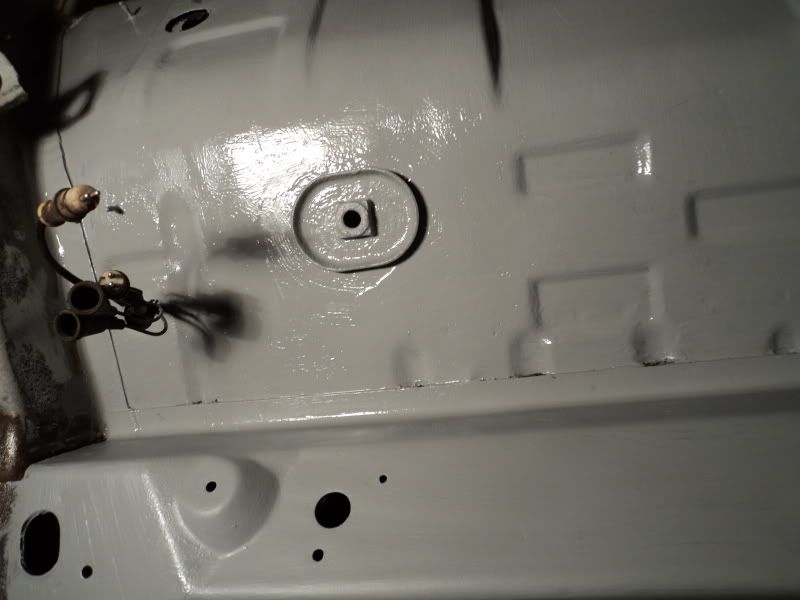
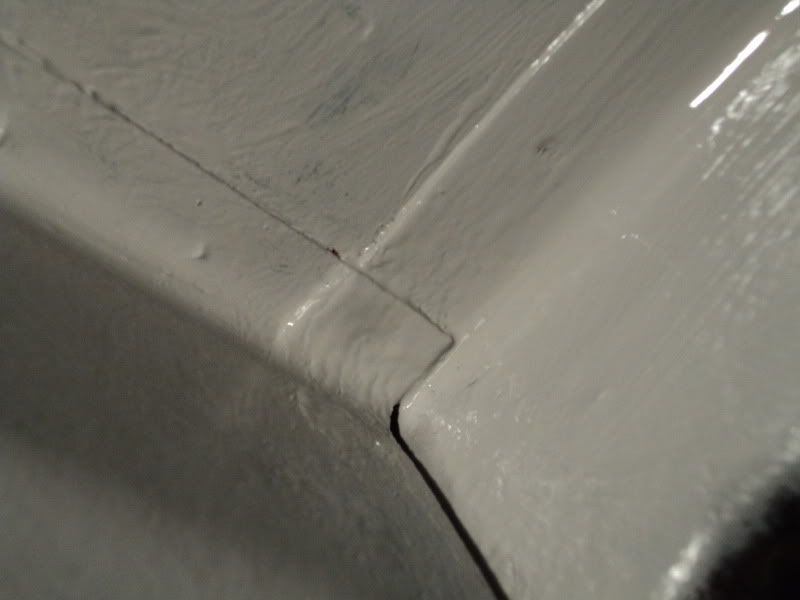
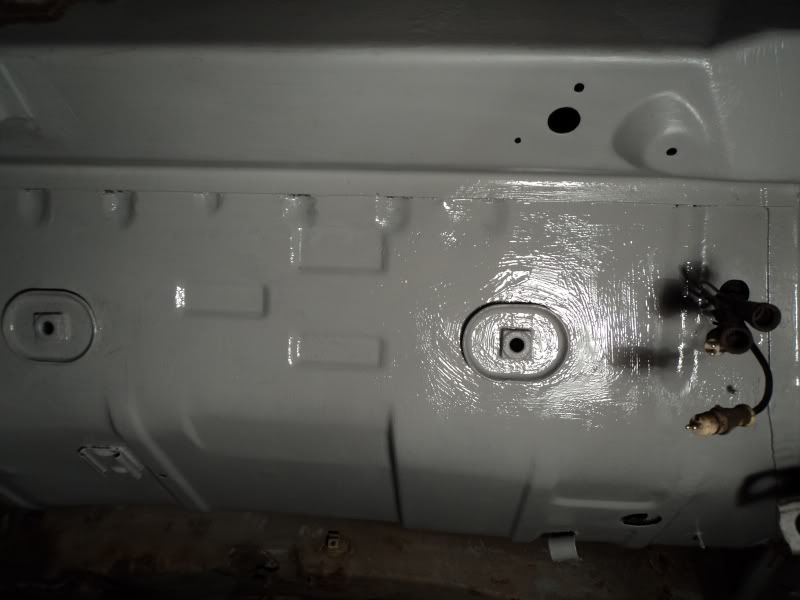
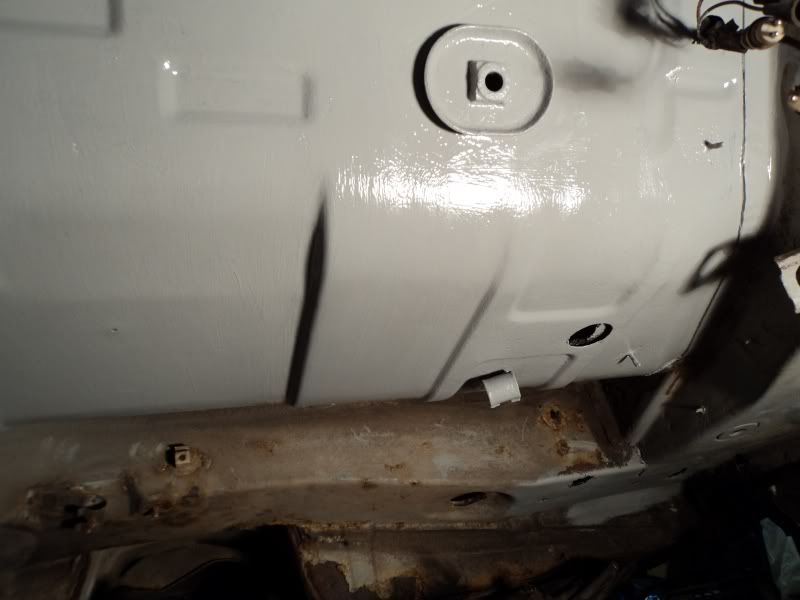
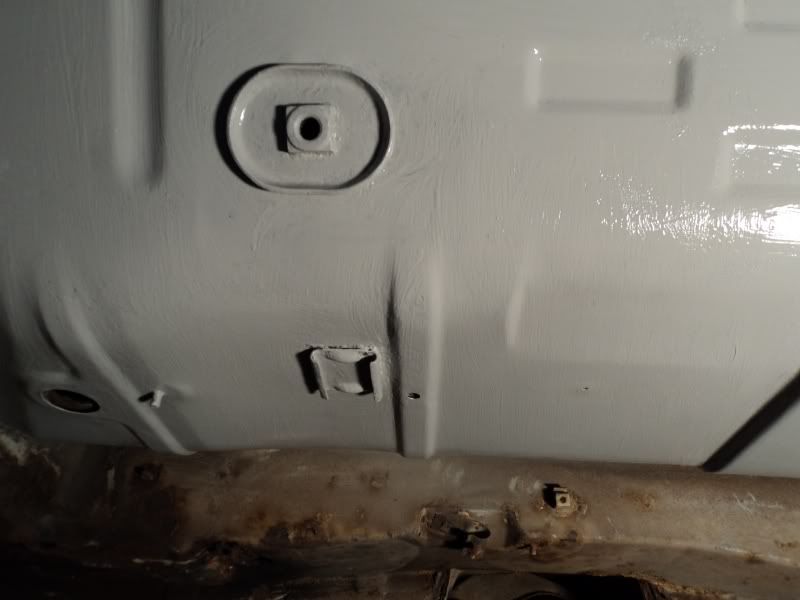
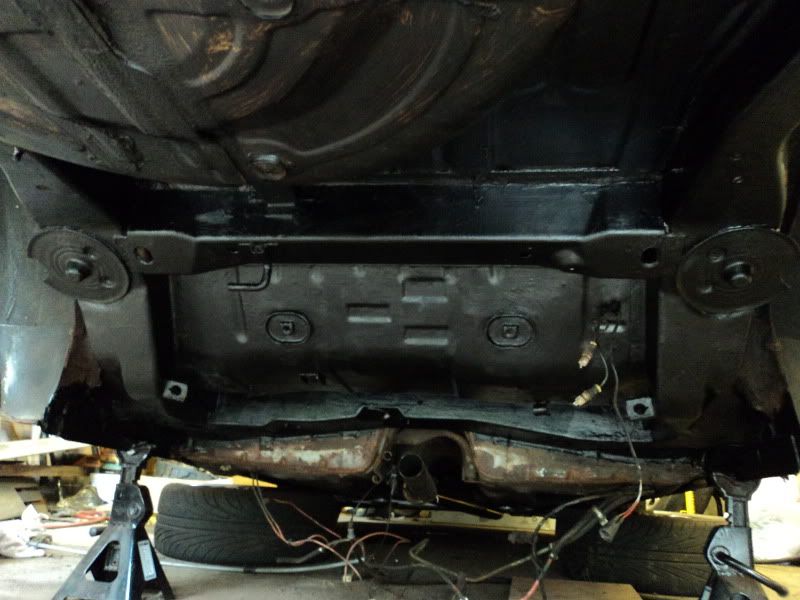
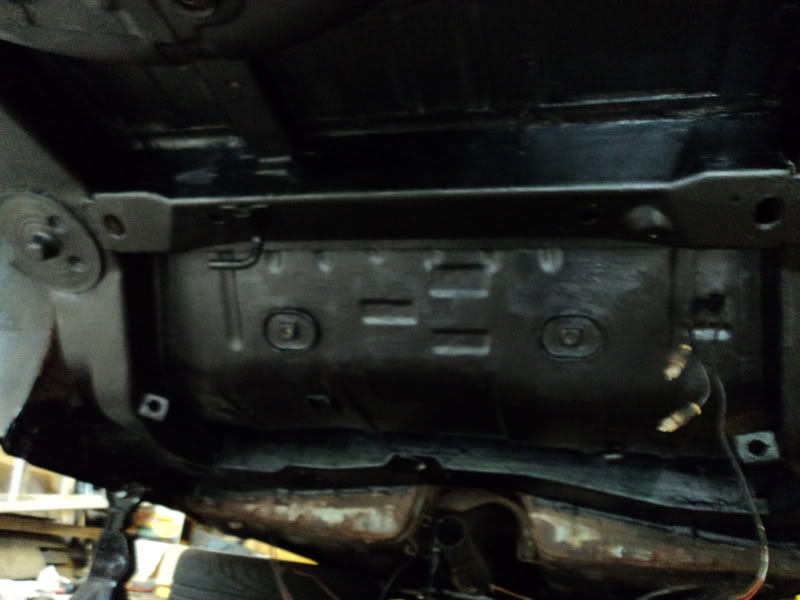
Skinned, treated and sealed underside (at rear).
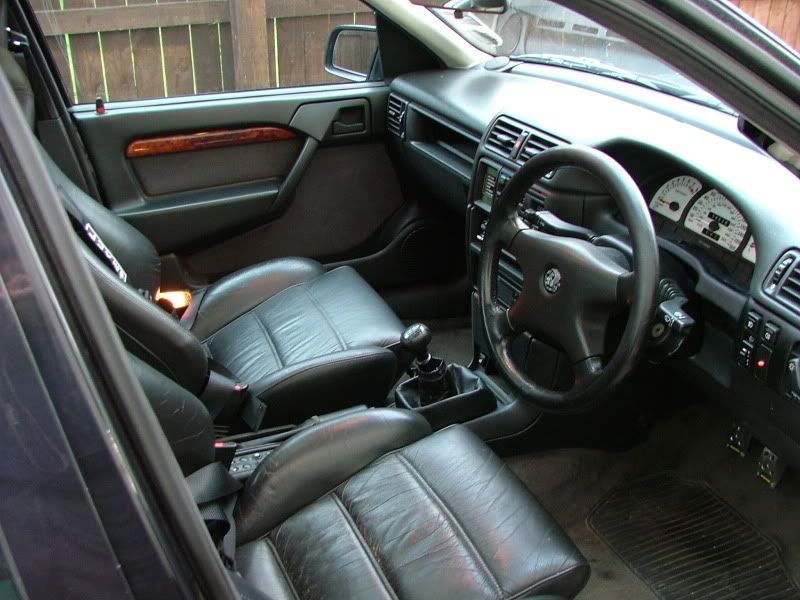
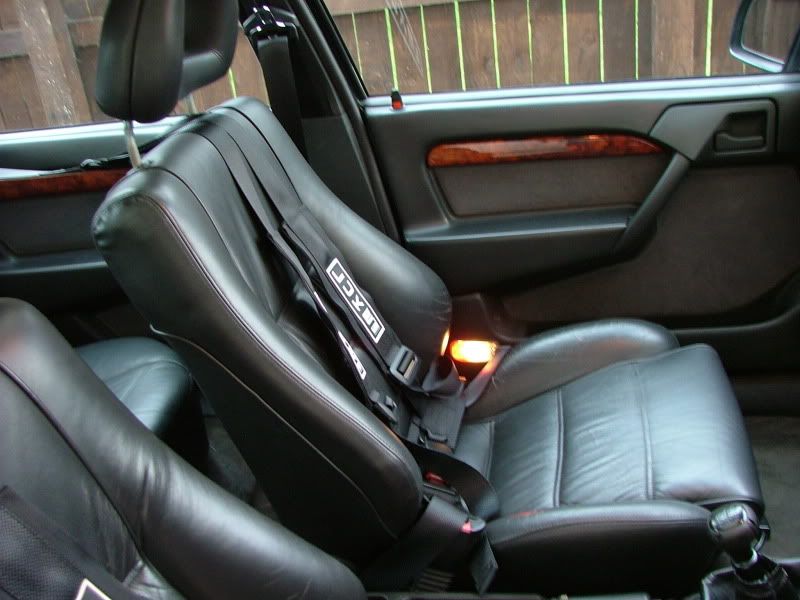
Interior
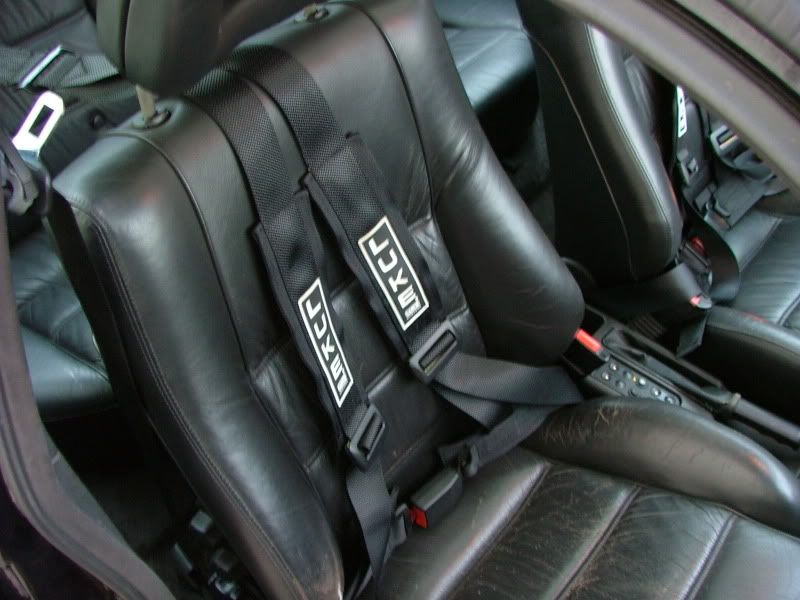
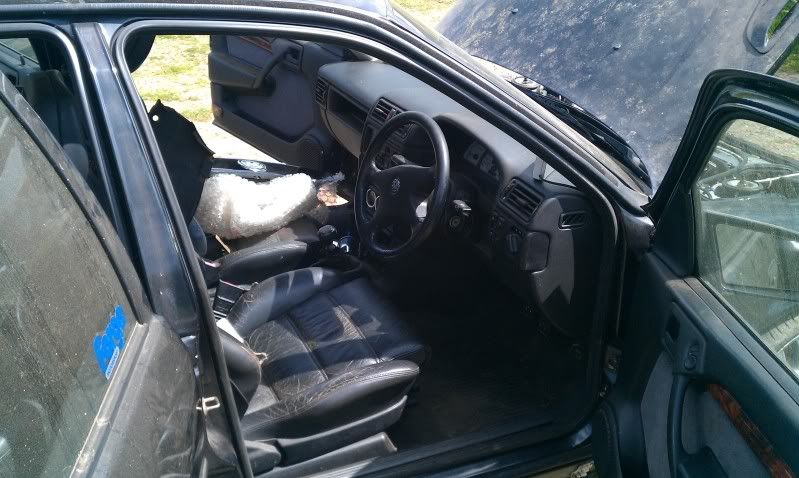
Standard 1993 Cavalier turbo spec with full leather interior.
Auto Gauge Boost, Voltage, Oil Pressure gauges.
AVC-R Boost Controller.
Sony Headunit (Not as old as Dave's yet).
AEM Wideband.

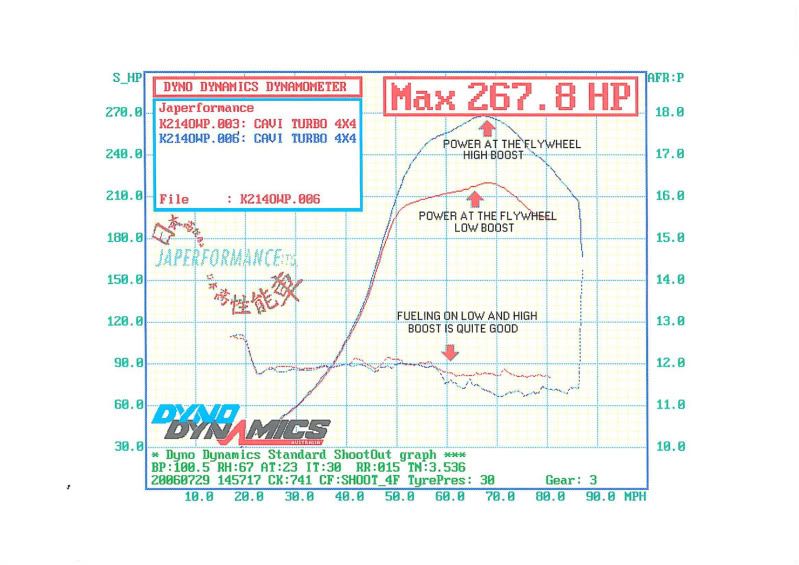
Rolling Road Figures '08
Low Boost @ 0.5 Bar
Image
High Boost @ 1.0 Bar
Image

History
Originally I had a GSI 2000 which was an H plated vehicle and despite Dave's insistence that I should move to a Turbo I simply didn't want to change from the GSI. Disaster hit me on more than one occasion with that car with problems ranging from a snapped timing belt to a front end smash which cost me the vehicle after insurance had finished with me. I clawed back as much cash as I could from breaking the GSI and after a heart wrenching few months I had a good amount of money together.

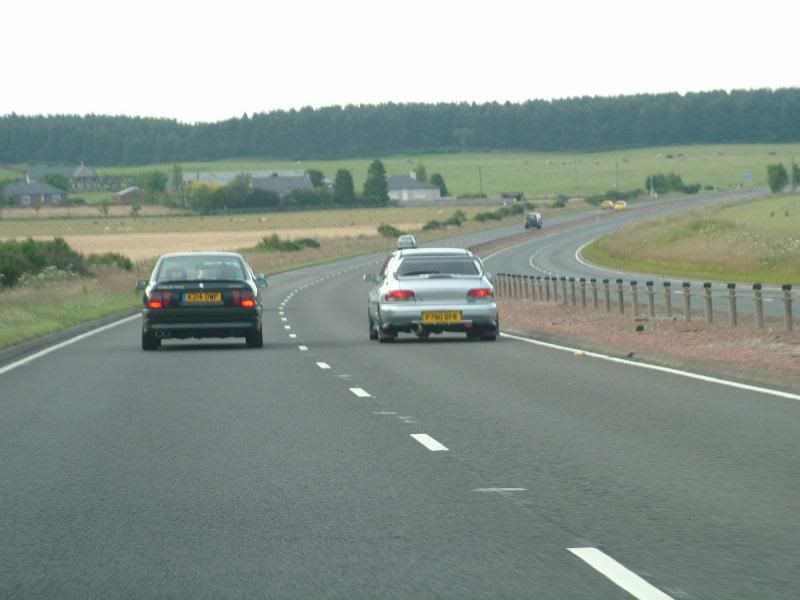
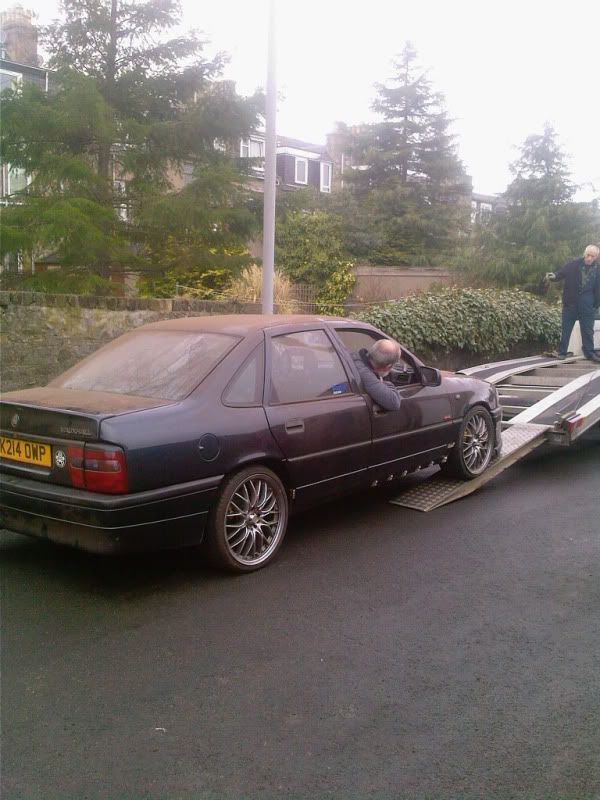
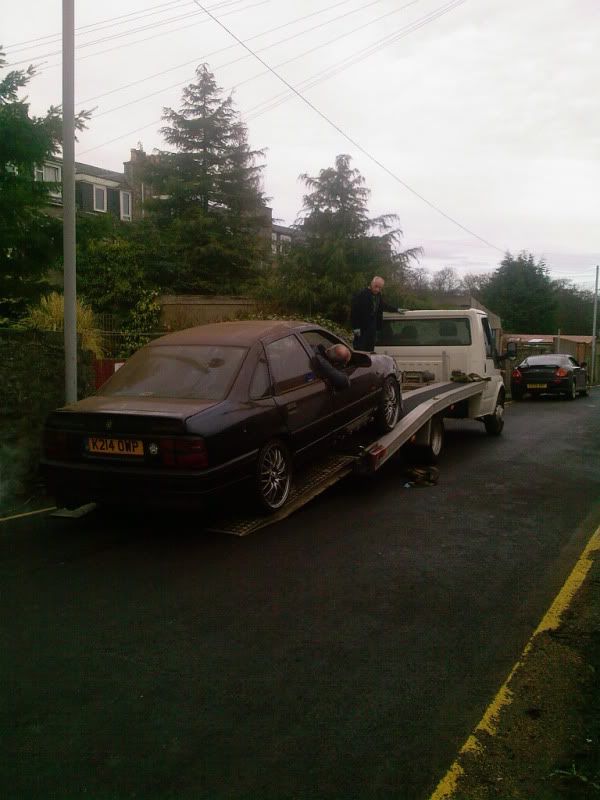
The time came in 2005 to get a turbo and to my surprise a Diamond Black number had gone up for sale in Aberdeen, just as I moved in to pluck it from the owners hands they had a change of heart and decided to keep it. It was through a friend that I even knew about the car and I had to push a little to get the seller to part with it. Here are the orininal "for sale" images that I saw prior to purchase.
Image
Image
Image
Image
Image
Image
Image
Image
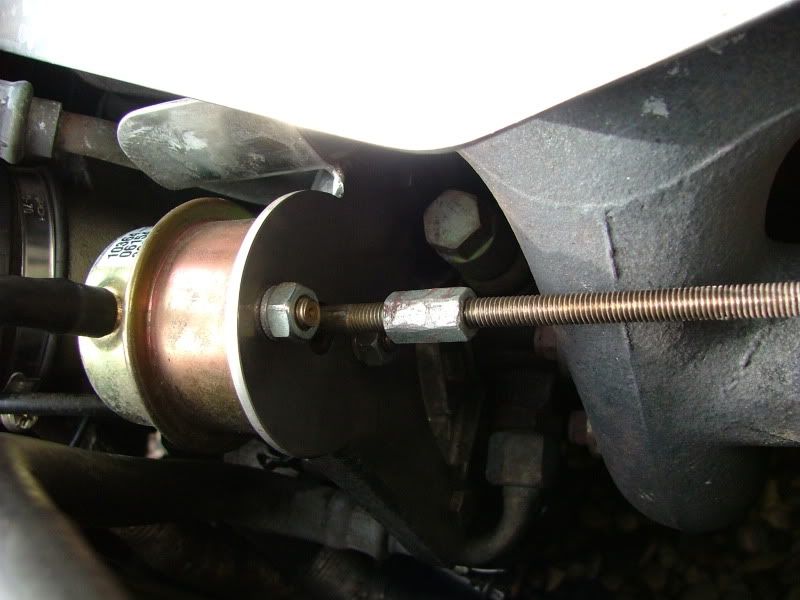
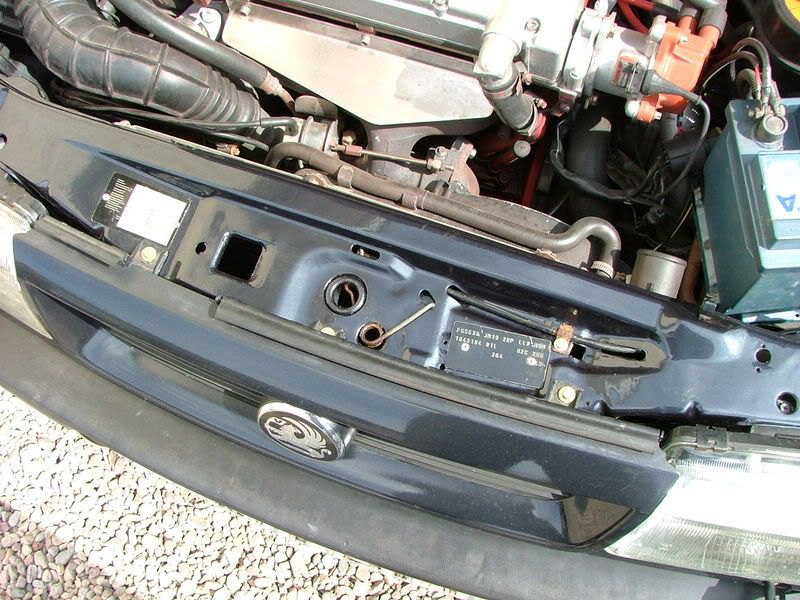
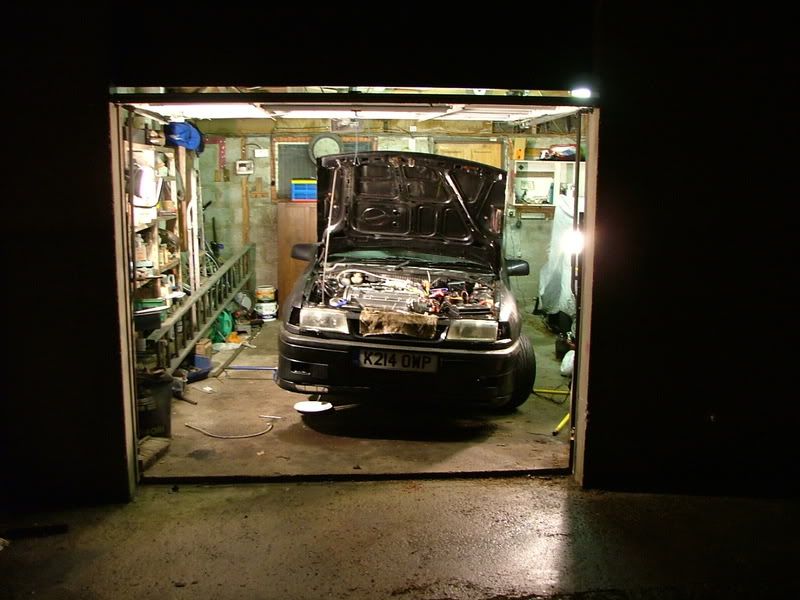
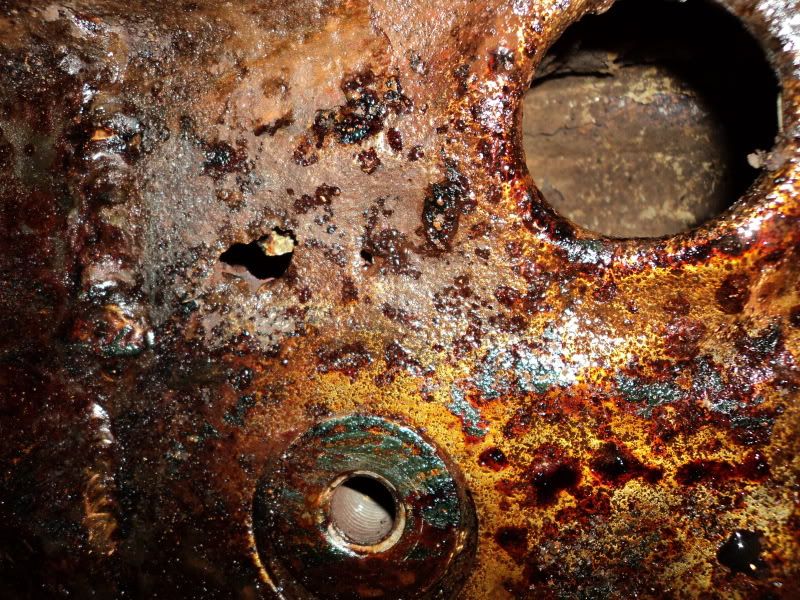
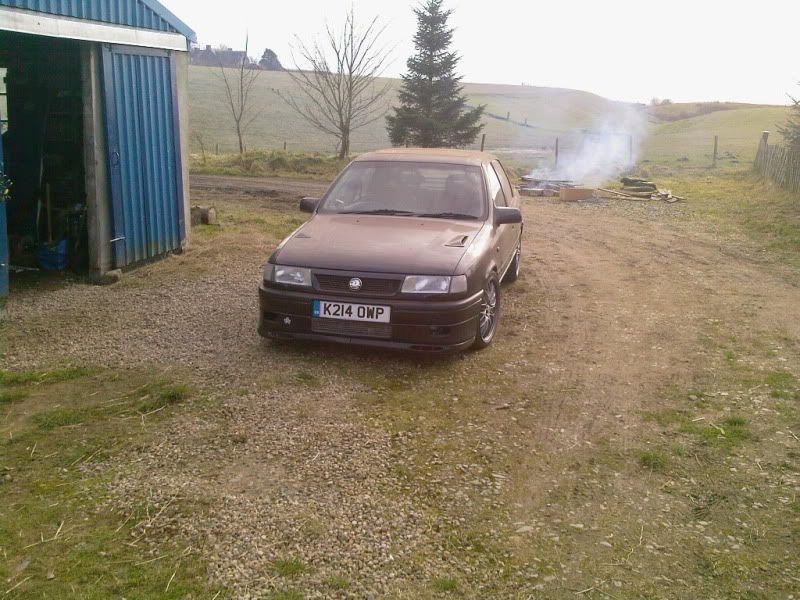
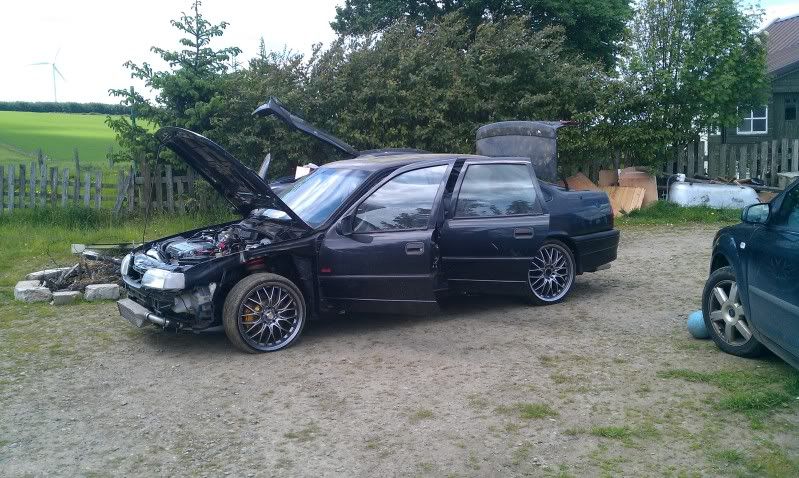
I can honestly say that very little on the car was to my taste but feeling like a seasoned Cavalier professional at this point I knew that restoration was only a spanner and skinned knuckles away and despite outward appearances the car was very clean underneath and the engine bay had no oil leaks or other worrying sights that are usually inherit when buying a Cavalier.

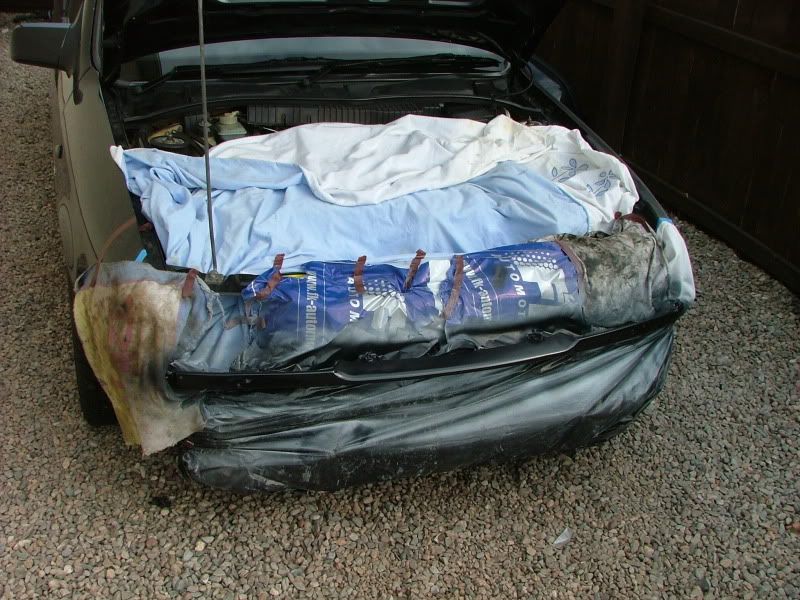
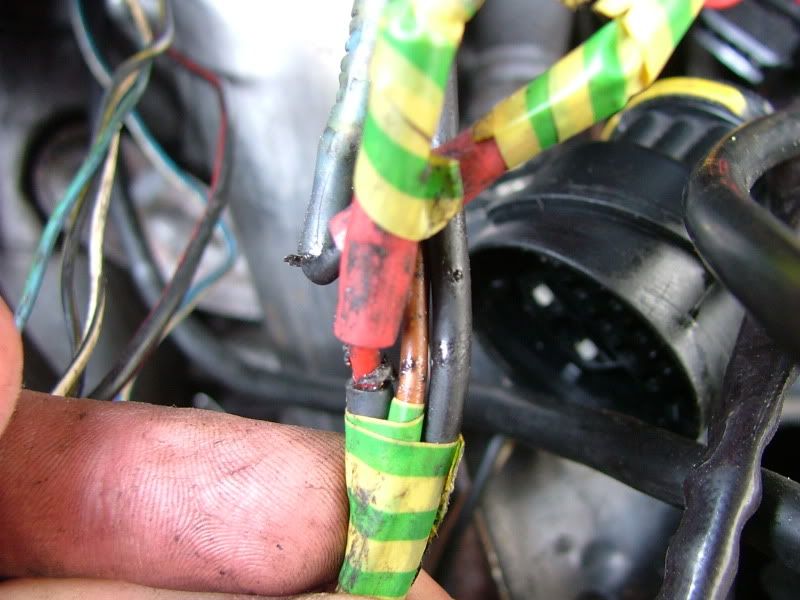
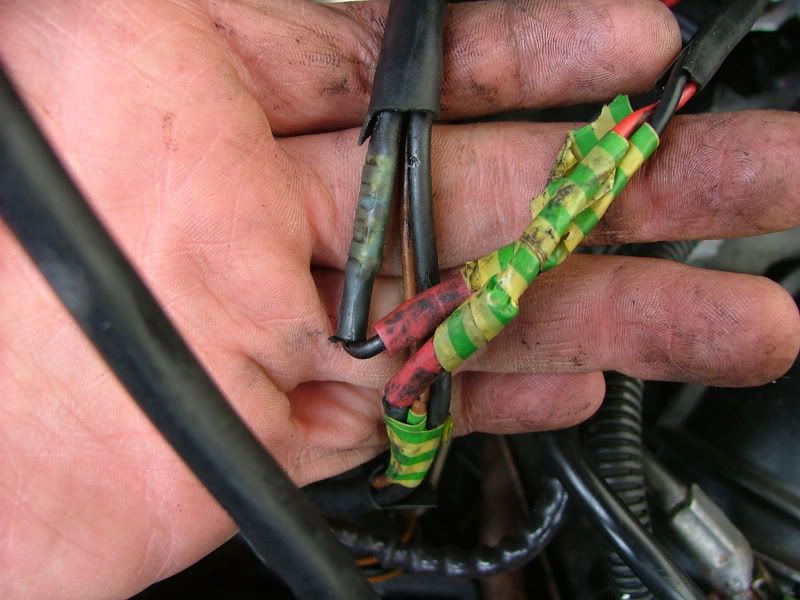
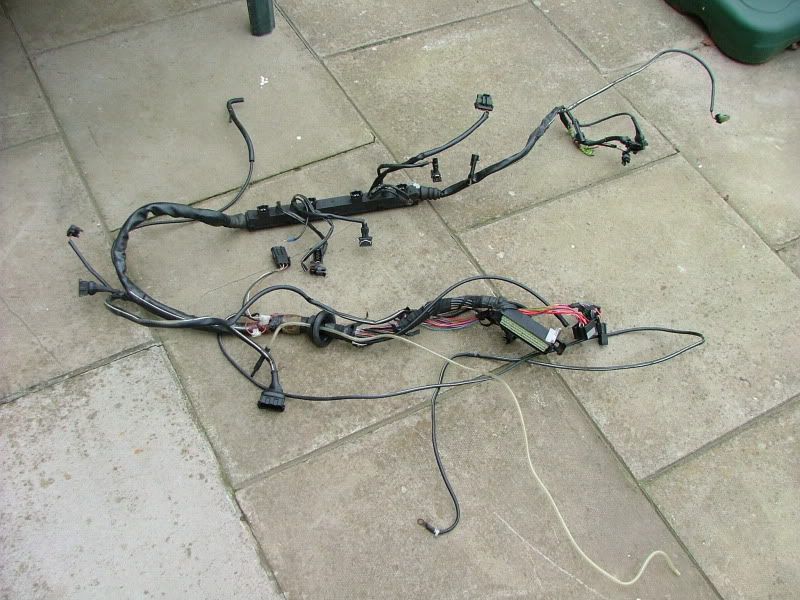
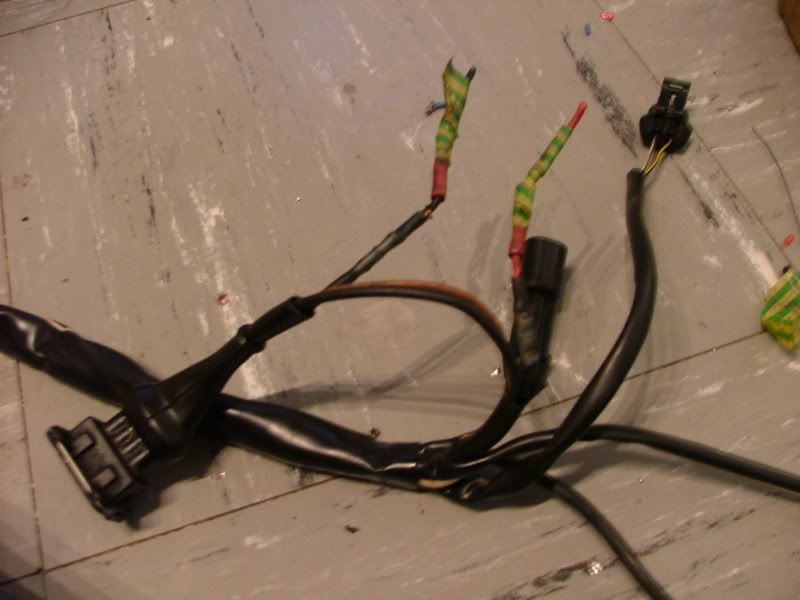
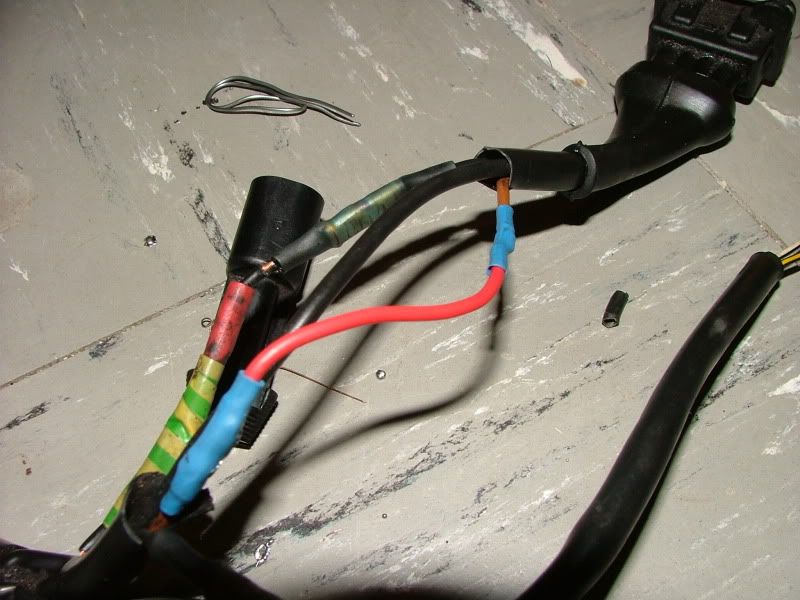
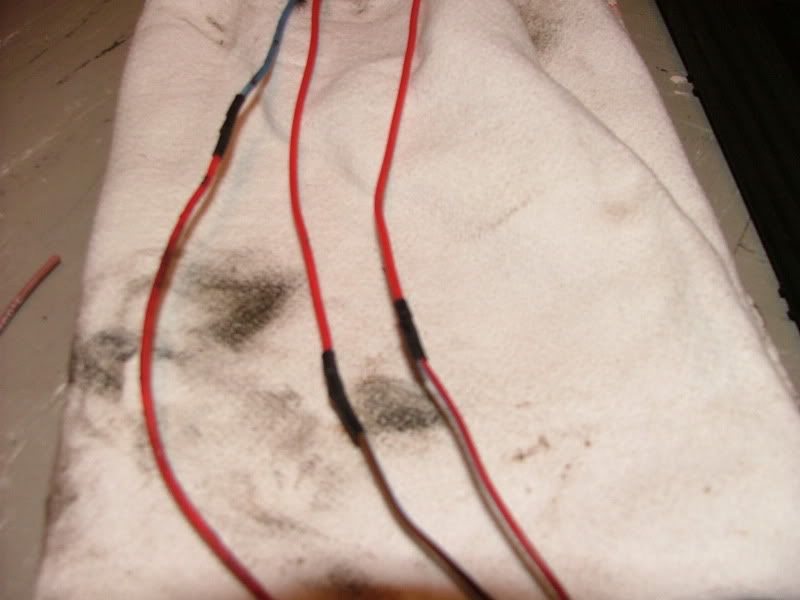
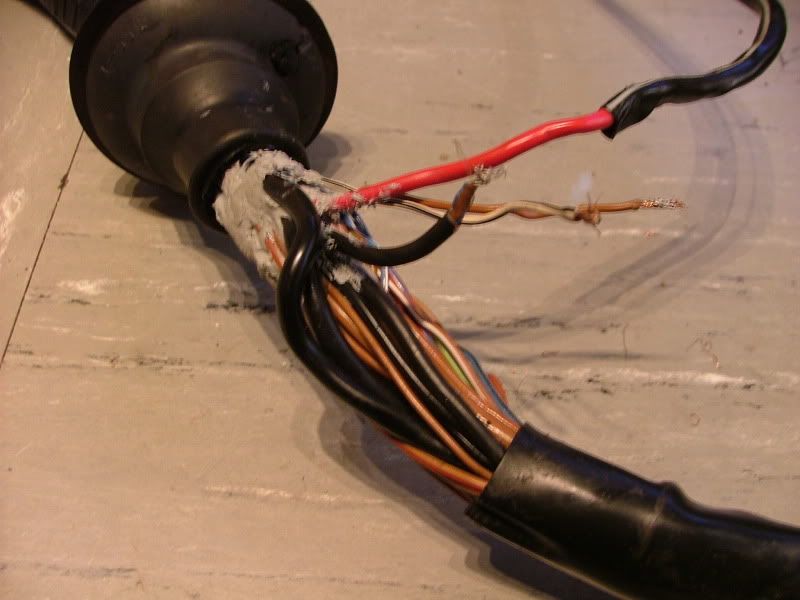
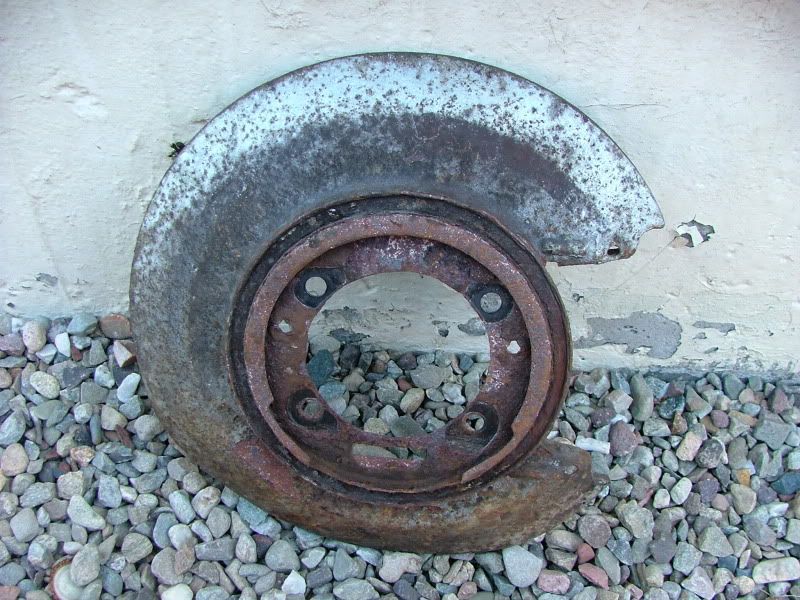
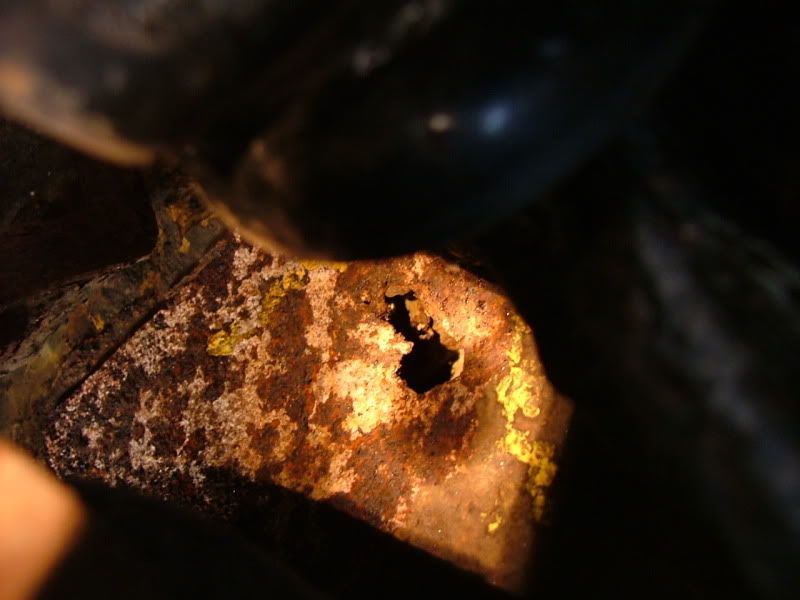
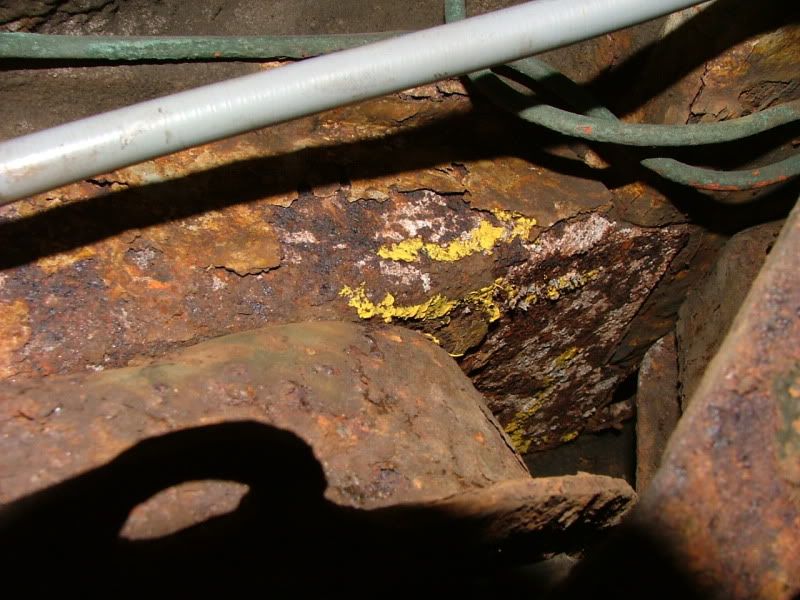
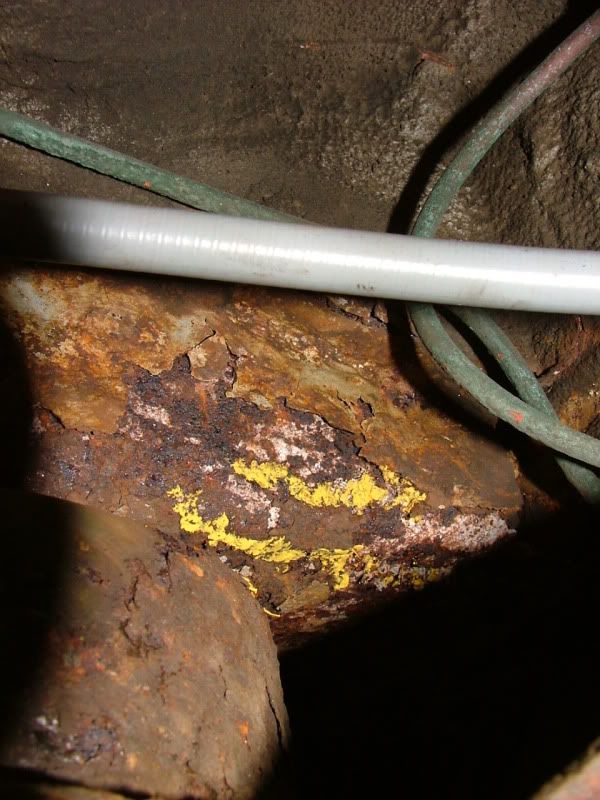
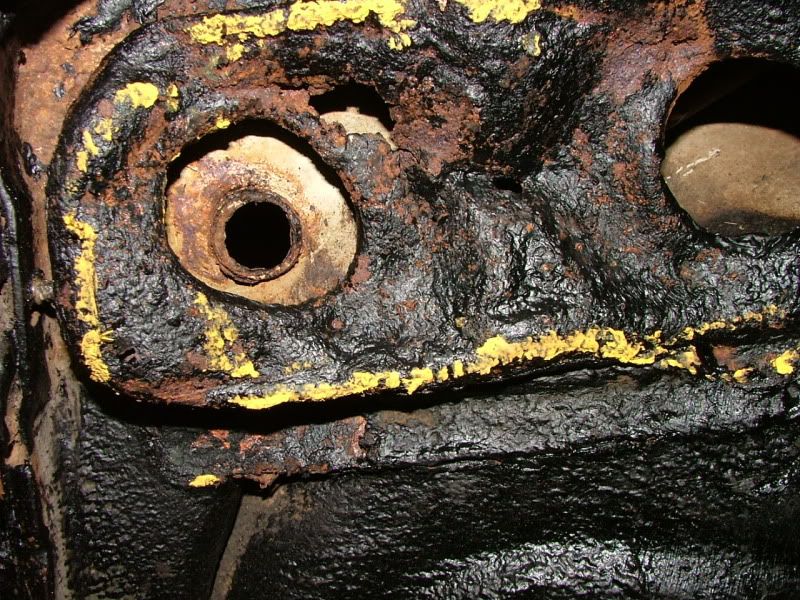
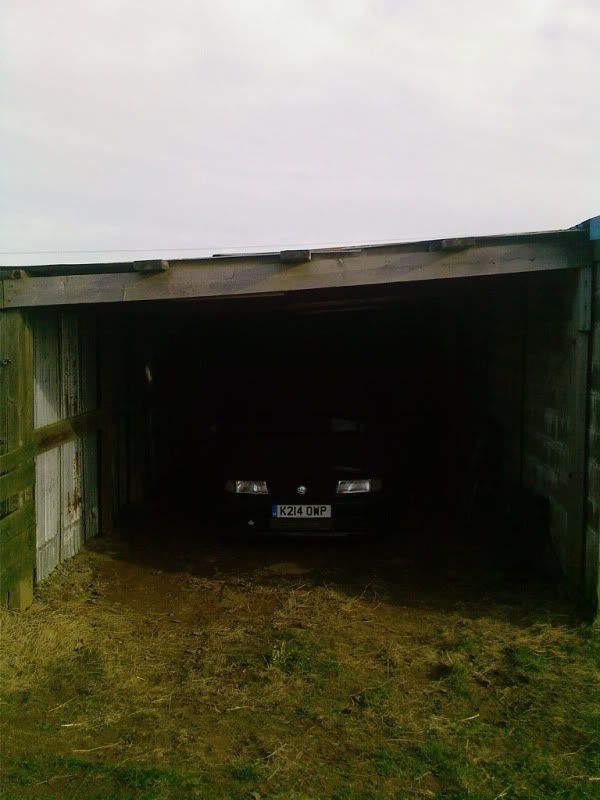
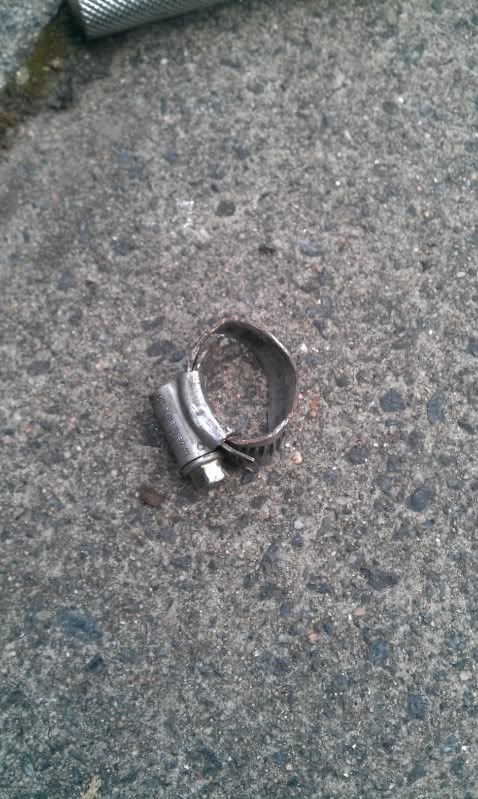
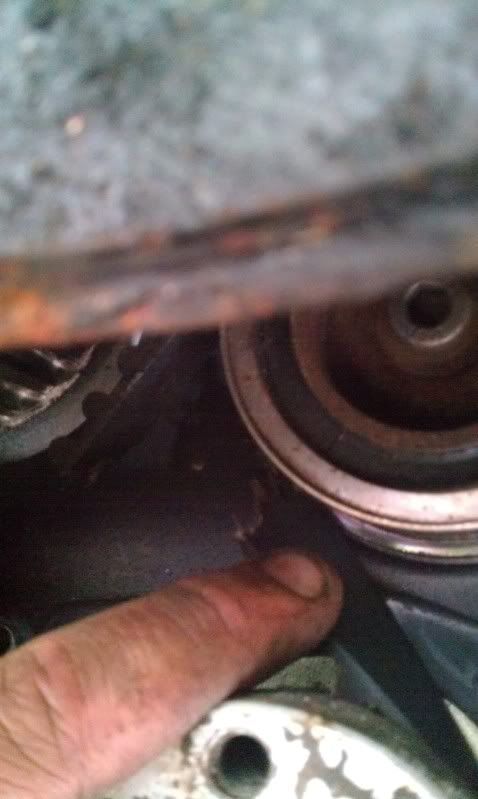
Unfortunately as I took the car home the problems surrounding the car grew from a little to a lot then from a lot to a shit load. Sensor wires were twisted together meaning nothing was reporting back like oil level or coolant level, the 4x4 was a littly iffy despite having a reconditioned txb, the bodywork was cosmetically knackared and the engine had seen the wrong end of a grinder at some point in its life. So it was kettle on, sleeves up and let the remaining years of your live become horribly wasted, GAME ON!
Yanayaya
Registered user
Posts: 100
Joined: Mon Jun 18, 2012 7:24 pm

Re: My Cavalier Turbo ( 2005 to Present )

Post by Yanayaya »

September 2005

So I got the car home and started my inspection which unearthed the problems I was recently talking about. Wiring faults were everywhere and I was surprised the car was actually running given what had been done, there was nothing that wasn't either butchered or twisted together to keep the warning lights off from coolent sensors down to abs sensors only god knew if I actually had the amount of fuel the car claimed I had.

I found the engine bay to be in quite a bad way, not that the car lacked performance but simply that it didn't seem to have been looked after. In my typical fashion I looked, dismantled and cleaned and at this point in the cars life an oil change and freshly painted cam and plug cover were well deserved.

The current EDS Phase 2 kit had been fitted by Wallace Performance along with an intercooler pipe solution that was quite uninspiring.

Image
Image
Image
Image
Image
Image
Image
Image
Image
Image
Image
Image
Yanayaya
Registered user
Posts: 100
Joined: Mon Jun 18, 2012 7:24 pm

Re: My Cavalier Turbo ( 2005 to Present )

Post by Yanayaya »

July 2006
As you have probably gathered from my last post there was a real desire to get the car back to standard because the eagle eye amoung you will have noticed the GSI Grill amoungs other things as well as the rust on the front panel below the headlights. This was something that warm weather permitted me to put right (speaking fromt he view of paint). So it was off with the grill and on with a freshly painted facelift one as well as a rub down, clean and paint of the lower panel.
Image
Image
Image
Image
Image
I also bought some new number plates at the time as well because Im wierd like that lol.

July 2006

Im ashamed to admit that I used to be a right cruiser in my youth and I had taken the Cavalier to a couple of shows that were being held in Edinburgh at the Royal Highland center by the now none existent Fast and Modified Magazine. The show in 2006 made me realise just how much A) I hated that sort of thing B)Just how many saxo's existed in the country and C) How naff the car looked sitting so low and how awful the body work was. Its moments like this you realise that your purchase is going to need an extensive amount of work and simply burying your head in the sand wont suffice. The last pic of the wheel was one I took just as I noticed how corroded and rotten the Cavalier looked....I just wanted to go home.

Image
Image
Image
Yanayaya
Registered user
Posts: 100
Joined: Mon Jun 18, 2012 7:24 pm

Re: My Cavalier Turbo ( 2005 to Present )

Post by Yanayaya »

August & October 2006

As the year rolled on I experimented with harnesses in the car just to see if they actually helped in anyway but all they did was stop me from being able to reach forward for things which just bugged me to bits so they eventually got taken back out.

Image
Image
Image


The Cavalier also got given a new alternator due to a dim battery light and a lack of charging going on. The alternator also starting making a really loud howling noise as the bearings became rotten due to weather and age.
Image
Yanayaya
Registered user
Posts: 100
Joined: Mon Jun 18, 2012 7:24 pm

Re: My Cavalier Turbo ( 2005 to Present )

Post by Yanayaya »

February 2007

The nagging issues of bodywork and the look of the car had really been bugging my happiness so I took shows of all the problems that the car had, from strange paint issues to missing lacquer the ride height was also bothering me as the car was chewing through tires like nothing on earth. Through advice gained from a few friends I popped out fuse 19 to keep the 4x4 off because of the risks presented to the txb with the height being as low as it was. As you can see the arches although original were rotting, there was a dent in the door, rust on the top of the windscreen and paint fading/reaction on the tops of the doors.

Image
Image
Image
Image
Image
Image
Image
Image

The time had come for something to be done so I invested in some springs and sent the images off to my friend at his bodyshop for a quick glance and an opinion.

Whilst I awaiting my new springs and the verdict of my body shop chap I decided to strip down and clean the coupling to txb of the prop shaft and replace the gasket seeing as it had never been done and you cant put a price on fresh grease :D

Image
Image
Image
Image

Image
Image
Image
Image
Image
Yanayaya
Registered user
Posts: 100
Joined: Mon Jun 18, 2012 7:24 pm

Re: My Cavalier Turbo ( 2005 to Present )

Post by Yanayaya »

March 2007

The car had been getting plagued by this EML coming on and off during driving up and down the duel carriageway and there seemed to be no sign of an end to the problem. I took the car to Vauxhall originally and they failed to understand or even get close to what the problem could be claiming that there diagnostics machine wouldn't talk to the car. So at home I stuck a paper clip into the diagnostic plug and flashed out the codes which turned out to be related to the O2 Sensor. I replaced it however the problem kept coming back and on top of that the car was running really rough because of the cone filter which was sitting below the Astra GSI bonnet vents that previous owner had installed. Since it was not bad weather I decided that the only way of finding out what the problem is would require me to rip out the loom and lay it all out and literally solder and wrap all the bad connections and bare wire, so that's what I did.

WTF Wiring
Image
Image
Image
Image
Image
Image
Image
Image

Air Filter Change
Image
Image
Image
Image

There was a misfire happening not too long after that which turned out to be a split in my coil to dizzy lead of my Magnecore leads. A quick phone call to their head office and the lovely chaps sold me the single unit on its own which was really nice of them.
Image
Image

After the work to the loom and the air filter was complete....the problem never came back 8-)
Yanayaya
Registered user
Posts: 100
Joined: Mon Jun 18, 2012 7:24 pm

Re: My Cavalier Turbo ( 2005 to Present )

Post by Yanayaya »

April 2007

In April I got down to some all round maintenance in the traditional Cavalier style with track rod ends and lower arms as well as CV joints. The car went in to get the alignment done and when the mechanic looked at the joints he just face palmed and walked off so this is where I ended up. Also the tone rings on the CV joints were so corroded there was no pulse being received at the sensor end and therefore the ABS was faulting out.

Image
Image
Image
Image

The lower arms were masked off and treated to a fresh coats of silver engine enamel just to see if their lifespan could be increased since the corrode so easily. The old one is in the first picture and the rest are the new units that arrived.
Image
Image
Image

Image
Image
Yanayaya
Registered user
Posts: 100
Joined: Mon Jun 18, 2012 7:24 pm

Re: My Cavalier Turbo ( 2005 to Present )

Post by Yanayaya »

May 2007

As you may remember I had taken some shots of the car with a view to have the bodywork corrected and that time had come around. I was now in a position to get the car sent off to the body shop and have her resprayed. Not only that bit due to almost killing myself in the car I deemed the standard brakes just far too much of a liability and invested in some bigger brakes from Hi-Spec.
Image
Image
Image
Image
Image

I had a lot of problems when the brakes first arrived in that the company sent out the wrong bells originally (4 stud instead of 5) and the gold anodised paint get coming off when the rain water touched them but apparantly this was due to a failure at their end which they rectified without any problems, I still use these brakes today they were a worthy investment.

Once the car was in the bodyshop it was clear to see the amount of dings and bashes she had not to mention the total bend in the rear door. Since the arches were not in terrible condition I asked the guy to try and save them so he did and in response he cut the lip off them as far as he could (the lip being where mud and crap sit causing the rot in the first place.
Image
Image
Image
Image
Image
Image
Image
Image

When I got her home she was looking nice and shiney shiney...
Image
Image
Image
Image
Image
Yanayaya
Registered user
Posts: 100
Joined: Mon Jun 18, 2012 7:24 pm

Re: My Cavalier Turbo ( 2005 to Present )

Post by Yanayaya »

June 2007

After the bodywork had been done I invested in some new badges all round and also installed my new big brakes which didn't go on immediately when I bought them because I needed spacers for the wheels :P

Image
Image
Image
Image
Image
Image
Yanayaya
Registered user
Posts: 100
Joined: Mon Jun 18, 2012 7:24 pm

Re: My Cavalier Turbo ( 2005 to Present )

Post by Yanayaya »

July 2007

The car was taking shape and I was getting her to where I wanted her to be. During its MOT the car failed on the handbrake and this was because the retaining clips "push turn" into the rear dust covers which were corroded and totally knackered. I had to buy new ones at £80 from Vauxhall (probably NLS now) and I fitted them along with reconditioned rear caliper, new pads and discs.

Image
Image
Image
Image
Image
Image

The Fast and Modified show came around again (which lets face it was a jaunt to Edinburgh no matter what way you look at it.) however this time I was running my own website called Tuned Aberdeen (hence the stand my car is on and the fact that we are inside). A lot of these lads branched off in the end and formed their own Japanese car enthusiast's website.
Image
Image
Image
Image
Image
Image
Image
Yanayaya
Registered user
Posts: 100
Joined: Mon Jun 18, 2012 7:24 pm

Re: My Cavalier Turbo ( 2005 to Present )

Post by Yanayaya »

August 2007

I installed an Alloy bottom end pulley...that is all.
Image

September 2007

A then friend of mine got a new DSLR camera and wanted to try it out so he did so on my car which was quite nice. Along with another friend of ours who draped herself over the car 8-) :lol: These pics are the last of the car when everything was..."ok" after this things get dark and rusty....
Image
Image
Image
Image
Image
Image
Image
Image
Image
Image
Image
Image
Image
Image
Image
Image
Yanayaya
Registered user
Posts: 100
Joined: Mon Jun 18, 2012 7:24 pm

Re: My Cavalier Turbo ( 2005 to Present )

Post by Yanayaya »

November 2007

I decided at this point to take the car off the road. The job I held at the time provided a company car and this gave me a chance to actually do some work to the Cavalier. Exciting times however my work focused on the engine and making her as clean as she could be whilst ignoring the cancer that was already starting to take hold of her rear end.

Some time passed. I moved home and the car was in storage, my Cavalier world was on hold.

August 2009
I started purchasing new items for the car which included the then new TX Autosport who had arrived on the scene. I was literally stripping the engine down a component at a time, cleaning, painting, replacing gaskets the works. It was all going quite well. I revitalised the old beaten up KKK16 turbo charger and added some braided oil and water feeds as well. I also added the TX Autosport radiator.
Image
Image
Image
Image
Image
Image
Image
Image
Image
Image
Image
Yanayaya
Registered user
Posts: 100
Joined: Mon Jun 18, 2012 7:24 pm

Re: My Cavalier Turbo ( 2005 to Present )

Post by Yanayaya »

August 2010

Image

It was the year spanning August 09 to 10 that me and my girlfriend moved into our new place which had a gargage and there for the car was moved from one storage location to another albiet a garage were I could get some further work done.

When I came to move the car and started her up to load her onto the back of the trailer I was met with the louded screaming noise on earth from the turbo charger and later investigations found out that the relief valve in the oil pump had siezed. Once the car arrived at my new garage it was pushed into the place and I set about getting a new oil pump and water pump ordered as well as a timing belt kit. I also took the chance to replace the cam belt backing plate as well. The end result was actually better than what I could of hoped for and she looked even cleaner after it was all sorted.
Image
Old Water Pump
Image
Old....everything else
Image
Old cam backing plate
Image
I also bought a new thermostat and housing along with CTS and Sender Gauge.
Image
Image
New oil pump, water pump and cam backing plate all in place.
Image
Image
Image
I installed a second hand power steering pump as my original was screaming a bit (this one is now faulty as well lol)
Image

Due to the extended period of time that the car had been off the road I decided to put her in for an MOT and not surprisingly there were more than just a few problems, in fact there were 3 pages of problems and 2 sheets of advisorys. Oh Shit!

There were problems with the sills, rear chassis leg, under both front arches and also the subframe mounting it was all looking very terminal.
Image
Image
Image
Image
Image
Image
Image
Image
Yanayaya
Registered user
Posts: 100
Joined: Mon Jun 18, 2012 7:24 pm

Re: My Cavalier Turbo ( 2005 to Present )

Post by Yanayaya »

September 2010

And so the work begins, I took the view that you cant lie to yourself with a Cavalier if its rotten its rotten and as an enthusiast it is down you yourself to rectify the problems so with the bad news of the MOT still looming I decided to dismantle the entire rear end of the car and skin the entire rear floor pan back down to bare metal, get it welding and treat the entire area with industrial chemicals and then seal the whole lot of it. Extreme I know but the car at this stage in it's life NEEDS this kind of work if she hopes to see many more years of use.

Image
Image
The extent of ignored rust becomes a reality at this point as does the grip it can hold over your car.
Image
Image
Image
Image
Image

January 2011
The scrub down began with a selection of whire wheels, flip flaps and anti-oxidisation sand paper and the investment into some lab chemicals and rust converters.
Image
Image
Image
Image

The process I opted for consisted of rubbing/grinding an area back down to bare metal, adding some rust conversion gel, scrumming again, cleaning with white spirit, painting with anti rust primer and then finally sealing it.
I met a mobile welder who took the time to repair the many rust holes the car had developed after which I moved in and did my work to finish off.
Image
Image
Image
Image
Image
Image
Image
Image
Image
Image

February 2011
My end result after many months of hard graft on the underside of the car staring at rust.
Image
Image

I took the chance to paint other areas like the cross member and diff.
Image
Image
Yanayaya
Registered user
Posts: 100
Joined: Mon Jun 18, 2012 7:24 pm

Re: My Cavalier Turbo ( 2005 to Present )

Post by Yanayaya »

February 2011
During all this I found time to get my inlet manifold powder coated and fitted some new seals and washers etc.
Image
Image
Image
Image
Image
Image

At the end of February disaster (for me) struck when the garage I had was being let out to another person and I needed to find a home for the Turbo until it could be put in for an MOT. So a call to my mate in Methlick and the Cavalier was moved to my mates house until I could finish off what I was doing. granted it was a 30 min drive away but beggers cant be choosers.
Image
Image
Arriving in Methlick
Image
Image
Yanayaya
Registered user
Posts: 100
Joined: Mon Jun 18, 2012 7:24 pm

Re: My Cavalier Turbo ( 2005 to Present )

Post by Yanayaya »

June 2011
Between the arrival at Methlick my time on the car became quite spread out but the goal was simple, get the thing in for an MOT. After a lot of work, much beer and a stern tan from being out in the country the car was ready for its MOT. These images are from the days prior to "the big day" at Methlick Motors.
Image
Image
Image
Image
Image
Image
When the car arrived for it's MOT it ended up in the garage for about 4 days to get it through as the car whilst up to temperature started loosing water (which in the end turnd out to just be a loose jubili clip on the water pipe on the rear of the block). Eventually however they got it through the MOT.

Image
After driving her home she could now live on the street instead of hiding away from everyone which was the best feeling in the world.
Image
The came a well deserved wash (queue gay images of washing equipment just for Dave)
Image
Image
Image
Image
Image
Yanayaya
Registered user
Posts: 100
Joined: Mon Jun 18, 2012 7:24 pm

Re: My Cavalier Turbo ( 2005 to Present )

Post by Yanayaya »

July 2011

The old girl is still suffering from an array of problems but at least they are (slowely) becoming fewer and fewer.

Fan and wiring
The fan problem that I was talking about seems to be a bad earth which I remedied by strapping two earth harnesses to the car. One from the gearbox to the battery and one from the alternator housing to the chassis. This seems to have resolved the problem along with a new battery from Vauxhall. So yeah...FIXED.
Image

Turbocharger
The Turbo and its inconsistent yet loud whistle have been diluted somewhat with the realisation that the end cap of the turbo's vacuum hole (recirc valve) had become open due to the perished silicone that had originally been put in there, even with the alloy ring in place air was still getting out through it. The plugging of said hole and the sealing of the end cap has been carried out which reduced the noise from the turbo but it's clear that the strange "air leak" type noise is still there.

End of the month see's a new exhaust gasket and a second hand turbo from Cemex getting installed and then I will take another look at her.

Gearbox and Transmission
Noisey and that's all there is too it. I run my turbo (at the moment) without the prop shaft in or fuse 19 for the simple reason I want a locked box and the hassle of the standard setup is just not something I can play with at the moment on top of everything else. Anyways the gear linkage is out of alignment so I need to reset my linkage, she is crunching into most gears and the box itself is a touch whiney and there is a really odd grating noise coming from it (which has always been there its not something new). End of the month Im buying all the rebuild parts for the linkage and I also will be pulling off a gearbox oil change. I know this wont cure what is essentially an F28 that's worn out to fudge but its a good start.
Yanayaya
Registered user
Posts: 100
Joined: Mon Jun 18, 2012 7:24 pm

Re: My Cavalier Turbo ( 2005 to Present )

Post by Yanayaya »

August 2011

Today was my day off work and I thought that I would fit the turbo charger I had bought from Cemex which lucky had arrived today as well. I spend most of the day changing parts over like the actuator and replacing the water and oil washers and inlets/outlets; other than that I was looking for dirt and grit in the turbo charger and to my horror there was a lot in there but it stopped shy of the turbine wheel itself. I very carefully cleaned it out with a long cotton bud bit by bit and then turned the turbine by hand at the opposite end to check there was nothing in there that would affect it, all seemed clear.
Image
Image
Image
Image
Image
Image
I then rubbed back the exhaust manifold side for the sake of the gasket and getting a good clean join.
Image
Image
Towards the end of my day I got to the point where I was ready to prime the turbo and get her started, so I pulled off the coil and removed the fuel pump relay and started to turn here, there was a strange metallic noise like something was vibrating, I stopped and inspected the bay...I couldn't see anything so I started turning her over again, I got the same noise. Scratched my head, turned her over again and just as I backed off the ignition I hear a big metallic noise.

I checked the timing belt area and right down the bottom by the crank pulley a jubilee clip had wedge itself between the timing belt and the timing belt case. :o :o :o :o :shock: :shock: :shock: :shock: Lucky I had only be turning the engine over but I got my torque socket out and jacked the car up removing the alloy bottom end pulley and exposing the crank pulley with the jubilee clip wedged on it. Using the socket I slowly turn the engine by hand freeing the jubilee clip for the belt however the belt has been cut almost all the way through and is held together by a shoe lace width of remaining belt. I took the opportunity to check that the engine hadn't managed to jump a tooth because of this however I am pleased to say that all the timing marks still line up perfectly. This was such a close call I cant even begin to describe how brown my pants are after that one. I really need to wake up :?
Image
Image
Image
Yanayaya
Registered user
Posts: 100
Joined: Mon Jun 18, 2012 7:24 pm

Re: My Cavalier Turbo ( 2005 to Present )

Post by Yanayaya »

September 2011

I moved house again :)

Oh come on what the fudge! I'm glad to have the Cavalier back on the road but since its return it seems to have been the target of some really shitty abuse. Originally it started as a wing mirror getting kicked of which is no big deal and where I live that is normal to be honest. Then it became both wing mirrors and eventually I came out to this:
Image
Image

She is really drawing attention ... but the wrong kind. :(

What is even more annoying is that whoever did this, stopped......found where he left off then started from that point again just to ensure he got the ful length of the car, the jealous pigs. :evil:
Yanayaya
Registered user
Posts: 100
Joined: Mon Jun 18, 2012 7:24 pm

Re: My Cavalier Turbo ( 2005 to Present )

Post by Yanayaya »

January 2nd 2012

So then the start of a new year and I am already charging ahead and getting some general maintenance and work carried out ( as you will no doubt noticed from my mass of tech threads asking for some info ). With my never ending search for answers to my bad earth plauging me at the end of summer last year I have turned my attention to getting the Cavalier running as sweet as it can and not only that but also handling better that it is at the moment.

So to kick start 2012 I bought new alloys as you know (end of 2011) and now I am moving to buy new tyres and suspension. The Koni Adjustables are so old now and to be honest look like that are stuck solid given the arse of the car being as high as it is on the offside.

The engine earth problems "appears" to have been sorted with the inclusion of a new earth strap between the gearbox and the battery and also the replacement of the battery light bulb to complete the charging circuit as well as a brand new battery from vaux. Its not perfect and the engine does seem to react to every switch you turn on and off. Until I can get someone to have a really good look I will have to live with it.

The starting problem is still there which means that once the car has been driven for a good length of time and the engine is up to optimal running temperature if you stop and turn her off you have a 20% chance she will actually start again. You have to jump start the car with leads to get her to start and this is regardless of how much power is in the battery. All fingers are pointing to the starter motor and this is now due for replacement (£55 +vat from Auto Vaux).

My thoughts surrounding the coil possibly adding to a not to fine running engine have been quashed and is seems that a compression test will be happening just to get an idea of how healthy she is on the inside, seeing as this has never been done by me since I bought the car I suspect that then time is right and also worth. Just awaiting figures for comparison and then it will be getting done.

Busy times but this year I want to get this engine into a stronger running position than it is, perhaps I expect to much from an older engine but on hearing her idle you can just tell that she's just not quite right. As a top off we have all the random noises she makes as well which are in need of attention.

Finally.......the air leak needs to be sorted --> http://www.youtube.com/watch?v=xSY6NzlVsP4
Yanayaya
Registered user
Posts: 100
Joined: Mon Jun 18, 2012 7:24 pm

Re: My Cavalier Turbo ( 2005 to Present )

Post by Yanayaya »

January 5th 2012

My original shopping list has now changed since I originally wrote it following a compression test that I did. The results were a little dissapointing as I discovered that cylinder #2 has low compression compared to the others.

Ref: ( http://www.cavalier-turbo.com/forum/vie ... =20&t=1754 )

Results
Cylinder 1: 170 psi
Cylinder 2: 138 psi
Cylinder 3: 170 psi
Cylinder 4: 180 psi

After a brief discussion with everyone here there is still a wet test to be carried out just to assist with identifying if this is piston or valve related. I could carry out a leak down test but for the sake of speed and available resources I am just going to carry out a wet compression test and re-check the results of cylinder #2.

No matter what happens the head is going to have to come off and that's one of those really unforgiving jobs that knowing my luck will cause more problems than it cures. It is however a good chance to narrow down those really strange noises plauging the car over the past year as well as checking the general internal health of the engine and its components. There is no weather for this to happen at the moment which is frustrating but for the time being I am trying to get a list of parts and prices together for everything I will need (gasket mainly). There was the suggestion of a broken valve spring causing the problem but everything is speculation until the engine is cracked open and I see whats going on under there.

Oddly the car runs sweet as a nut even with this compression problem, no smoke, drives like a dream but on idle there is that hint of something not being quite right and I even started talking about the ignition system again with Dave but promptly realised that my problems ran a little deeper than that. Alas 2012 is shaping up to be painful and we are not even at the MOT side of the year yet..... :clap:
Yanayaya
Registered user
Posts: 100
Joined: Mon Jun 18, 2012 7:24 pm

Re: My Cavalier Turbo ( 2005 to Present )

Post by Yanayaya »

January 9th 2012

Image
Not really having the best of times at the moment, it has been a mixed back of positives and negatives. The negatives are that the car does appear to have a faulty or worn out piston ring requiring the engine to be stripped down and the ring replaced and I have no space or working area that I can do that (the street outside my house is a ‘no no’).
The positives are that this problem not only allows me to claw back the engines performance but it also allows me to replace some of the worn out engine components that are nestled in there.

What I am worried about is that at the very least this problem is a piston ring but once the engines in pieces I might discover a whole load of problems from a damaged piston to head gasket issues not to mention my insatiable need to clean and replace stuff while it’s in bits. Personally I am of the opinion that if I’m in there anyway I may as well to all the piston rings not to mention lapping all the valves and cleaning things up. Perhaps that’s a little over fussy I don’t know.

The wet and dry test results have pointed directly at a piston related problem however I would never rule out the issue still being a valve or something else and this is why I think I should just go all out and get things cleaned up and replaced (where appropriate).

Results (DRY)
Cylinder #1: 170 psi
Cylinder #2: 138 psi
Cylinder #3: 170 psi
Cylinder #4: 180 psi

As you can see cylinder two showed that it is having problems, a further WET test was carried out to identify whether this was piston related or valve related.

Results (WET, Retest)
Cylinder #2: 140 psi (Dry)
Cylinder #2: 163 psi (Wet)

The hike in pressure when oil was added to the cylinder is typical of a faulty piston ring (according to Haynes anyway.) This has now led me to start the ball rolling and get the required parts in to carry out all the work.

I didn’t want to mess around and so this weekend I kick started my work and started purchasing all the fluff I’ll need to do this job, my purchases ranged from lapping tool and compounds to varies degreasing and cleaning agents and some tools like Flex-Hone etc. I will have to get as much together as I can as to avoid starting the job and then realising I am missing some vital things.

In all honesty this is the first time I have personally attempted this level of work (i.e. down to the pistons) and so any advice on parts, techniques or considerations to make would be very welcome at this point. More details to follow as this project pans out.
Yanayaya
Registered user
Posts: 100
Joined: Mon Jun 18, 2012 7:24 pm

Re: My Cavalier Turbo ( 2005 to Present )

Post by Yanayaya »

January 30th 2012

I ordered a good majority of parts for my engine repair last week and I am expecting delivery on Wednesday.
  • Inlet manifold gasket.
  • A set of valve Stem Seals.
  • Tophat to throttle body gasket.
  • Throttle body to inlet manifold gasket.
  • A set of standard piston rings.
  • Big End Shells.
  • Thermostat housing gasket. To head.
  • Thermostat housing gasket. Housing to housing.
  • Cam Cover gasket.
  • Oil pickup pip o-ring.
  • Cam shaft oil seals.
  • Exhaust manifold gasket.
  • A set of Injector seals.
  • 1.9mm Steel Head Gasket.
I still have a good few items to buy not to mention tools but I think this is a good start. Weather permitting I may get the head off sometime soon and that will go away to be skimmed and pressure tested at my local head specialist.

The condition of the pistons and the head itself will become all too apparent once I separate them and I'll get pictures of them up as soon as I can.

Image
Yanayaya
Registered user
Posts: 100
Joined: Mon Jun 18, 2012 7:24 pm

Re: My Cavalier Turbo ( 2005 to Present )

Post by Yanayaya »

March 8th 2012

Holy crap an update. Well not much of an update as not a lot has happened yet, march see's the coupe needing a full set of discs and pads and also an MOT however I did get an opportunity to try and address the failure to start after she is warm issue and it comes in the form of this starter motor that I bought from Auto Vaux. On inspection i thought it was new but once I found that big sticker on the side of the box I came crashing down as it is a refurb. Costs for this part where approx £54. Getting installed this weekend and see if it makes a difference.

Image
Image
Image
Image
Yanayaya
Registered user
Posts: 100
Joined: Mon Jun 18, 2012 7:24 pm

Re: My Cavalier Turbo ( 2005 to Present )

Post by Yanayaya »

March 12th 2012

After last week and running the old girl to and from work I noticed a knocking had developed at the front near side wheel and at speed there was an excessive amount of wobble coming through the steering wheel. I thought that perhaps wither the wheel had thrown a weight or the was a bush gone on the lower arm. Inspection revealed that the 16mm bolt that sits horizontally at the front of the lower arm bolting it to the sub frame seems to have stripped its threads and was working its way out.

I am not 100% sure about whats happened and my initial reaction was that the bolt had snapped so I tried tighten it up but it just turned and nothing happened. To find out if the bolt had actually snapped I put my finger through the small whole hole in the sub frame so I can feel the end of the bolt and when I turned it the end turned as well so I don't believe it has snapped but I do think that threads have stripped. I tried to wind the nut out of course to check it and also in preparation for putting the replacement in but although it wound back it wouldn't come out, it now looks as if I am going to have to take the entire strut to pieces to get right in about this bloody bolt and get it out. /sigh

I also changed the starter motor. http://www.cavalier-turbo.com/forum/vie ... 723#p26723
Post Reply