James' 1995 Manual CDX V6 Saloon

Show off your pride and joy! All Mk3 Cavaliers are welcome (please post only one thread per car)
User avatar
Robsey
Club Admin
Posts: 10619
Joined: Fri Dec 12, 2008 1:42 pm
Location: East Manchester

Re: James' 1995 Manual CDX V6 Saloon

Post by Robsey »

I believe I will miss the Cav's departure on Sunday.
I hope you like what you find James.

Image

It has been a joy to work on this car...
even when it put up a fight, or when things didn't quite go as expected.
But that is the Cavalier way. :D
cavalier1990
Registered user
Posts: 1463
Joined: Wed Jun 29, 2011 9:15 pm
Location: Paisley, Scotland

Re: James' 1995 Manual CDX V6 Saloon

Post by cavalier1990 »

That is awesome work done there, really enjoyed reading over it and seeing the end result. Sure James will be chuffed :thumb
User avatar
James McGrath
Club Admin
Posts: 2896
Joined: Tue Aug 11, 2009 11:35 am
Location: East Sussex

Re: James' 1995 Manual CDX V6 Saloon

Post by James McGrath »

I'm picking her up tomorrow :D
Really excited, can't wait to see it!
3cav3 wrote: Wed Mar 01, 2023 7:15 am Really feel for James having to sell his house, my fixed rate mortgage is due to expire in August, if I hadnt over paid it when I couldn't spend much during lockdown, I'd too probably have to consider selling up. Its still going to really hurt.
Hopefully the cracking job on the Cav will help ease the pain.
It's OK. I've had a long time to think about it. Now it's actually sold, it's nice not to worry about it.
We're going to buy something else, something a lot cheaper but it will be all ours and not shared ownership like before.
User avatar
Robsey
Club Admin
Posts: 10619
Joined: Fri Dec 12, 2008 1:42 pm
Location: East Manchester

Re: James' 1995 Manual CDX V6 Saloon

Post by Robsey »

It still amazes me how he achieves that super glossy paint finish.
And a perfect paint colour match.
Especially as the 'booth' is a home-brew affair made by Troy himself.

I am sure that with the paint job,
and the repairs to the ignition system and trailing arm bushes,
the car should look, feel, and sound the best it has for a few years.

UPDATE - I have added the actual dates to the posts to provide a true timeline.
User avatar
Mk3alan
Registered user
Posts: 633
Joined: Sun Mar 09, 2014 8:40 pm

Re: James' 1995 Manual CDX V6 Saloon

Post by Mk3alan »

Wow what a story but what a happy ending! Bet your excited and will enjoy the journey back to your new home.
I was in Tonbridge today and could have popped in on my way back!

Alan
User avatar
Robsey
Club Admin
Posts: 10619
Joined: Fri Dec 12, 2008 1:42 pm
Location: East Manchester

Re: James' 1995 Manual CDX V6 Saloon

Post by Robsey »

James McGrath wrote: Sat Mar 04, 2023 11:25 pm I'm picking her up tomorrow :D
Really excited, can't wait to see it!
I know it was a long drive back... 300 miles-ish. :shock:

I hope she made you smile for every mile. :D
User avatar
Robsey
Club Admin
Posts: 10619
Joined: Fri Dec 12, 2008 1:42 pm
Location: East Manchester

Re: James' 1995 Manual CDX V6 Saloon

Post by Robsey »

I hope James doesn't mind me sharing,
but he sent me a couple of his usual brochure style photos of the car back at the McGrath Manor.

Beautiful Pictures.. :cool :love

Image

Image
3cav3
Registered user
Posts: 1423
Joined: Sun May 22, 2016 6:07 pm

Re: James' 1995 Manual CDX V6 Saloon

Post by 3cav3 »

Looks stunning. With that back drop it could almost be factory fresh from the 1990s again, ( if the skoda is edited out).
User avatar
Mk3alan
Registered user
Posts: 633
Joined: Sun Mar 09, 2014 8:40 pm

Re: James' 1995 Manual CDX V6 Saloon

Post by Mk3alan »

More like 1690's! Nice one James.

Alan
User avatar
Robsey
Club Admin
Posts: 10619
Joined: Fri Dec 12, 2008 1:42 pm
Location: East Manchester

Re: James' 1995 Manual CDX V6 Saloon

Post by Robsey »

3cav3 wrote: Thu Mar 16, 2023 10:18 am ( if the skoda is edited out).
Let it be so!

Image


By the magic of my phone eraser. ;)
3cav3
Registered user
Posts: 1423
Joined: Sun May 22, 2016 6:07 pm

Re: James' 1995 Manual CDX V6 Saloon

Post by 3cav3 »

Thats much better. I've nothing against skodas however now the shot could easily be taken in 1994 again as the car looks so fresh and clean, and is a real credit to James.
User avatar
James McGrath
Club Admin
Posts: 2896
Joined: Tue Aug 11, 2009 11:35 am
Location: East Sussex

Re: James' 1995 Manual CDX V6 Saloon

Post by James McGrath »

Thanks for all the wonderful comments and a very big thank you to Rob for writing it all up for me, it's very much appreciated!

Sorry I haven't made any posts sooner, I was on holiday when I picked the car up from Troy and have been a bit busy since. Can't believe it's been 4 months though. :?
Needless to say, I'm over the moon with the result, looks absolutely stunning and have total peace of mind knowing the quality of the work.

3cav3 wrote: Thu Mar 16, 2023 10:18 am Looks stunning. With that back drop it could almost be factory fresh from the 1990s again, ( if the skoda is edited out).
Love the edited photo without the cars in the background :thumb
How about these for 1990s style images?

Image

Image

Image

Image

Image

Image

Image


Shot on Kodak ColourPlus 35mm colour film with a Asahi Pentax Spotmatic. More 70s looking than 90s but all stuff that would have been in wide use in the 90s.
I love taking photos on real film, you get a feel that can't be replicated in digital. I like to take a roll of film with me when I go on holiday. I would do it more often but it's just so expensive these days.

Anyway, I have an amazing time driving it along the wonderful roads in Lincolnshire. Replacing the ignition amplifier made a big difference.

Since then, I've been trying to keep it as clean as possible under a car cover. So far I've been reasonably successful. I've only washed it twice since I got it back from Troy, just been wiping it down with microfibres before I put the cover on.

I've got two more major things I really want to get done on this car:
First the car seat - update on that coming soon!!
Next the steering rack which is worn out.

Hopefully I'll get both done by the end of the year.
User avatar
Robsey
Club Admin
Posts: 10619
Joined: Fri Dec 12, 2008 1:42 pm
Location: East Manchester

Re: James' 1995 Manual CDX V6 Saloon

Post by Robsey »

That is the bonus of modern phones, they have fantastic tools like spot eraser, white balance, and other things that allow you to tweak pictures.
I cannot photoshop for toffee, but for me, this is near enough without losing the original concept.

I am glad you are happy with the car. As said previously, it was a blast to work on. It was also great working along side Troy.
I felt more useful on this car, because it was reminiscent of my last 20 years of tinkering.
User avatar
James McGrath
Club Admin
Posts: 2896
Joined: Tue Aug 11, 2009 11:35 am
Location: East Sussex

Re: James' 1995 Manual CDX V6 Saloon

Post by James McGrath »

Well, you're very welcome to work on the car any time Rob!

Here are some more images of the work up close:

Image

Image

Image

Image


And some more Brochure-esque ones:

Image

Image

Image
User avatar
James McGrath
Club Admin
Posts: 2896
Joined: Tue Aug 11, 2009 11:35 am
Location: East Sussex

Re: James' 1995 Manual CDX V6 Saloon

Post by James McGrath »

Right, so if you've been following this thread for a while, you'll know that the drivers seat had become the unfortunate victim of a lamentable dehumidifier related accident.
Squeamish readers look away now!

Image


Of all the soul destroying mishaps that have happened to my cars over the years, I think this has been one of the worst, especially considering how good the seat was before the accident. It wasn't something I could put out of my mind either, as my buttocks was instantly reminded of the fact the moment I sat down, and would remain conscious of it for the remainder of any journey. In other words, it was extremely uncomfortable.
Time to do something about it.

I wasn't too keen on the idea of buying another seat. For one, they are quite hard to get hold of and normally only sold in complete sets. Meaning I'd have to break up a set to make my interior good, and potentially leave myself with 4 redundant seats to store/sell on.
No, a far better option was to repair my existing seat; less waste and more responsible on the dwindling parts supplies.

Only downside, cost. Not going to lie, this was expensive, £600 incl. VAT! :shock:
So I've had to save up; took me about 6 months to put enough dosh aside for this, but at last the day came when it was time to get to work.

Removing the seat:
Following the Haynes book of lies, the first step is to remove the seat rail cover, held in place by the single screw on the front edge:

Image


This exposes the safety belt pre-tensioner system...

Image


...Which can be deactivated by inserting the provided safety tab, thusly:

Image


Think this is such a great feature by the way. Just when I think I can't be more impressed with the Cavalier's design, I find this sitting under the seat.
Such a useful thing to have attached on the spring for anyone to use. I get the feeling that only 'qualified service engineers' would have access to such a thing on modern cars.

Anyway, next remove the rail trim on the rear corner, using a screwdriver to carefully release the tabs:

Image


Then it's a simple matter or taking out the four 13mm bolts that hold the seat in place.
I say simple, but one of the bolts was stuck fast on my seat and it took me a good 30 minutes to get it out!

Once the seat is removed, you are now free to ponder at all the dirt that has accumulated under the seat over the last 3 decades.
After owning the car for 7 years now, I'm amazed at how much dog hair I still find left over from the previous owner!

Image


Certainly very roomy with no seat to get in the way!

Image


Inspecting the seat:

Image


Build date of 27th April 1995:

Image


Noticed a bit of rust on the seat rails, so these were given a good wire brushing and a coat of Bilt Hamber Hydrate-80:

Image

Image


I also lubricated the rails and height adjust mechanism while I was at it.

Then it was off to the upholsterer!

Three days later, I got a call to say it was all done! :love


Image


Refitting the seat took no time at all. Here's another photo of that small plastic tab that appeals to my sense of order and my appreciation of logical intelligent design so much:

Image


The end result:

Image


I'm a very happy man :D
User avatar
Robsey
Club Admin
Posts: 10619
Joined: Fri Dec 12, 2008 1:42 pm
Location: East Manchester

Re: James' 1995 Manual CDX V6 Saloon

Post by Robsey »

I presume it was one of the rear bolts that played hard to remove... I had removed the front two bolts, so that we could lift the carpet for the welded floor repair.

That is the down-side of leather upholstery.
It is damned expensive to have repaired.
It is looking very tidy now without the wavy piping.

Are you missing your seat slider handle, or was that only removed for the upholstery.?
I don't recall it being missing in the unit...
User avatar
James McGrath
Club Admin
Posts: 2896
Joined: Tue Aug 11, 2009 11:35 am
Location: East Sussex

Re: James' 1995 Manual CDX V6 Saloon

Post by James McGrath »

Yeah, it was the rear left one that was stubborn. I was worried about breaking the bolt at one point. Kept making a clonking noise as I turned it.
I tried being more gentle at first, undoing it a bit then tightening it again to ease it out. That didn't really work. Just lots of WD-40 and a bit of brute force and ignorance got it out in the end.

Yep, I removed the handle so it wouldn't go missing. It's back on now.
User avatar
James McGrath
Club Admin
Posts: 2896
Joined: Tue Aug 11, 2009 11:35 am
Location: East Sussex

Re: James' 1995 Manual CDX V6 Saloon

Post by James McGrath »

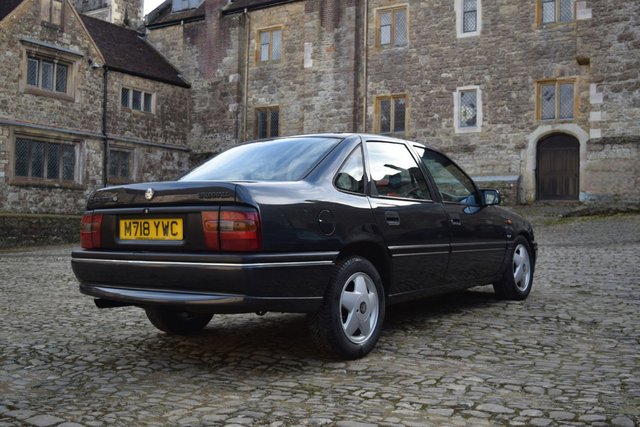
Sorry for the lack of posting recently. There's seems to be a decreasing amount of spare time as I get older. What spare time I have I've been indulging my other long standing hobbies, maybe I'll post something in my mega thread about that. Cars have definitely not been forgotten about however, and I'm still just as interested as ever.

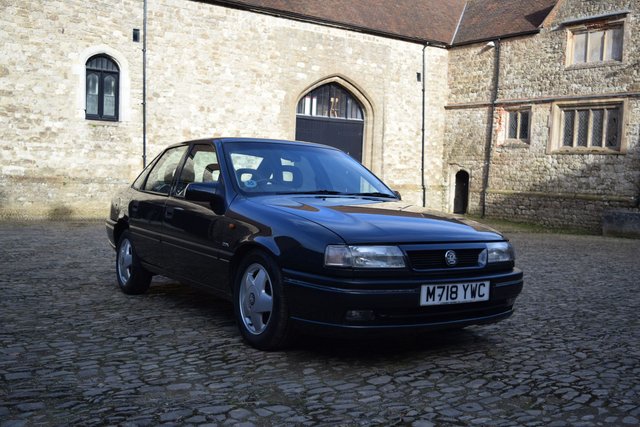
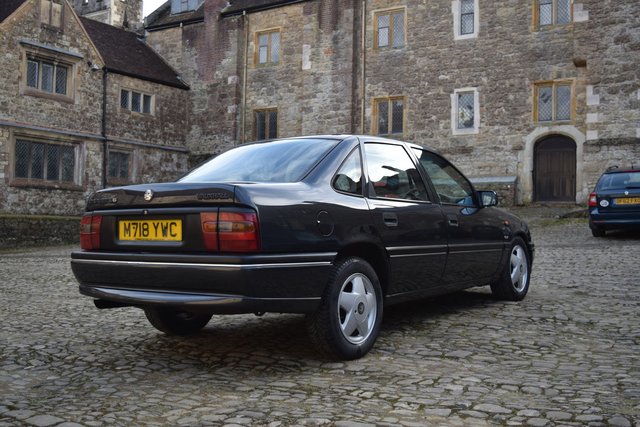
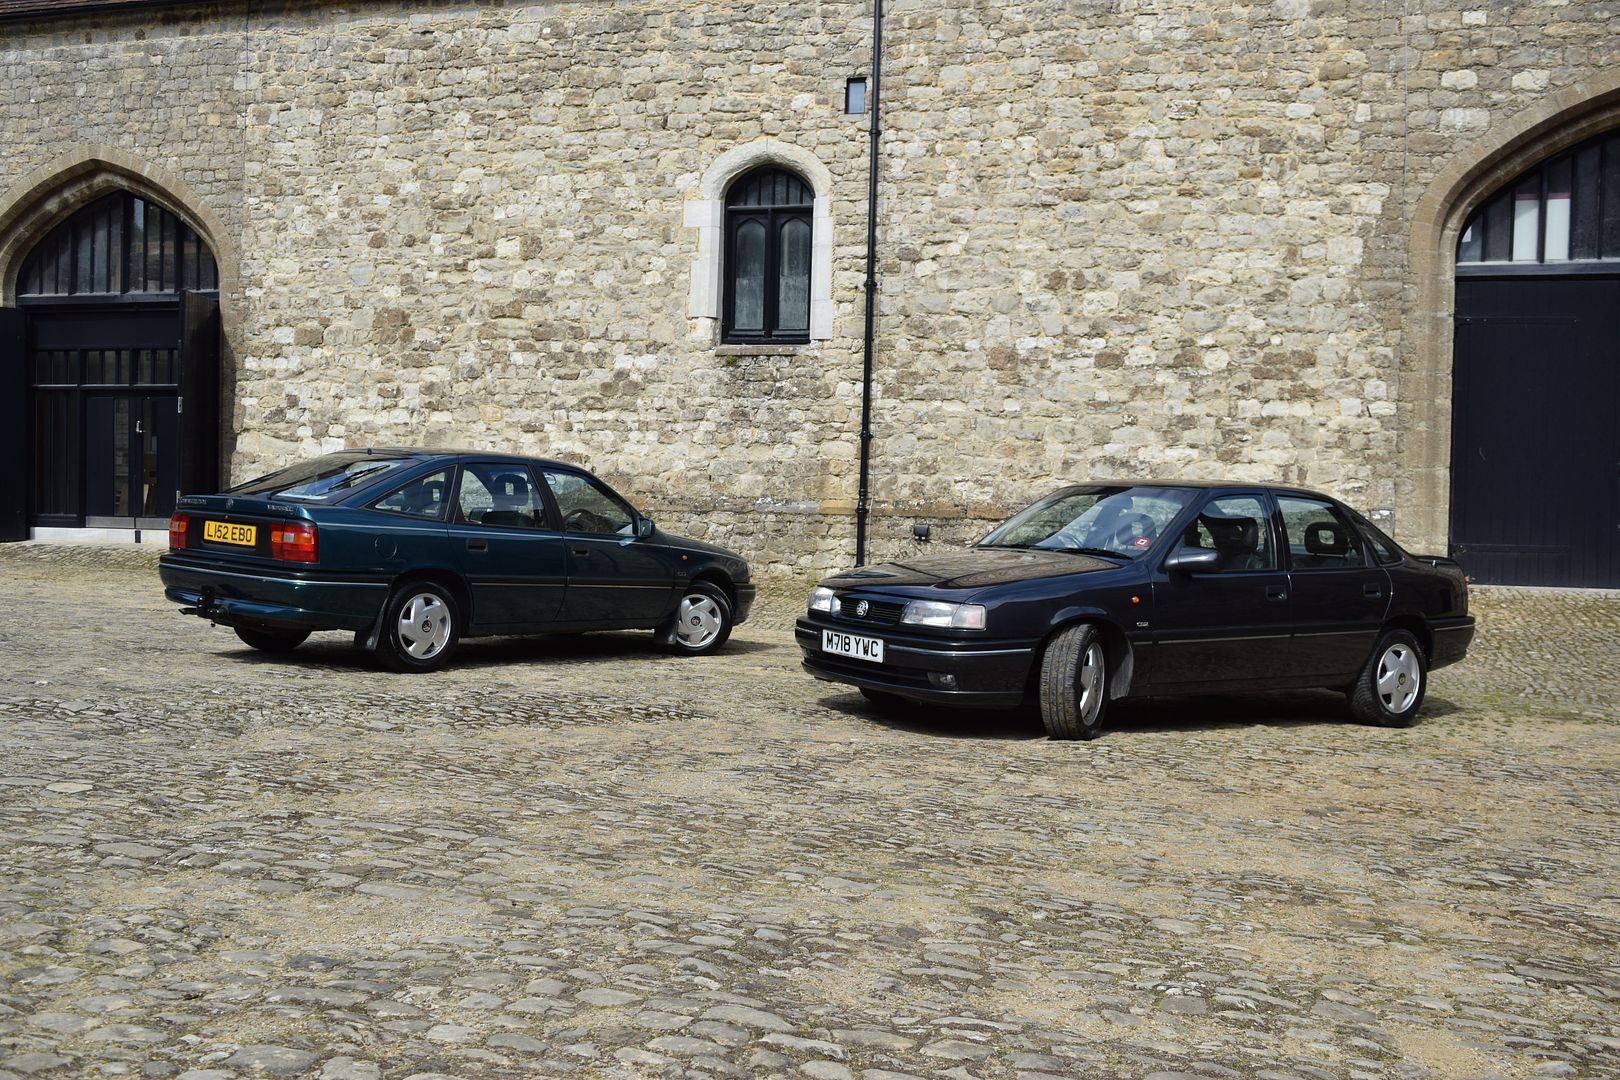
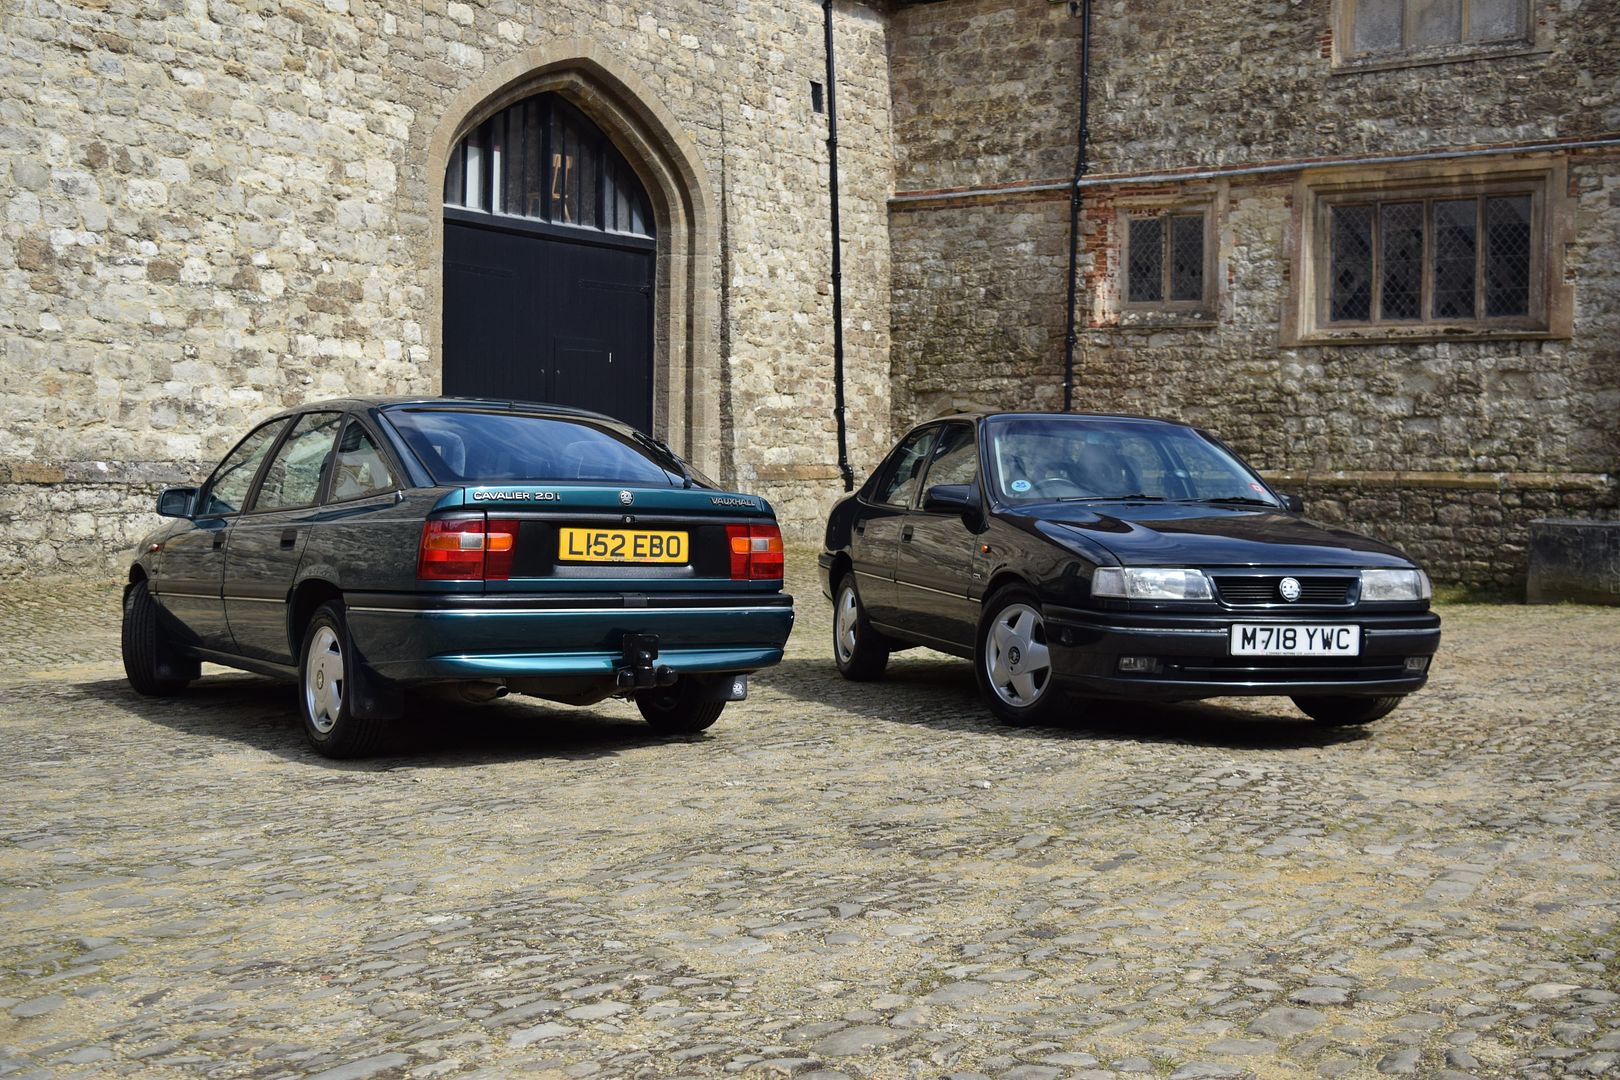
Since spring this year, the V6 has actually been my daily driver. Completely bonkers in the middle of a fuel crisis but I didn't have much choice. We were using my mother in law's Smart car for a time but it was made quite clear that I am only allowed 2 cars here at Knole. So the choice was get rid of one of the Cavaliers or get rid of the Smart car, so it was obvious which one had to go!

To be honest, I don't do very much driving these days, one of the benefits of living in the same building that I work in!
LEBO, Lizzie's Green Cavalier CD however, does take a bit of a hammering. It's the main family car and what she uses for her daily 10 mile commute to work and to drop off/pick up William from nursery every day in heavy traffic. Quite incredibly really considering it's now 29 years old.

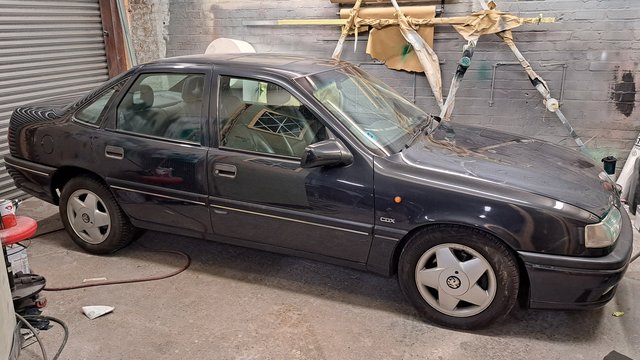
Anyway, I have done a few minor jobs on the V6 since my last post. Firstly, I had a bit of bother with my alarm going off for no apparent reason.
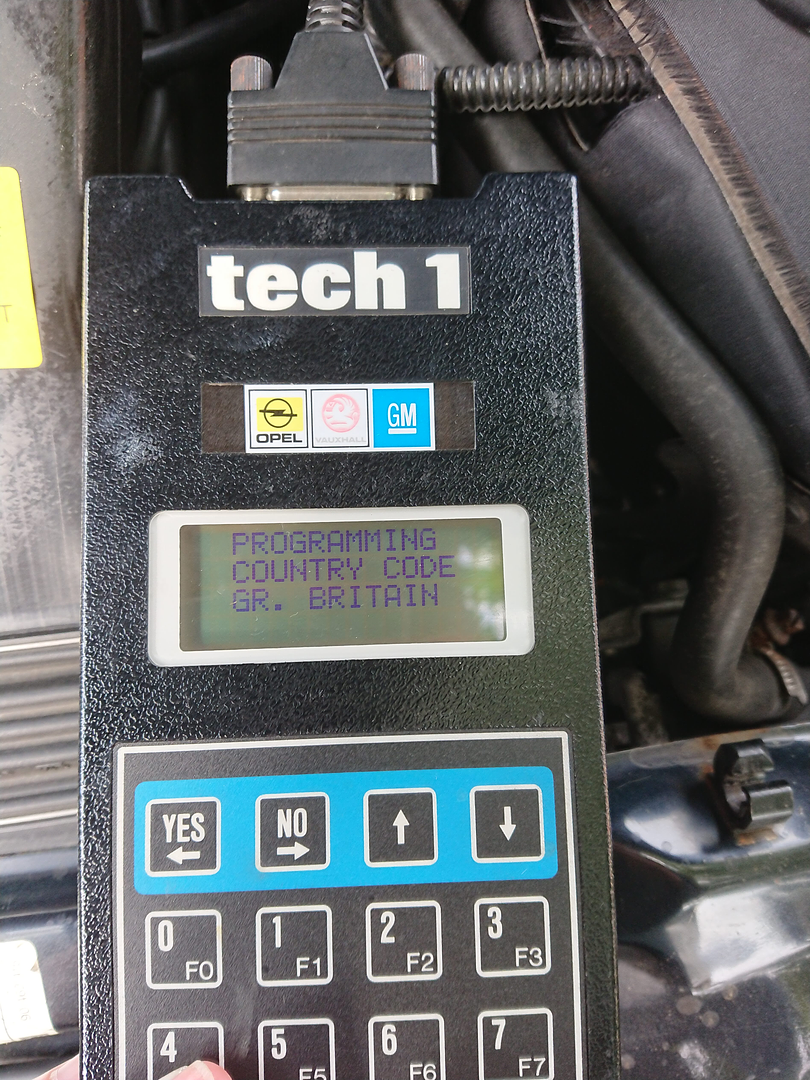
Diagnosing this sort of issue can be troublesome and it's these situations that I'm really thankful for my Tech1 unit. All I had to do was plug it in and look up what set the alarm off. There were about a dozen codes stored on the alarm ECU, all of which were the same. It was the ultrasonic sensor which was triggering an alarm every time. It definitely wasn't cobwebs setting it off so I went on the hunt for a replacement unit.

I have actually replaced this very sensor before, back on page 10 of this thread here, but last time I got one second hand and in the pre-facelift champagne colour. Luckily, one was listed on eBay for a decent price. Unlike the last one I replaced, it was the right grey colour too:
New left, old right:

Image


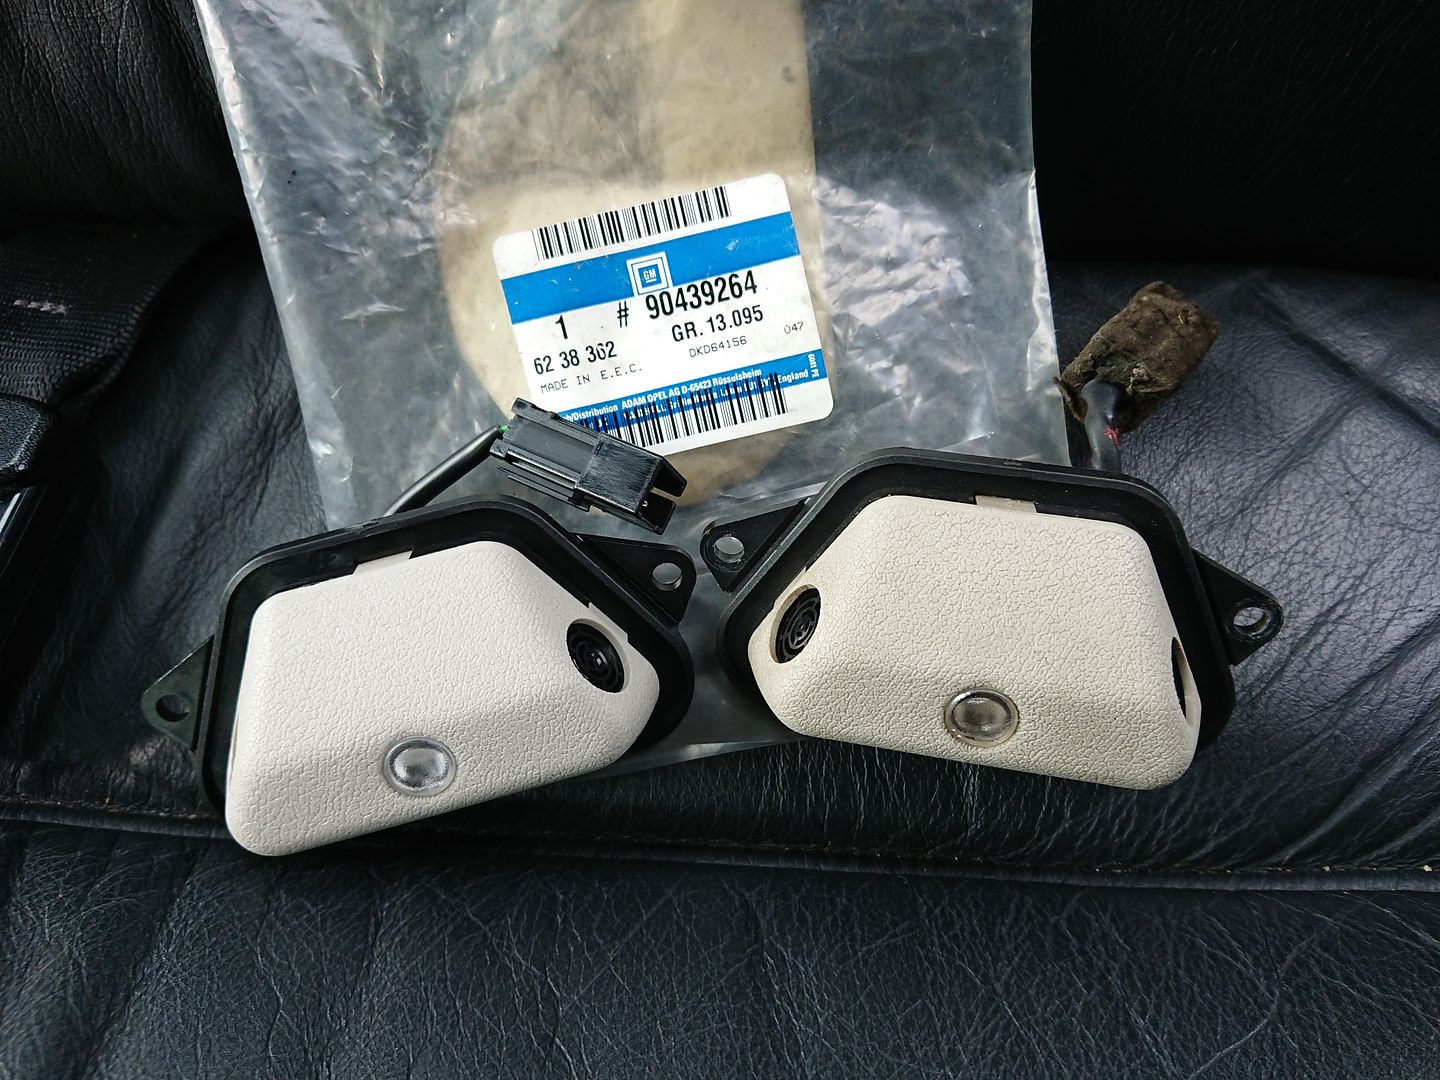
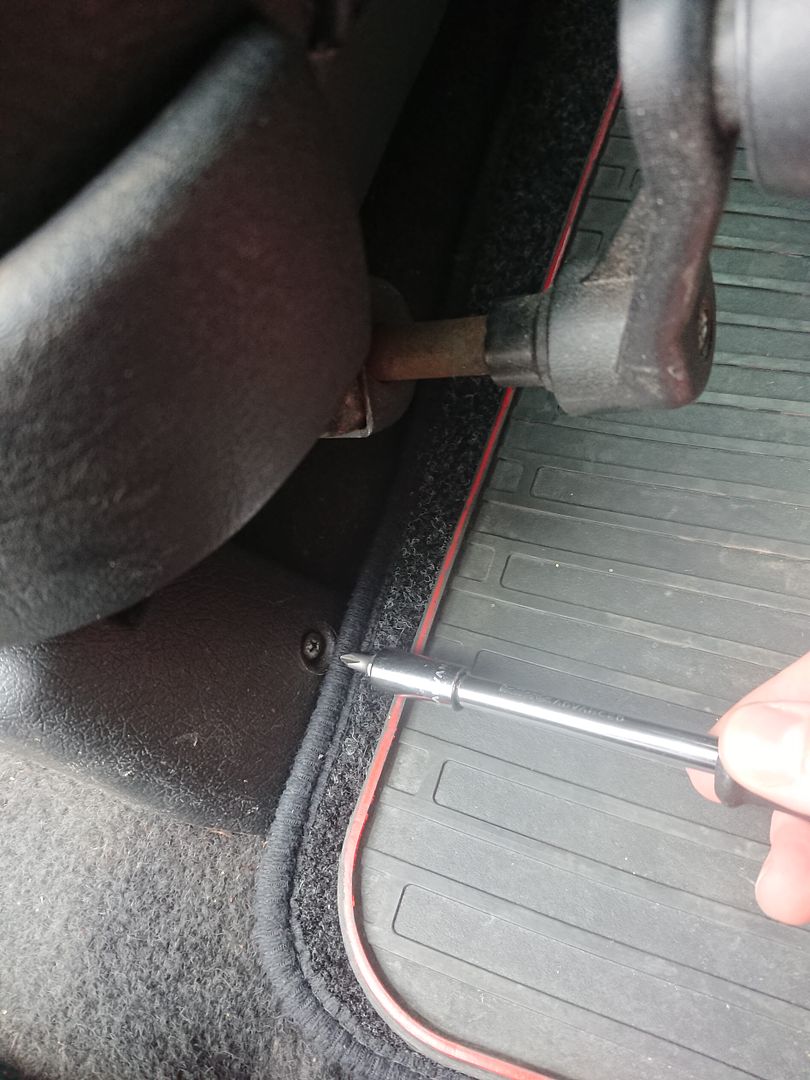
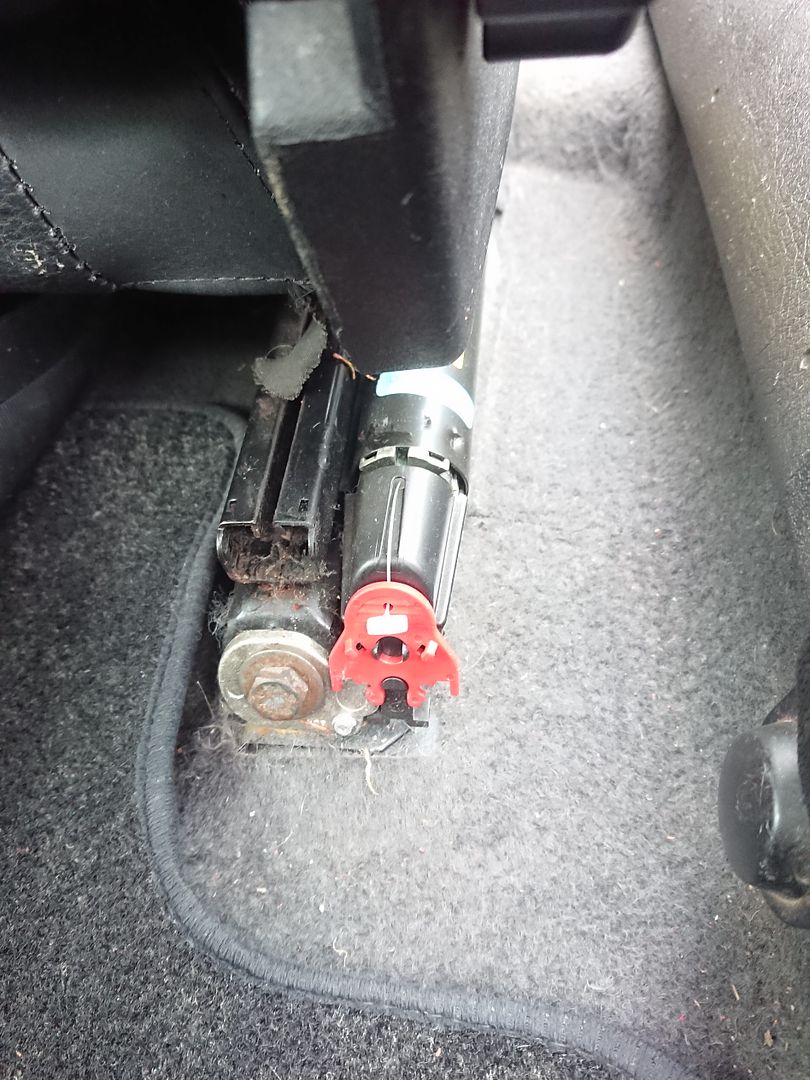
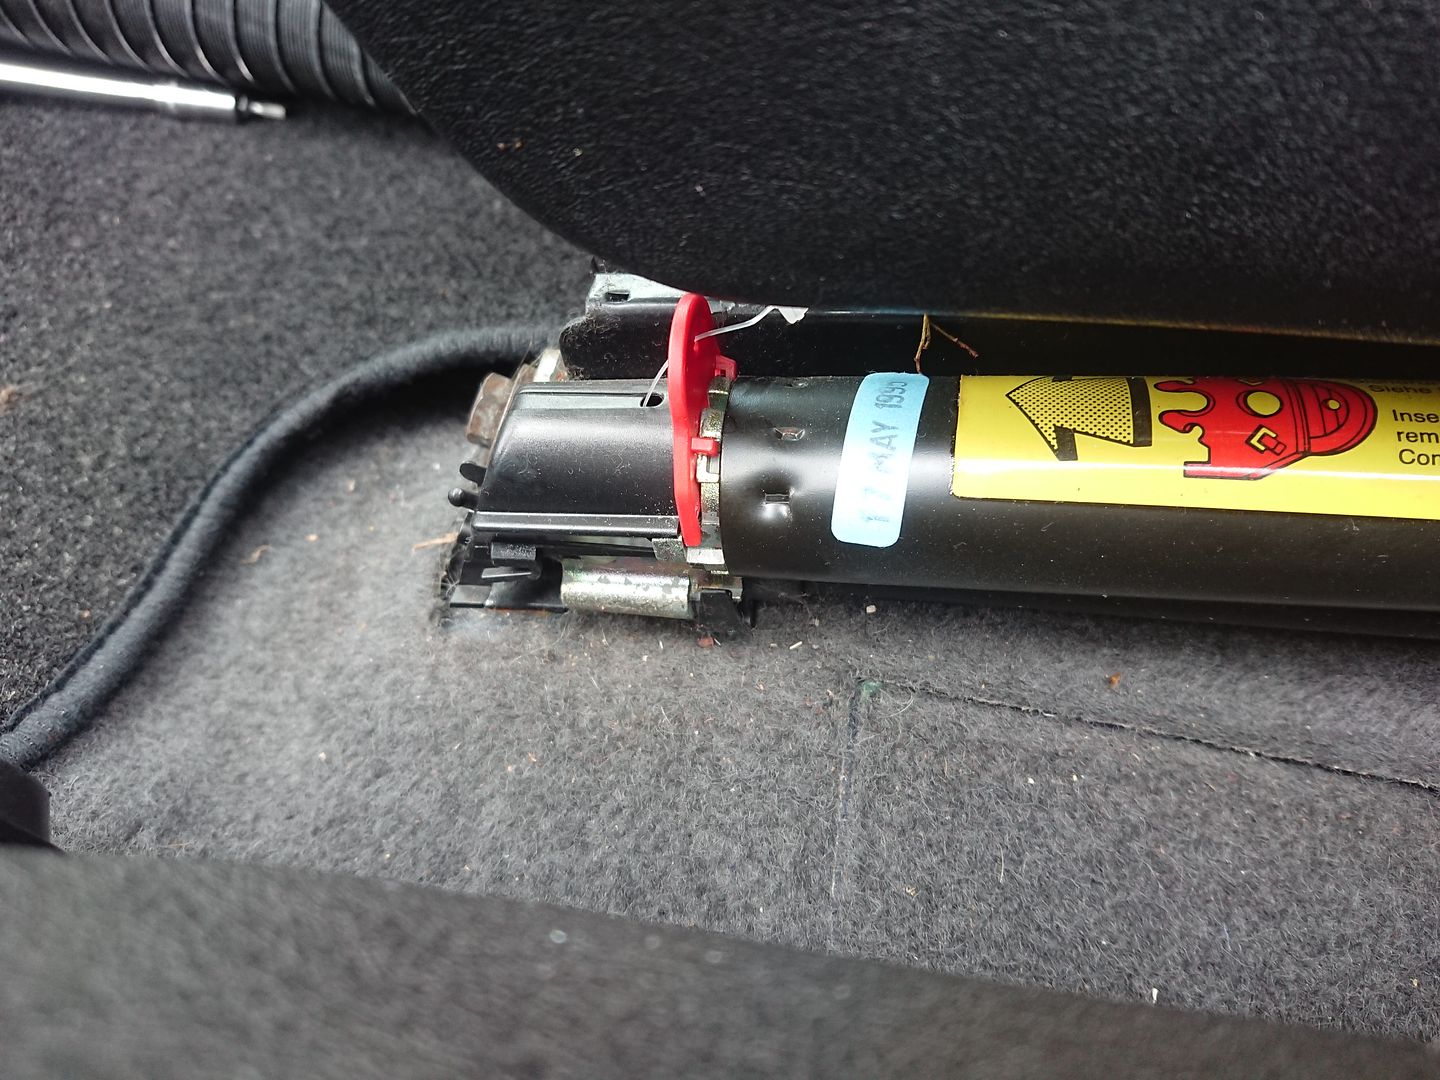
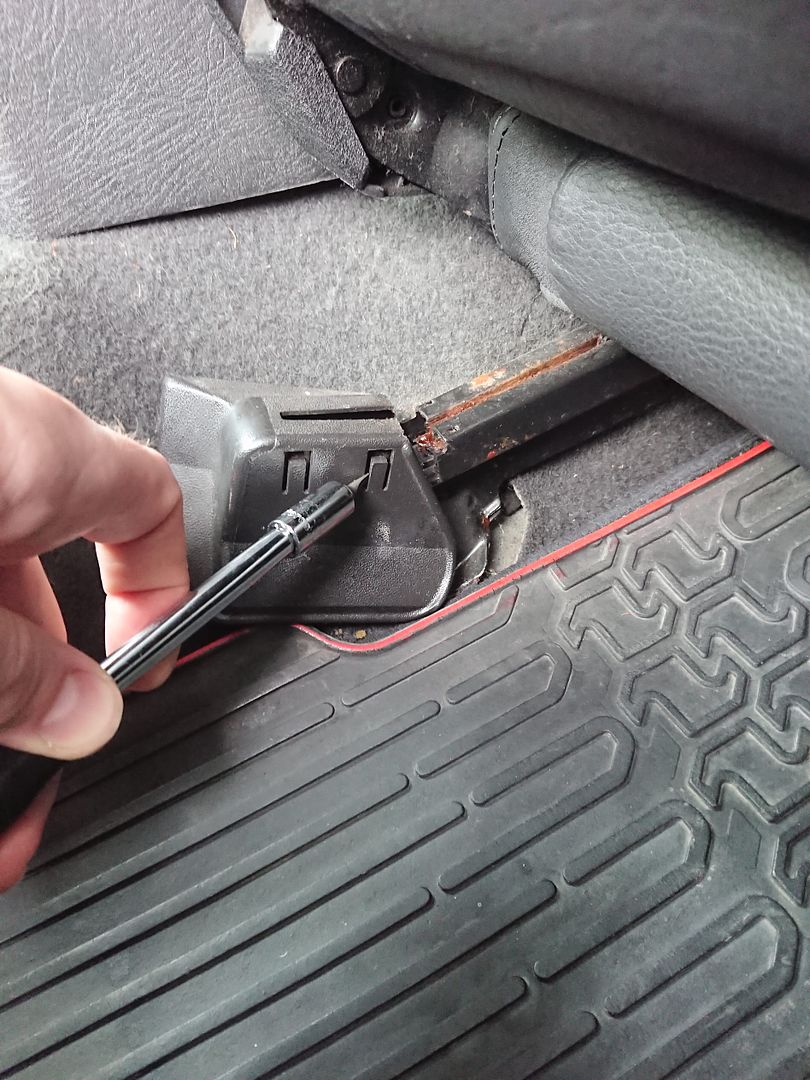
Fitting these is easy enough, just need to prise off the plastic surround, undo the two screws and unclip the connector:
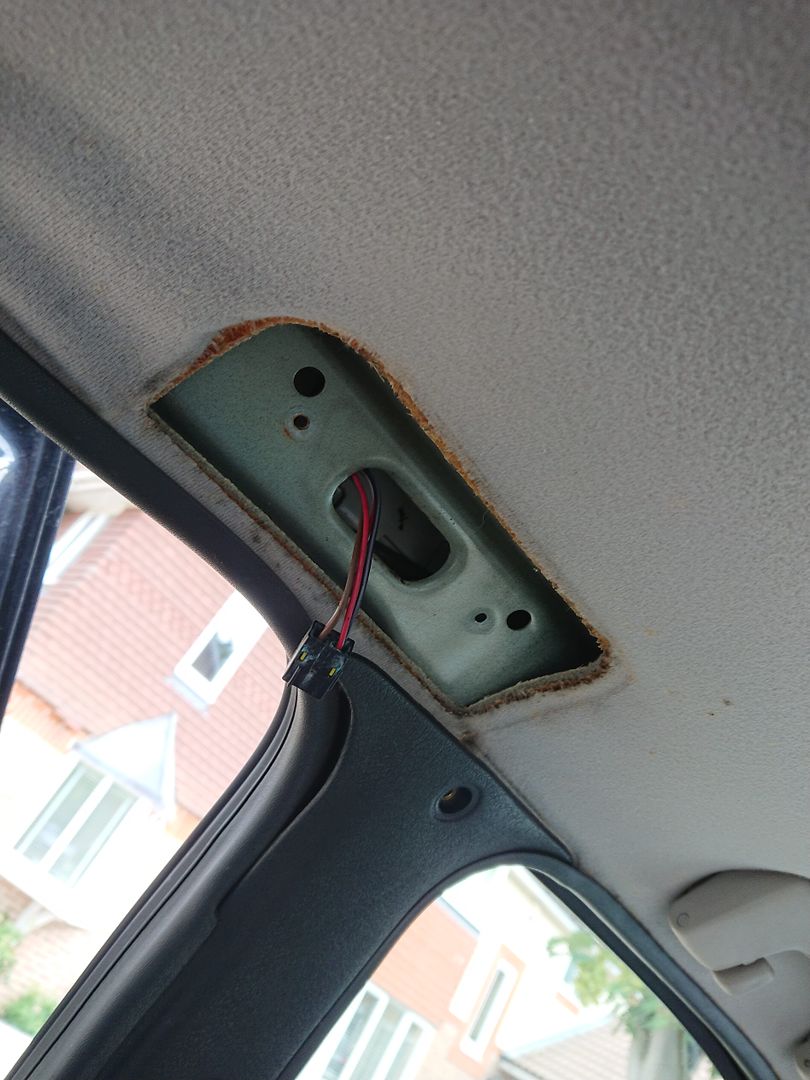
Image


New one fitted:

Image


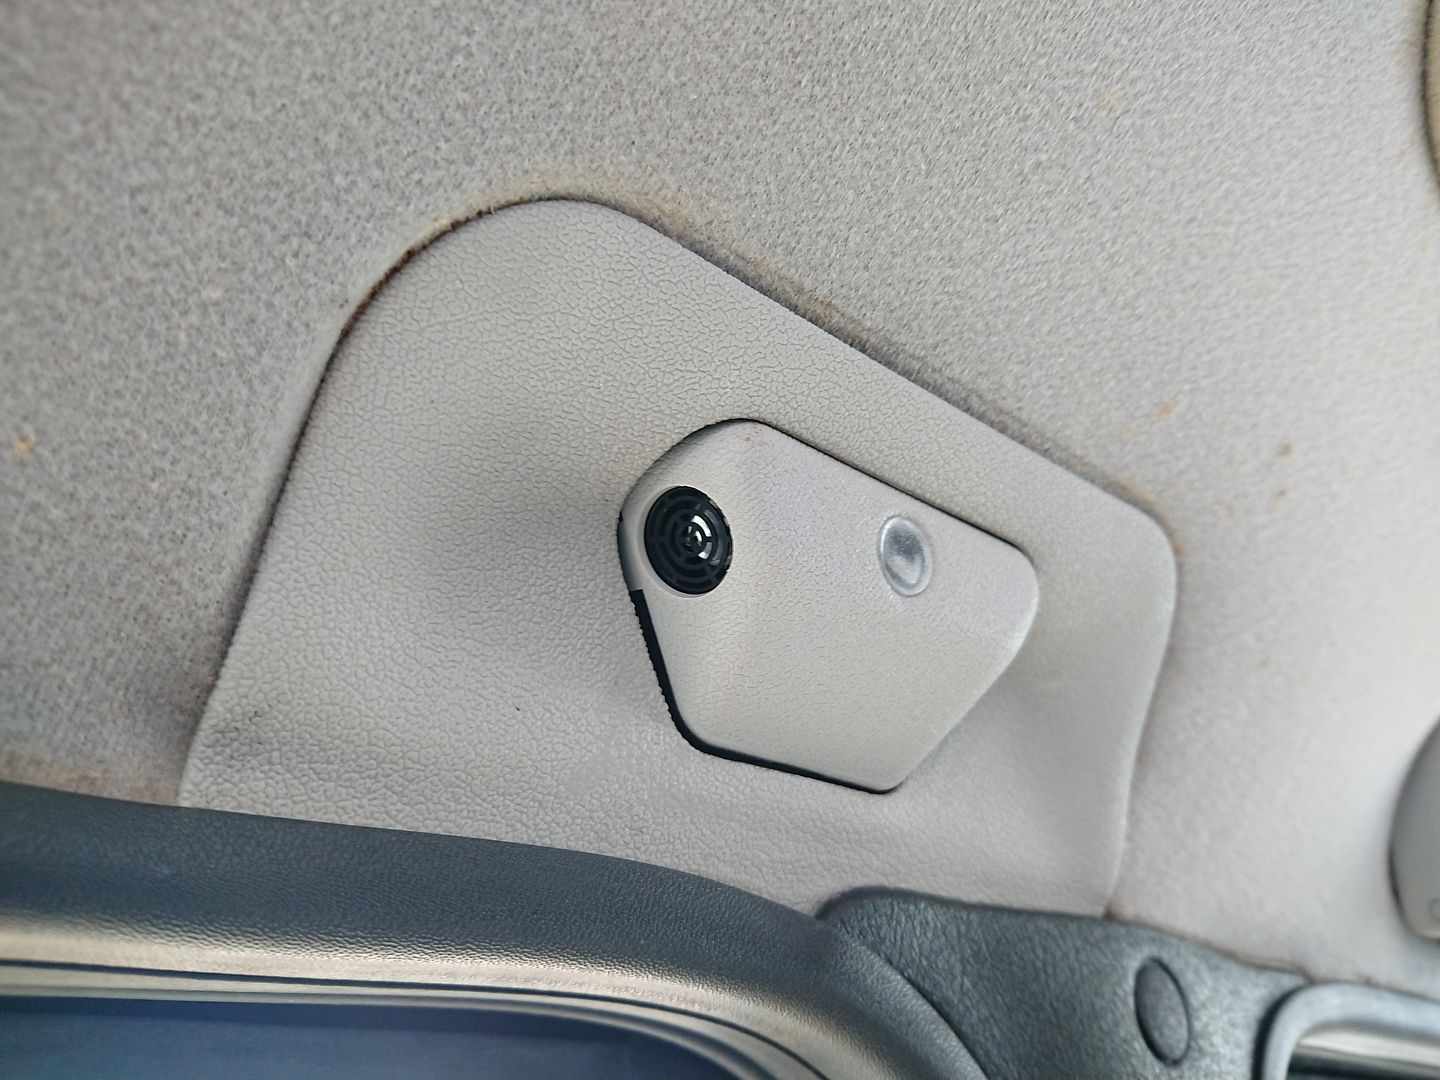
Then it was back to the Tech1 to reprogram the new sensor:

Image


Not only did this solve all the issues with the alarm, but it seems to have also sorted out my central locking. Occasionally, I used to have trouble when locking the car; turned the key and the door locks would go into spasm and lock and unlock themselves a few times. This issue seems to have gone! :D


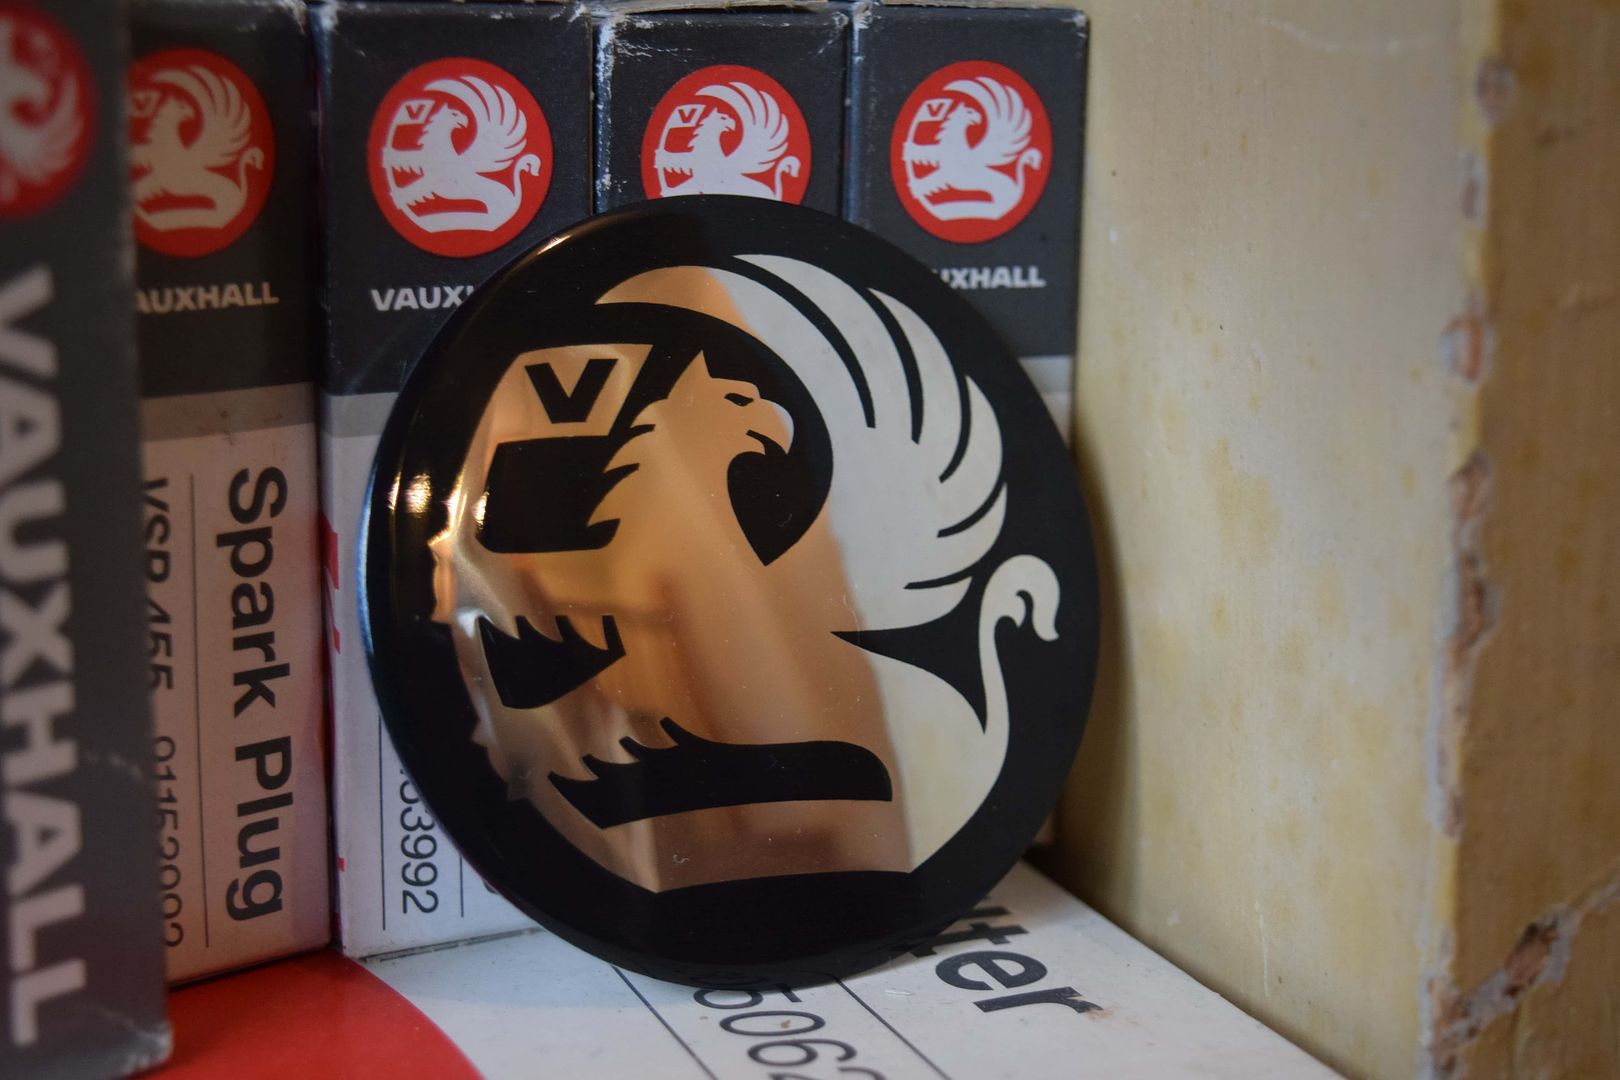
Rather annoyingly I managed to loose a wheel badge form my alloys. Actually heard it fall of this time on the motorway, so no chance to retrieving it. Thought I'd try out a metal reproduction from eBay. Fairly pricey at £15.95 each but not so bad if it's just one that needs replacing. Quite impressed with the quality, almost indistinguishable from the original:

Image

Fitted:

Image


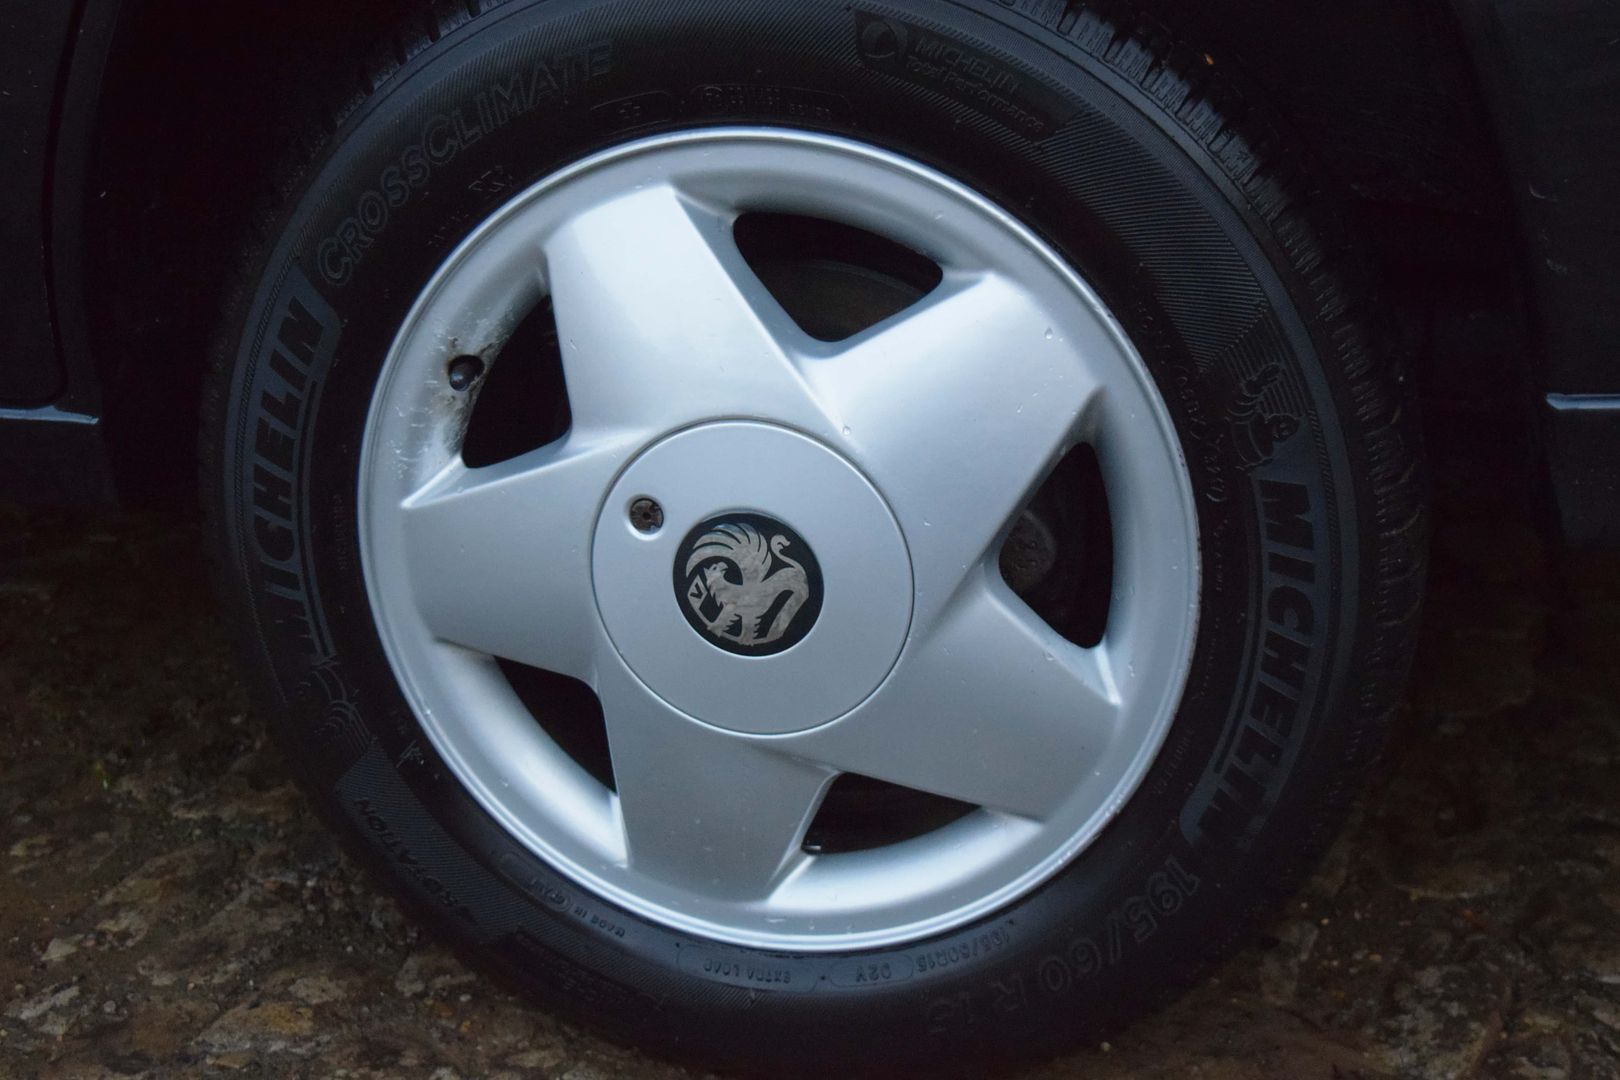
Quite happy with it; fits very well and, looks good. Comes with an adhesive backing pre-applied so hopefully won't come off! Thoroughly recommended if anyone is looking for one.


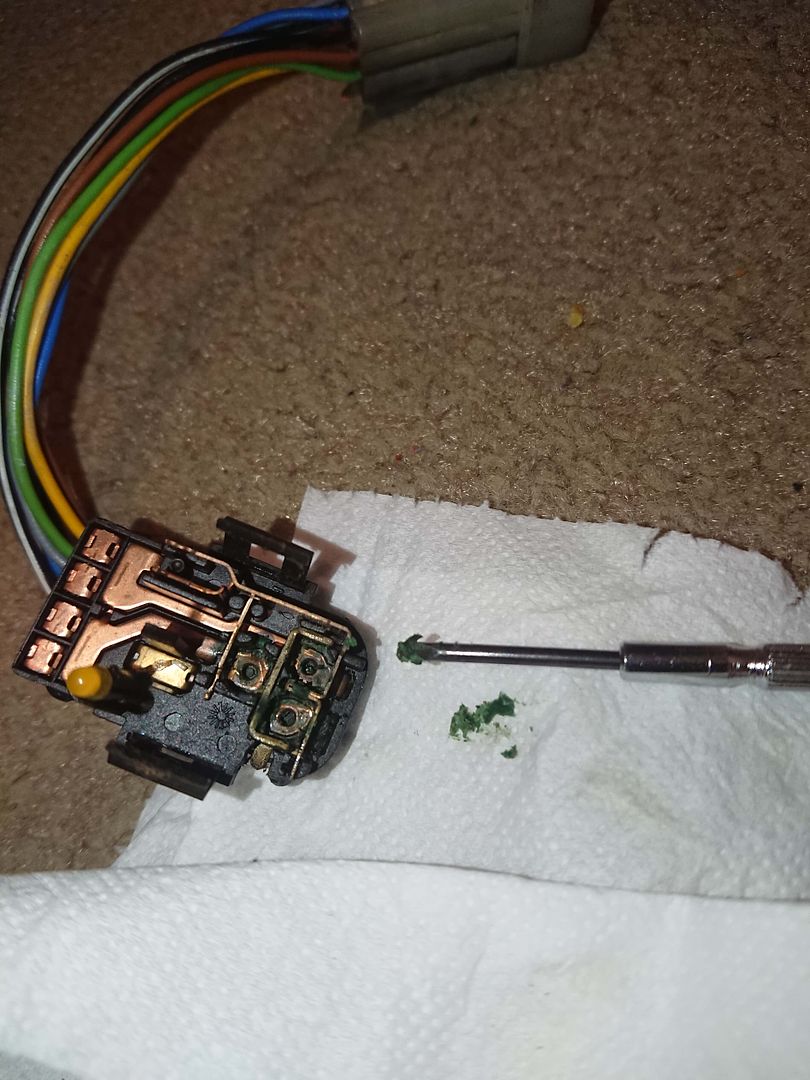
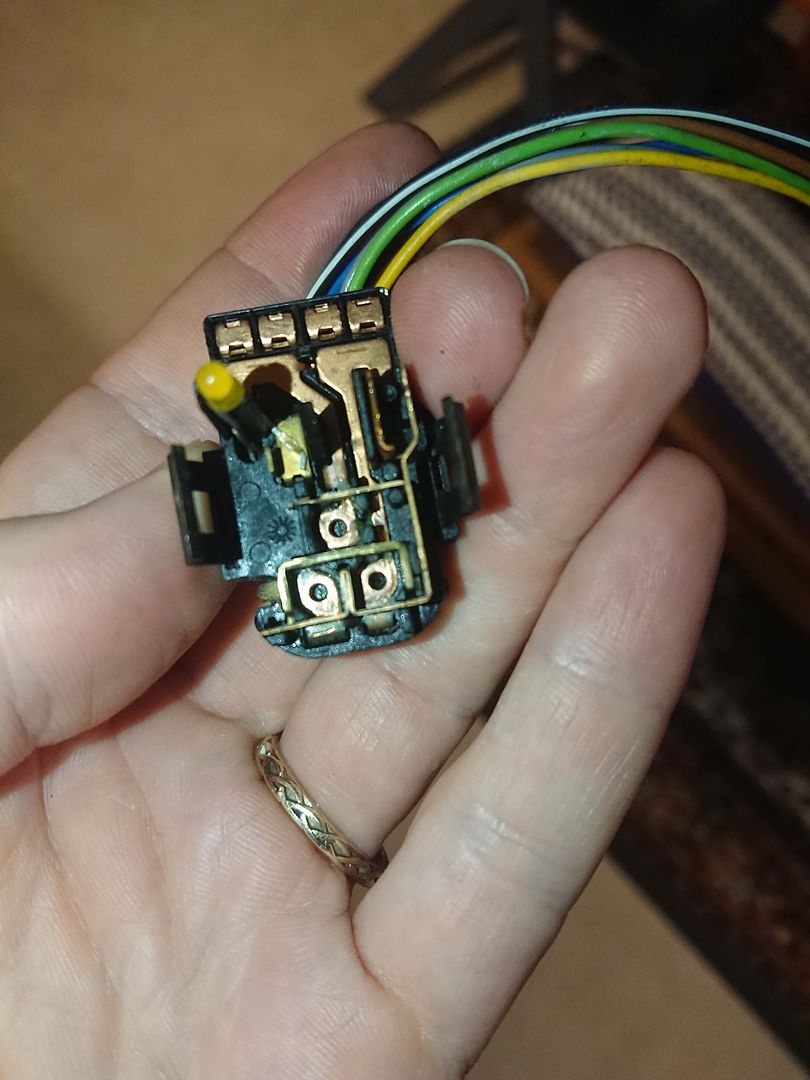
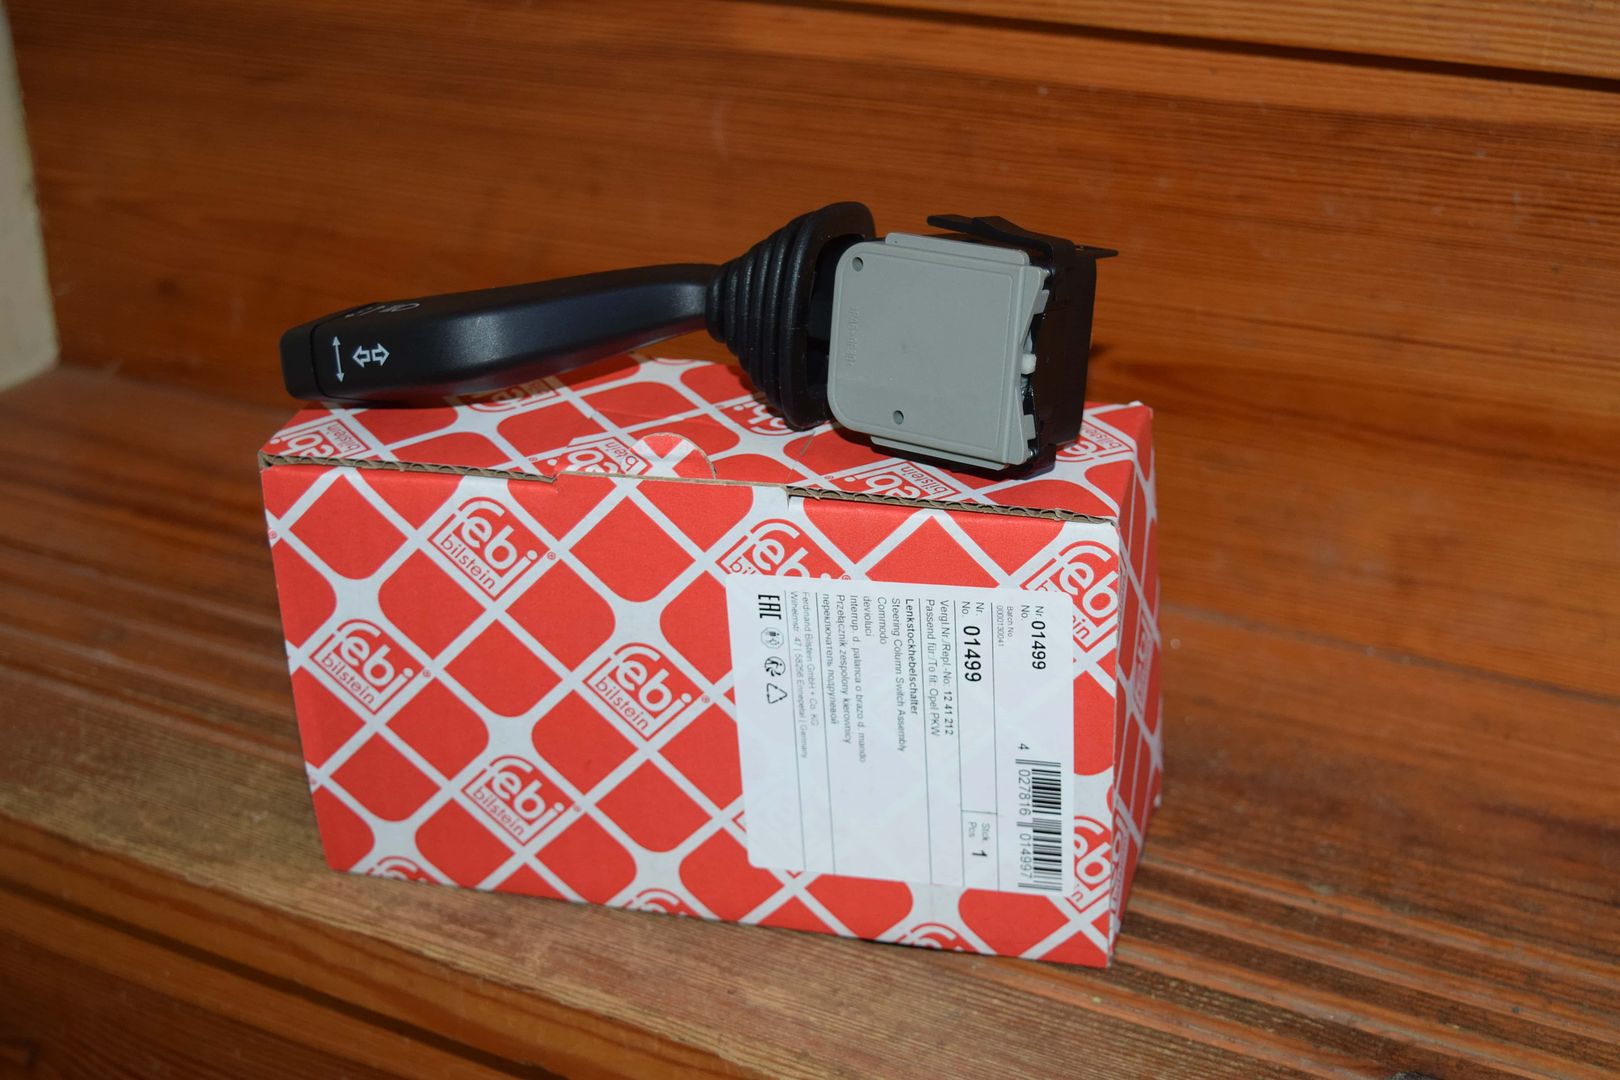
Last little job was replacing this:

Image


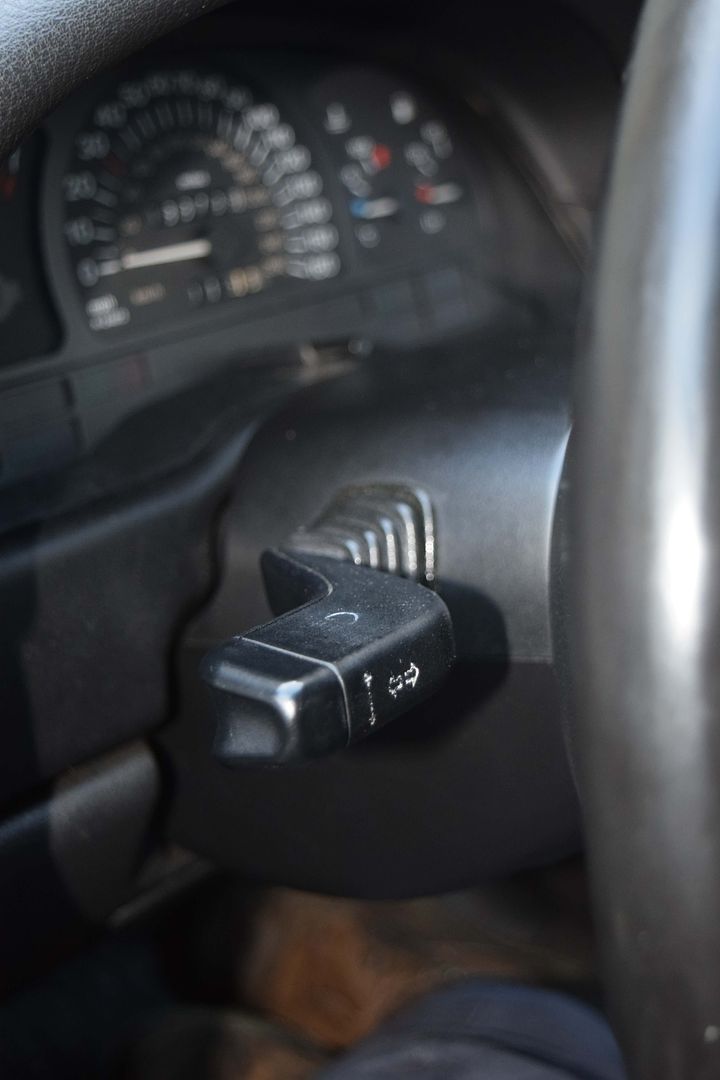
Nothing wrong with it per se, just didn't feel very nice. I replaced the indicator stalk on my Dad's CD a year or two ago for the same reason and really liked how it felt so thought I'd treat myself to the same thing. Unfortunately, unlike with my dad's car, I couldn't find a genuine part. So I settled for Febi, thought that would be the next best thing.

Image


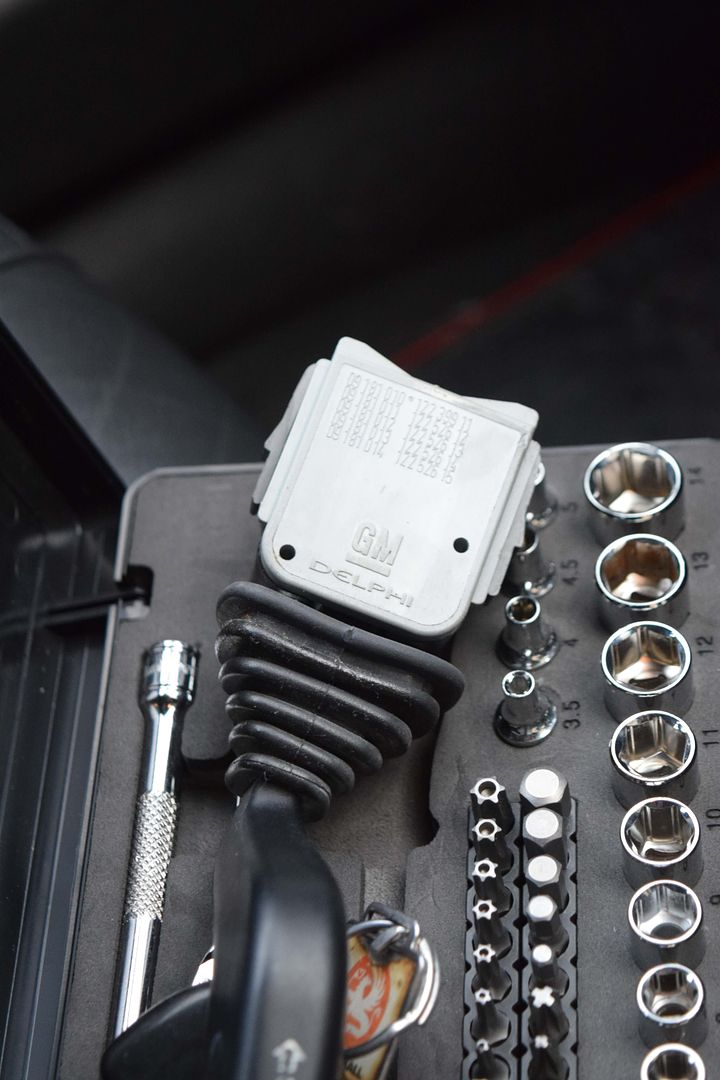
All fitted now and feels great. Here's the old one removed, made by Delphi, If anyone wanted to know who made the genuine parts. :)

Image


Lastly, I finally got the steering rack replaced with that spare I bought earlier ion this thread. Only cost £150 to fit, which I thought was quite reasonable. Apparently it took 4 hours to do but I was only charged for 2 as that's how long the Vauxhall service manual said it should take!
It's made a big improvement to the steering, especially after I got the tracking and balancing done. It's not the end of it though, as annoying this rack has the same issue. :( No way near as bad, but it is worn. I'm going to send my old one off to be reconditioned. If anyone knows a good old fashed engineering company that can do this sort of thing let me know. Most of the places around me just replace the seals, clean it it and paint it. This needs new internals.
chrisp
Registered user
Posts: 188
Joined: Sun Nov 19, 2017 11:25 am
Location: Cumbria

Re: James' 1995 Manual CDX V6 Saloon

Post by chrisp »

Did the garage that replaced your steering rack look for, or comment on, any cracking of the bulkhead where the steering rack is mounted to it? Apparently, the V6 Cavalier is more prone to this because the extra weight of the engine puts more strain on the rack. I worry about this on my Cavalier V6 every time I hear a slight creak when cornering tightly - and it's an MoT failure once it's bad enough to cause steering rack movement.
You used to be able to buy a kit containing a bracing bracket from the passenger side steering rack mount to the ABS unit mount, plus a solid aluminium bush for the rack mount instead of the standard rubber one. You can still buy a slightly different kit which has the brace plus an aluminium bush that doesn't fit the Cavalier mount - and I used this to fit the brace only on my Cav.
1993 Cavalier V6 Auto in Smoke Grey Metallic
User avatar
James McGrath
Club Admin
Posts: 2896
Joined: Tue Aug 11, 2009 11:35 am
Location: East Sussex

Re: James' 1995 Manual CDX V6 Saloon

Post by James McGrath »

I've heard a lot about the bulkhead issue over the years but never actually heard of it happening to someone. Not sure if it is a real issue or just one of those things that is perpetuated by hearsay.
Either way, it's never been an issue for me on any of my Cavaliers.
User avatar
James McGrath
Club Admin
Posts: 2896
Joined: Tue Aug 11, 2009 11:35 am
Location: East Sussex

Re: James' 1995 Manual CDX V6 Saloon

Post by James McGrath »

Almost forgot, I also had a go at following Robsey's excellent how2 guide on cleaning electric wing mirror switches which can be found here.

My mirrors had stopped working some time ago. I've defiantly been guilty of replacing these switches unnecessary before, and what with the scarcity of genuine parts these days, I thought I'd give reconditioning a go.

The job I always dread is taking off the door cards. Unfortunately, it is necessary to take the door car off to get to the mirror switch wiring connector. Without fail at least one of the clips will break off whenever I do this. This time was on exception, but at least it was only one that came off. This was promptly stuck back on with some super glue.

Image


As you can see, it was pretty filthy inside:

Image


I found that a small flat head screwdriver was the best thing to scrape the verdigris off with. That and lots of contact cleaner.

Image

Image


Now both mirrors are working perfectly. Thanks for your excellent guide Rob :thumb will definitely do this again.

Oh, one last thing, treated myself to this last month:

Image


Can't resist a bit of OE tat :D
User avatar
Envoy CDX
Club Admin
Posts: 9681
Joined: Sun Sep 23, 2007 3:51 pm
Location: Jarrow, Newcastle Upon Tyne

Re: James' 1995 Manual CDX V6 Saloon

Post by Envoy CDX »

Happy days! Repair over replace where possible.
Check the Rules!

Raw 8v Power! - Bad Cav, Naughty Cav... Cav want's to do 90!

The How2 Index
User avatar
Robsey
Club Admin
Posts: 10619
Joined: Fri Dec 12, 2008 1:42 pm
Location: East Manchester

Re: James' 1995 Manual CDX V6 Saloon

Post by Robsey »

I would have used an epoxy (araldite) type glue or old fashioned brush-on evostick contact adhesive.
Or the well named "Sticks Like Shit" adhesive.

Over time, super-glue become brittle and crystaline.
Turning to powder and letting go.
----------------

I am glad the window mirror switch repair how 2 was useful.
I do like a good free fix. :)
User avatar
James McGrath
Club Admin
Posts: 2896
Joined: Tue Aug 11, 2009 11:35 am
Location: East Sussex

Re: James' 1995 Manual CDX V6 Saloon

Post by James McGrath »

Yeah, I used to use a glue with a bit more elasticity in it. Super glue was all I had at the time.

More bad news, my catalytic converter has started to break up. Rattling like hell at the moment.
chrisp
Registered user
Posts: 188
Joined: Sun Nov 19, 2017 11:25 am
Location: Cumbria

Re: James' 1995 Manual CDX V6 Saloon

Post by chrisp »

Maybe I'm doing something wrong, but the only thing I find superglue sticks well together are my fingers!
1993 Cavalier V6 Auto in Smoke Grey Metallic
Post Reply