James' 1995 Manual CDX V6 Saloon

Show off your pride and joy! All Mk3 Cavaliers are welcome (please post only one thread per car)
User avatar
Robsey
Club Admin
Posts: 10619
Joined: Fri Dec 12, 2008 1:42 pm
Location: East Manchester

Re: James' 1995 Manual CDX V6 Saloon

Post by Robsey »

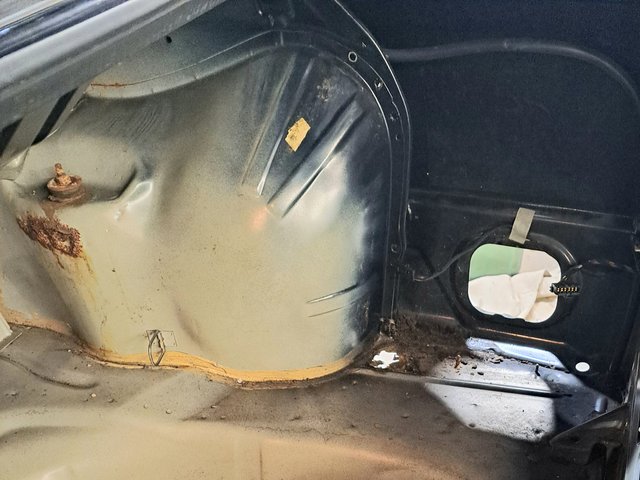
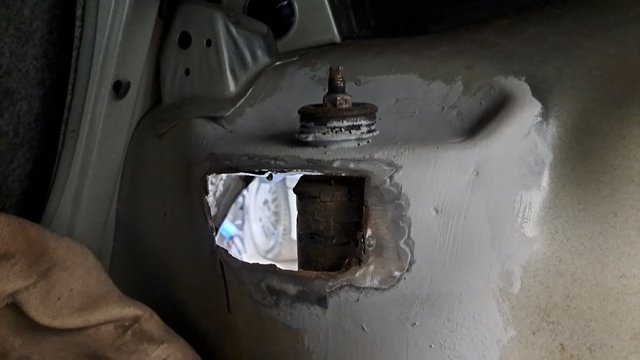
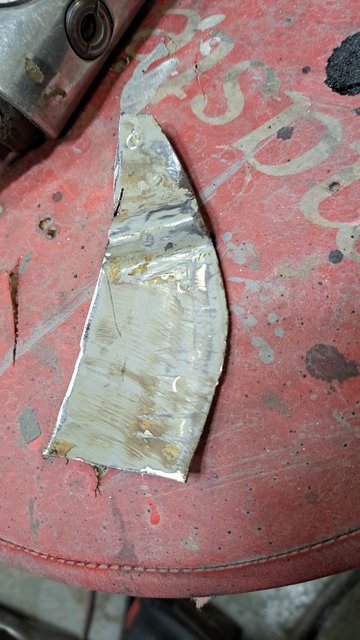
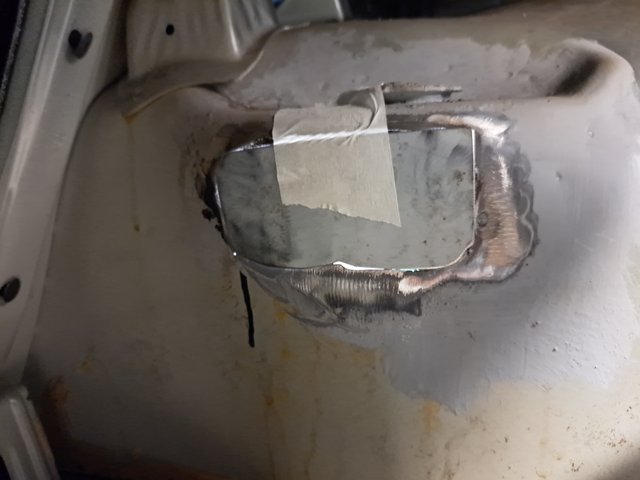
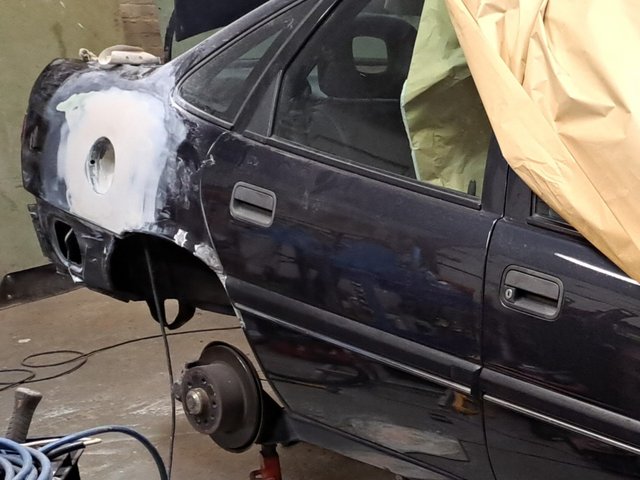
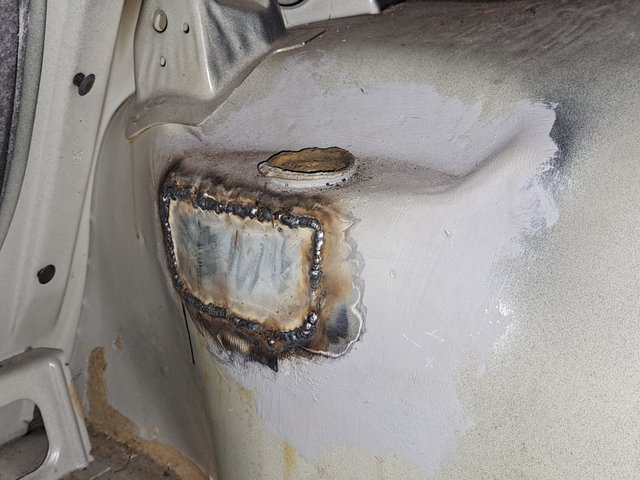
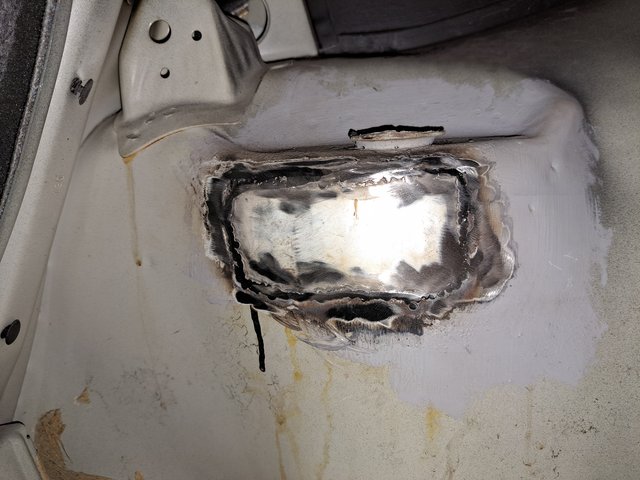
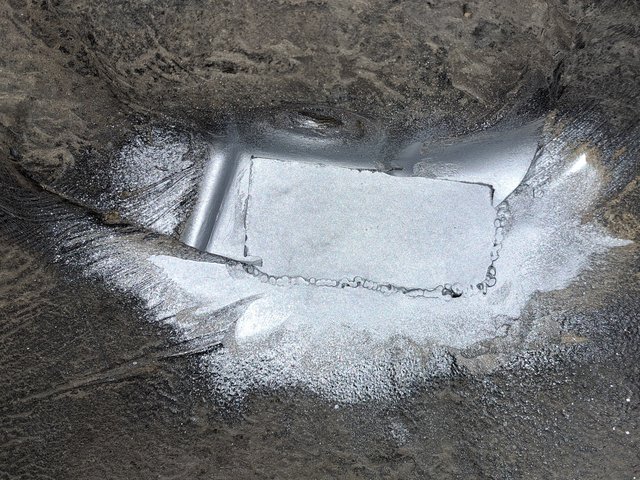
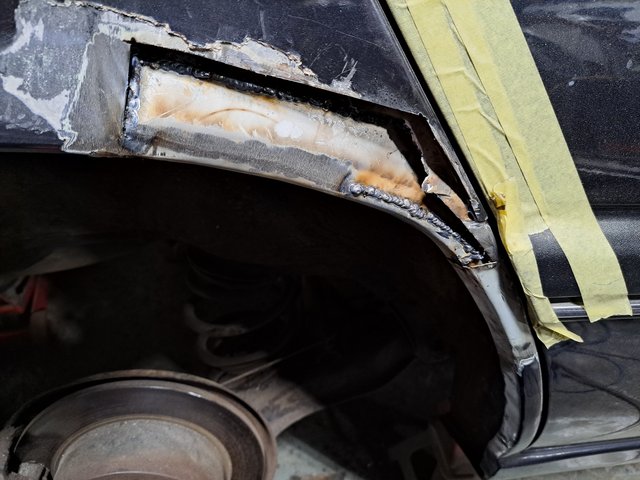
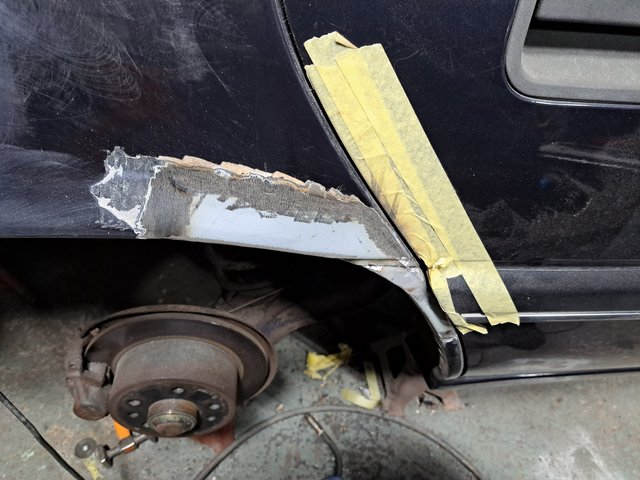
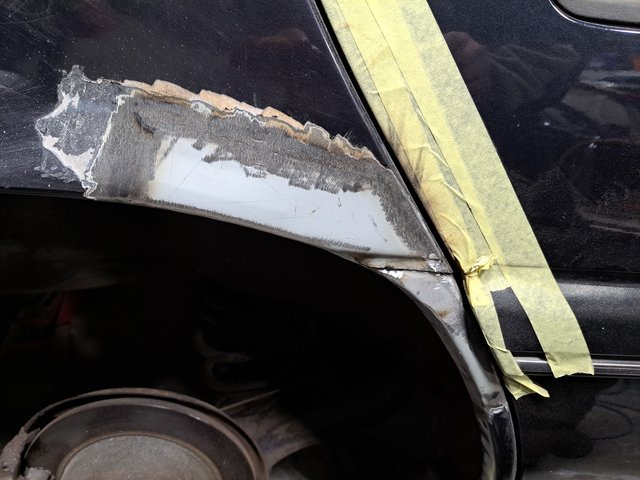
Then came the moment of truth...

Did my repair panels fit?
Well apparently they fitted very well indeed.
Gold star for Rob :cheers

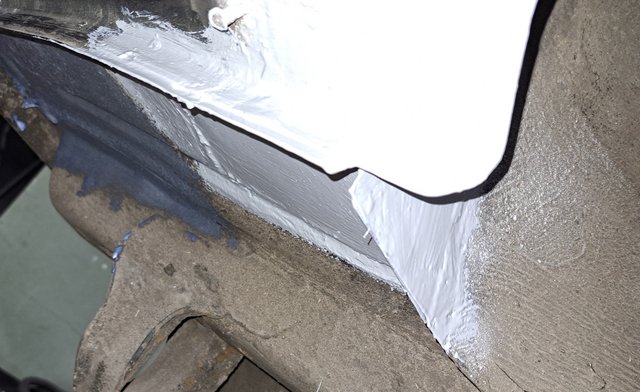
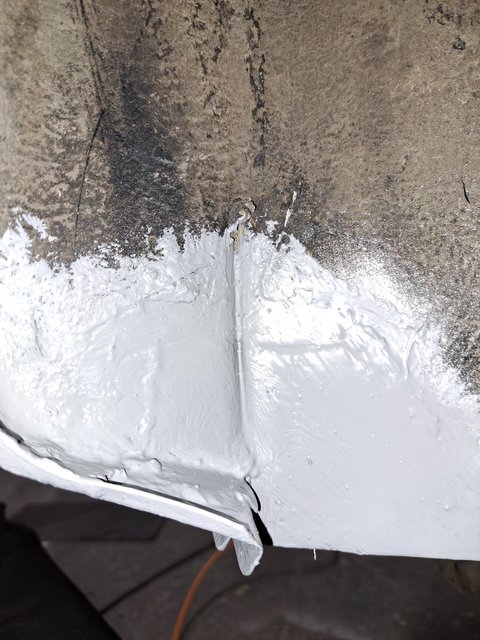
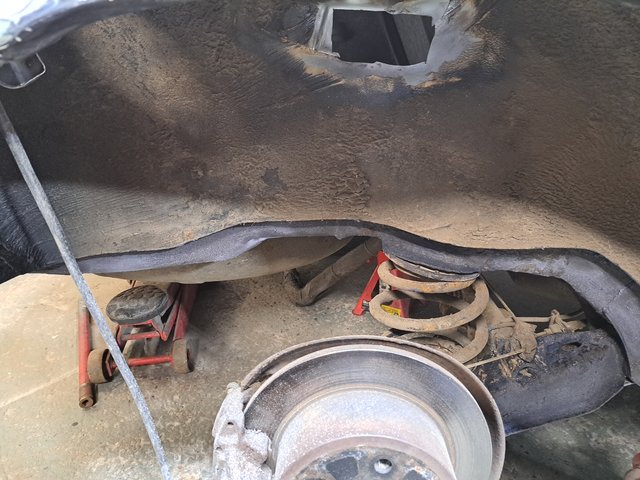
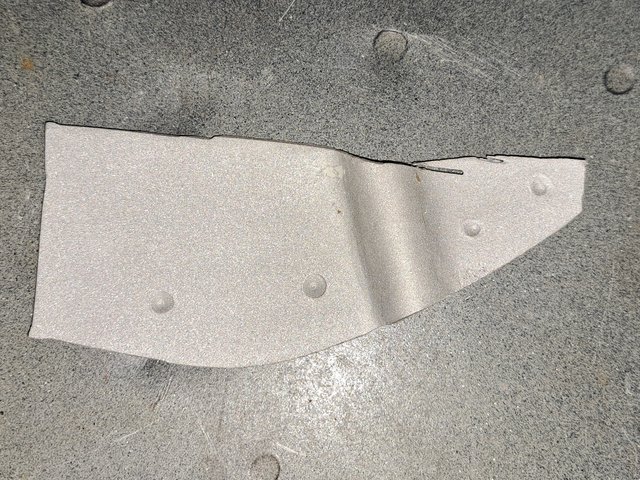
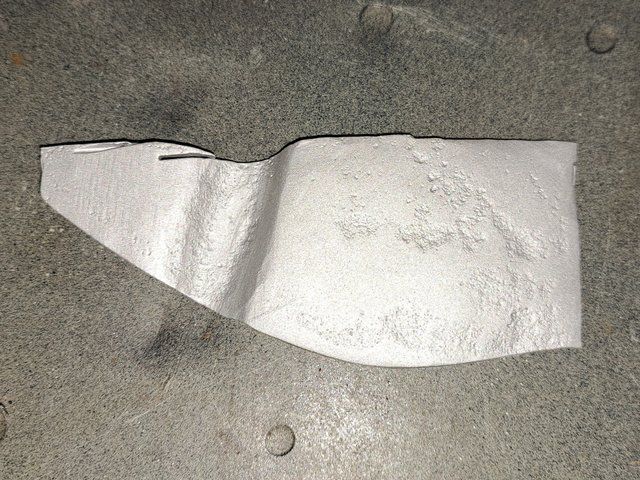
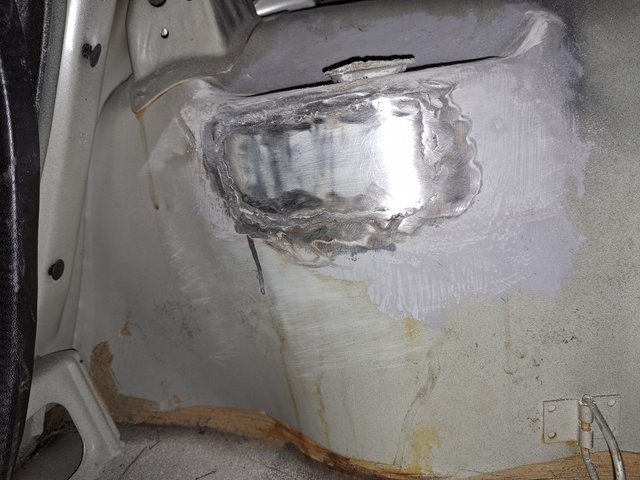
Once fitted, and the welds were fettled.
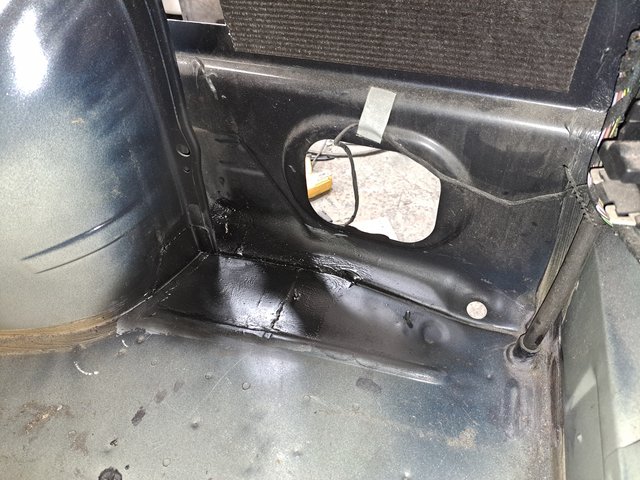
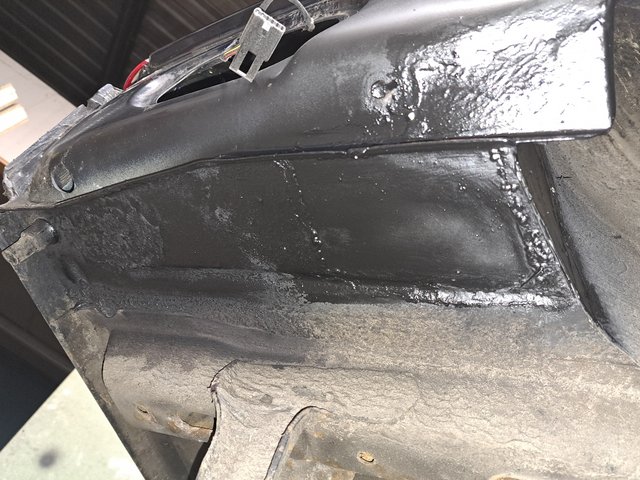
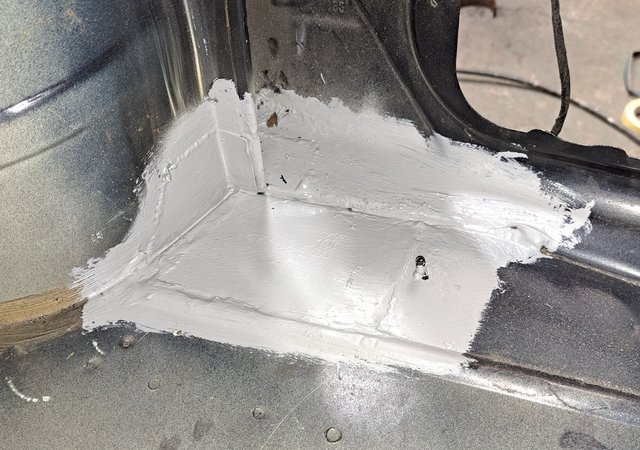
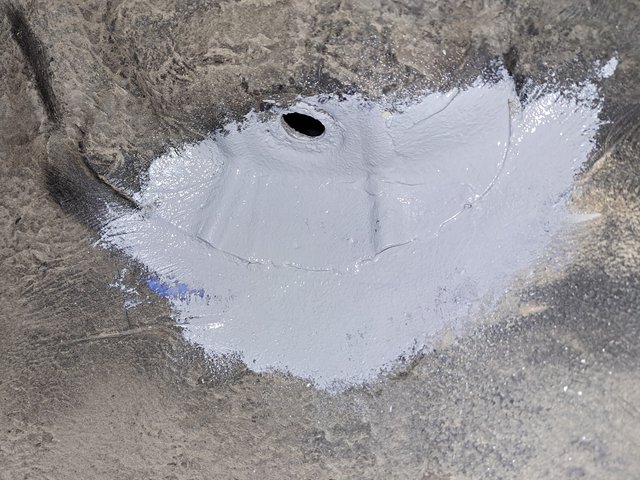
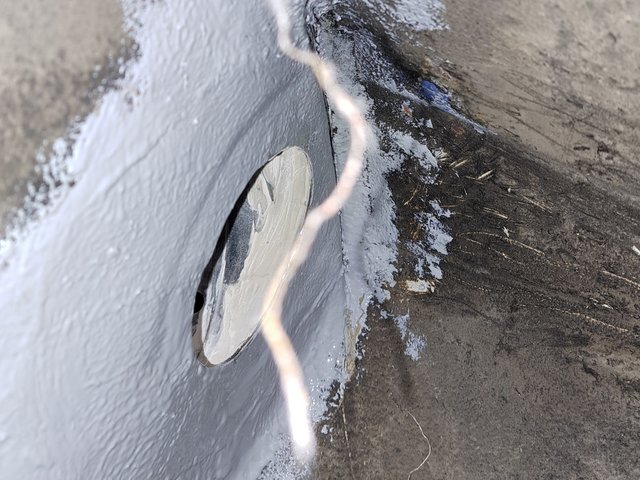
A nice coating of epoxy mastic, before some sort of colour coat later.

Image

Image

Image

There was also an area rear of the large flat repair panel that was a bit scabby.
After ensuring that nothing was loose or too flakey, I covered the area with Vactan.
See left side of middle picture.

From what I can tell, my work on the Cav is done until we are ready to refit the rear bumper and boot interior.

(As with any car repair thread - that was a very naive and stupid thing to say - of course I had not finished yet).

It is now all Troy's territory.
User avatar
Robsey
Club Admin
Posts: 10619
Joined: Fri Dec 12, 2008 1:42 pm
Location: East Manchester

Re: James' 1995 Manual CDX V6 Saloon

Post by Robsey »

20th November 2022

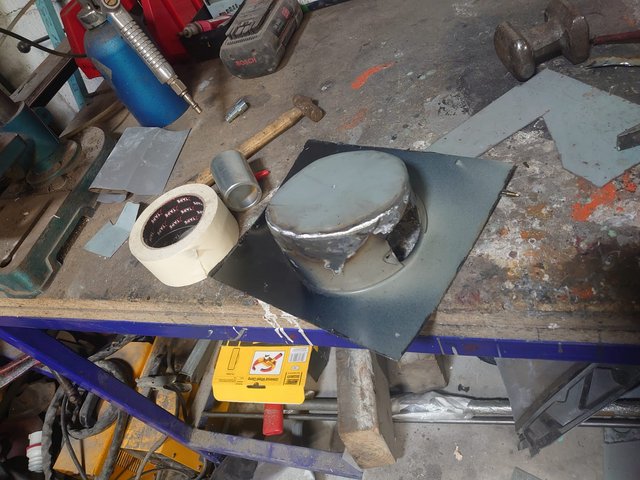
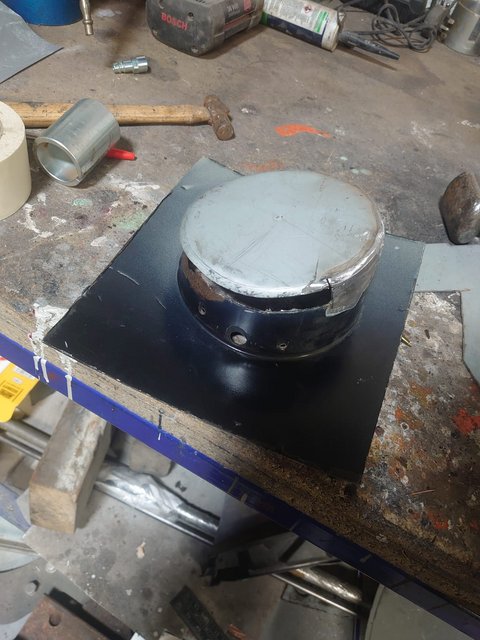
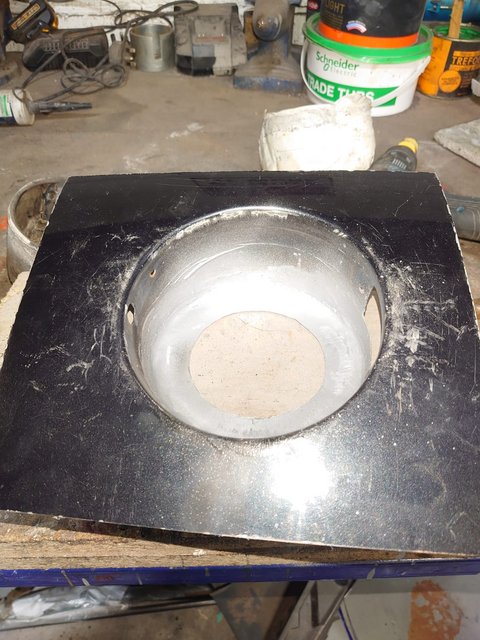
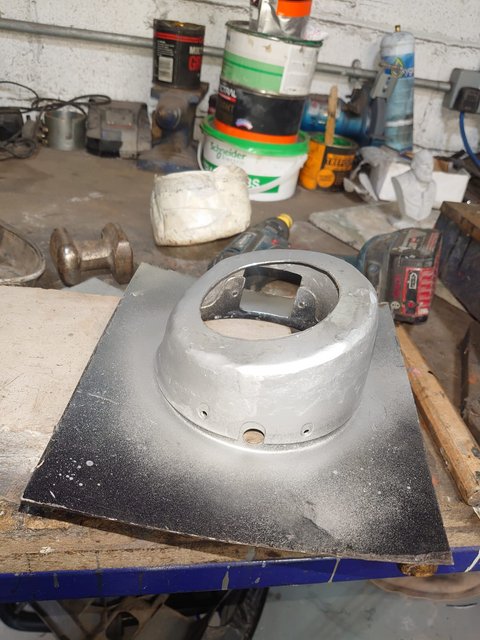
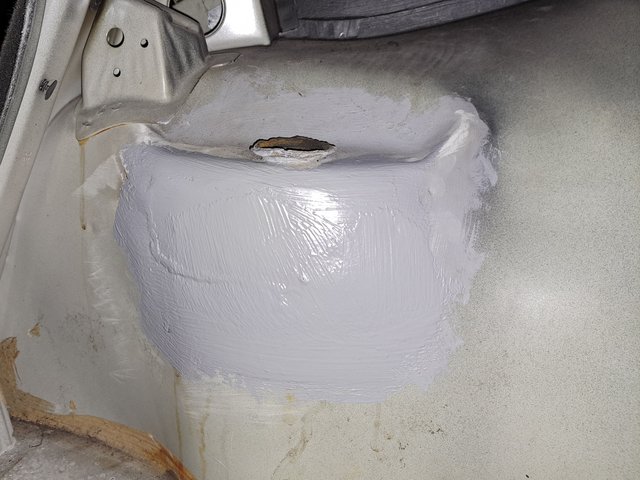
Here we can see Troy building up the petrol filler oriface .

Image

Image
User avatar
Robsey
Club Admin
Posts: 10619
Joined: Fri Dec 12, 2008 1:42 pm
Location: East Manchester

Re: James' 1995 Manual CDX V6 Saloon

Post by Robsey »

21st November 2022

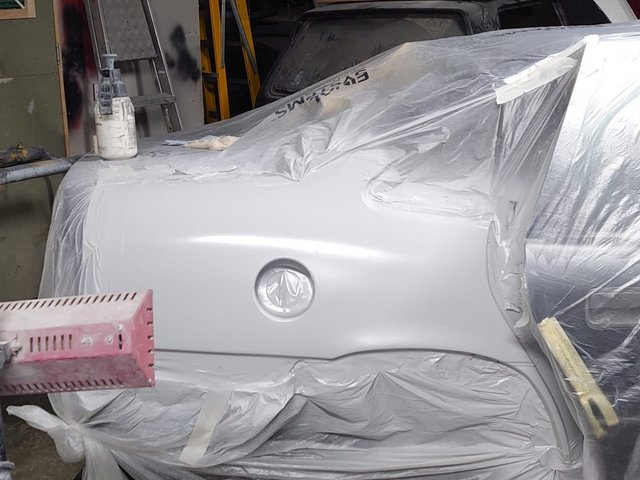
Getting there...

Outer section now complete.

Image

Image

Image
User avatar
Robsey
Club Admin
Posts: 10619
Joined: Fri Dec 12, 2008 1:42 pm
Location: East Manchester

Re: James' 1995 Manual CDX V6 Saloon

Post by Robsey »

23rd November 2022

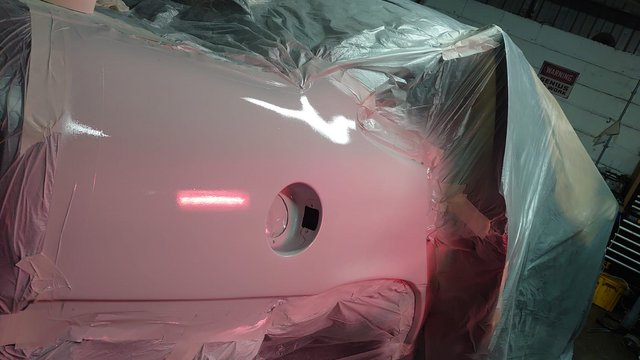
A bit more from me -
my job was to paint the epoxy mastic with a colour coat.
It is in fact Rustoleum direct-to-rust high adhesion black primer.

So good enough as is, or equally good if Troy paints over in the body colour.

So here are the pics...

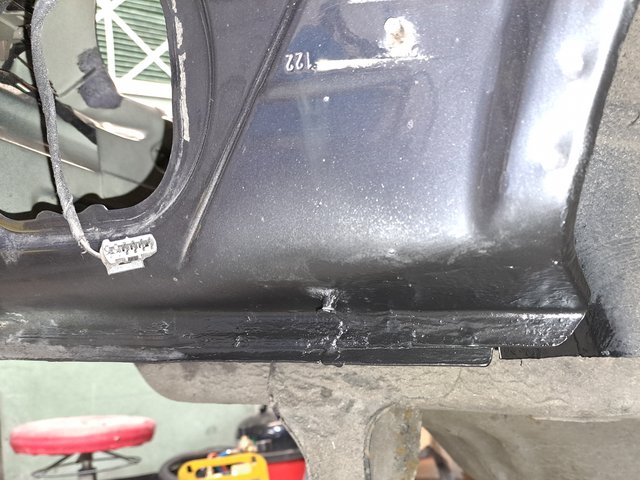
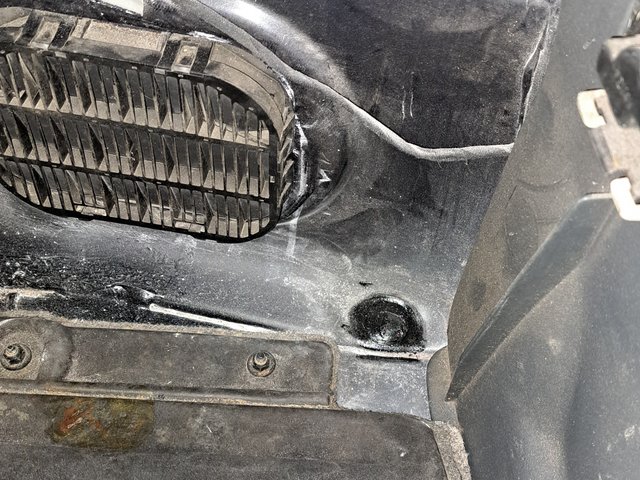
The boot floor
Image

The Underneath
Image

And the outer wing.
Image

More installments to follow:- :D
User avatar
Robsey
Club Admin
Posts: 10619
Joined: Fri Dec 12, 2008 1:42 pm
Location: East Manchester

Re: James' 1995 Manual CDX V6 Saloon

Post by Robsey »

25th November 2022

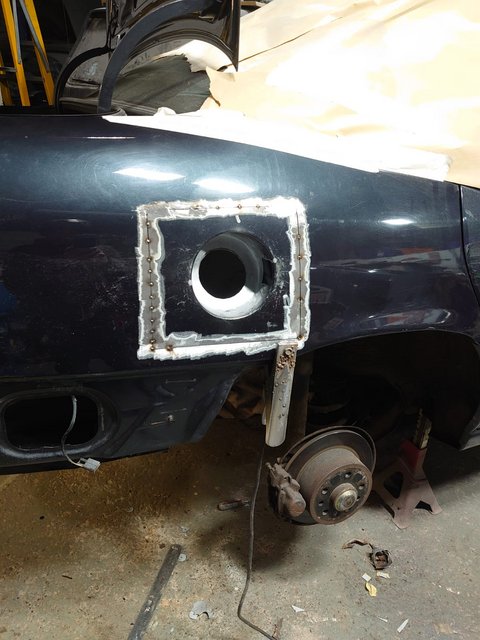
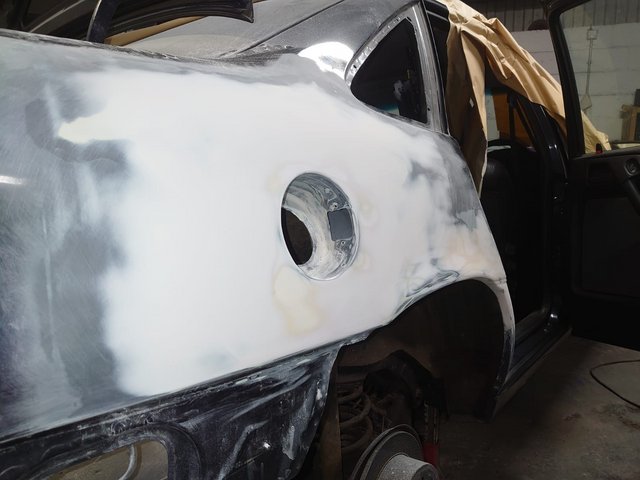
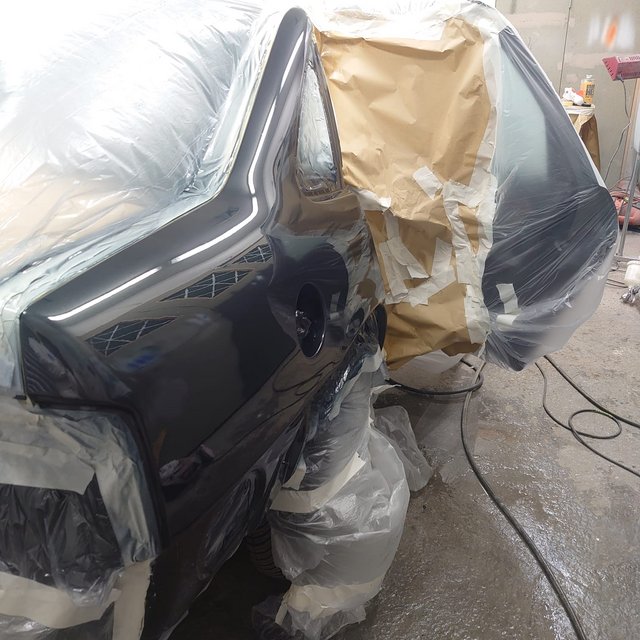
Okay, so Troy had been a busy boy.

With the panel welded in.

Image

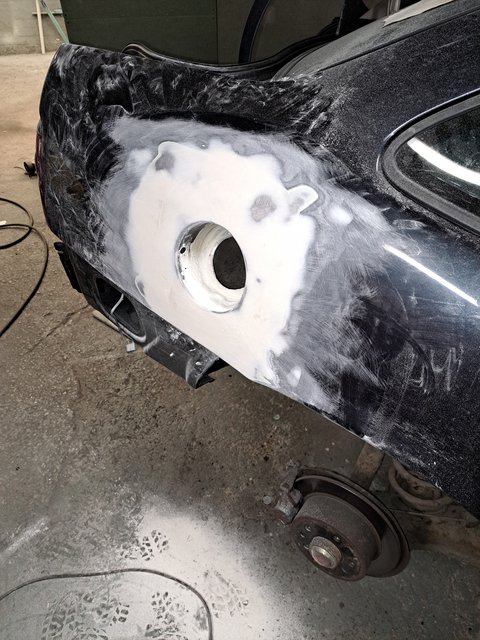
Doing a bit of panel beating when I arrived.
He was blending out the distortion caused by welding in a close-fitting panel.

A skim of filler to identify high and low patches.
No doubt his OCD will have him spending almost all week getting the finish closer and closer to the level of perfection that he expects.

So outside -

Image

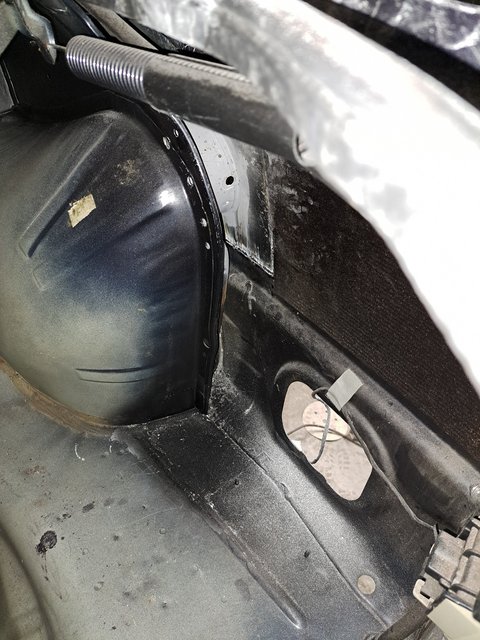
And inside - now minus a big hole.

Image

Just so you know, we both checked the fit of the rubber filler neck liner to the hole in the new metal oriface.
A good fit - for info, the hole for the filler is 87mm diameter.

I measured it previously to confirm that my masking tape template was correct.
Troy measured it to confirm fitment to his finished repair panel.
User avatar
Robsey
Club Admin
Posts: 10619
Joined: Fri Dec 12, 2008 1:42 pm
Location: East Manchester

Re: James' 1995 Manual CDX V6 Saloon

Post by Robsey »

30th November 2022

Just when I said my work was done on the cavalier, I was given a few more jobs to do.

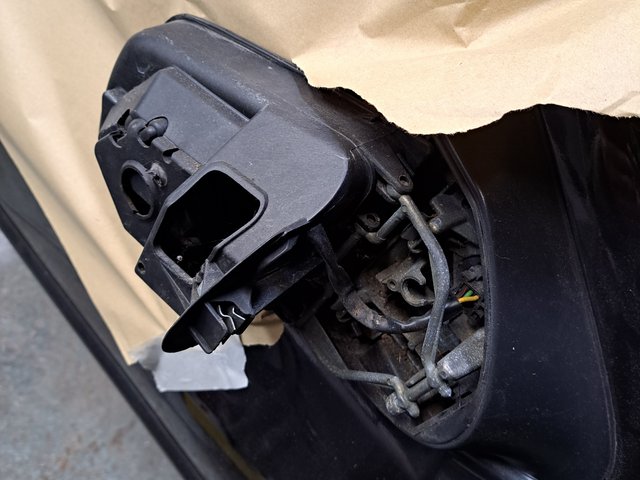
First was to remove the casing from the driver's door mirror.
Troy says he struggles to release them, but a quick review of my How 2, meant that this was only a two minute job.

Image

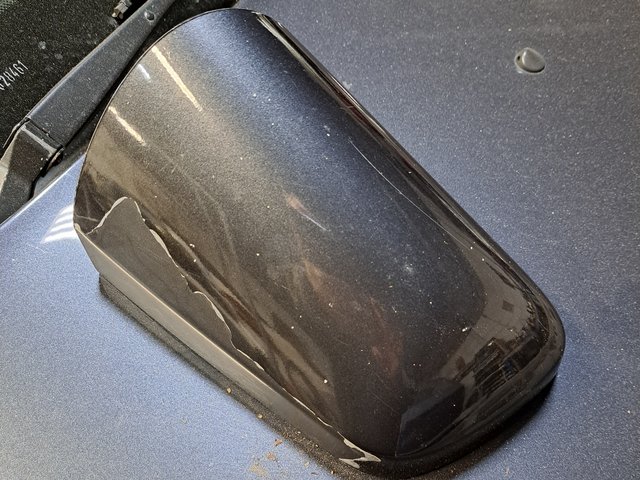
There is a lot of paint and lacquer peel. So I will be prepping this later.

Image

The problems with the mirrors is fitting them back onto their spring catches.
They need a good thump to clip them back into place, but it is far too easy to smack them too hard, and crack the casing...

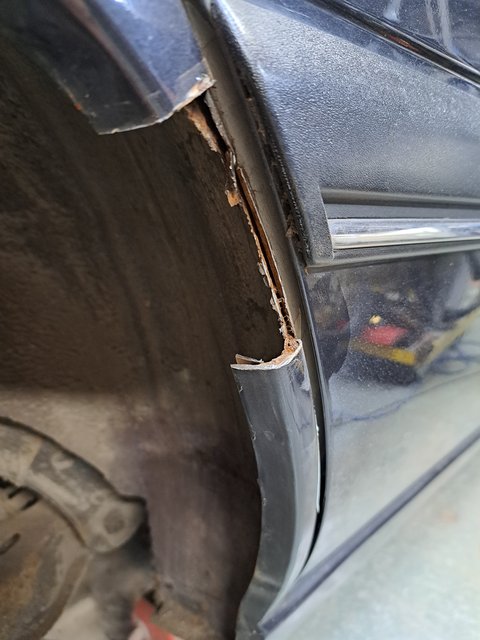
Then there was - "investigate bubbles on the off-side rear arch".
Ooops, here we go again.

Image

Rust galore.

Image

Image

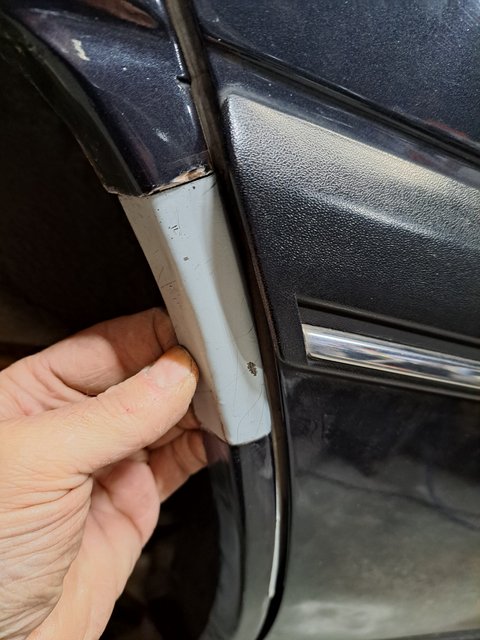
And new repair pieces for the win.
Inner...

Image

And outer skin.

Image

Troy says that they look brilliant.

Apparently he will have me welding soon...
Don't worry James, I assume that will be on my van.
User avatar
Robsey
Club Admin
Posts: 10619
Joined: Fri Dec 12, 2008 1:42 pm
Location: East Manchester

Re: James' 1995 Manual CDX V6 Saloon

Post by Robsey »

Troy has done two more patches on the outer arch to sort a few small eruptions that turned out to be rust holes.

Image
User avatar
Robsey
Club Admin
Posts: 10619
Joined: Fri Dec 12, 2008 1:42 pm
Location: East Manchester

Re: James' 1995 Manual CDX V6 Saloon

Post by Robsey »

2nd December 2022

Here we go again...

First job tonight was to repair the scabby rear suspension tower.
As you can see to the left of the picture, quite scabby.

Image

Scabby patch cut out...

Image

Outer reinforcement piece cut out with the scabby part.
The scabby metal virtually fell off the reinforcer as I cleaned it up. Just two very strong spot welds that needed to be ground off.

Image

Replacement panel for the tower skin.

Image

As you may be able to tell in the pictures, I was sat in the spare wheel well with a body saw and angle grinder doing the cutting, cleaning and photographing. :shock:

I had to unbolt the rear damper to get better access to clean up the edges of the hole.
Rear beam resting on an axle stand to stop the spring popping out.

Now the older job.
The driver's door mirror with galloping paint and lacquer peel.

Image

Now totally devoid of paint.
Sanded with a d/a sander and 180 grit paper.

Image

Ready for it's proper paint,
Plastic requires a proper adhesion coating, not just generic primer for the paint to "stick" properly.
(so I am told - lol).
User avatar
Robsey
Club Admin
Posts: 10619
Joined: Fri Dec 12, 2008 1:42 pm
Location: East Manchester

Re: James' 1995 Manual CDX V6 Saloon

Post by Robsey »

7th December 2022

Righty-oh...
A bit of filling, flatting, and smoothing of the repaired wing.
Getting very close.
Also a few bits of the arch given a bit more attention.

Image

Here is a picture of the hole in the inner arch, and the rust-treated chassis rail and trailing arm.

Image

At the end of the evening, Troy welded in the inner panel for the inner arch / suspension tower.

My first job in a few days will be to clean up the welds and give a quick blast of weld-thru primer.
The thicker support panel will need a quick bead-blasting to clean any light surface pitting before that is ready to be welded in.
User avatar
Robsey
Club Admin
Posts: 10619
Joined: Fri Dec 12, 2008 1:42 pm
Location: East Manchester

Re: James' 1995 Manual CDX V6 Saloon

Post by Robsey »

9th December 2022.

And tonight's instalment...

First job was to remove the whole off-side tail light assembly - ready for when the wing gets painted.
(10mm socket on the four hex-head self-tapping screws).

The remainder of the night was mainly the completion of the suspension turret / inner wing repair.

On Tuesday, the inner skin was welded in.

Tonight,
1 - the welds were cleaned up both inside and outside.
2 - The outer face painted with weld-thru paint / primer.
3 - The reinforcer was cleaned in the bead-blaster cabinet, to remove any remnants of corrosion and pitting.

Image

4 - Again - weld-thru paint on the face to be tacked onto the inner skin.

Image

5 - All welded up,
6 - Cleaned and painted with Epoxy-primer mastic paint.

A good solid, tidy job.

The pictures in sequence -
Inside the boot...

Image

Image

Image

Image

Inside the wheel arch...

Image

Image

Image

And a previously unseen picture of the inside of the fuel filler hole.

Image

Ignore the piece of cord from a power file sanding belt.

As there is work to do near to the rear door aperture on the arch, it was agreed to remove the rear quarter glass.

Very easy, once the inner trim is removed.
Four white plastic trim clip / rivet-thingies like those used on the door cards.
One torx screw (t25 screw-driver).
and the upper seat belt mounting bolt.(21mm hex socket).

A whole lot easier on the saloons than on the hatchbacks... (well over a dozen t25 torx screws to remove, to take out the rear speaker shelf, load area trims etc...)

The quarter-glass is held on by four plastic nuts.
(9mm hex socket).
User avatar
Robsey
Club Admin
Posts: 10619
Joined: Fri Dec 12, 2008 1:42 pm
Location: East Manchester

Re: James' 1995 Manual CDX V6 Saloon

Post by Robsey »

23rd December 2022

A lot more progress from Troy today. 8-)

When I arrived, the arch had been cut open to expose the rusty middle layer...
This had now been cut away to leave only good solid steel.

Image

As you can see, the inner skin had already been repaired a few days ago.

Whilst I was oblivious getting nowhere faffing on my van, Troy had turned into the fabrication and mig robot...
Two hours later, at the end of the night, all three skins were made up, welded in and tidied up, ready for body prep.

Even on close inspection, the hand made repair piece looked like a perfect factory part

Image

Image

Awesome work.
User avatar
Robsey
Club Admin
Posts: 10619
Joined: Fri Dec 12, 2008 1:42 pm
Location: East Manchester

Re: James' 1995 Manual CDX V6 Saloon

Post by Robsey »

4th January 2023

The body has been getting a bit more love over the past few days.
Troy is almost at the point where the word primer is being mentioned.

And I know that the top coat colour has also been ordered.

So this is the state of play....

Image

As for me... last week I refitted the rear off-side damper, so that there is less to do, and also so that the car can be rolled back into the spray area.

So fingers crossed, no more cutting out or welding to do.
Just paint and rebuild.
User avatar
Robsey
Club Admin
Posts: 10619
Joined: Fri Dec 12, 2008 1:42 pm
Location: East Manchester

Re: James' 1995 Manual CDX V6 Saloon

Post by Robsey »

6th January 2023

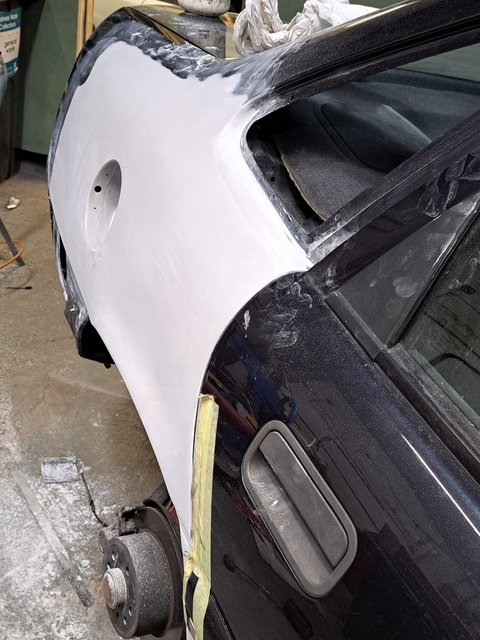
End of play tonight.
.. the "rough" primer coat.

Image

the starting point, from where all following coats will be dressed to maximise the final finish.

Image

Amazing how well the look improves when it is all one even colour.

Then...

14th January 2022

Slowly but surely...
Sanding of the primer level is complete.

Image
User avatar
Robsey
Club Admin
Posts: 10619
Joined: Fri Dec 12, 2008 1:42 pm
Location: East Manchester

Re: James' 1995 Manual CDX V6 Saloon

Post by Robsey »

25th January 2023

As I arrived last night, the rear wheel was being put on, and the fuel filler had been re-installed.

The plan was to start the car and then after Troy was happy with that, we were going to reverse it into the spray booth area.

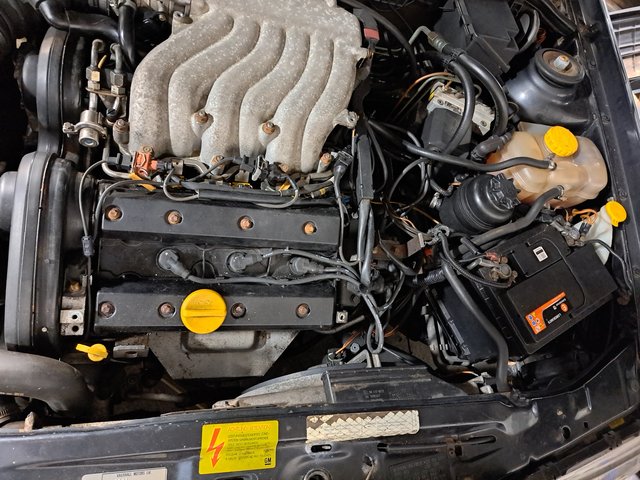
Unfortunately we spent close to three hours going through the ignition system looking for a non start issue.

The front bank of plugs (2, 6, and 4) and their bores were very oily...
Badly leaking seal somewhere?
All mopped out, plugs cleaned... still no joy.
Swapped the old coil pack back in... no change.
Continuity and resistance checks found both coil packs to be okay, returning approx 11k ohms on each winding.
(Well within tolerances).

Image

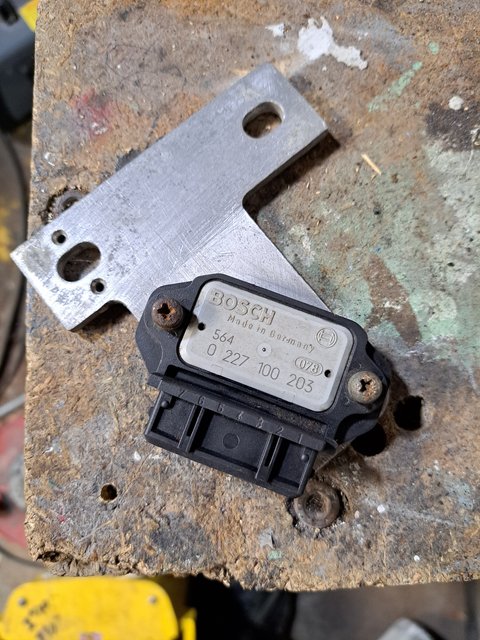
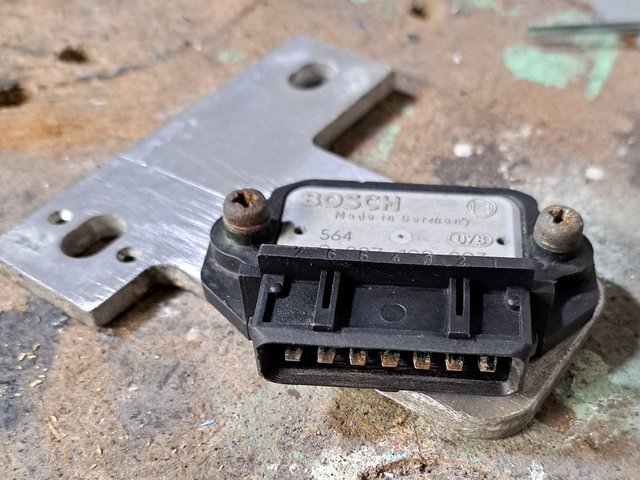
Eventually after some googling Troy found an ignition amplifier on the near-side wing under the P.A S. fluid reservoir.

Image

Image

Pin 4 of this was heavily corroded.
Checking continuity found no continuity to earth / ground. - even after cleaning.

Our suspected diagnosis is a defective ignition amplifier.
Being a V6, it has 7 pins, so not as common as the typical 4-pot, 5 pin amplifier.

To add further insult to injury, there is quite an oil leak from the sump area.

Fingers crossed for some positivity soon
User avatar
Robsey
Club Admin
Posts: 10619
Joined: Fri Dec 12, 2008 1:42 pm
Location: East Manchester

Re: James' 1995 Manual CDX V6 Saloon

Post by Robsey »

28th January 2023

After fitting the new amplifier module, the car lives!!

Now idling quite smooth I believe. :D

1st February 2023

The car was reversed into the spray area, however due to a poor paint colour match by the mixers (not enough blue), the car was obviously not painted.

The near-side mirror casing was removed, as this will be used by a different paint supplier to match the paint to the correct combination.

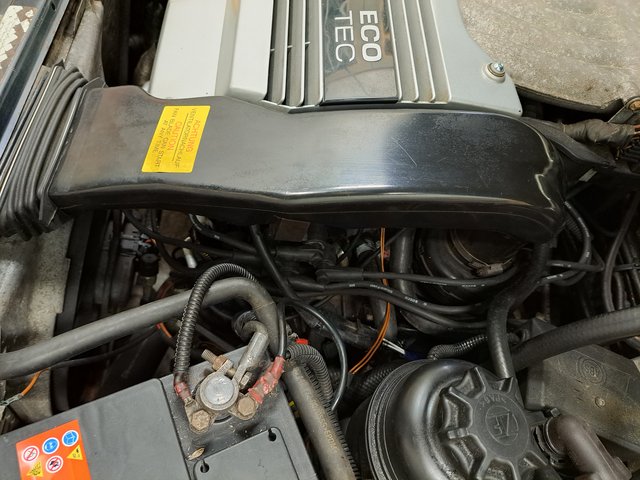
I elected to put everything back together in the engine bay.

First was to refit the ignition amplifier back to the inner wing under the power steering reservoir.
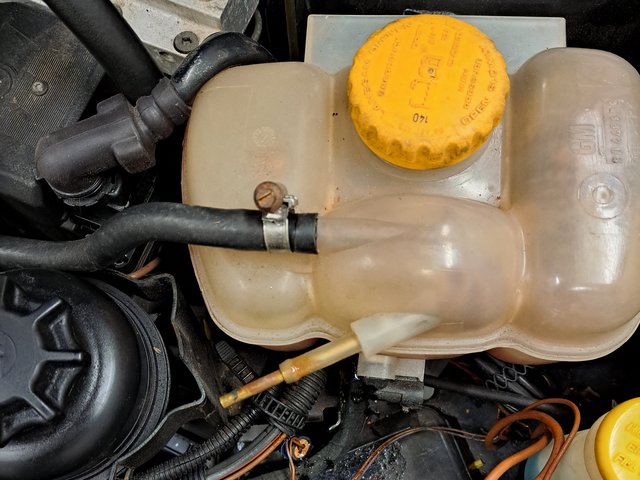
A bit of a bugger to get the screws in so I moved the coolant header tank for better access.

I initially released the top hoses, but realised that this was not necessary, but I am happy that I did, because I found the stub reinforcing liner to be sticking out a long way from the stub.

Image

This was gently tapped back into the stub.

Then all the air-trunking was refitted. It is redundant due to the alternator not requiring an external cooling fan, but the trunking keeps the original look.

Image

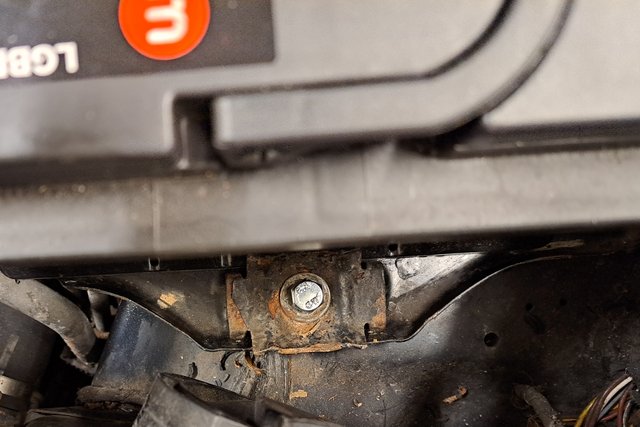
The battery terminals were tightened and the battery clamp bolt replaced with a new one, as the old bolt had a virtually stripped thread.

Image

I found a button-head screw to fit the plastic cylinder head cover. Not a perfect match, but now all four corners are securely located.

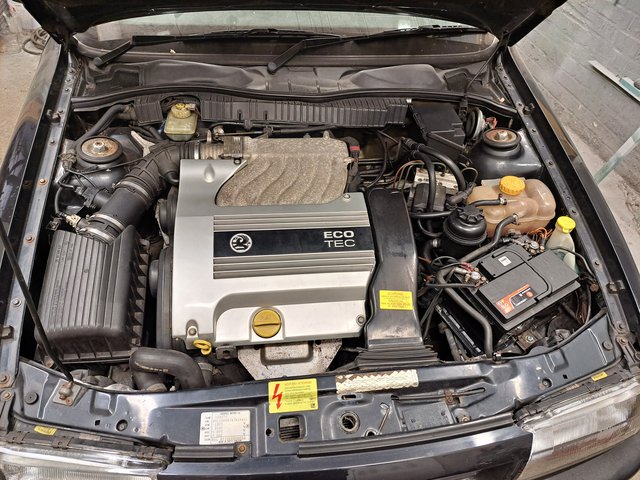
So here we go - fully assembled.

Image

At least that is the engine-bay work 'boxed off'.
User avatar
Robsey
Club Admin
Posts: 10619
Joined: Fri Dec 12, 2008 1:42 pm
Location: East Manchester

Re: James' 1995 Manual CDX V6 Saloon

Post by Robsey »

Hot off the press...
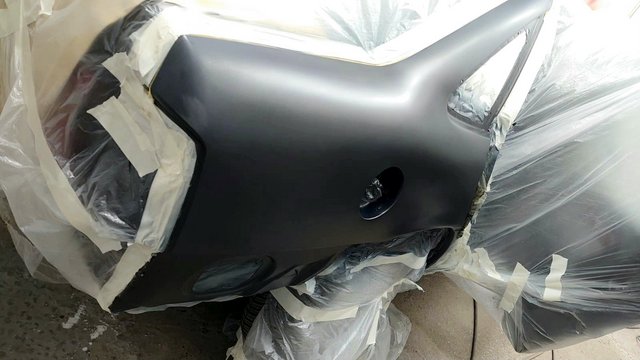
1st Base coat applied.

Image

Next Update....
2nd February 2022

Lacquer on...

Image

He won't know how good the colour match is until he removes the masking...
User avatar
Robsey
Club Admin
Posts: 10619
Joined: Fri Dec 12, 2008 1:42 pm
Location: East Manchester

Re: James' 1995 Manual CDX V6 Saloon

Post by Robsey »

8th February 2023

The car has been put back together.

Engine Bay -
I refitted the battery cover, so the engine bay is complete.

Interior -
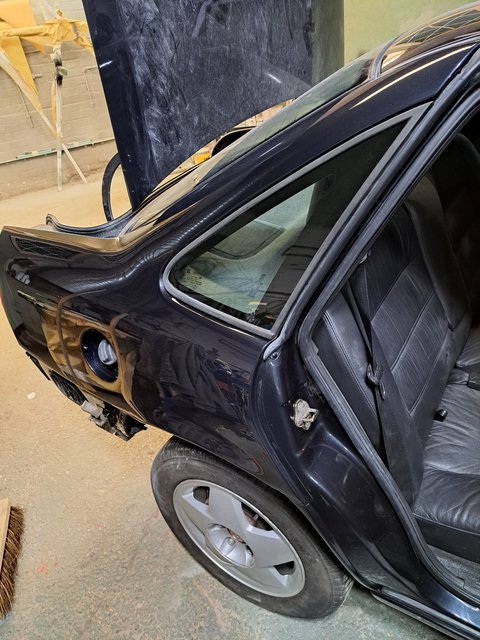
I refitted the off-side rear quarter glass,

Image

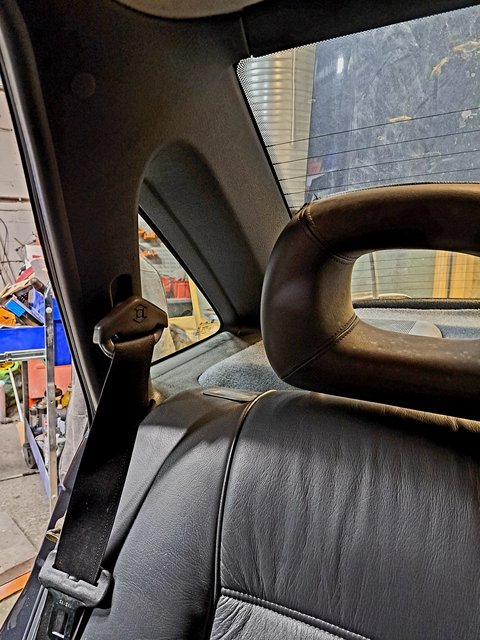
the rear quarter interior trim and a new buckle cover.

Image

Image

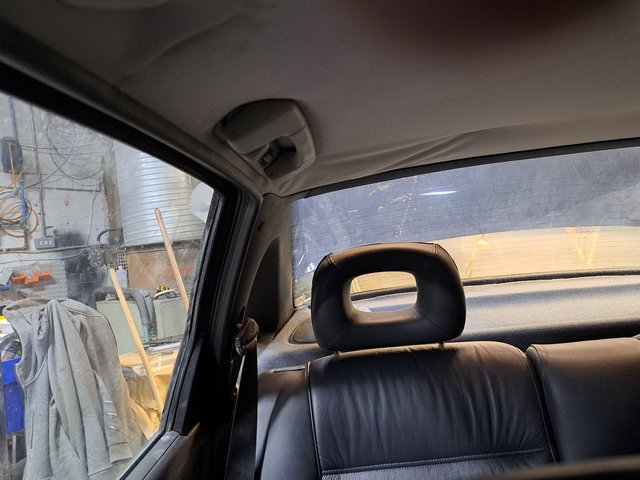
Interior complete.

Boot and Rear Bumper -

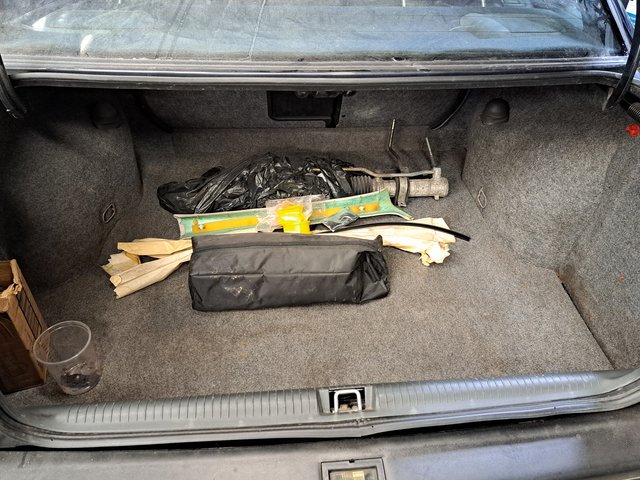
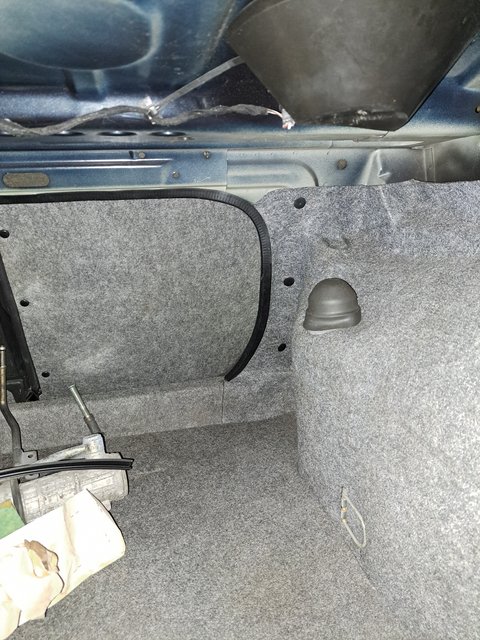
The boot interior trims, carpet etc; were all fitted.
I forgot how tight a fit that plastic rear valance cover is.
All done now though.

Image

Image

And the rear bumper finally attached.

Off-Side Rear wheel -
The wheel nuts torqued up and the centre cap refitted.

Image

That just leaves one job for Troy to do tomorrow.

The fuel filler cap and rubber filler liner.
Then it is job done.

I lied - I have one piece of boot trim to refit on the off-side of the little hatch behind the rear seats...
User avatar
Robsey
Club Admin
Posts: 10619
Joined: Fri Dec 12, 2008 1:42 pm
Location: East Manchester

Re: James' 1995 Manual CDX V6 Saloon

Post by Robsey »

10th February 2022

In the absence of Troy, I did the last couple of jobs on the car.

First - replace a grommit in the boot floor.
For extra security, smeared with a bit of black sealant.

Image

Then fitted the trim at the rear of the panel behind the rear seats.

Image

The rubber filler neck gasket / liner next.
What a total bugger to get the flange over the bodywork with the filler pipe in situ.

Image

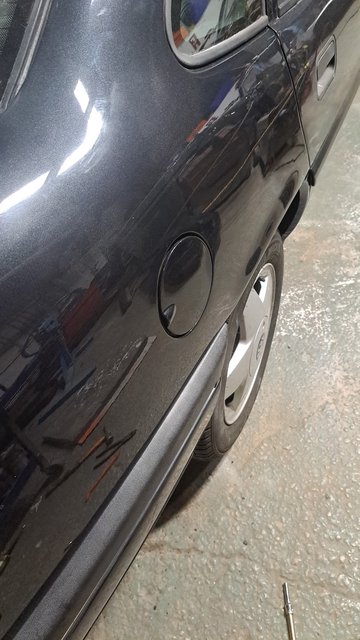
And finally the filler flap.

Image

--------------------------------------------

A quick check for functioning of the lights found a sticking rear fog light switch.

The hazard switch was initially a bit sticky, but free'd off and worked properly after a few actuations.
User avatar
Robsey
Club Admin
Posts: 10619
Joined: Fri Dec 12, 2008 1:42 pm
Location: East Manchester

Re: James' 1995 Manual CDX V6 Saloon

Post by Robsey »

18th February 2023

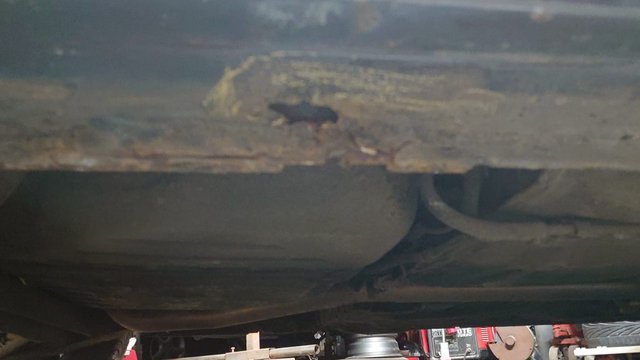
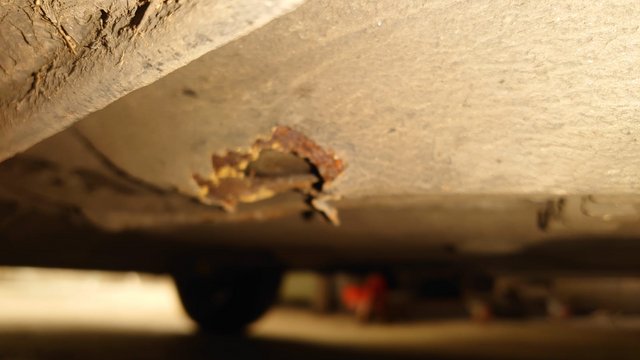
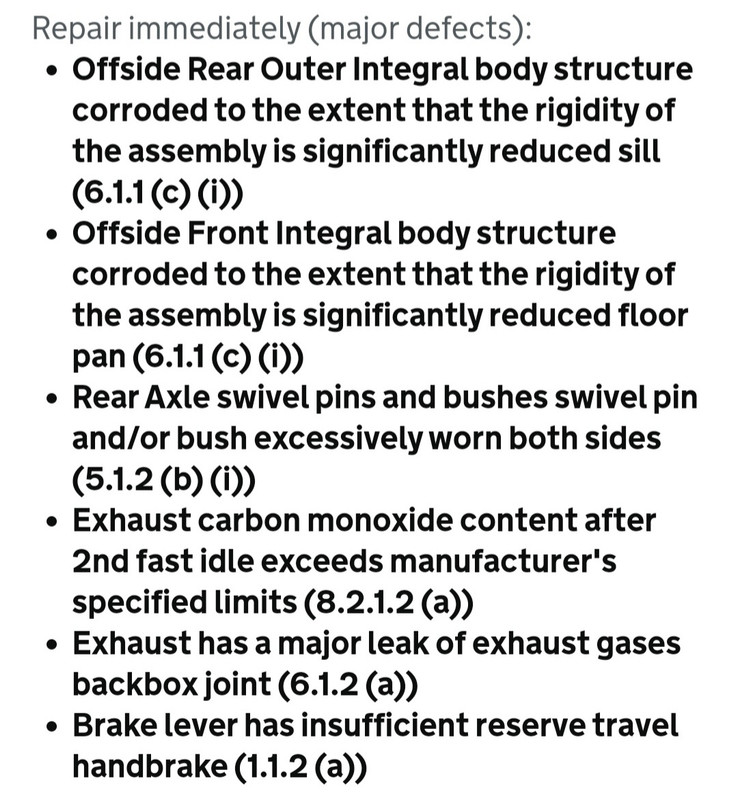
Unfortunately, the car failed it's MOT.

Two bits of welding -
off-side sill,

Image

Front footwell.

Image

Then non-welding stuff -
Hand-brake travel (insufficient reserve)
Swivel pins or bushes - excess wear - rear axle (both)
Leaking exhaust tail-pipe joint
And emissions...

-Image

So some interior stripping beckons...
User avatar
Robsey
Club Admin
Posts: 10619
Joined: Fri Dec 12, 2008 1:42 pm
Location: East Manchester

Re: James' 1995 Manual CDX V6 Saloon

Post by Robsey »

22nd February 2023

When I arrived tonight, Troy had already done the off-side rear sill.
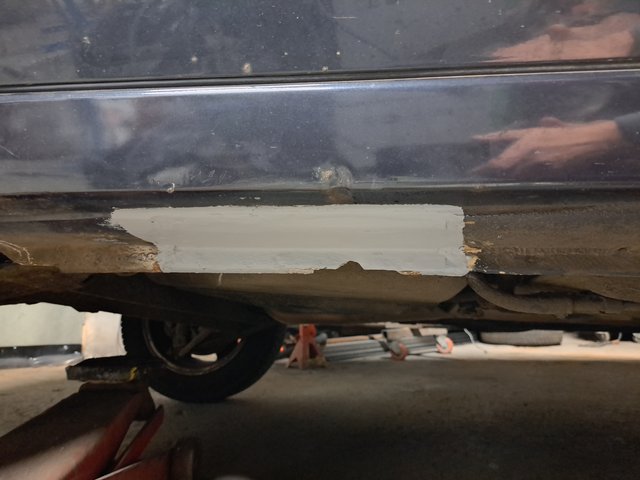
Image

It looks like he had been busy again.
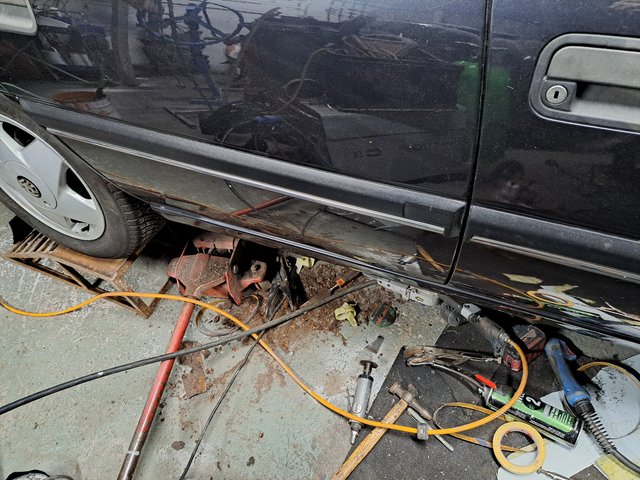
Image

Next job was to do the rear brakes - excessive handbrake travel.
The off-side (driver's) handbrake was set about right.

The near-side was not very effective.

Being a bit of a veteran at these things, Troy had the cable adjusted up so that full wheel-lock was achieved with six clicks on the lever, in less than ten minutes.

Next job - I unbolted the front of the driver's seat just enough to get the carpet and underlay out of the way.

Protected by a piece of sheet steel and a fire blanket, the hole just forward of the driver's seat was repaired.

All welded up, cleaned and painted inside.

Whilst he did the repair panel and welding, I removed the exhaust.
It came apart quite easily, the centre section was quite a loose fit in the tail-pipe.
It didn't look like much exhaust paste had been used originally
I cleaned up the joint faces and then re-sealed with 300°C silicon sealant.

Image

Re-assembled and tightened up.
I managed not to shear the exhaust clamp U bolt.

Note the fancy-pants hanger-rubber retaining clips.
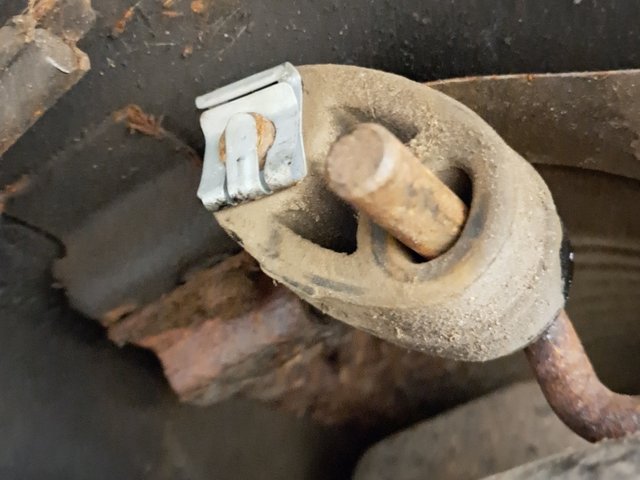
Image

Whilst I was under the car, I also loosened the rear beam pivot bolts ready to drop the beam when the bushes have arrived.

The near-side bush was tatered. Lots of movement of the beam.

Last job was to test the exhaust.
The car is still a bit reluctant to start, but once it is running, it is quite happy.

I am pleased to say no leaks, but still quite a fruity note.

Because of my OCD, I made sure that the tail pipe was straight / level.
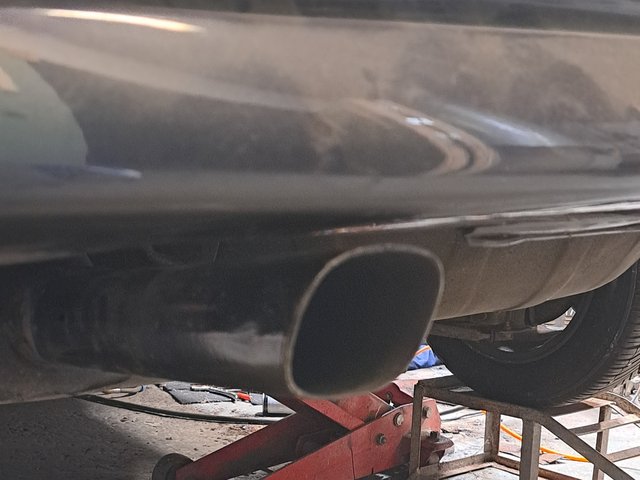
Image

Last job tonight was to paint / underseal the exterior of both repair panels.

Other than the rear beam pivot bushes, it looks like we have sorted everything else listed on the fail sheet.
User avatar
ilovedmymantas
Registered user
Posts: 1202
Joined: Sat Jan 12, 2013 2:54 am

Re: James' 1995 Manual CDX V6 Saloon

Post by ilovedmymantas »

blimey, someone's had their weetabix :lol:

What a good write-up, I haven't seen this level of cav work for ages :thumb
" It's not rust. It's age-related patina " ;)
1980 vauxhall cavalier MK1 1.6L, 1982 opel manta berlinetta 1.8s, 1985 opel manta 2.0 gte, 1990 cavalier 2.0 gl ,1994 cavalier sri x20xev

-1995 cdx x20xev

---------------
Matt
3cav3
Registered user
Posts: 1422
Joined: Sun May 22, 2016 6:07 pm

Re: James' 1995 Manual CDX V6 Saloon

Post by 3cav3 »

Cant believe how fast you've moved it on, looks awesome level of finish too.
Really feel for James having to sell his house, my fixed rate mortgage is due to expire in August, if I hadnt over paid it when I couldn't spend much during lockdown, I'd too probably have to consider selling up. Its still going to really hurt.
Hopefully the cracking job on the Cav will help ease the pain.
User avatar
Robsey
Club Admin
Posts: 10619
Joined: Fri Dec 12, 2008 1:42 pm
Location: East Manchester

Re: James' 1995 Manual CDX V6 Saloon

Post by Robsey »

It has been about three or four months from end to end - during evenings after work for both of us.

Plan is for the bushes to be fitted, and get that elusive piece of white paper before the end of the week.
User avatar
Robsey
Club Admin
Posts: 10619
Joined: Fri Dec 12, 2008 1:42 pm
Location: East Manchester

Re: James' 1995 Manual CDX V6 Saloon

Post by Robsey »

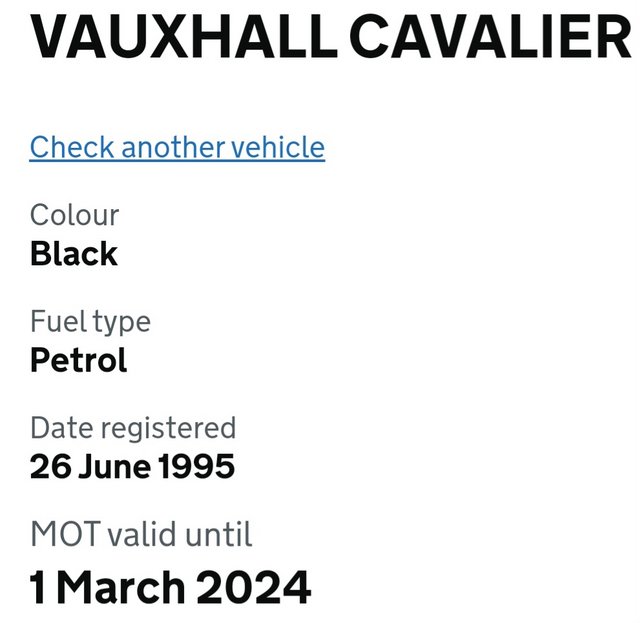
A quick look at the .gov site shows that the Cavalier now has a test certificate until 1st March 2024.

Whoop whoop!!

Image

Image

The Cav will be making her triumphant trip back home very soon.
I will bid her a safe journey home when I visit the unit tomorrow.
User avatar
Envoy CDX
Club Admin
Posts: 9680
Joined: Sun Sep 23, 2007 3:51 pm
Location: Jarrow, Newcastle Upon Tyne

Re: James' 1995 Manual CDX V6 Saloon

Post by Envoy CDX »

Fantastic! :)
Check the Rules!

Raw 8v Power! - Bad Cav, Naughty Cav... Cav want's to do 90!

The How2 Index
Post Reply