1990 G-plate 1.8L Hatchback

Show off your pride and joy! All Mk3 Cavaliers are welcome (please post only one thread per car)
User avatar
MrSteve
Posts: 39
Joined: Fri Aug 25, 2017 12:15 am
Location: Lancaster

Re: 1990 G-plate 1.8L Hatchback

Post by MrSteve »

I replaced the seal between the head and the thermostat housing- used one of these- Viton has a wider temp range .

Image


And this arrived a short time ago. :)

Looks virtually identical to the original, only shinier and without rust!

Image

Heavy rain forecast over the next 2 days so looks like Sunday is fitting day.
User avatar
Robsey
Club Admin
Posts: 10619
Joined: Fri Dec 12, 2008 1:42 pm
Location: East Manchester

Re: 1990 G-plate 1.8L Hatchback

Post by Robsey »

Yep - rain will stop play for many of us.

Thankfully Sunday afternoon should be drier and less blustery, so maybe squeeze in a few hours before dusk.

Hopefully get it sorted at last.

Then onto the next challenge. :roll:
User avatar
MrSteve
Posts: 39
Joined: Fri Aug 25, 2017 12:15 am
Location: Lancaster

Re: 1990 G-plate 1.8L Hatchback

Post by MrSteve »

My, it's been a while since I posted anything! :oops:

So what has happened since my last post?

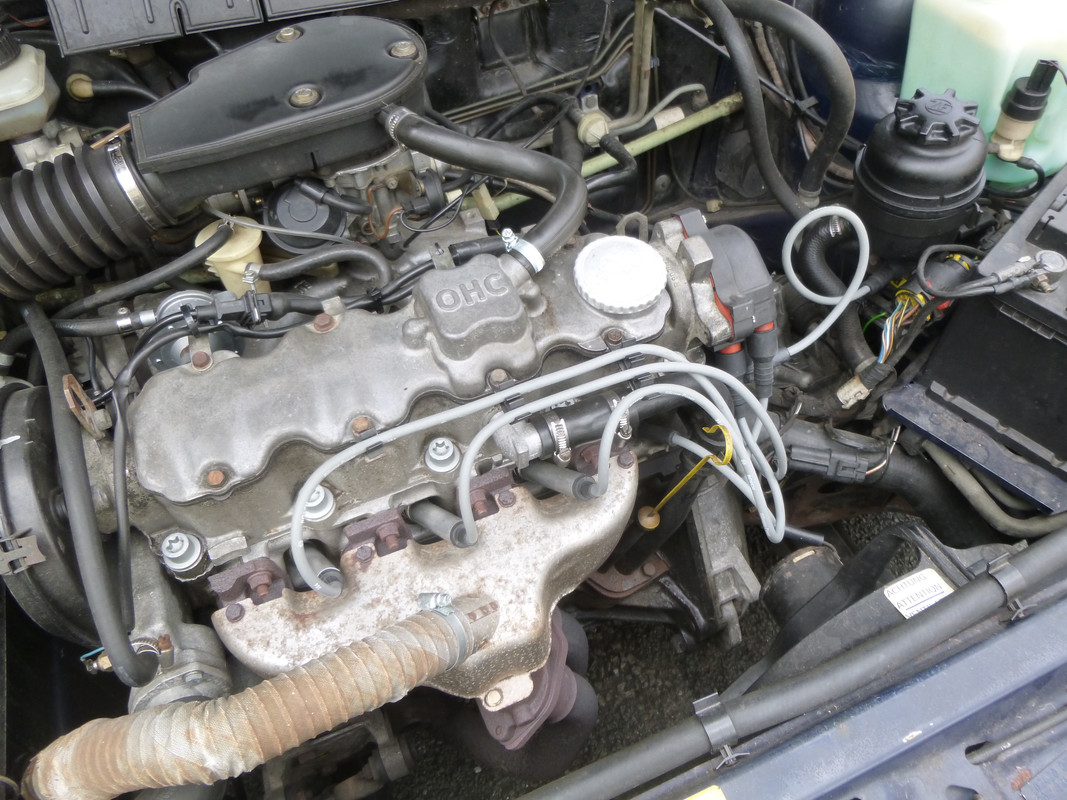
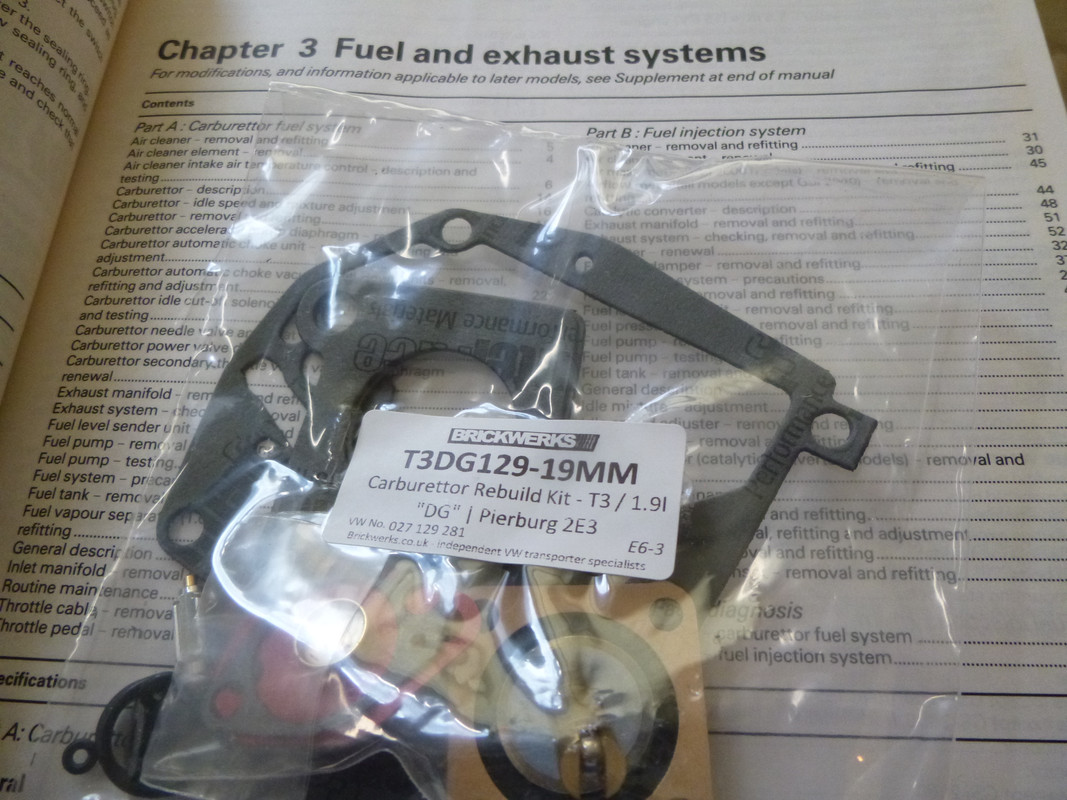
Well, I decided to take the head off, both to renew the head gasket and to be able to apply fresh sealant between the cam housing and head as it was weeping oil.

Whilst the head was off, I fitted new valve stem seals, and gave each valve a quick lap.

I had the head checked and it was fine, but opted to have a very light skim just to clean up the head gasket surface.

Image

Image

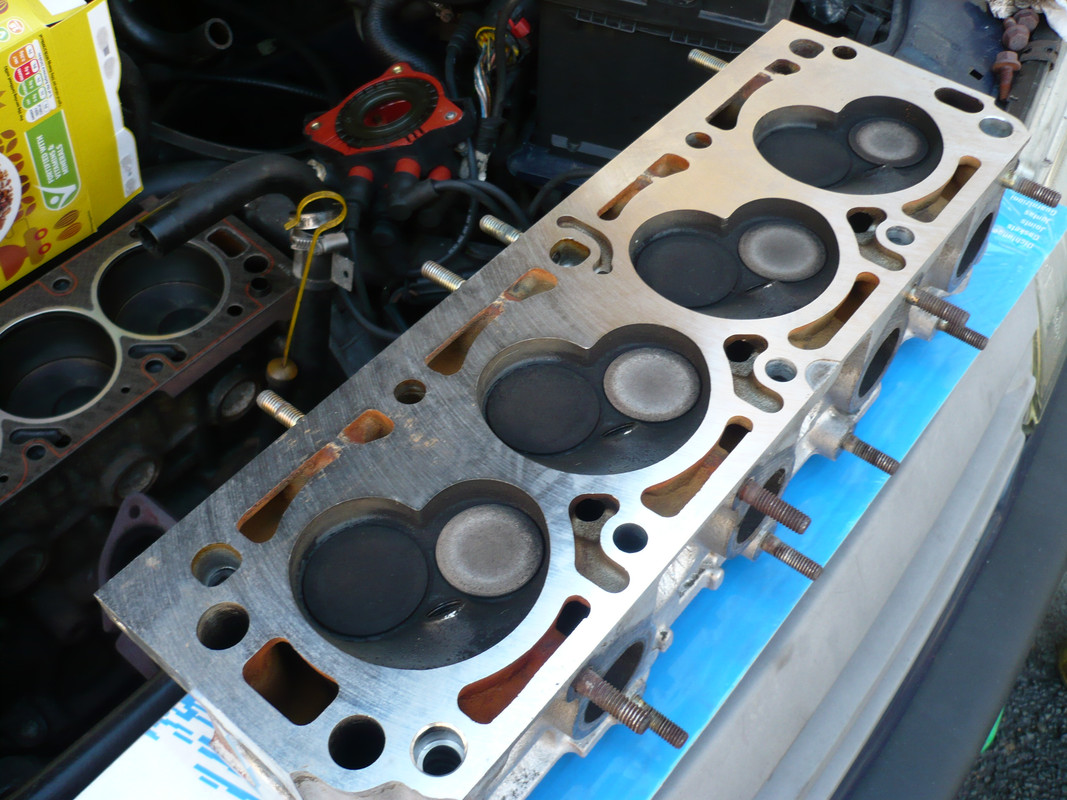
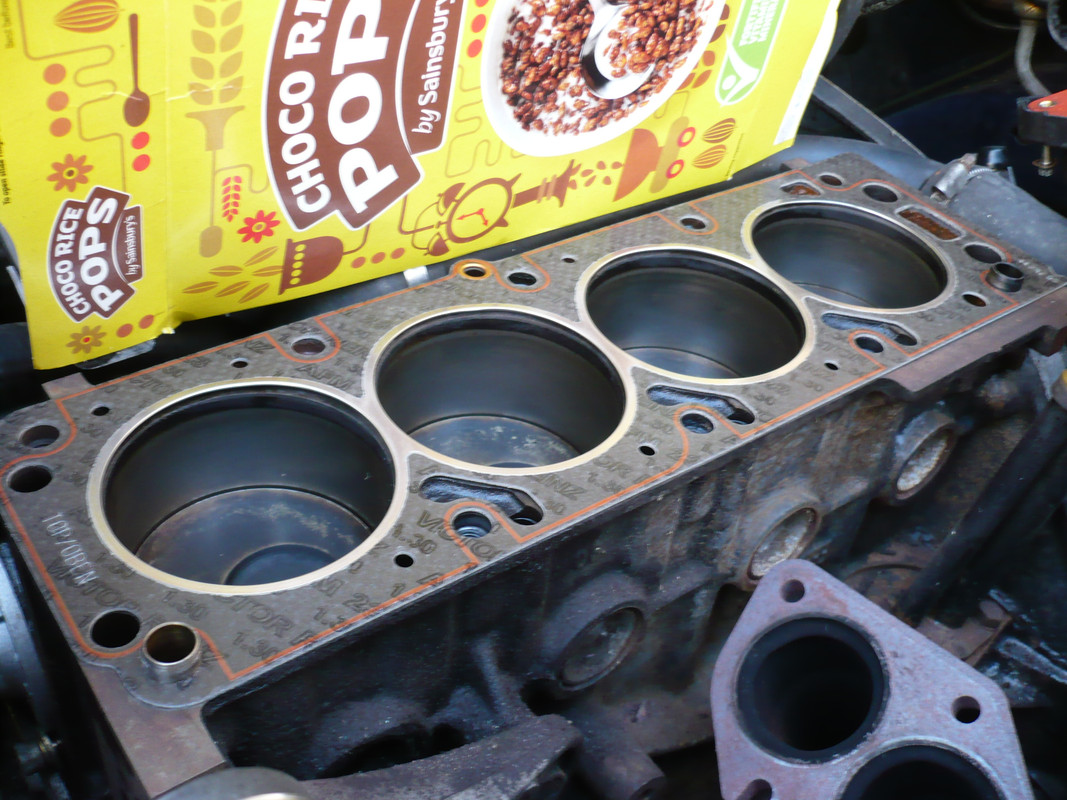
New head bolts, inlet and exhaust gaskets were also fitted.

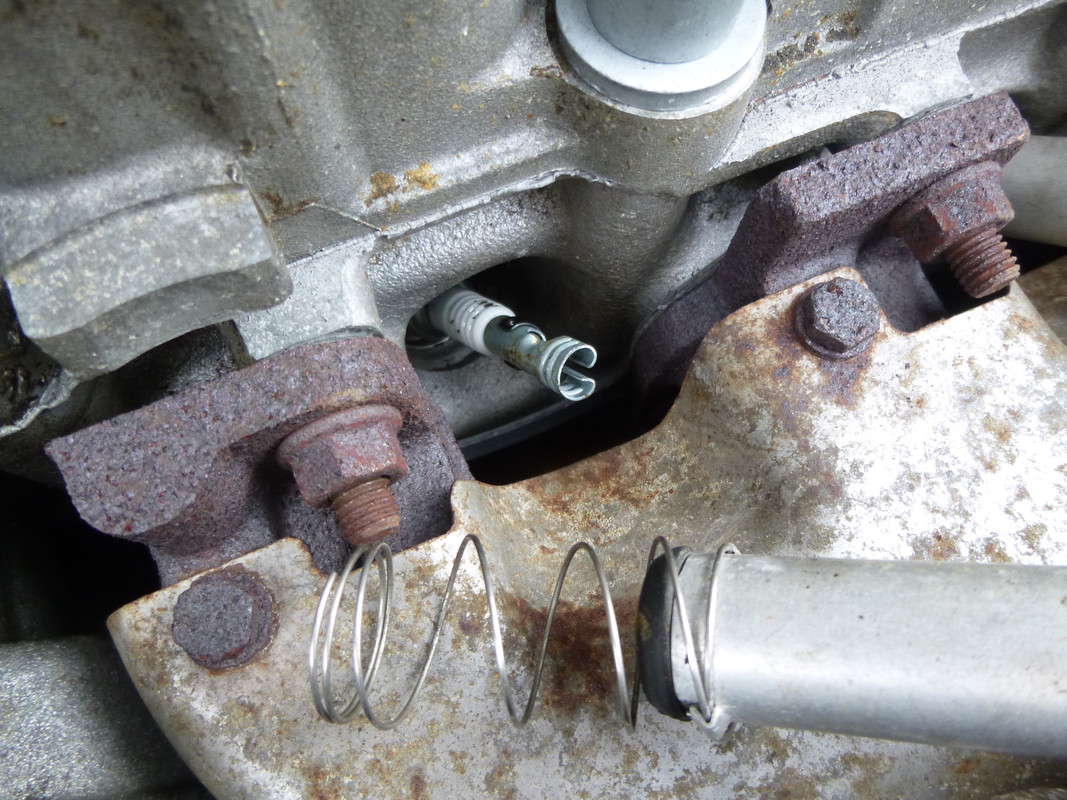
I did have fun as I managed to drop one of the manifold to downpipe bolts down the downpipe, so had to remove the front exhaust section to retrieve it...

All the gaskets and seals for the above work were Victor Reinz brand.

The manifold to downpipe gasket is some random brand and it blows with the bolts at the right torque...will have to replace that with a Reinz one I think.

I also had to replace the little rubber breather pipe between the head and block as it was dripping onto the exhaust manifold and making a bad smell that makes you think you're about to suffer a major mechanical failure.

I got 50cm of black 22mm I/D silicone pipe off ebay and cut off the length I needed- fits well and no more leaks from there. I do have a lot spare if anyone else wants to replace theirs!

I now have oil weeping from the fuel pump and the camshaft seal at the distributor end, so that is some more fun ahead.

Anyway, the dash temp gauge still over-reads, as I did did a temp test from cold with the multimeter sensor lead taped onto the thermostat housing. I first tested the sensor lead in a boiling kettle to see how accurate it was- it is spot on.

Here is what the multimeter said:

Engine cold- 15 degrees

Dash gauge at 80- 47 degrees

Dash gauge at 90- 62 degrees

Dash gauge at 100- 82 degrees (thermostat starting to open, top of rad getting hot)

Dash gauge entered the red at 110- 87-94 degrees (the breezy day was passing air through the rad, I guess). Whole rad hot.

The rad fan kicked in at a multimeter temp of 99 degrees, ran for a few seconds, switched off at 93 but the temp lowered down to 85 degrees before going back up a bit. It kicked in again at 97 degrees for a second, but this time the temp dropped down to 83 degrees before climbing back to the 'normal'range.

One flaw I have noticed with the rad design is that with the outlet being quite a few inches up from the bottom of the rad, on a long run, the bottom of the rad gets stone cold- my other car has the outlet at the bottom, so you get full rad cooling at all times.

But yes, either an over-enthusiastic temp gauge sender or dash gauge.

Now, swapping the clocks for one with a rev counter is quite appealing, but not sure if I should change the temp sender again?
User avatar
MrSteve
Posts: 39
Joined: Fri Aug 25, 2017 12:15 am
Location: Lancaster

Re: 1990 G-plate 1.8L Hatchback

Post by MrSteve »

I have now fixed the dash temp gauge!

I was thinking that it might be worth whipping out the whole speedo unit out and seeing if I could alter the needle position on the temp gauge.

Took a while to get the speedo out- what Haynes doesn't say is that once you have taken out the 3 screws that hold the speedo unit into the dash, you then need to pop the bonnet and shove the speedo cable into the car a few cm so you can pull the speedo unit out enough to get your hand behind the speedo to unclip the speedo cable and the 2 multiplugs. Oh, and it helps if you can unclip and remove the speedo glass too!

I then removed the dash temp gauge to investigate...

Turns out you can't alter the needle position on its shaft, but you can gently bend the long U-shaped metal arm that operates the needle.

With the multimeter temp sensor in position on the thermostat housing and its screen visible from the drivers seat, I ran the engine up to temp and then made a series of adjustments until the gauge needle position was close enough to the multimeter readout.

Bit of a faff because you have to keep taking the speedo unit out and dismantle the dash gauge to bend the metal operating arm, then re-assemble and try again...

After 4 rounds of adjustments, I've gone from a gauge that over-reads by around 25-30 degrees to one that now over-reads by less then 5 degrees!

Out on the road this means that the needle sits around the 95 degree mark depending on speed and airflow and the cooling fan kicks in just over the 100 degree mark when stationary, which sounds fine to me! :D

Found another Cav near me earlier too- an L-reg hatch in a turquoise colour- might have to have a chat with them one day.

No pics, sorry, as I have lost my camera. :(
User avatar
Mk3alan
Registered user
Posts: 633
Joined: Sun Mar 09, 2014 8:40 pm

Re: 1990 G-plate 1.8L Hatchback

Post by Mk3alan »

Sounds like a bit of a faf, but a good result!

Alan
User avatar
Robsey
Club Admin
Posts: 10619
Joined: Fri Dec 12, 2008 1:42 pm
Location: East Manchester

Re: 1990 G-plate 1.8L Hatchback

Post by Robsey »

Good news on the gauge fix.
Yes a fair bit of faff, but worth it in the end.

Always nice to see another Cavalier pootling around in your area.

Not many at all near me now... probably 4 or 5 within a 10 mile radius.
Ten years ago, there were no less than a dozen members plus countless non-members driving Cavaliers about in the same locality.

Reading your earlier posts, I see you have the Pierburg 2e3 carburettor.
A good little unit that works well.
Adjustments are very easy to carry out.
Only issue I ever had on my 1987 1.3S Cavalier also with the 2e3, was the auto-choke.
I ended up fitting an 'Alexander' manual choke conversion kit, and a choke lever from an older Mk2.
No more issues after that.

The breather pipe between head and block is a well known dribbler.
I fitted a brand new GM original pipe a few years ago. Strangely in my opinion it was a good 1 inch / 2.5cm too short.

All the gaskets are easy to sort, including the camshaft seal behind the distributor.
The important thing (as you know) is to mark all the alignment positions of the distributor before you loosen the clamp / hold down ring and pull it out of it's bore.

Not sure why, but the small block engines didn't seem to weep oil as much... but the 1.8 and 2.0 blocks weep for fun.

A good splurge on the gaskets in this nice weather, should have the gaskets sorted in a matter of a couple of hours.
The Viktor Reinz kit should be spot on.
User avatar
MrSteve
Posts: 39
Joined: Fri Aug 25, 2017 12:15 am
Location: Lancaster

Re: 1990 G-plate 1.8L Hatchback

Post by MrSteve »

Blimey- it's been a while since I posted anything... :oops:

Before the last MOT I found this bit of passenger footwell floor had rotted out- here it is all cleaned up to see how frilly it was, before cutting out the rust:

Image

Bit fiddly to shape the new pieces and I ran out of welding gas before finishing, but after grinding down the pigeon poop gas-free welds, epoxy priming, black stonechip then spray wax it looked like this:

Image

MOT passed with no advisories again!

The next problem was that the fuel pump, the original Pierburg, developed a fuel leak, so I got a cheap one off ebay.

A month or so later the car started to run badly and would cut out- eventually stranding me at the other end of town. After doing all the usual checks I ended up syringing petrol into the float bowl- it started and ran, so I drove it home pronto!

After stripping the carb and cleaning out the jets, it turned out to be...the fuel pump!

Image

Yup! The spring had broken- arrows show the break. This meant it couldn't pump enough fuel through...cue a new pump...a named brand this time- Quinton Hazell.

As it's been running a bit rough and feeling a bit 'missy' from cold recently, I thought I'd check the plugs- cylinders 4, 3 & 2 were all fine, but when I tried pulling off the No.1 lead...

Image

Sigh.

So I have ordered a set of Bosch leads (ref 0 986 356 801 / B801) for not a lot off ebay - £17- so when those arrive I hope it will make a difference...!
User avatar
Robsey
Club Admin
Posts: 10619
Joined: Fri Dec 12, 2008 1:42 pm
Location: East Manchester

Re: 1990 G-plate 1.8L Hatchback

Post by Robsey »

Welcome back Mr Steve,

Those dreaded plug leads -
I always seem to lose the end off just one lead.

Amazingly though, if the lead is otherwise okay, you can shove the lead cap back onto it's end piece. The car should not run any worse than it did before.

As for this poor running in damp weather, I usually found that it was caused by damp / condensation in the distributor cap or rotor.
Or on one extreme case, the ignition amplifier under the coil on the wing.
User avatar
MrSteve
Posts: 39
Joined: Fri Aug 25, 2017 12:15 am
Location: Lancaster

Re: 1990 G-plate 1.8L Hatchback

Post by MrSteve »

The HT leads are a random brand, so the Bosch ones will be an improvement.

It's good you mentioned the amplifier because I found my heatsink grease earlier, and I know it hasn't got any on it at the moment.

Hopefully the leads will arrive on Monday, so all these little jobs will keep me amused when the sun is shining.
User avatar
MrSteve
Posts: 39
Joined: Fri Aug 25, 2017 12:15 am
Location: Lancaster

Re: 1990 G-plate 1.8L Hatchback

Post by MrSteve »

The new Bosch HT leads arrived yesterday and the engine bay now looks like this:

Image

I also just went for a test drive and the stuttering performance seems to have gone and it has gone back to more normal smoother running.

So once again Bosch quality parts beat random obscure/lesser brands!

Might even treat the car to some Autoglym Vinyl & Rubber spray & give the black plastics a bit of love...
User avatar
James McGrath
Club Admin
Posts: 2896
Joined: Tue Aug 11, 2009 11:35 am
Location: East Sussex

Re: 1990 G-plate 1.8L Hatchback

Post by James McGrath »

Good to hear it was an easy fix. :thumb

Your engine looks amazing, no leaky gaskets there!
I'd love a 1.8 carb one day; good power, simple easy to fix mechanics and no emissions test to pass!
User avatar
Robsey
Club Admin
Posts: 10619
Joined: Fri Dec 12, 2008 1:42 pm
Location: East Manchester

Re: 1990 G-plate 1.8L Hatchback

Post by Robsey »

Carbs are great, when everything is working.
The Pierburg is an excellent willing unit used by many European manufacturers.
A good bit of unrestricted grunt on tap.

There is an emissions test - lol.
But nowhere near as strict as for an injection set-up.

I think for carbs it is a max 2% CO,
Whereas injections are a max of 0.3% CO.
Plus all the other HC milarkey etc.

Good to see that things are working well again 8-)
User avatar
MrSteve
Posts: 39
Joined: Fri Aug 25, 2017 12:15 am
Location: Lancaster

Re: 1990 G-plate 1.8L Hatchback

Post by MrSteve »

Had to go for another test drive this afternoon...you know...just because...still running fine. :D

Autoglym spray ordered and arriving tomorrow sometime- paid £7.10 on Amazon (rather than Halfords £9.50 :shock: ).

That engine bay is indeed quite clean and is mostly oil-free, apart from the slow dribble from the camshaft seal that has left a bit of an oily mist on the gear selector area. Oh, and the still-leaky sump gasket. :lol:
User avatar
MrSteve
Posts: 39
Joined: Fri Aug 25, 2017 12:15 am
Location: Lancaster

Re: 1990 G-plate 1.8L Hatchback

Post by MrSteve »

Small update from here in Lancaster.

Main thing was the MOT, which I forgot to book early enough in August so as to get a test date close to when it expired... :oops:

(Cue much anxiety about having an unMOT'd car on the road for 2 weeks until test day on 4th September)

As the Cav doesn't get used a great deal (less than 2k miles per year), my approach to the MOT was to give it a wash and a vac, go wild with the Autoglym spray, clean and grease the front caliper sliders, check the bulbs and washer fluid, then see how things go.

Cav all glammed up, ready to wink seductively at the MOT tester:

Image

And the result:

Image

That's the no-advisories hat trick!

So now it's road legal again, I'll do the oil change I should have done pre-test and then have a go at the Pierburg with this:

Image
User avatar
Robsey
Club Admin
Posts: 10619
Joined: Fri Dec 12, 2008 1:42 pm
Location: East Manchester

Re: 1990 G-plate 1.8L Hatchback

Post by Robsey »

Excellent news on yet another clean sheet.
:thumb

Shame you have to get a VW campervan parts supplier to get a Pierbutg carburettor service kit.
User avatar
ilovedmymantas
Registered user
Posts: 1202
Joined: Sat Jan 12, 2013 2:54 am

Re: 1990 G-plate 1.8L Hatchback

Post by ilovedmymantas »

Congratulations on passing.
Wow three clean ones in a row :thumb speaking of which, car's looking good, I don't think my car interior's been touched in three years :o
" It's not rust. It's age-related patina " ;)

1980 vauxhall cavalier MK1 1.6L, 1982 opel manta berlinetta 1.8s, 1985 opel manta 2.0 gte, 1990 cavalier 2.0 gl ,1994 cavalier sri x20xev

-1995 cdx x20xev

---------------
Matt
cavalier1990
Registered user
Posts: 1463
Joined: Wed Jun 29, 2011 9:15 pm
Location: Paisley, Scotland

Re: 1990 G-plate 1.8L Hatchback

Post by cavalier1990 »

Looks good with the black wheels, and a pre-facelift as well!

I think that engine is the same one from the expression model I stripped out, got a few pipes, rad and fan from engine bay. I think the guy still has the complete engine and box lying in his yard.
Post Reply