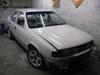
Subject: ddohertys... 1.7 Isuzu Cavalier Project *pic heavy*
-
ddoherty406
- Registered user
- Posts: 54
- Joined: Wed Jun 29, 2011 11:23 am
- Location: Northern Ireland - Derry
Re: Subject: ddohertys... 1.7 Isuzu Cavalier Project *pic he
Thanks lads. It'll go well with the rest of the interior. Handy enough done if you take the time.
-
ddoherty406
- Registered user
- Posts: 54
- Joined: Wed Jun 29, 2011 11:23 am
- Location: Northern Ireland - Derry
Re: Subject: ddohertys... 1.7 Isuzu Cavalier Project *pic he
Well, I had the second sunroof all built up and whilst putting it back in I damaged it, so ended up sitting looking at two broken units. Luckily it was different parts that were broken so I decided to strip one down and build a hybrid out of both. Worked out better in the end as everything was stripped cleaned and greased.
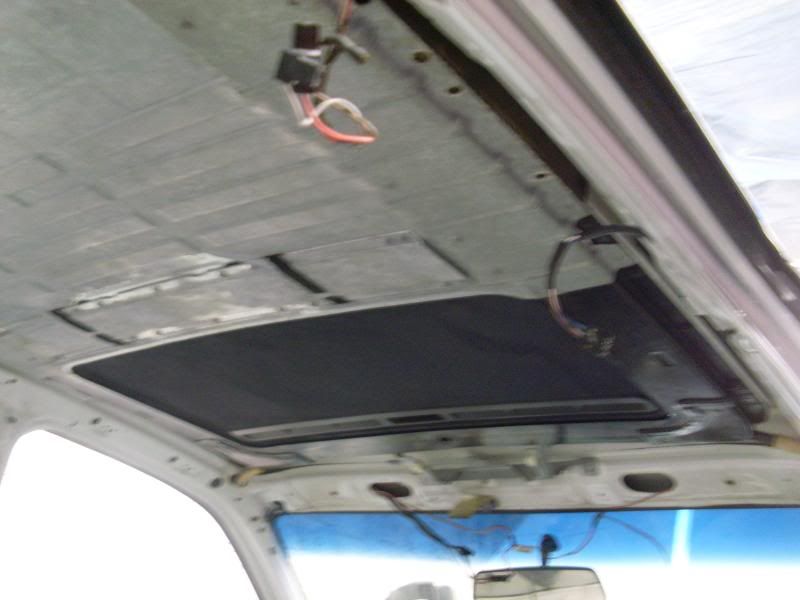
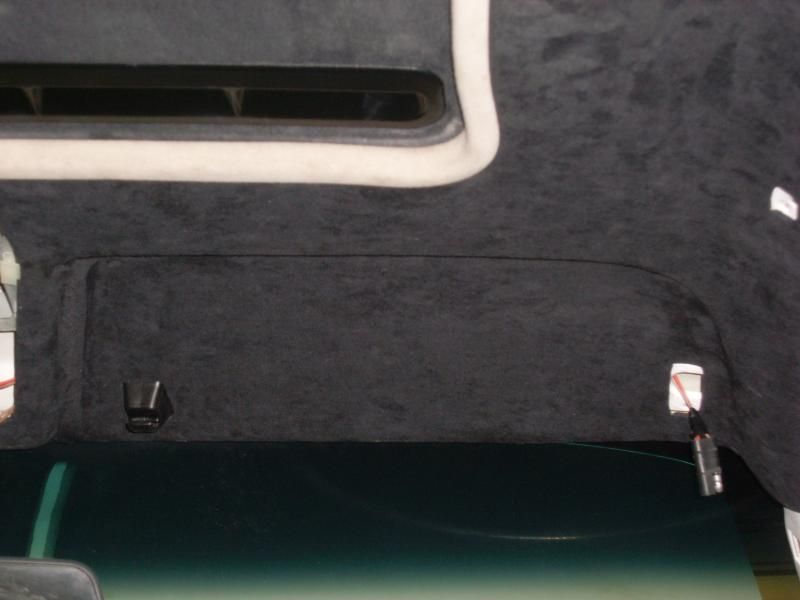
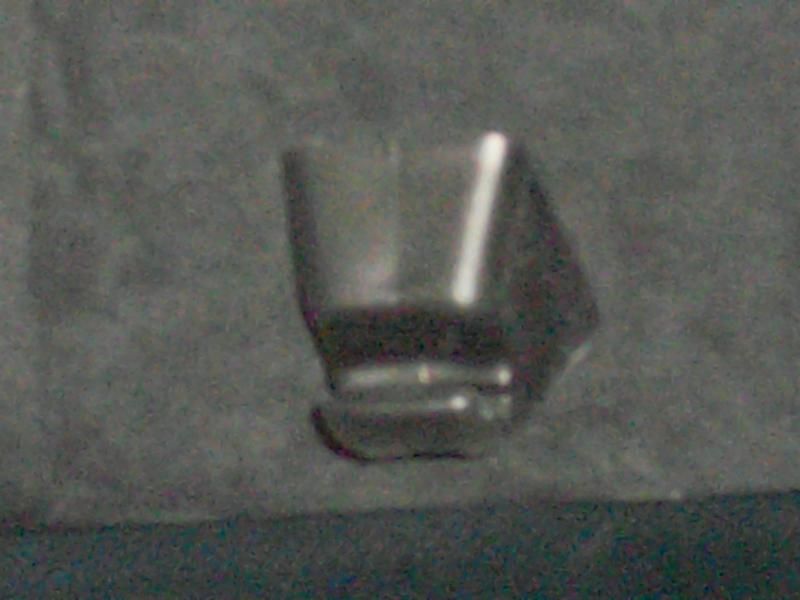
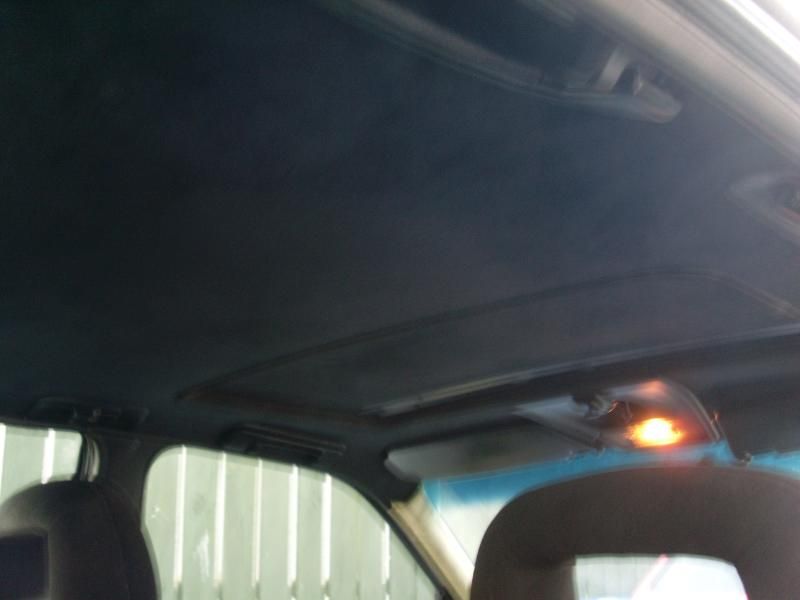
Now back in and a few pics of the roof lighting extras....
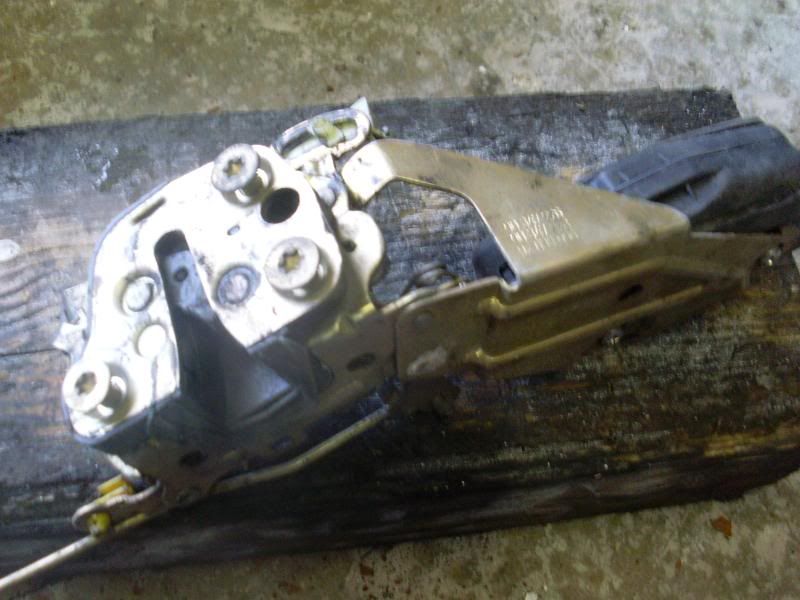
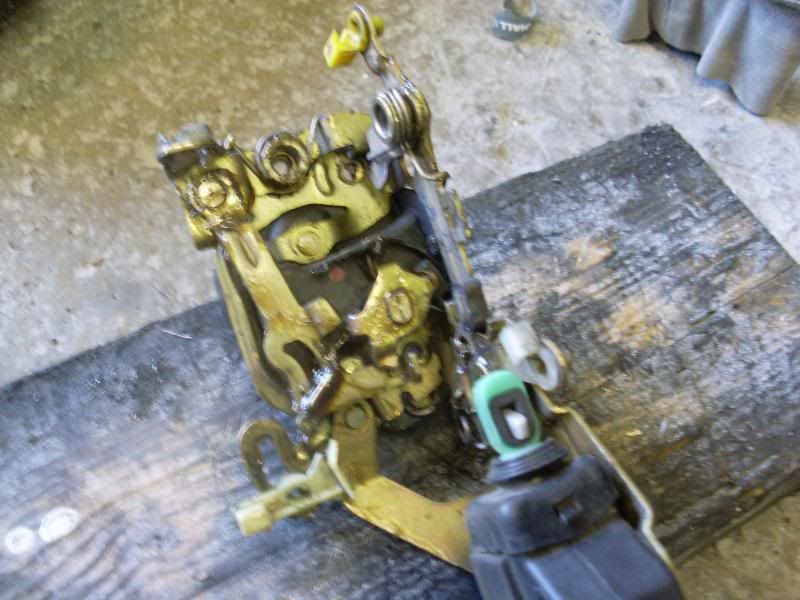
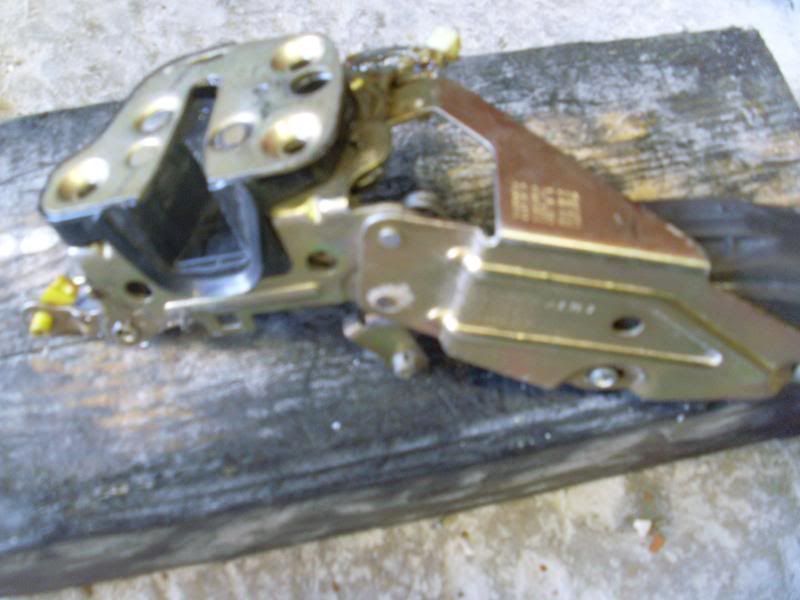
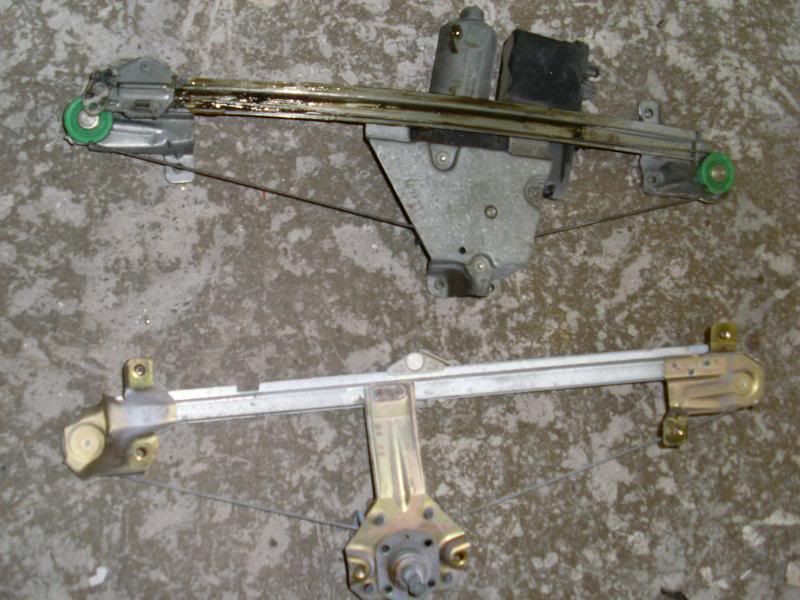
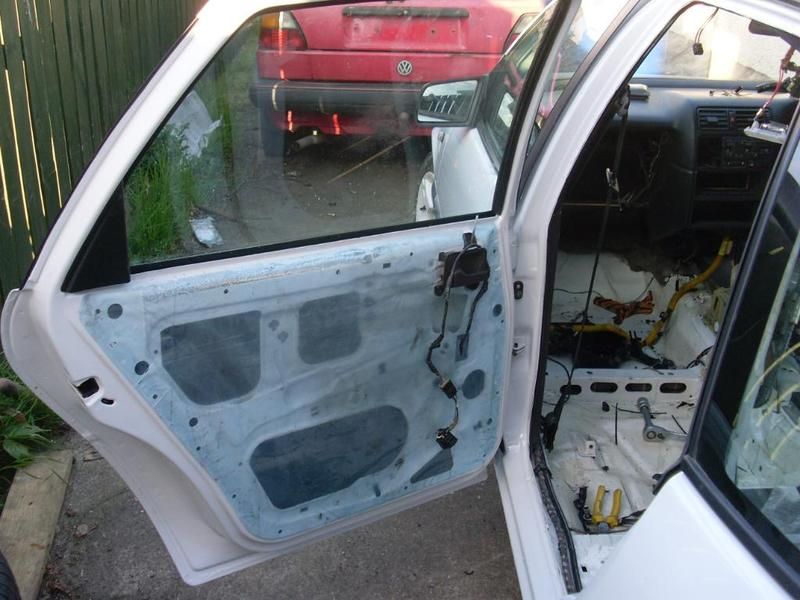
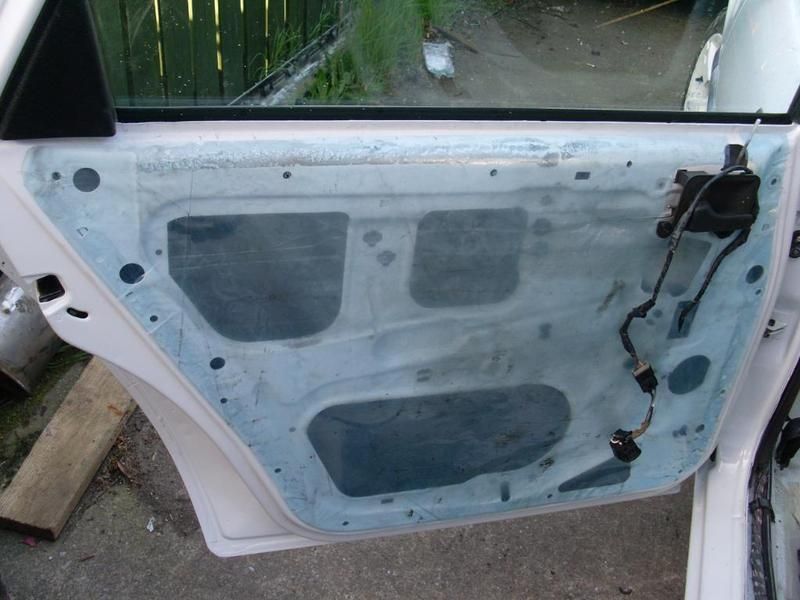
Ive also started building the doors back up. Cleaned and greased the locking mechanisms... Also drilled out the revits of the manual window winders and switched over to the electric ones...
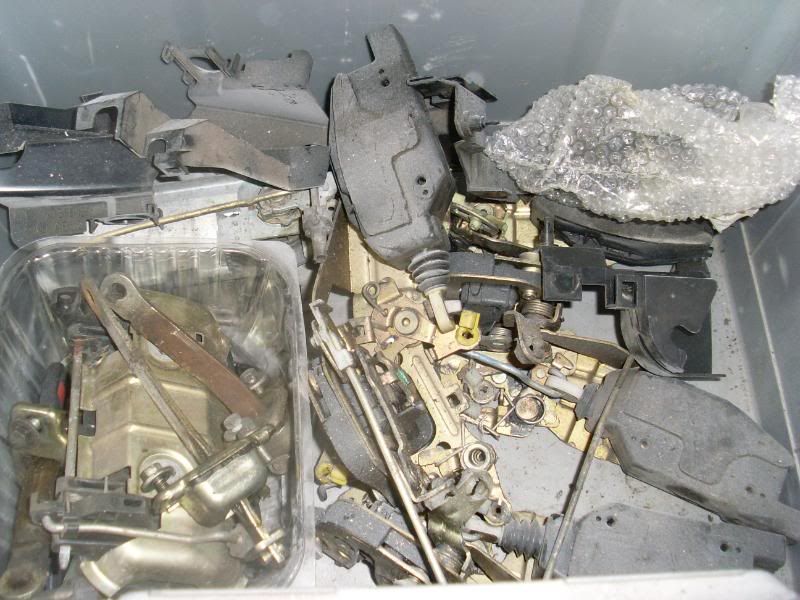
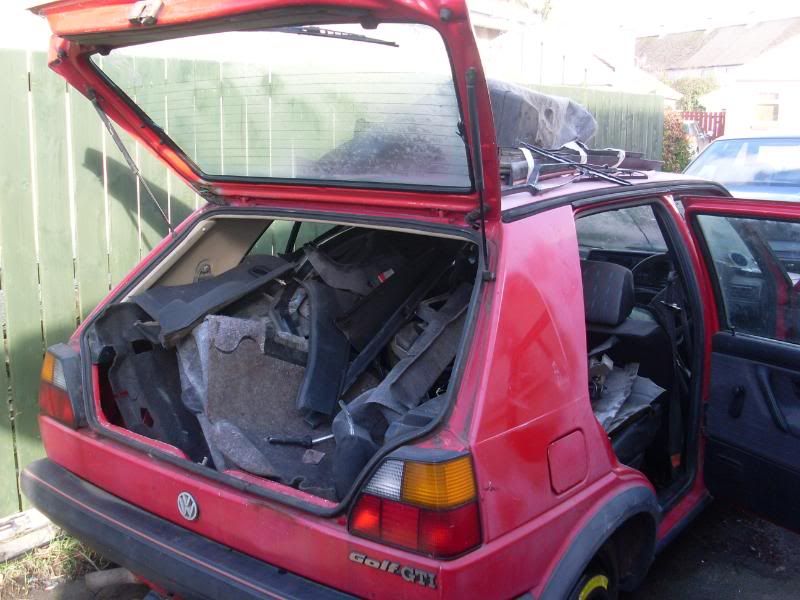
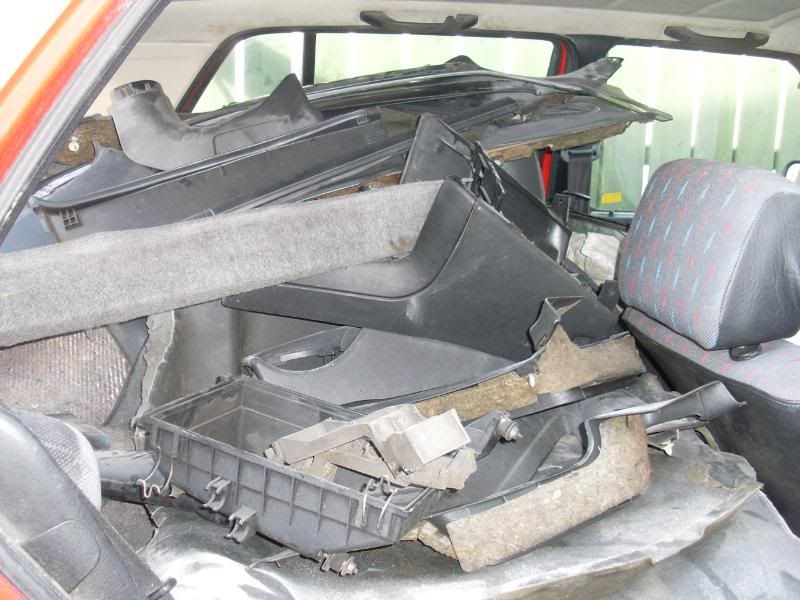
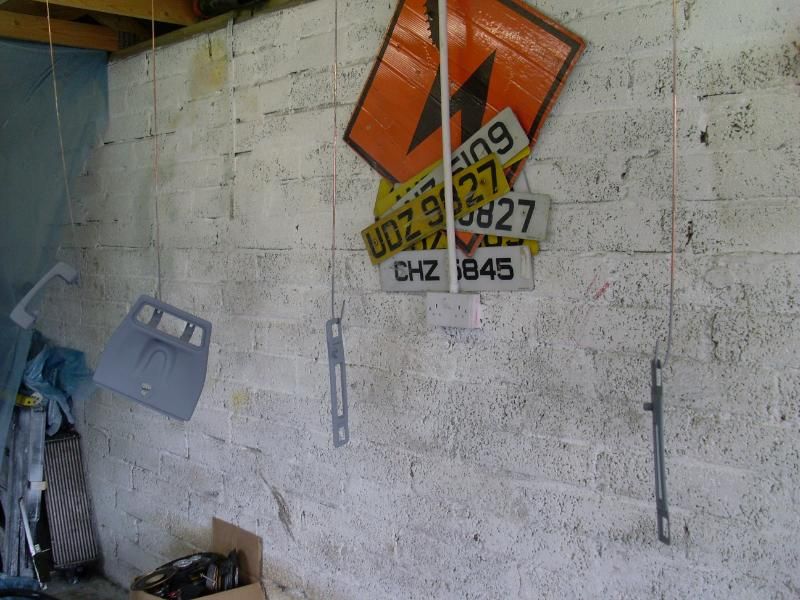
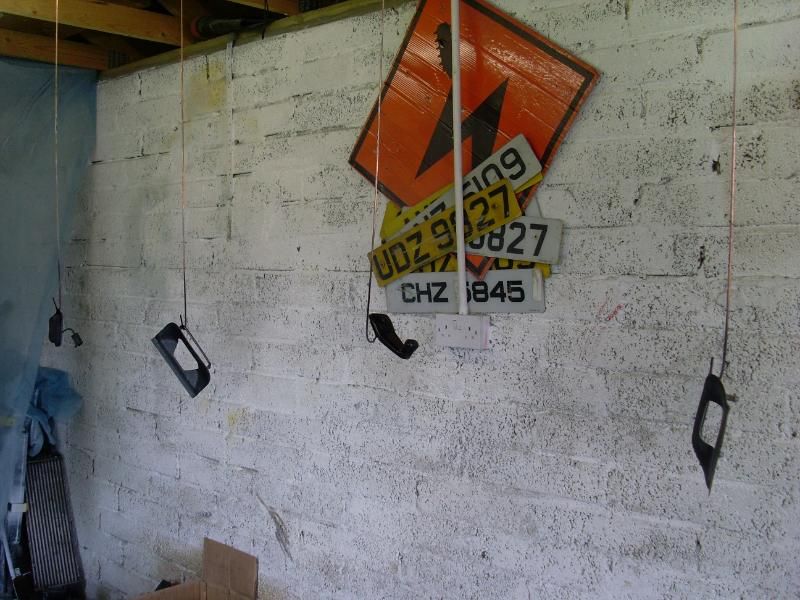
Few pics of my cav parts shed and everything that has to go back in. Also started cleaning and installing some of the door rubbers...
Now back in and a few pics of the roof lighting extras....
Ive also started building the doors back up. Cleaned and greased the locking mechanisms... Also drilled out the revits of the manual window winders and switched over to the electric ones...
Few pics of my cav parts shed and everything that has to go back in. Also started cleaning and installing some of the door rubbers...
-
ddoherty406
- Registered user
- Posts: 54
- Joined: Wed Jun 29, 2011 11:23 am
- Location: Northern Ireland - Derry
Re: Subject: ddohertys... 1.7 Isuzu Cavalier Project *pic he
Well... an update is an update, unfortunitly I havent had the time to get at this and anything I have been doing hasnt been worth taking photos of.
- Door Mechanisms in,
- Managed to find green glass for the rear door,
- Rear electric windows in and working (still a problem with total closure on the passenger side)
- Broken clips on cables for airbox replaced
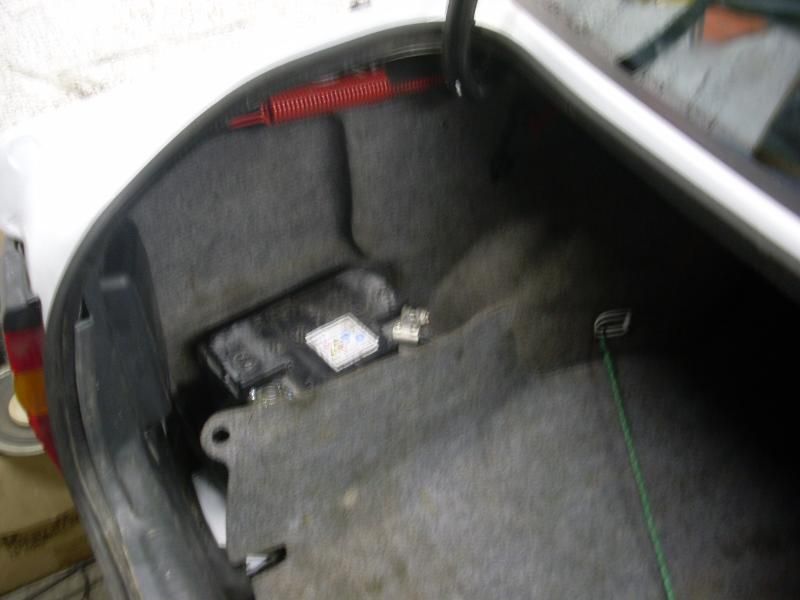
- Battery now in boot with cut off and new junction box
- Under bonnet lights in and nearly wired up.
- Cable to starter from junction box upgraded.
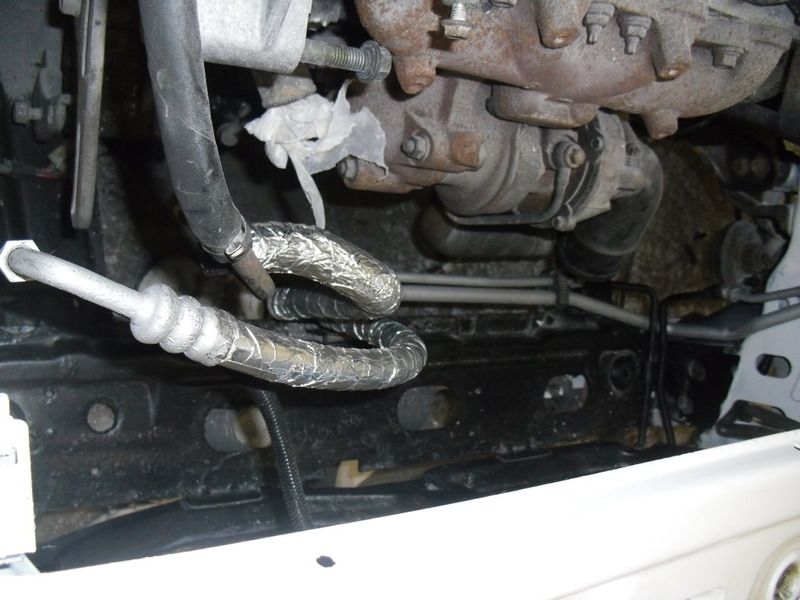
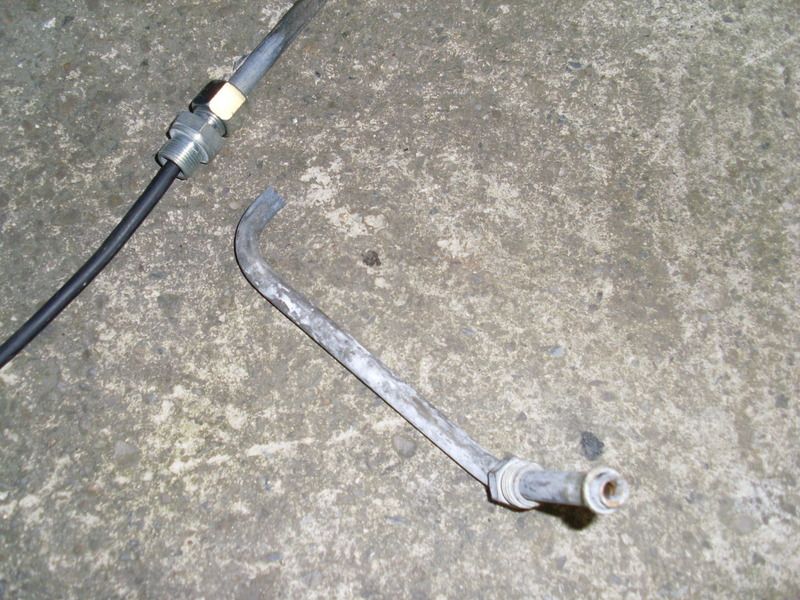
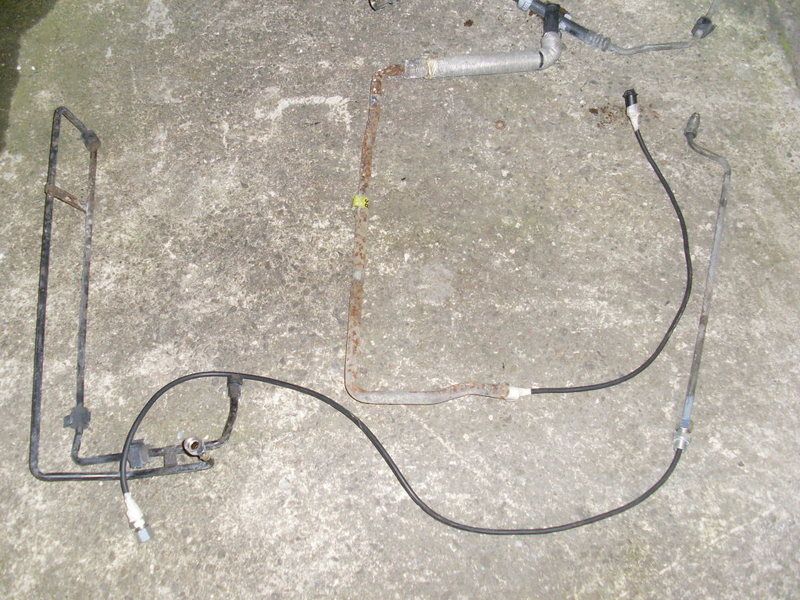
- powersteering pipes refurbed and the hoses covered with head sheild (Still looking for something like the original but will do for now)
- Bonnet catches painted
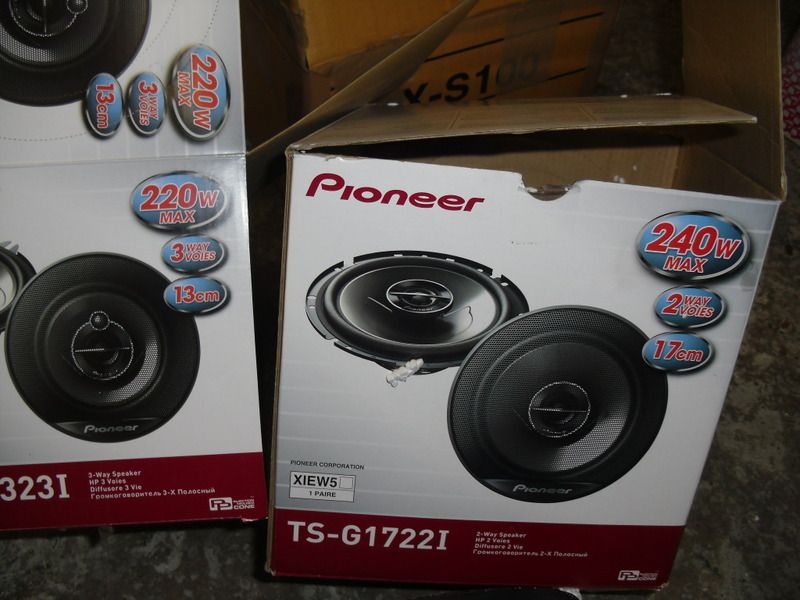
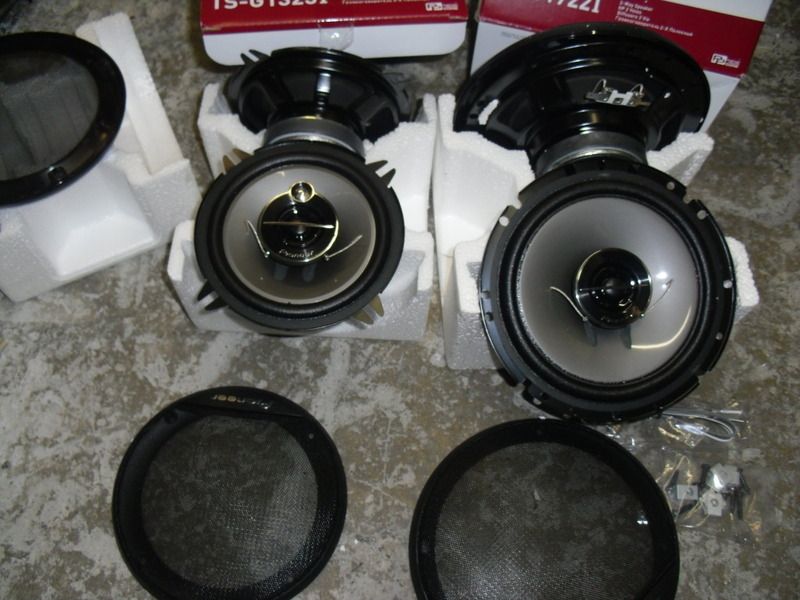
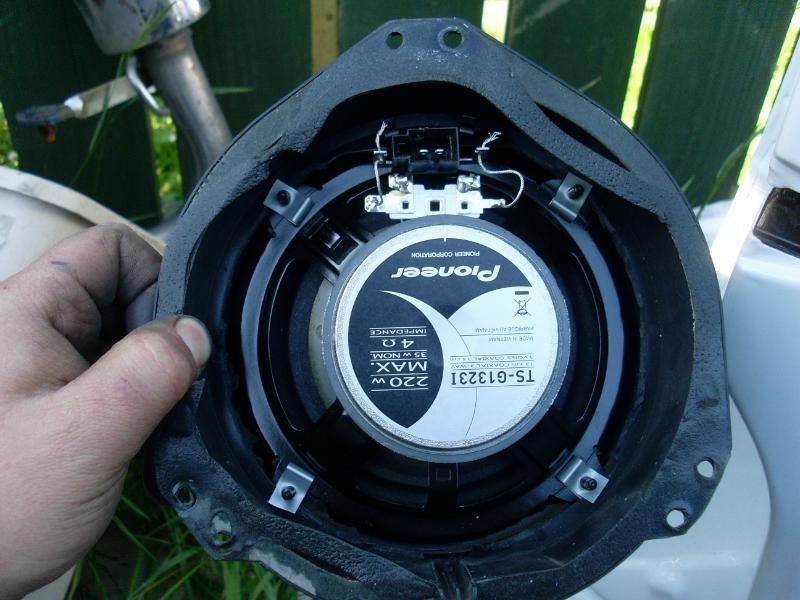
- New speakers bought. - Rears bolt straight in but il have to make something to fit the fronts.
Few pics...
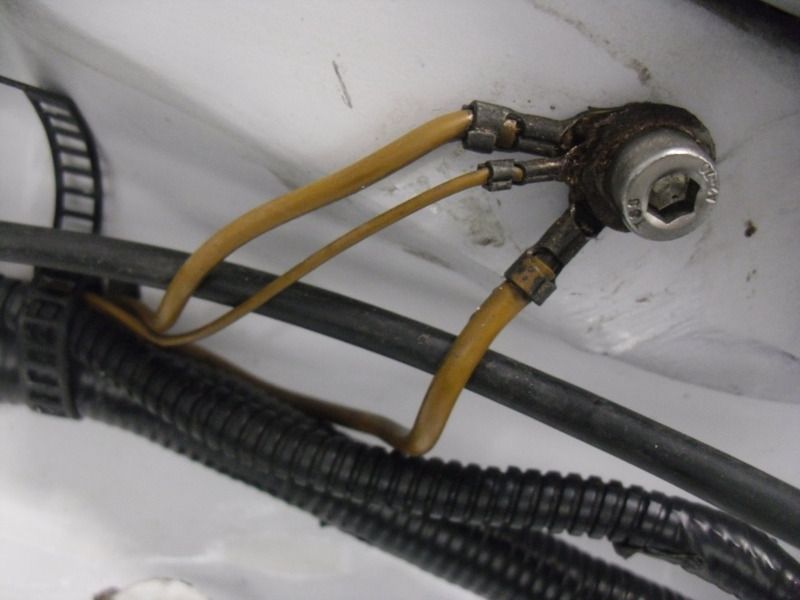
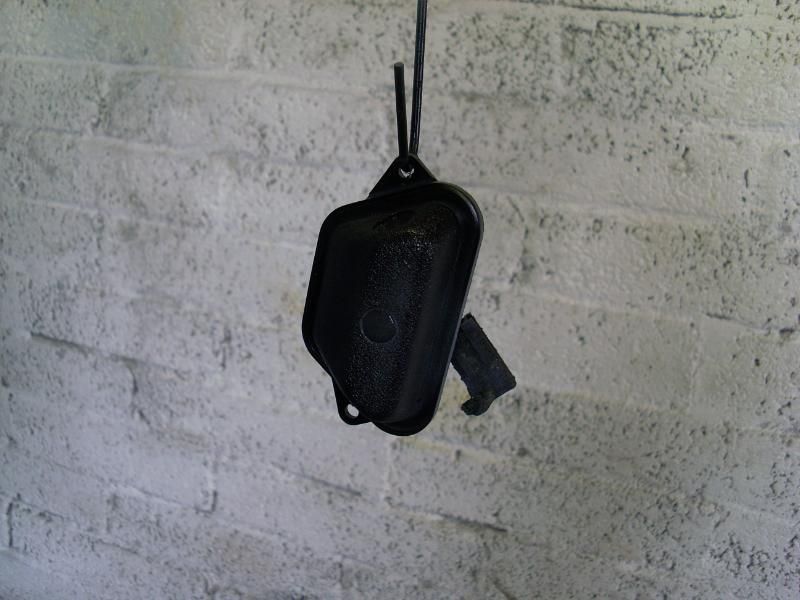
New Earth Point under bonnet

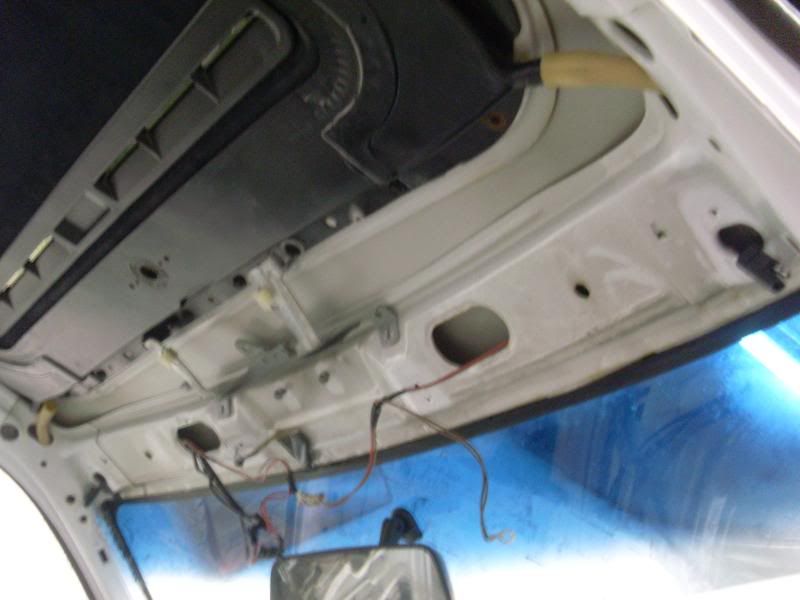
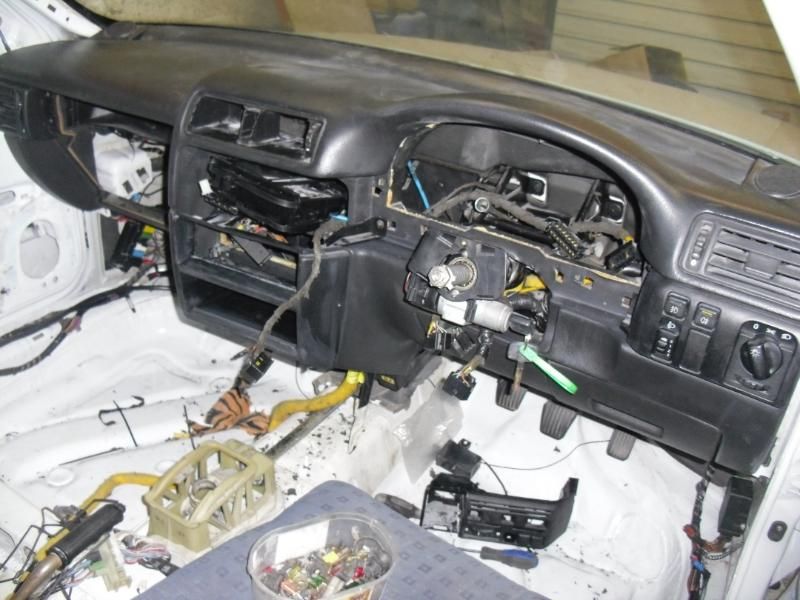
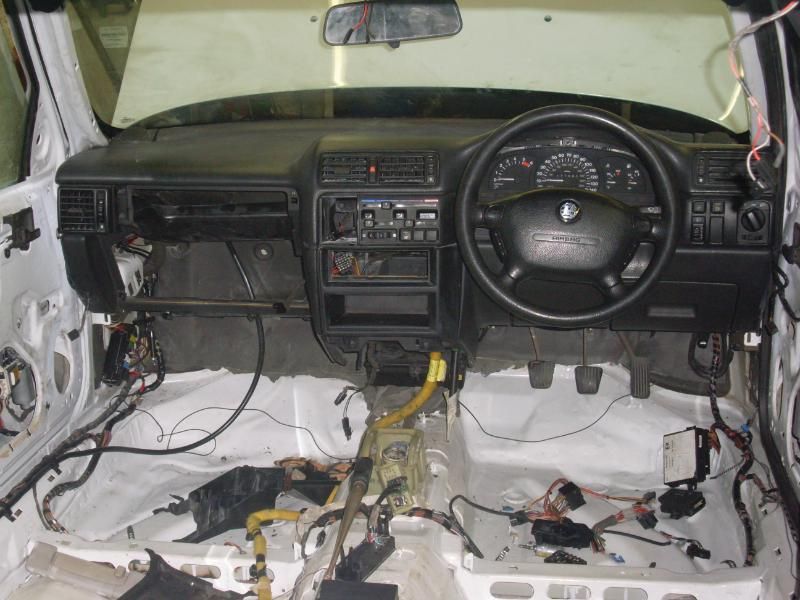
I dont think I have any pics up of the dash when it was out but anyway it came out after the car was painted to make the wiring easier, now its back in. Still have to run boost pipe and wiring for the gauge so I havent finished it. I also started spraying the interior roof parts.
Dash & New battery cable...
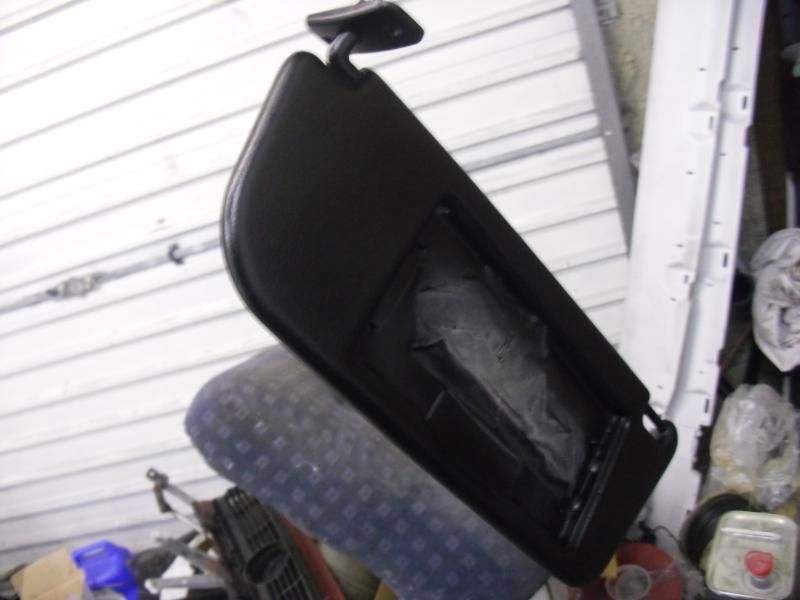
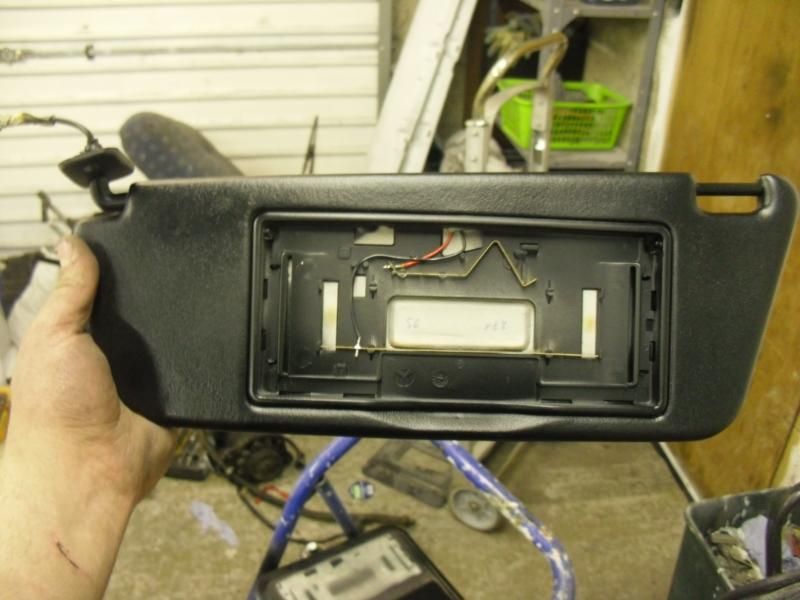
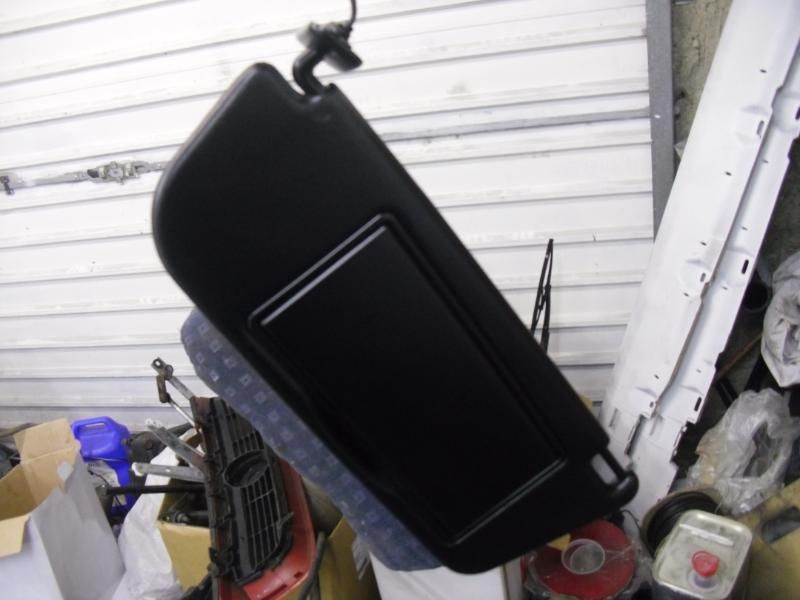
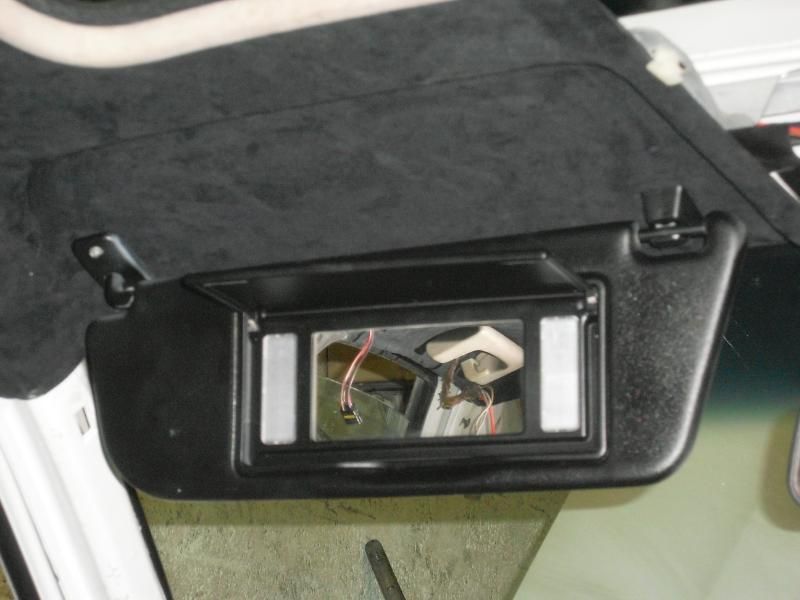
Sunvisor dismantled and painted...

- Door Mechanisms in,
- Managed to find green glass for the rear door,
- Rear electric windows in and working (still a problem with total closure on the passenger side)
- Broken clips on cables for airbox replaced
- Battery now in boot with cut off and new junction box
- Under bonnet lights in and nearly wired up.
- Cable to starter from junction box upgraded.
- powersteering pipes refurbed and the hoses covered with head sheild (Still looking for something like the original but will do for now)
- Bonnet catches painted
- New speakers bought. - Rears bolt straight in but il have to make something to fit the fronts.
Few pics...
New Earth Point under bonnet
I dont think I have any pics up of the dash when it was out but anyway it came out after the car was painted to make the wiring easier, now its back in. Still have to run boost pipe and wiring for the gauge so I havent finished it. I also started spraying the interior roof parts.
Dash & New battery cable...
Sunvisor dismantled and painted...
-
ddoherty406
- Registered user
- Posts: 54
- Joined: Wed Jun 29, 2011 11:23 am
- Location: Northern Ireland - Derry
Re: Subject: ddohertys... 1.7 Isuzu Cavalier Project *pic he
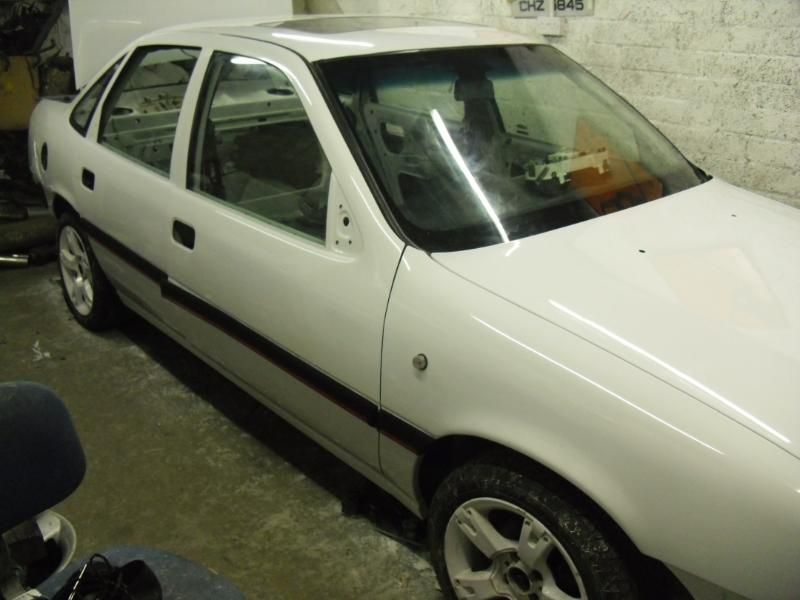
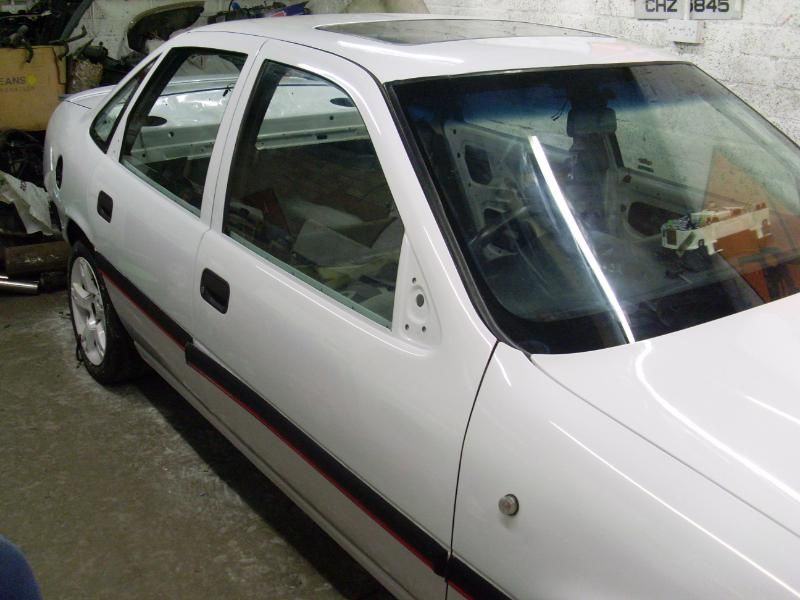
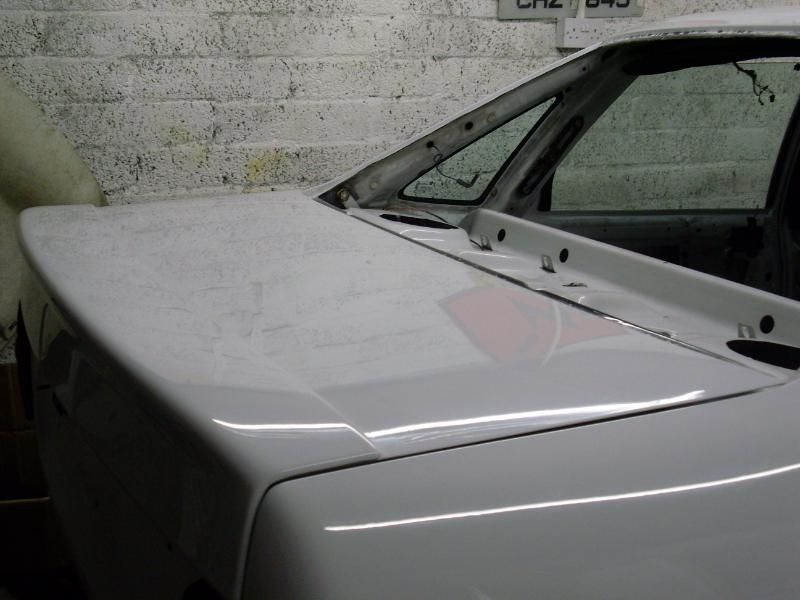
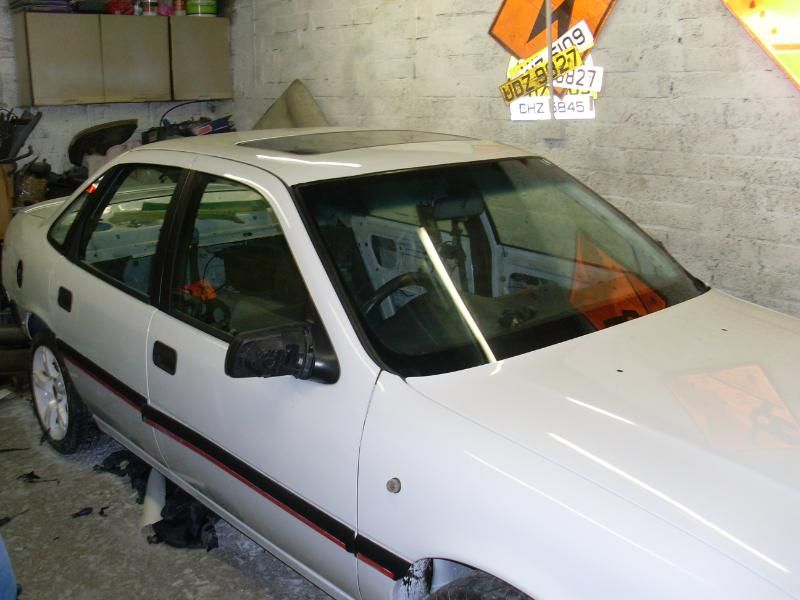
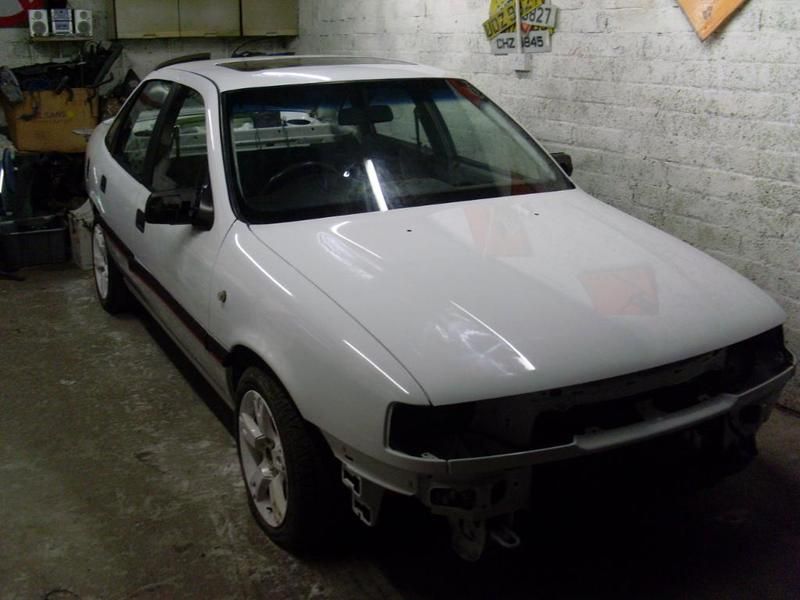
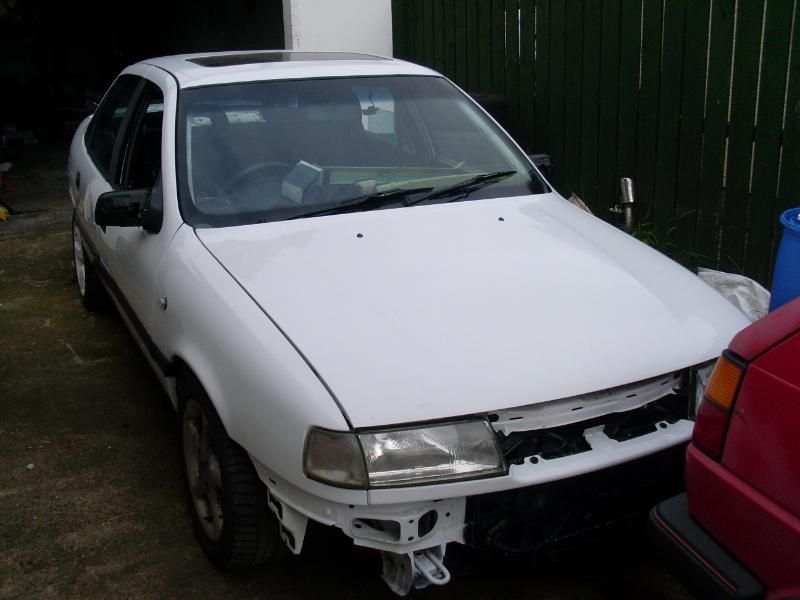
Well car has been flattened with 2000 and buffed with g3, it will get another run over with glaze when its all back together.
Im now at the stage where im trying to work out what goes on next and where the hell did I put it, or whats this screw for, because ive two of everything and im using whatever is in the best condition :L So basically ive just put a few new parts on tonight and the rubber seals to see how its going to look.
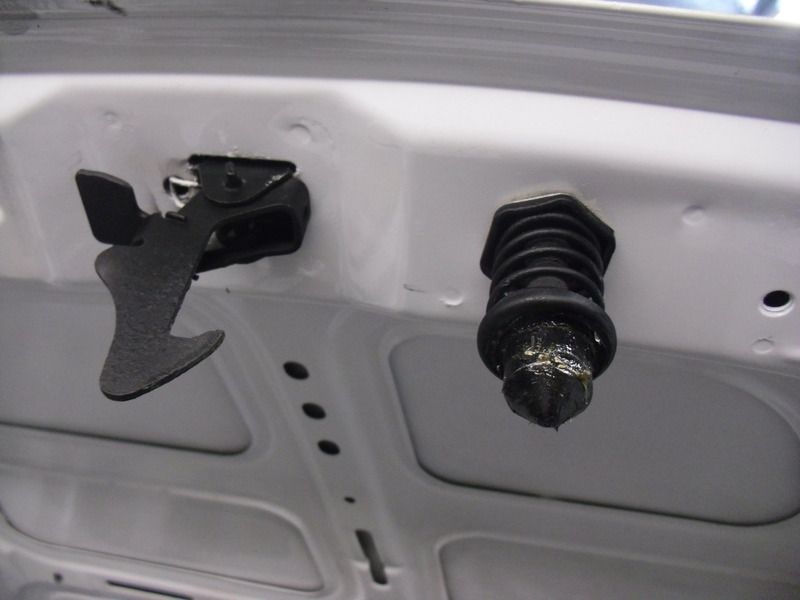
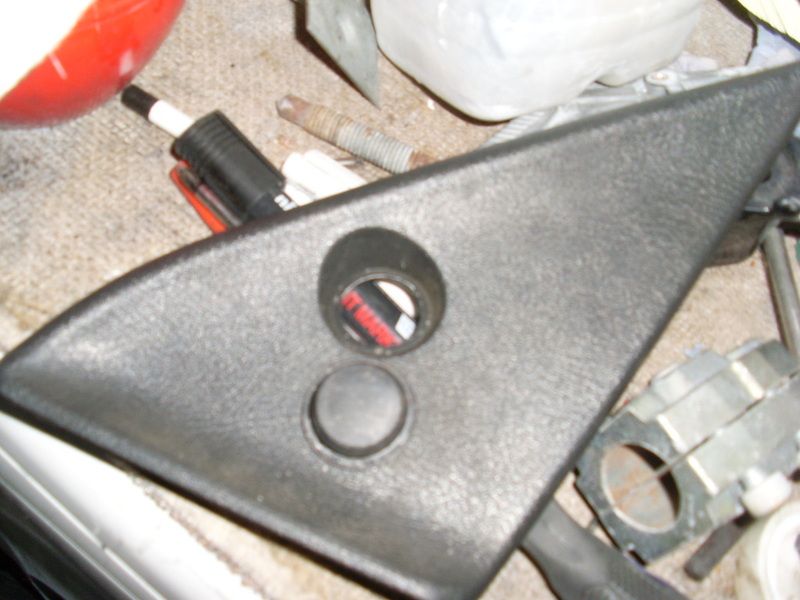
Door strip needs stuck down.
Oh and I now have remote central locking.
Im now at the stage where im trying to work out what goes on next and where the hell did I put it, or whats this screw for, because ive two of everything and im using whatever is in the best condition :L So basically ive just put a few new parts on tonight and the rubber seals to see how its going to look.
Door strip needs stuck down.
Oh and I now have remote central locking.
-
ddoherty406
- Registered user
- Posts: 54
- Joined: Wed Jun 29, 2011 11:23 am
- Location: Northern Ireland - Derry
Re: Subject: ddohertys... 1.7 Isuzu Cavalier Project *pic he
Well things are coming on a bit quicker. Its at a stage now were its more enjoyable to work, once something is put on its one step closer to the finish.
Ive loads of photos from the past few days so il just throw them up and comment on them...
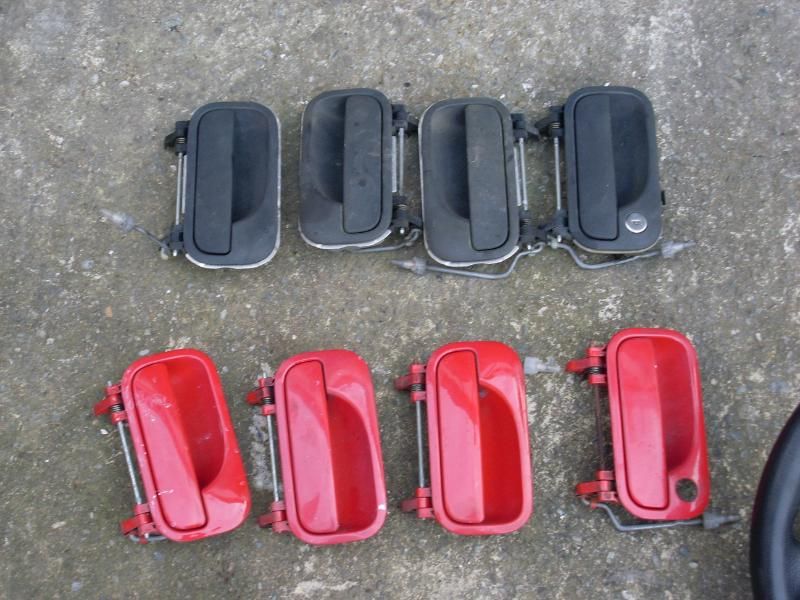
1st up a few spares.
Going to use the best of what ive got.
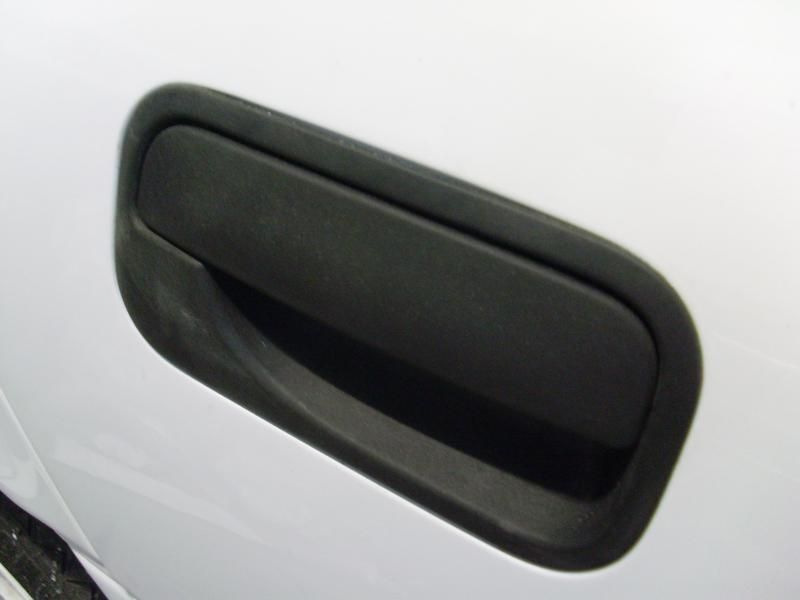
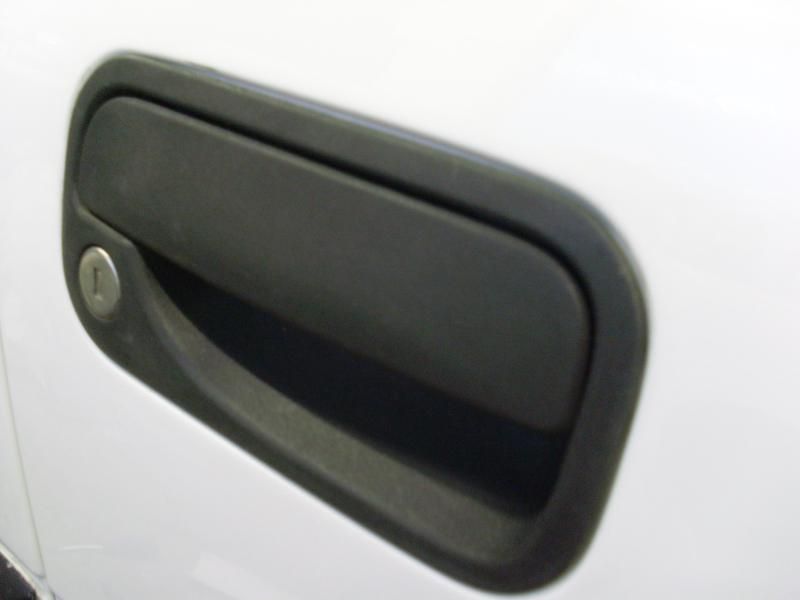
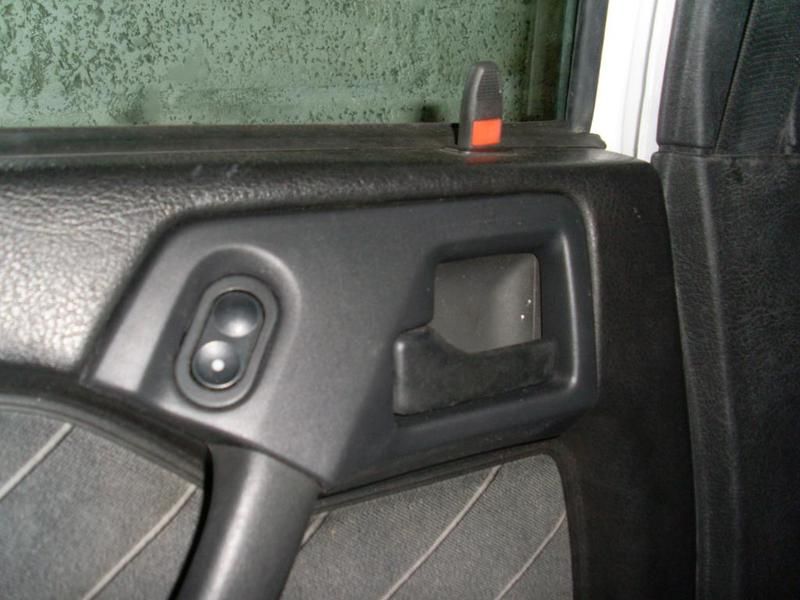
The red handles will be colour coded and they mite be swapped over in the future, but for now im using the black vectra B handles.
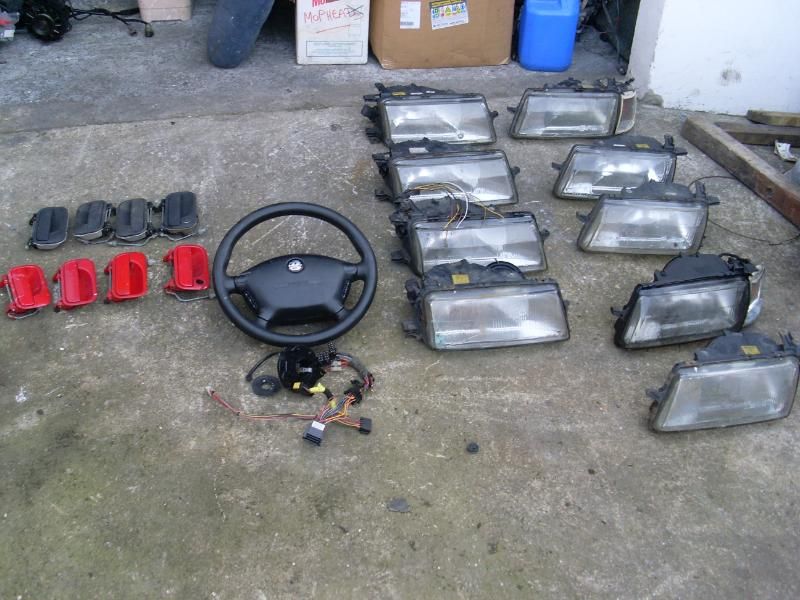
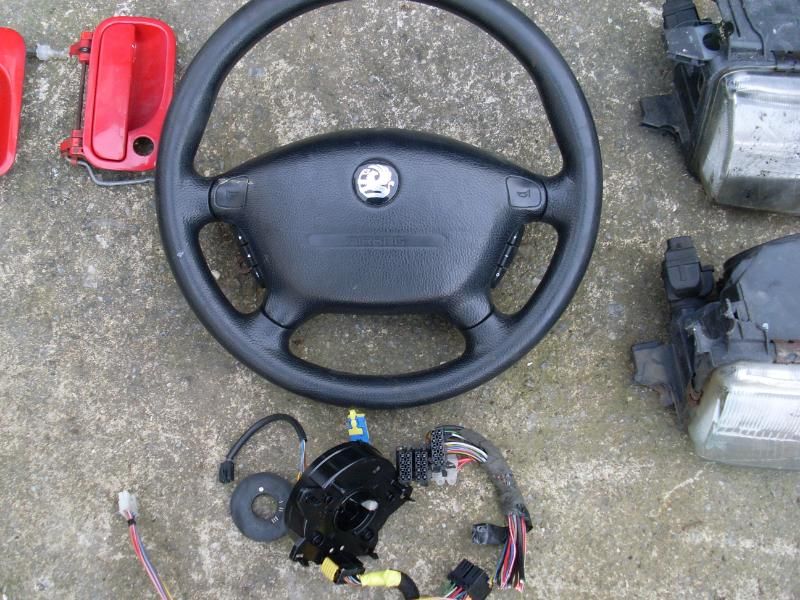
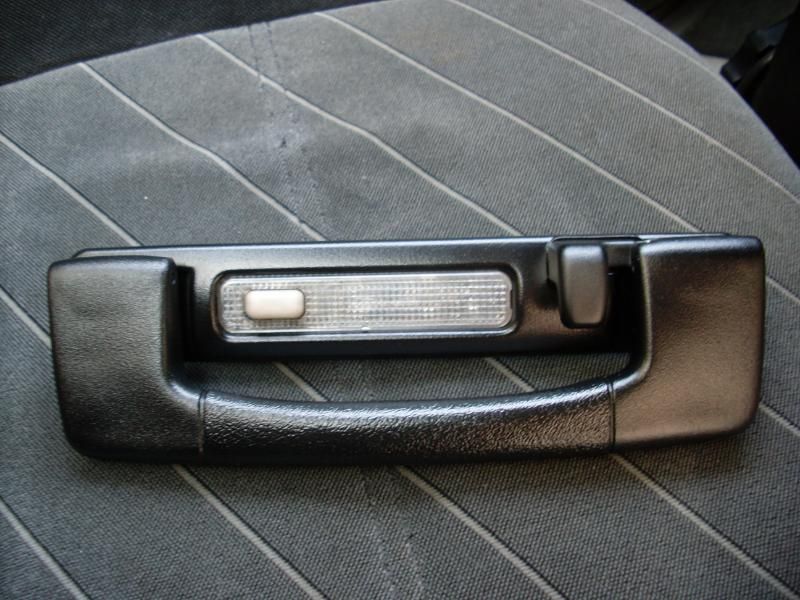
Vectra B steering wheel, will be wired up for the radio controls...
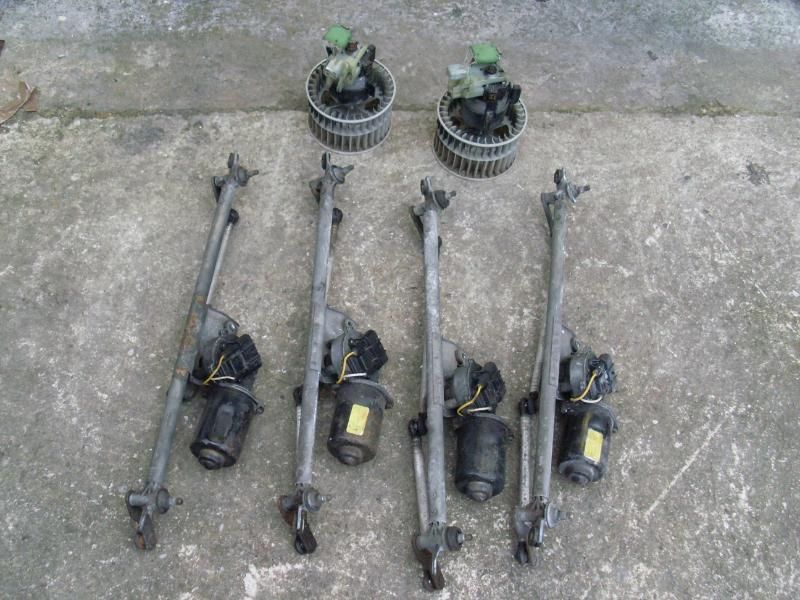
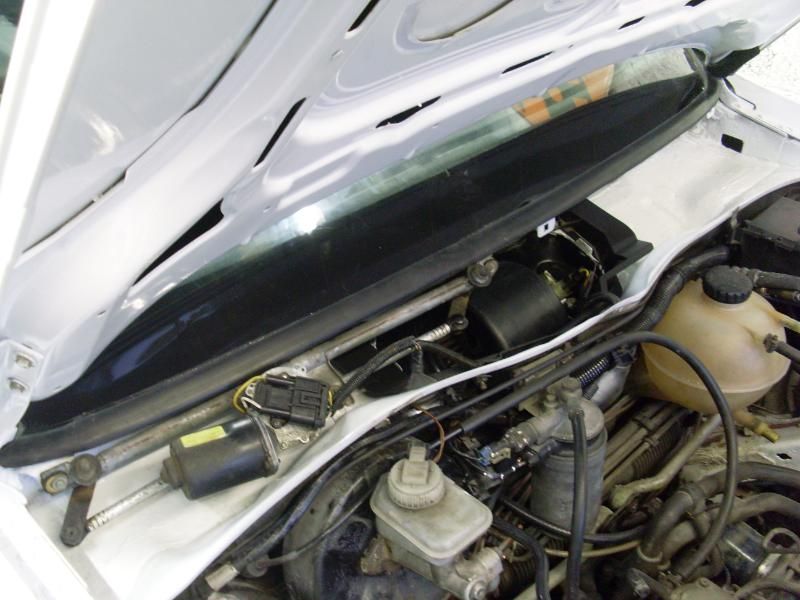
Blower motor and wiper mechanism back in...
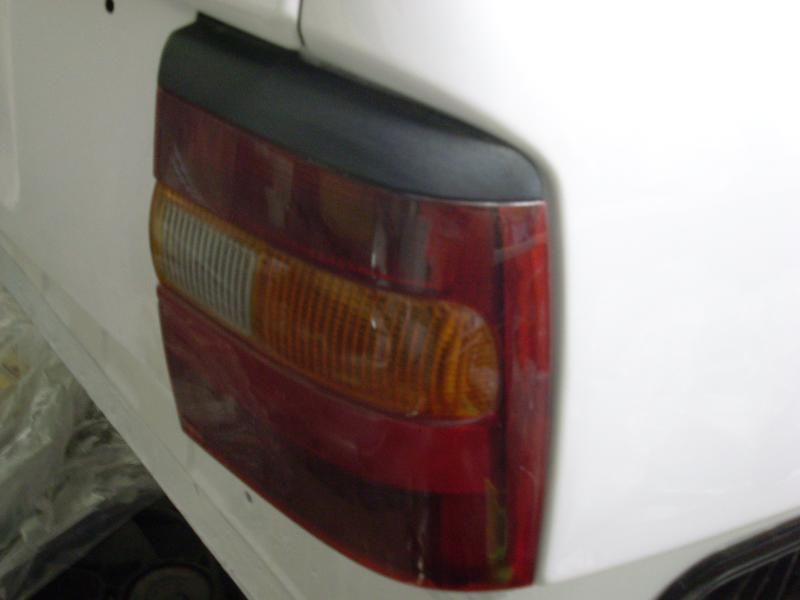
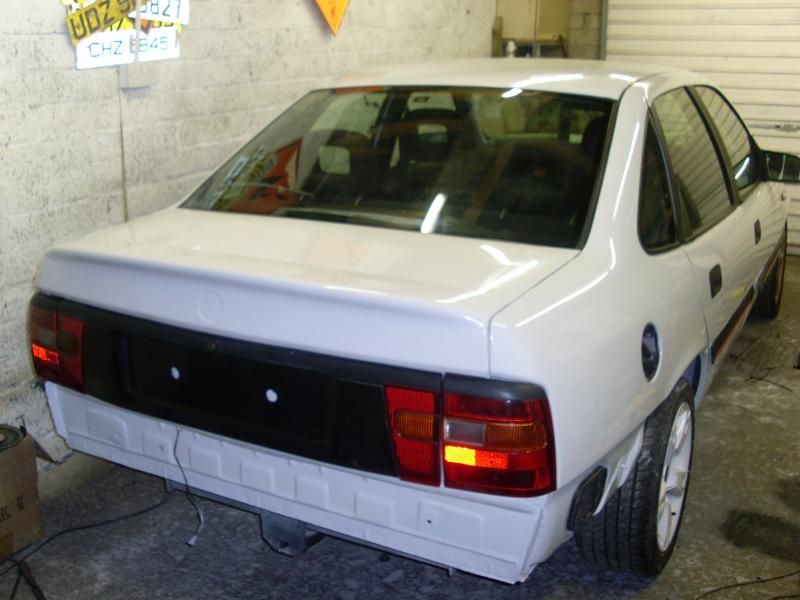
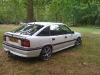
Tail Lights back in, and a wee shot of the boot reflection,
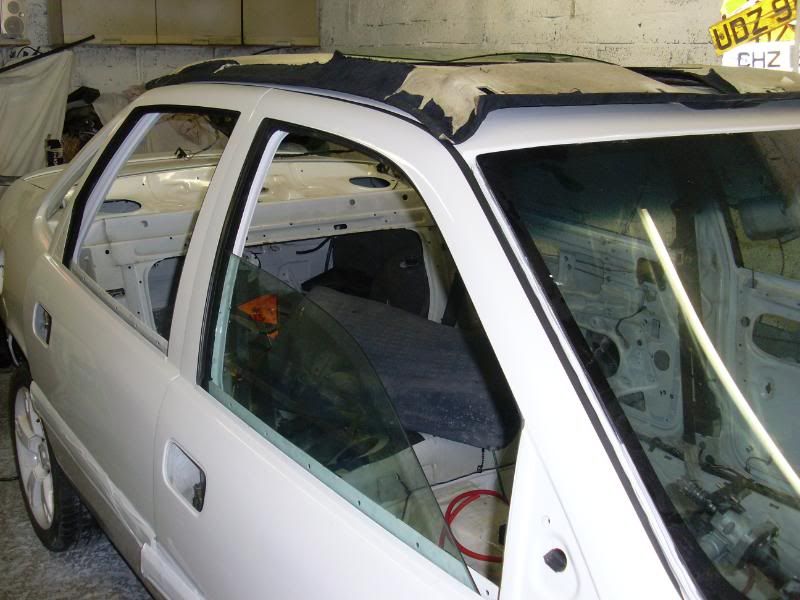
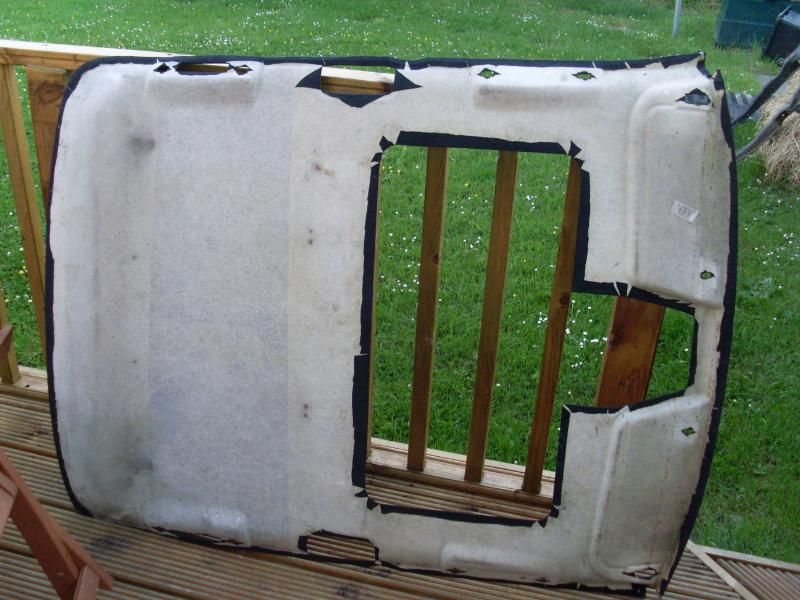
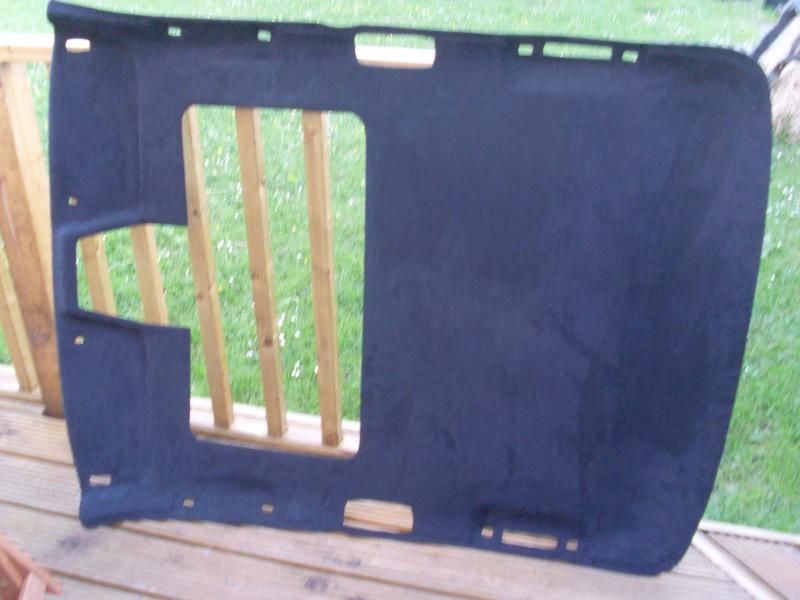
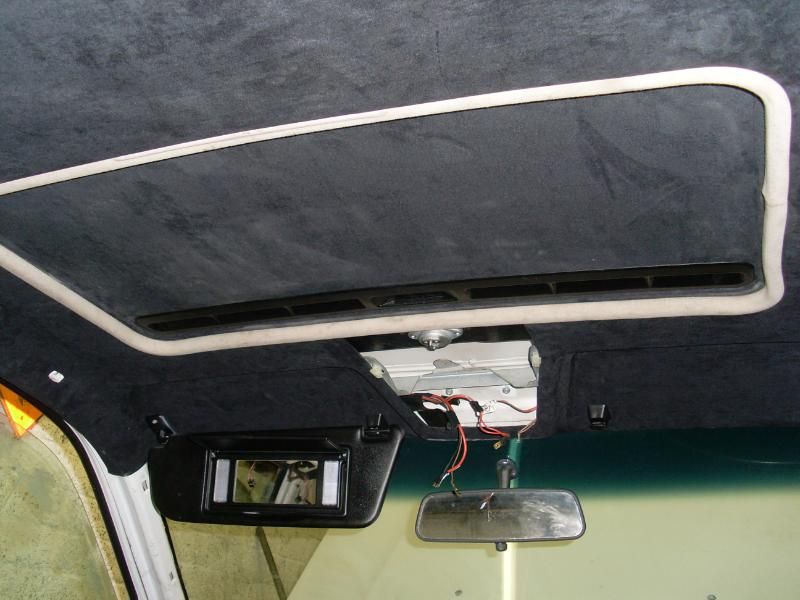
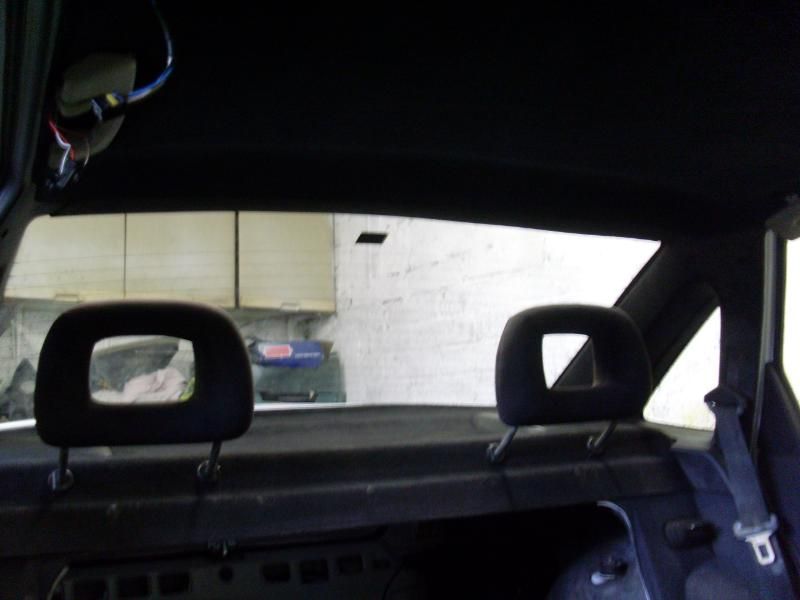
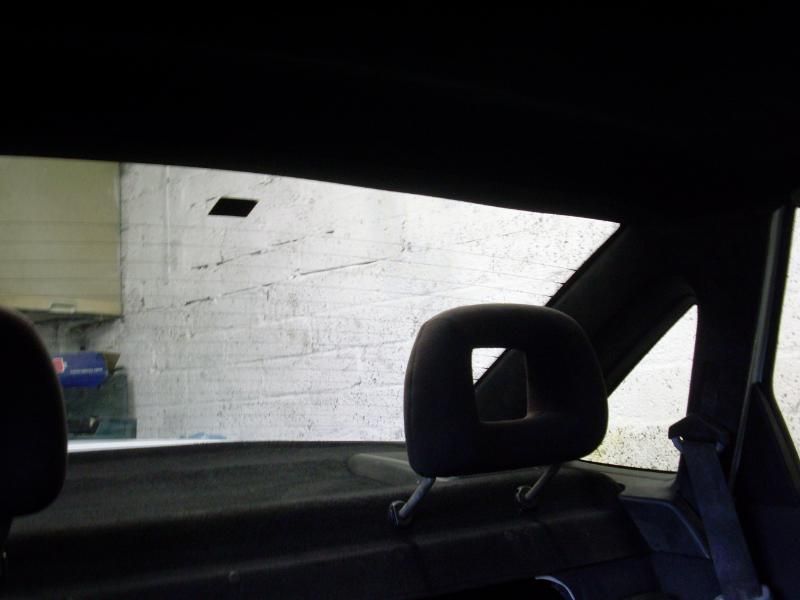
As you may have seen previously I recovered the roof lining and with it being my 1st time doing one, I rushed it and just put it into the car as soon as it was done as I couldnt wait to see what it was going to look like. So I was never 100% happy with it and I think I subconsciously balls it up completely when I made a cut in the wrong place.
Sooooo... I redone it the correct way...
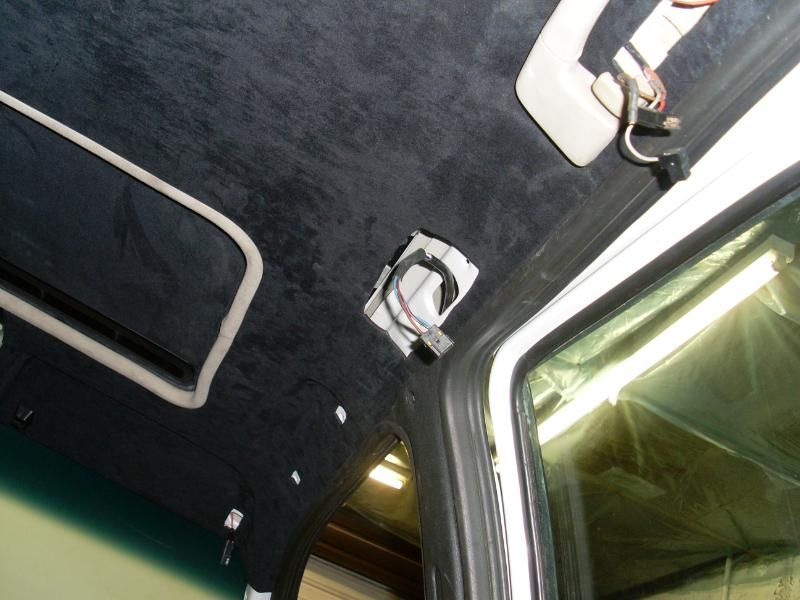
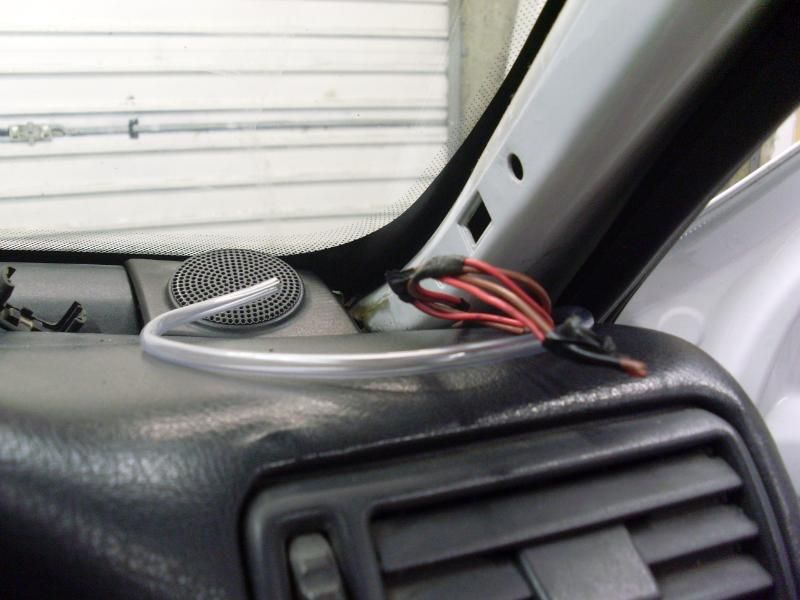
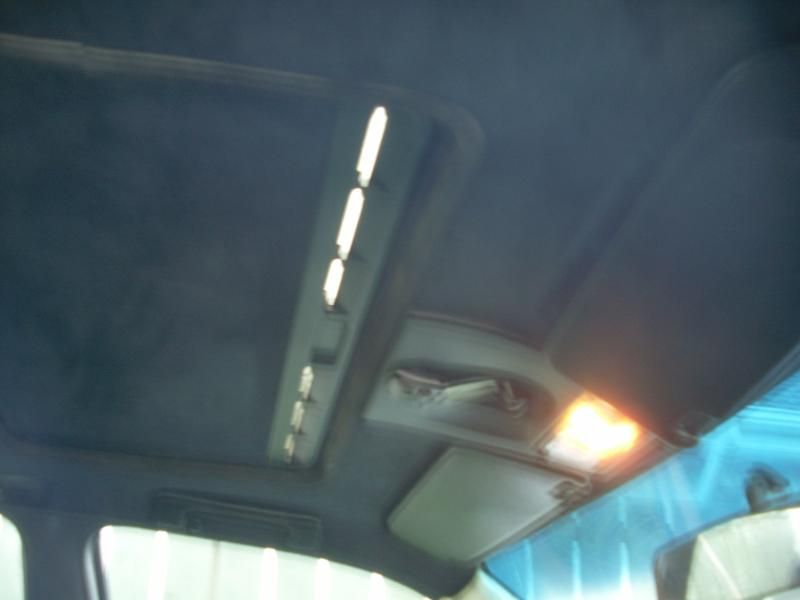
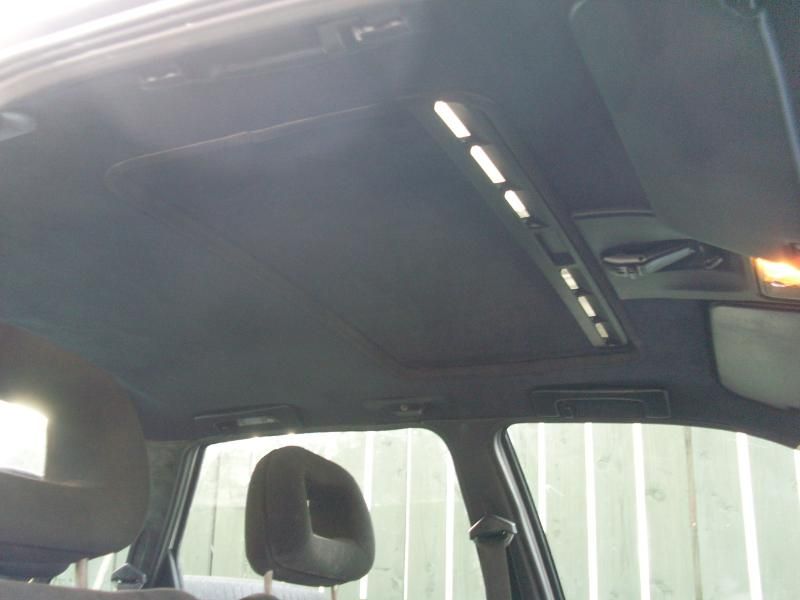
Wiring for my new roof lights and tweeters...
the repainted roof items, they still need another coat of satin black...
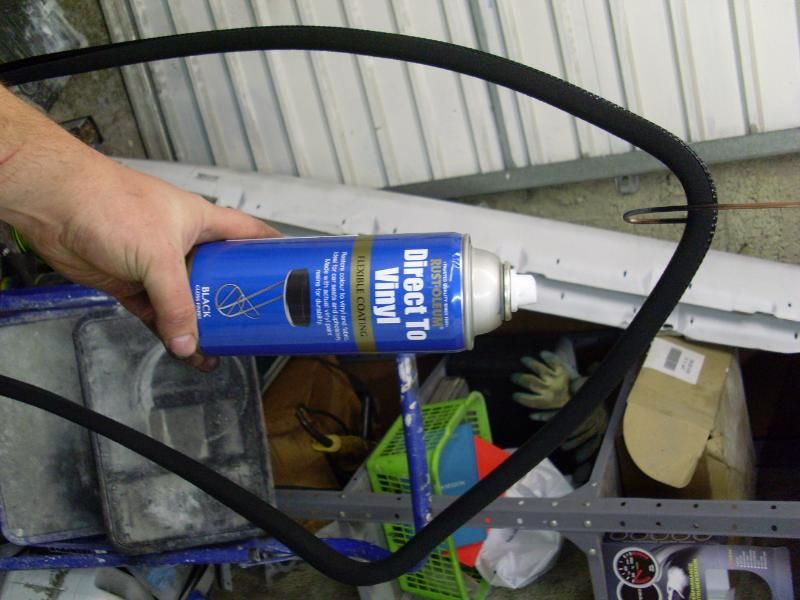
The wee trim around the sunroof was painted with the direct to vinyl however ive no pics of it now in the car...
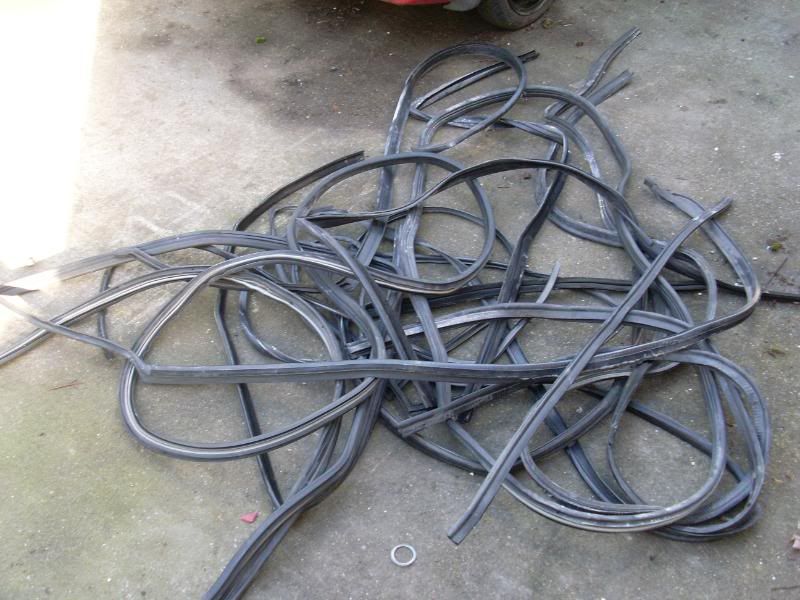
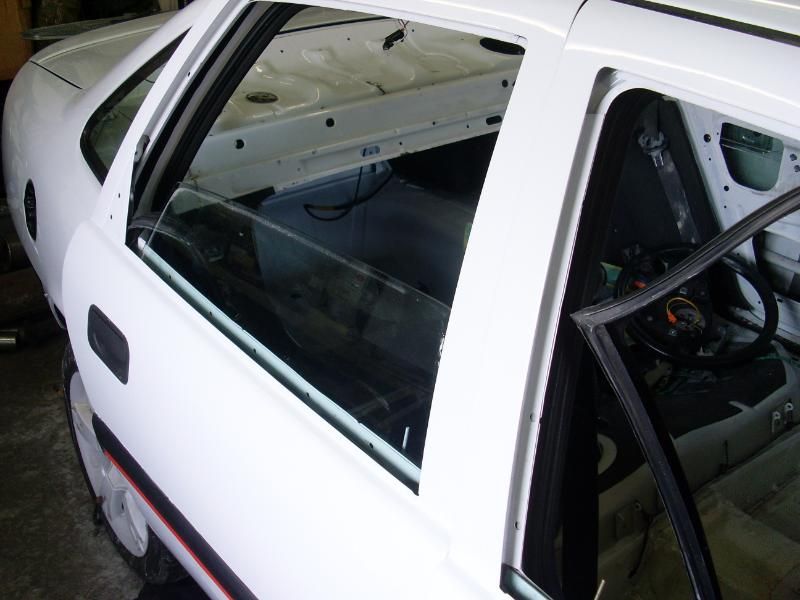
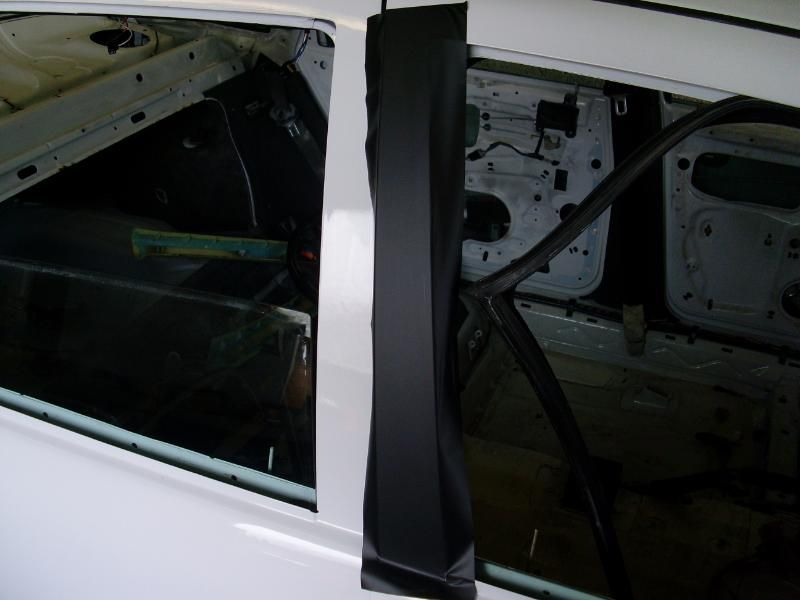
Then today the vinyl for the door piller arived in the post so I got that stuck on and I could finally finish the window seals and put the runners back in for the glass.
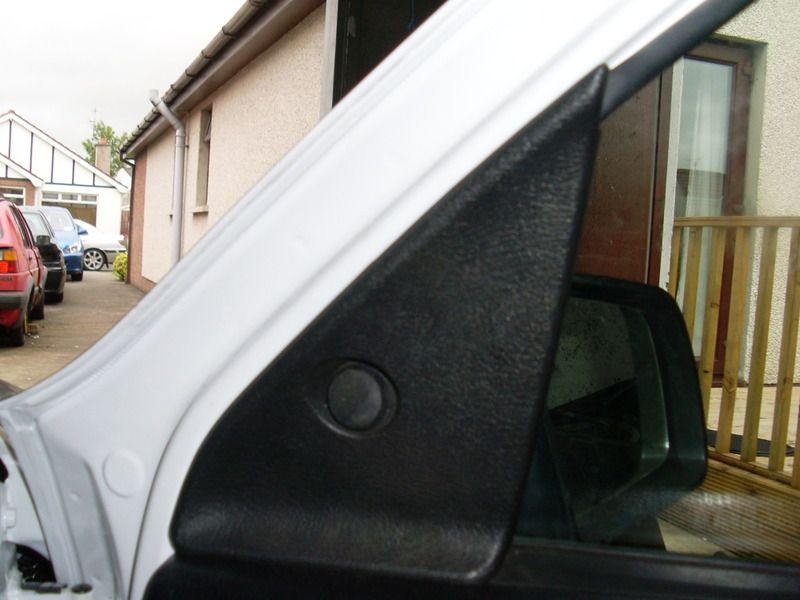
The electric mirrors also went on, wired up and now working. Just need the covers painted.

After 3 hours of testing wires I finally found the total closure (BLACK/BROWN) wire was loose in the connector going into the rear door, so after repairing that and programming the windows, I now have all 4 windows closing using the door lock.
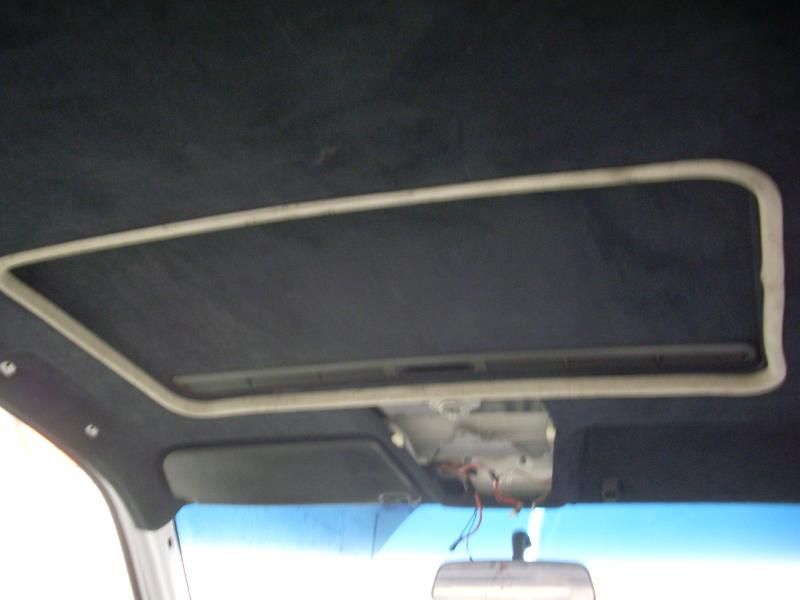
1st up the sunroof surround which will need another coat I think...
Door finished and sealed up. il have to find something for the hole where the window winder was.
I spotted the handle surround one ebay on night by pure luck.
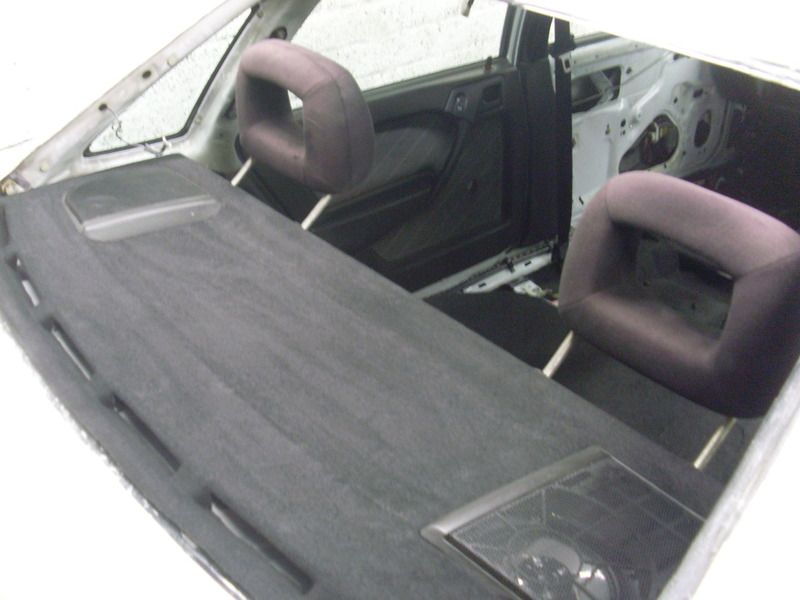
Then I put the parts back on the floor and got the carpet back in.
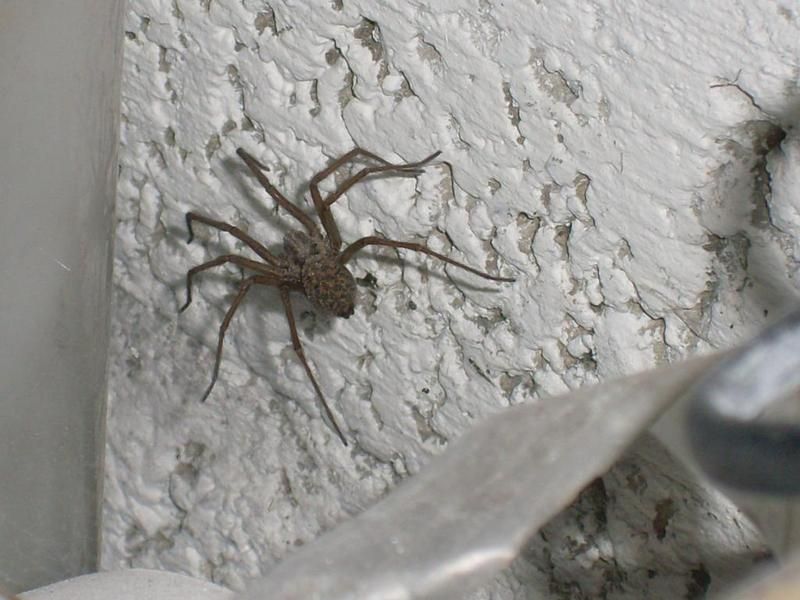
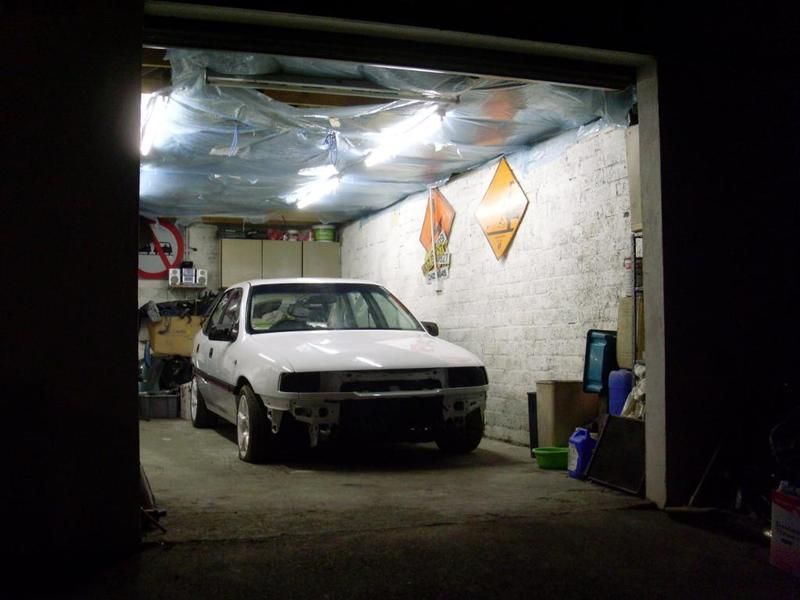
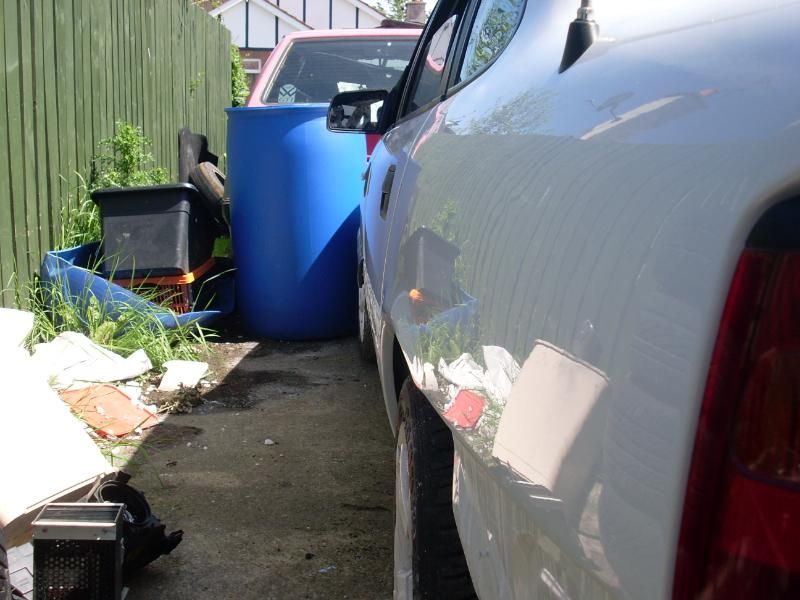
Lastly, ive been meaning to tidy the garage up and since ive the carpet in now I couldnt put it off any longer, oh and I found a huge spider along the way. :L
Ive loads of photos from the past few days so il just throw them up and comment on them...
1st up a few spares.
Going to use the best of what ive got.
The red handles will be colour coded and they mite be swapped over in the future, but for now im using the black vectra B handles.
Vectra B steering wheel, will be wired up for the radio controls...
Blower motor and wiper mechanism back in...
Tail Lights back in, and a wee shot of the boot reflection,
As you may have seen previously I recovered the roof lining and with it being my 1st time doing one, I rushed it and just put it into the car as soon as it was done as I couldnt wait to see what it was going to look like. So I was never 100% happy with it and I think I subconsciously balls it up completely when I made a cut in the wrong place.
Sooooo... I redone it the correct way...
Wiring for my new roof lights and tweeters...
the repainted roof items, they still need another coat of satin black...
The wee trim around the sunroof was painted with the direct to vinyl however ive no pics of it now in the car...
Then today the vinyl for the door piller arived in the post so I got that stuck on and I could finally finish the window seals and put the runners back in for the glass.
The electric mirrors also went on, wired up and now working. Just need the covers painted.
After 3 hours of testing wires I finally found the total closure (BLACK/BROWN) wire was loose in the connector going into the rear door, so after repairing that and programming the windows, I now have all 4 windows closing using the door lock.
1st up the sunroof surround which will need another coat I think...
Door finished and sealed up. il have to find something for the hole where the window winder was.
I spotted the handle surround one ebay on night by pure luck.
Then I put the parts back on the floor and got the carpet back in.
Lastly, ive been meaning to tidy the garage up and since ive the carpet in now I couldnt put it off any longer, oh and I found a huge spider along the way. :L
Re: Subject: ddohertys... 1.7 Isuzu Cavalier Project *pic he
Thats a lot of work you've put in there. I keep thinking of doing that to my headlining/parcel shelf and a pillas on my CDX. Looks really good. I even did a test ages ago by painting on old sunvisor to see how the paint stuck.
Bet you cant wait to get it all finished.
Bet you cant wait to get it all finished.
C30XE
-
ddoherty406
- Registered user
- Posts: 54
- Joined: Wed Jun 29, 2011 11:23 am
- Location: Northern Ireland - Derry
Re: Subject: ddohertys... 1.7 Isuzu Cavalier Project *pic he
Yea lad was wanting it out for the summer but with being busy @ work I havent had the same free time.
When I was doing the headling the second time I was thinking of doing it a dark grey instead, as it looks a bit blue compared to the seat cloth. Only reason I didnt was because I would have to take the sunroof out again to do th sliding panel.
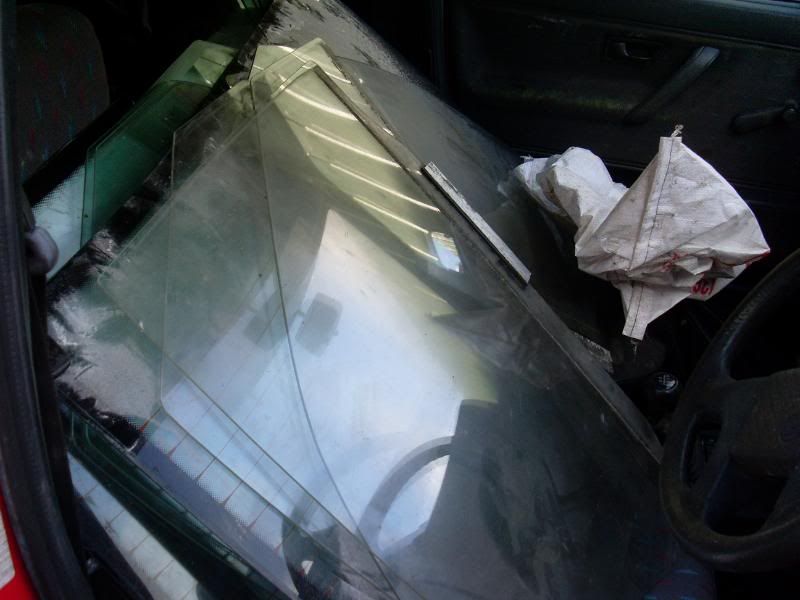
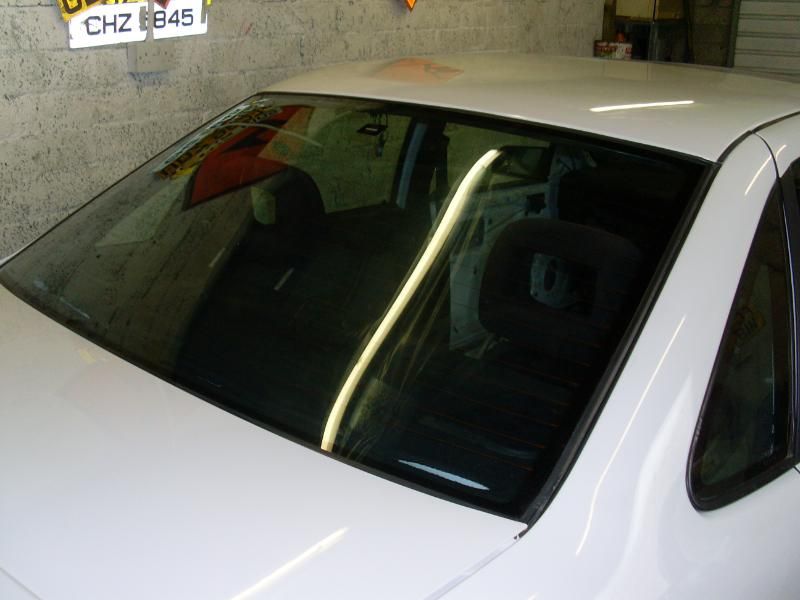
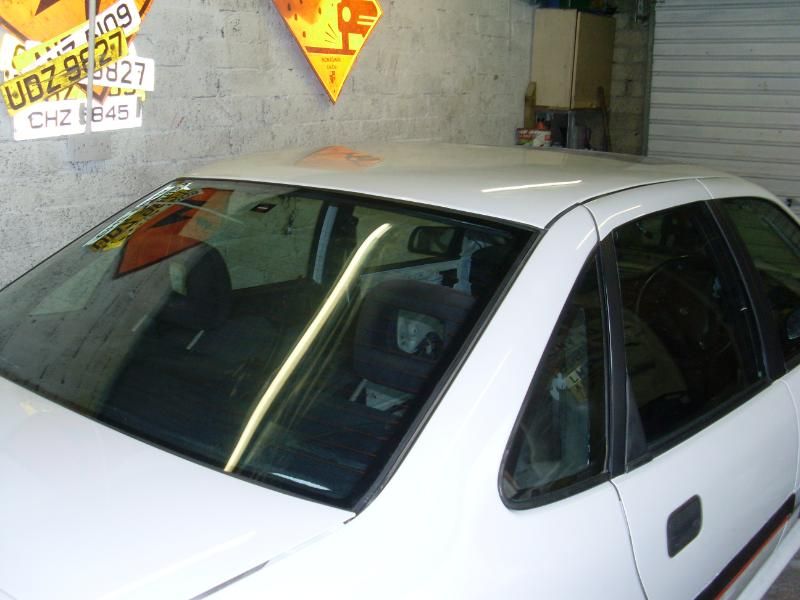
I have the rear window out to change it to the green tinted one so now was the time to do it.
When I was doing the headling the second time I was thinking of doing it a dark grey instead, as it looks a bit blue compared to the seat cloth. Only reason I didnt was because I would have to take the sunroof out again to do th sliding panel.
I have the rear window out to change it to the green tinted one so now was the time to do it.
-
Lowrider Dave

- Club Admin
- Posts: 2993
- Joined: Wed Dec 22, 2010 10:00 am
- Location: Southampton
- Contact:
Re: Subject: ddohertys... 1.7 Isuzu Cavalier Project *pic he
Fantastic effort, loving the photos - great work so far!
-
ddoherty406
- Registered user
- Posts: 54
- Joined: Wed Jun 29, 2011 11:23 am
- Location: Northern Ireland - Derry
Re: Subject: ddohertys... 1.7 Isuzu Cavalier Project *pic he
Thanks dave, heres a few more...
Doesnt look like much but this took me a few hours last night. I cleaned and sprayed the parcel shelf with black straight to vinyl, then dismanteled the spreaker covers and sprayed the mesh satin black.
The speaker protectors and new speakers went in along with the shelf. Then I made the holes for the rear headrests, they'll need a good clean tho.
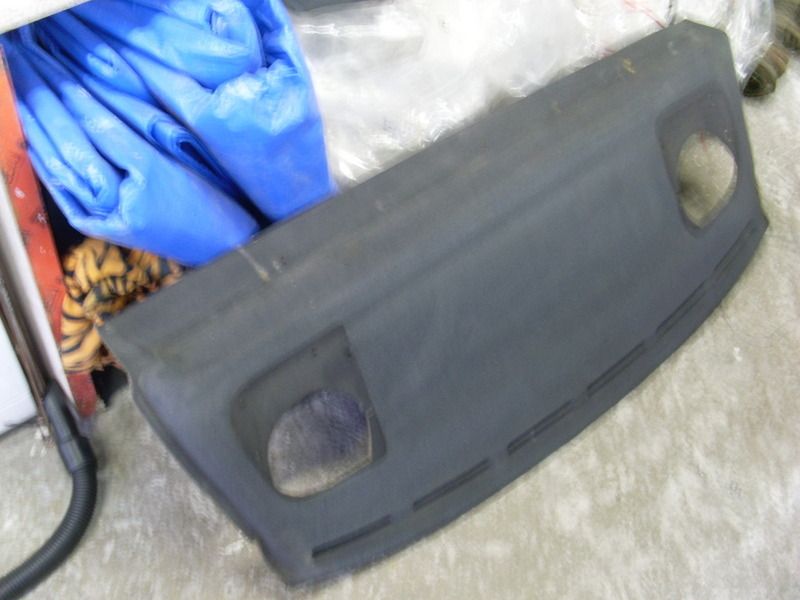
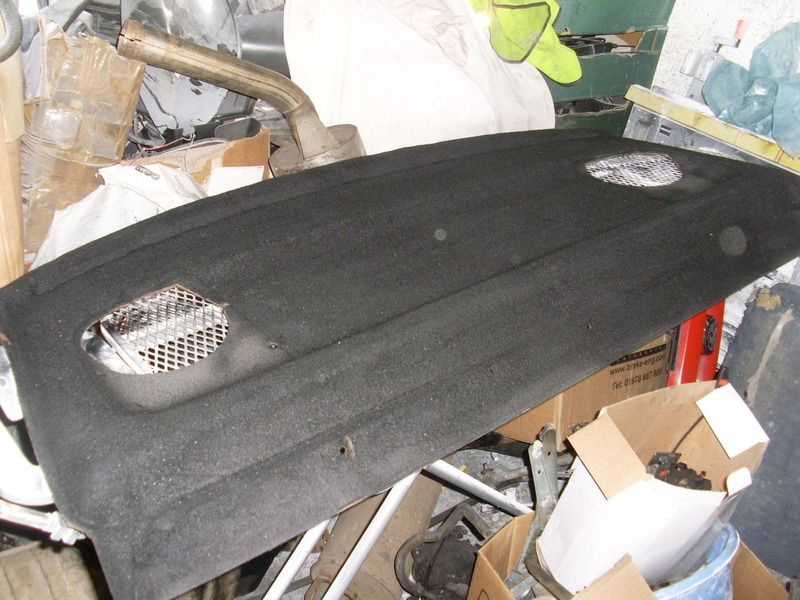
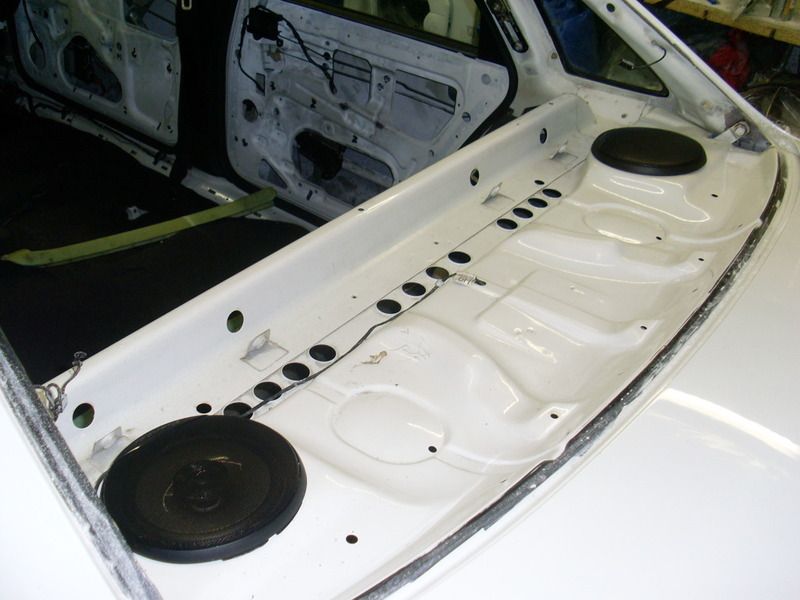
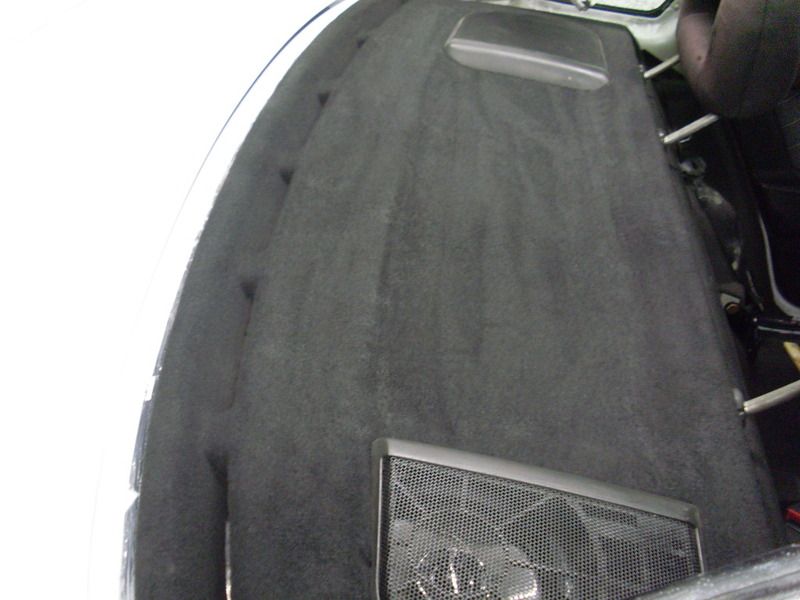
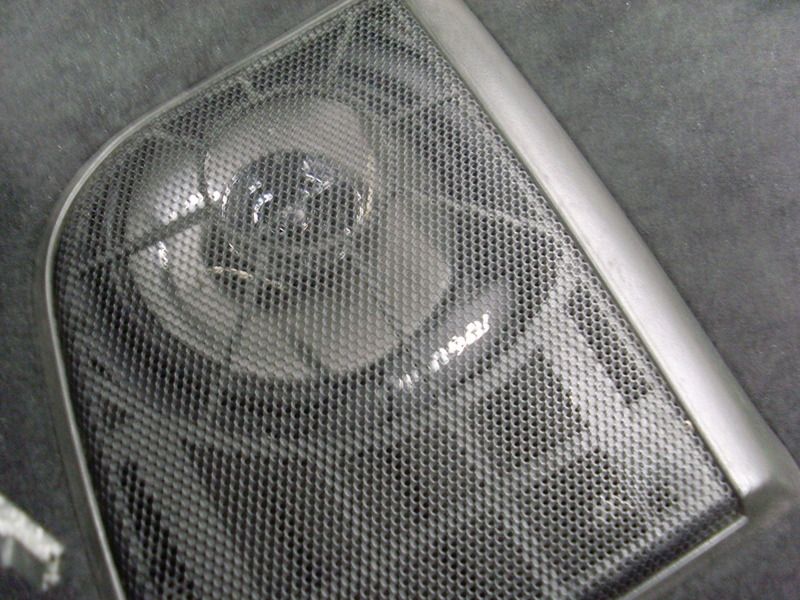

Re: Subject: ddohertys... 1.7 Isuzu Cavalier Project *pic he
Looking really well, will be really nice when your finished

Re: Subject: ddohertys... 1.7 Isuzu Cavalier Project *pic he
Looking good I wish I had a garage like that. what interior you having put in
-
gsi pie
- Registered user
- Posts: 3769
- Joined: Tue May 10, 2011 7:24 pm
- Location: blackwood south wales
Re: Subject: ddohertys... 1.7 Isuzu Cavalier Project *pic he
looking good dude 
what size are rear speakers?
was the roof lining hard to get out?
what size are rear speakers?
was the roof lining hard to get out?
My valver brings all the boys to the yard, dam right its cammed and carbed, dam right it pops and farts, I would show you but the fuker won't start!
-
Envoy CDX

- Club Admin
- Posts: 9682
- Joined: Sun Sep 23, 2007 3:51 pm
- Location: Jarrow, Newcastle Upon Tyne
Re: Subject: ddohertys... 1.7 Isuzu Cavalier Project *pic he
Very impressed with the work you've put into this. Can't wait to see the end results.
Re: Subject: ddohertys... 1.7 Isuzu Cavalier Project *pic he
Superb mate tones of work went into that cav! Will be worth it lookimg forward to seeing it finnished
-
ddoherty406
- Registered user
- Posts: 54
- Joined: Wed Jun 29, 2011 11:23 am
- Location: Northern Ireland - Derry
Re: Subject: ddohertys... 1.7 Isuzu Cavalier Project *pic he
Thanks lads.
-Ive read through your thread Gaz which inspried me to do the wee electronic extras.
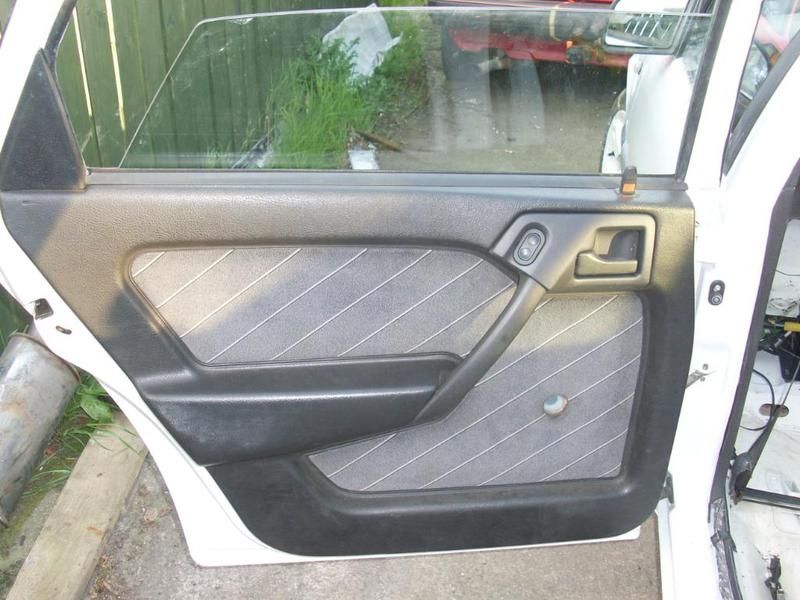
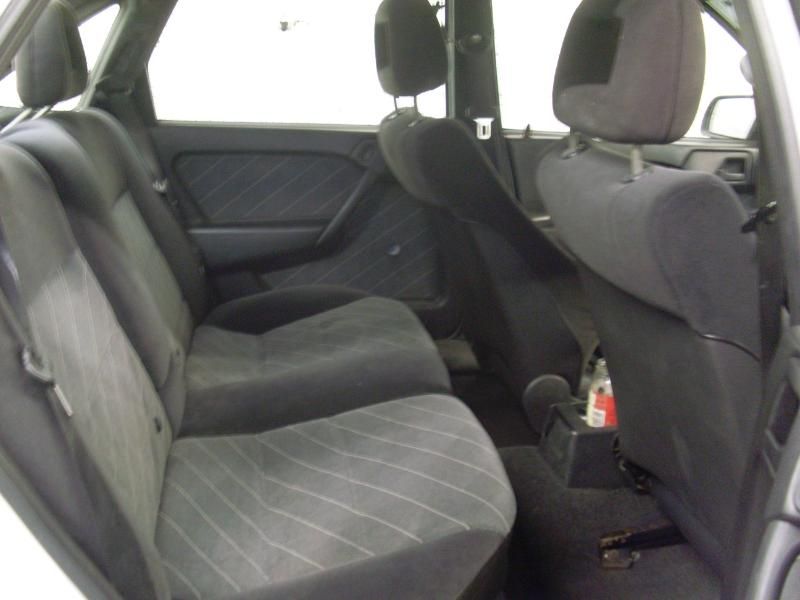
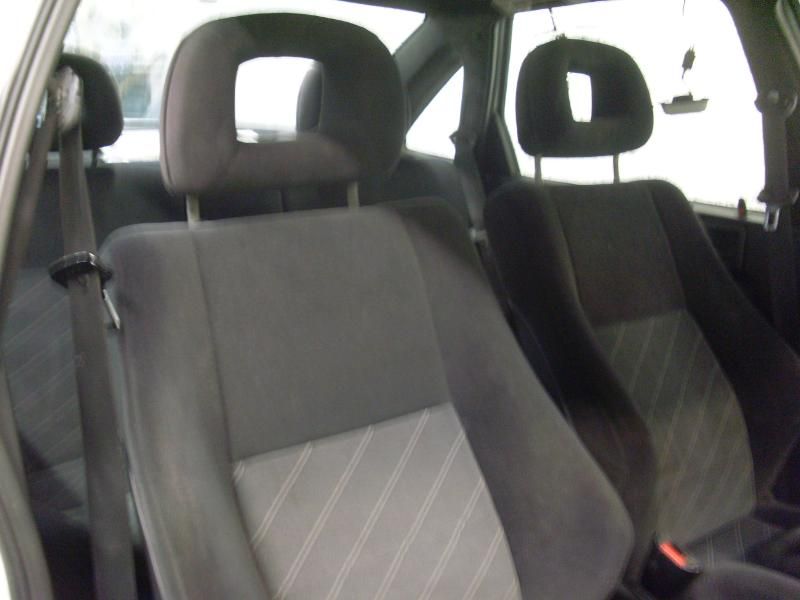
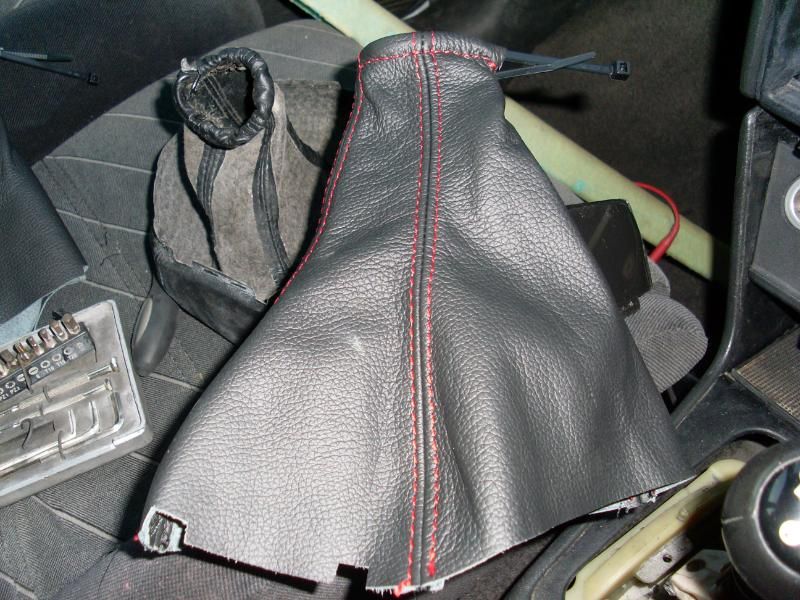
-The Sri black with grey and the white stripes will be going back into it. (like the doorcard above)
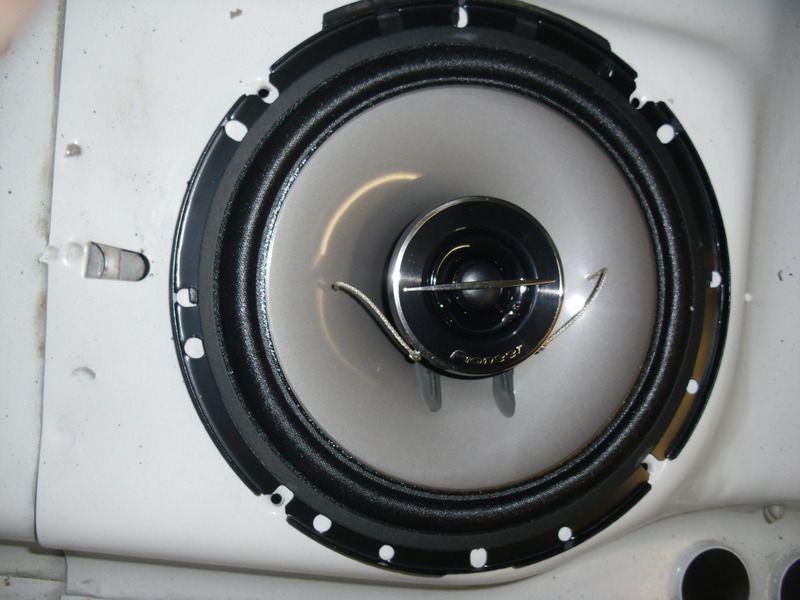
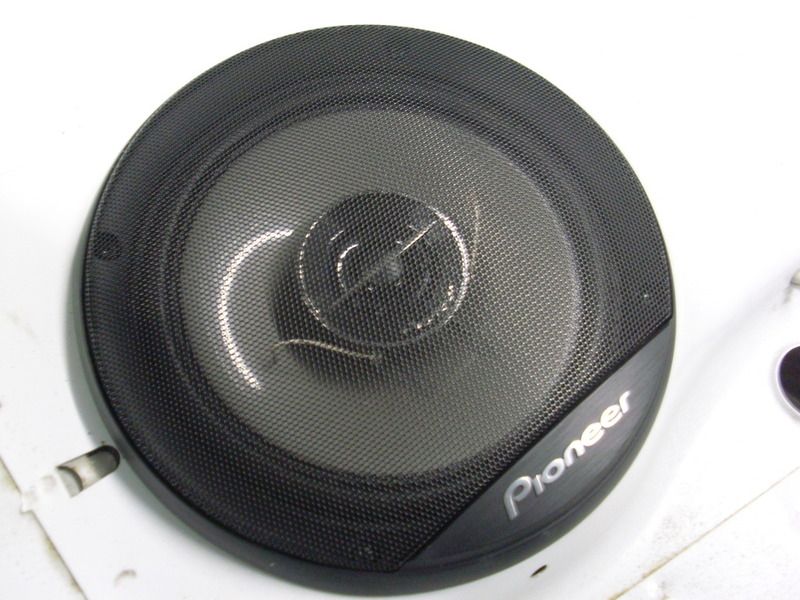
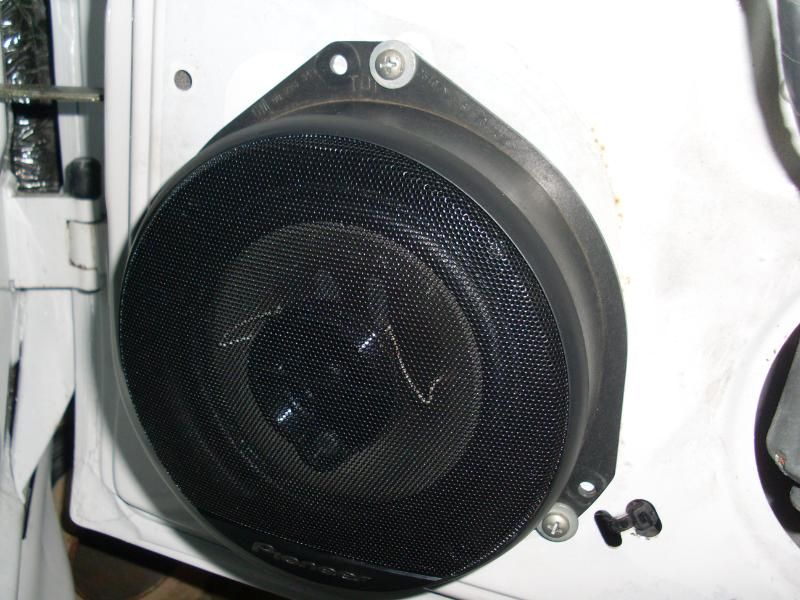
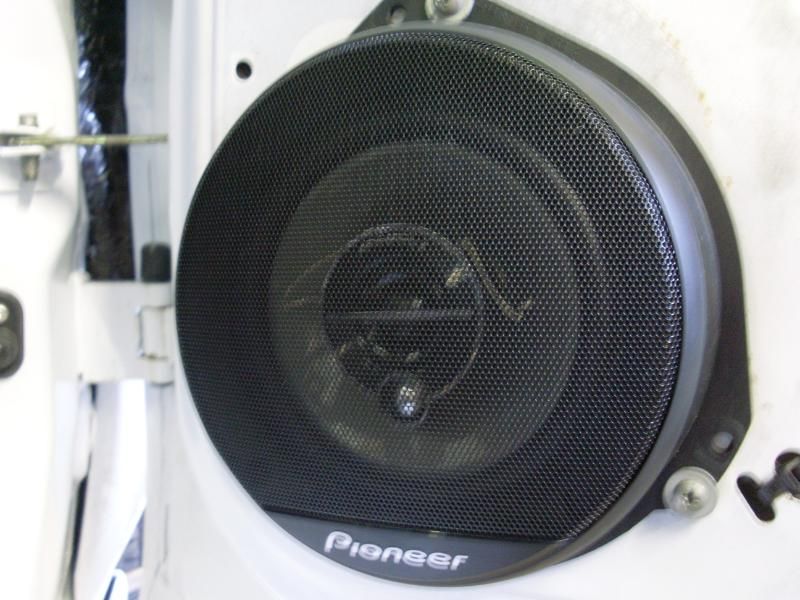
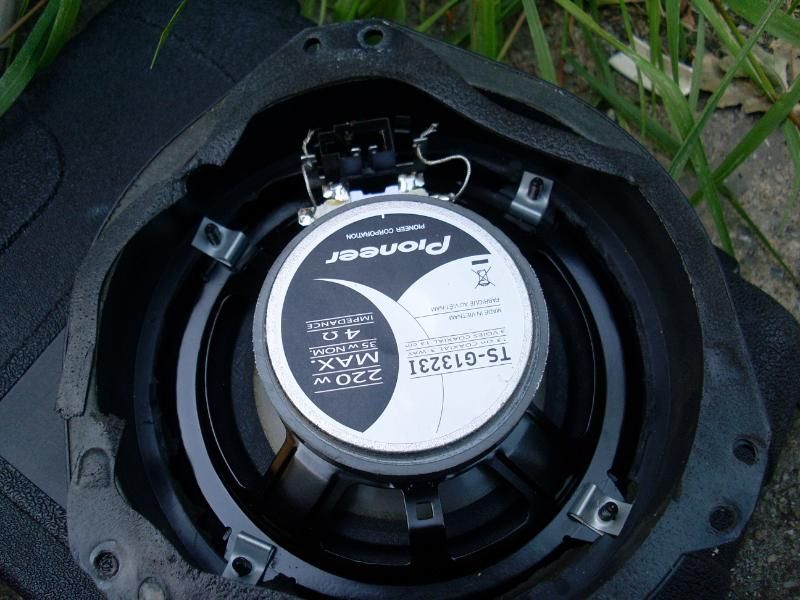
-The Speakers are 6.5inch (17cm) And those pioneer ones I got screwed exactly into the same holes. The fronts will require a slight modification to make fit.
-The Headlining was simple enough removed, sunvisors, door handles, door pillers plastics and door rubbers all need to come off 1st. The hardest part of it all is doing the sunroof panel as the entire unit has to come out and stripped down. I have the rear windscreen out to change to the green tinted one which made things a hell of alot easier. (I dont know if you could get it out without removing the seats if you have a saloon)
-Ive read through your thread Gaz which inspried me to do the wee electronic extras.
-The Sri black with grey and the white stripes will be going back into it. (like the doorcard above)
-The Speakers are 6.5inch (17cm) And those pioneer ones I got screwed exactly into the same holes. The fronts will require a slight modification to make fit.
-The Headlining was simple enough removed, sunvisors, door handles, door pillers plastics and door rubbers all need to come off 1st. The hardest part of it all is doing the sunroof panel as the entire unit has to come out and stripped down. I have the rear windscreen out to change to the green tinted one which made things a hell of alot easier. (I dont know if you could get it out without removing the seats if you have a saloon)
Re: Subject: ddohertys... 1.7 Isuzu Cavalier Project *pic he
nice work 
-The Headlining was simple enough removed, sunvisors, door handles, door pillers plastics and door rubbers all need to come off 1st. The hardest part of it all is doing the sunroof panel as the entire unit has to come out and stripped down. I have the rear windscreen out to change to the green tinted one which made things a hell of alot easier. (I dont know if you could get it out without removing the seats if you have a saloon)[/quote]
you can out the front door
Re: Subject: ddohertys... 1.7 Isuzu Cavalier Project *pic he
is it finished yet?looks awesome!
-
ddoherty406
- Registered user
- Posts: 54
- Joined: Wed Jun 29, 2011 11:23 am
- Location: Northern Ireland - Derry
Re: Subject: ddohertys... 1.7 Isuzu Cavalier Project *pic he
Nope good bit more to do unfortunitly...
The car is now watertight. This is one job I didnt want to risk doing myself, so I got a local fella that fits windscreens to put the rear window in. I would highly recomend him as it was a perfect job for a very reasonable price.
And with the window in I finished off the rear interior parts...
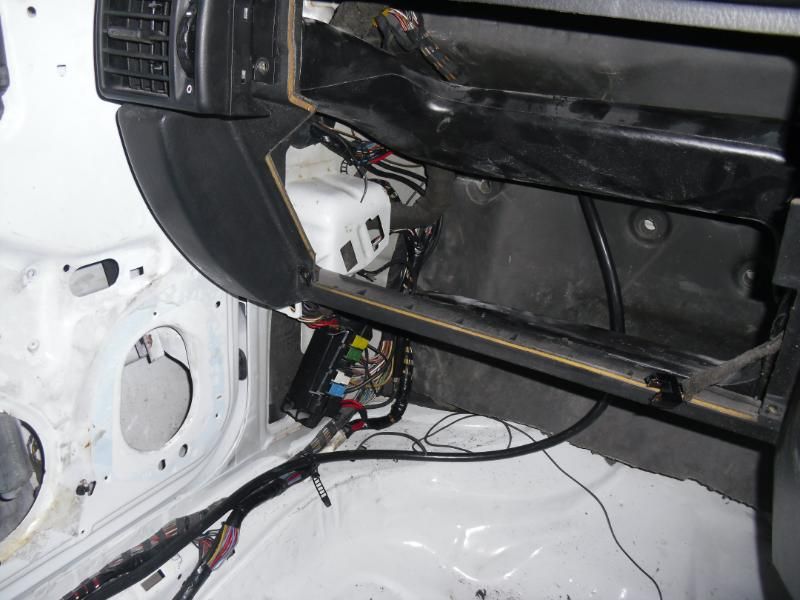
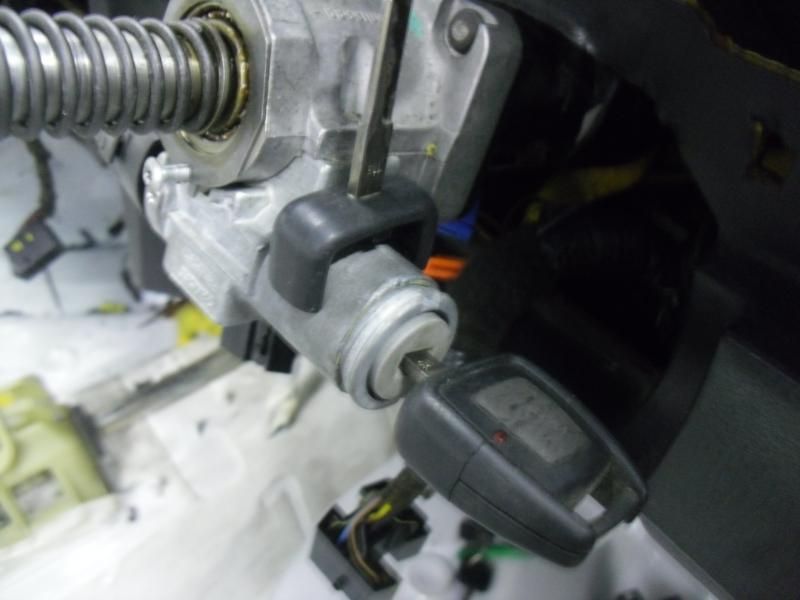
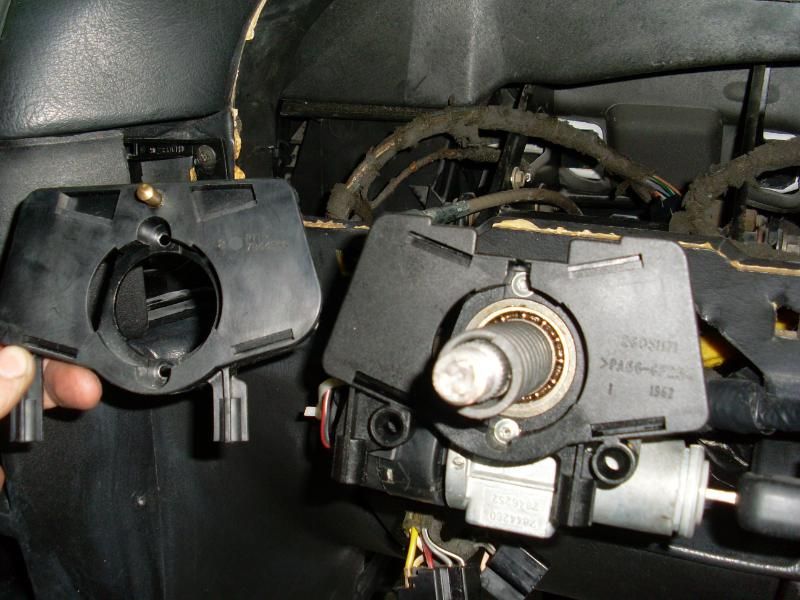
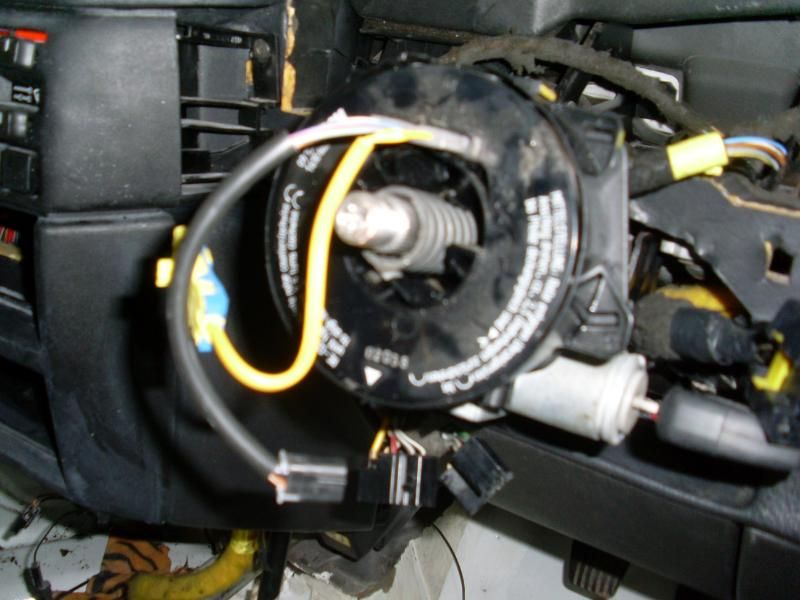
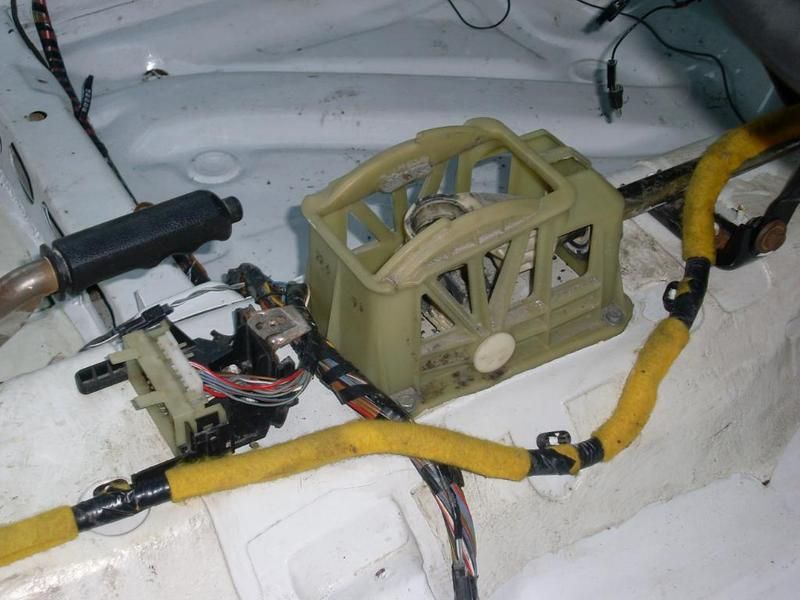
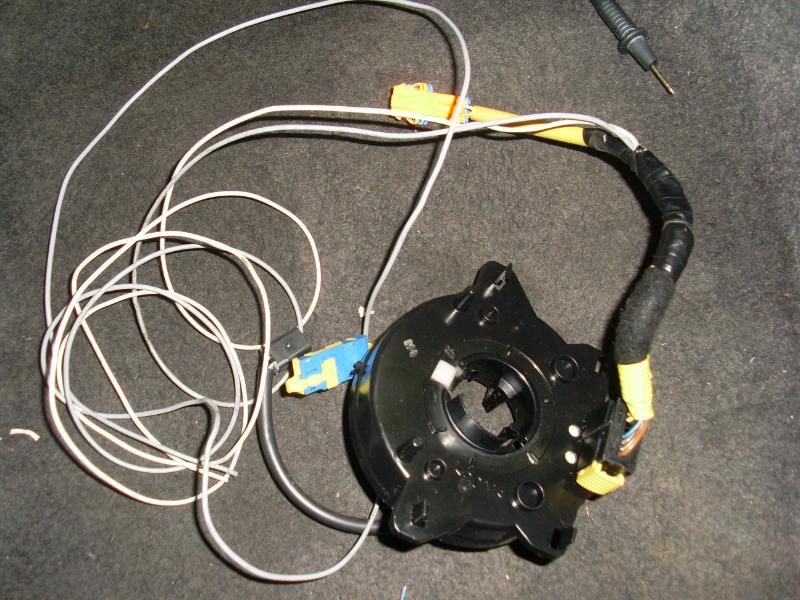
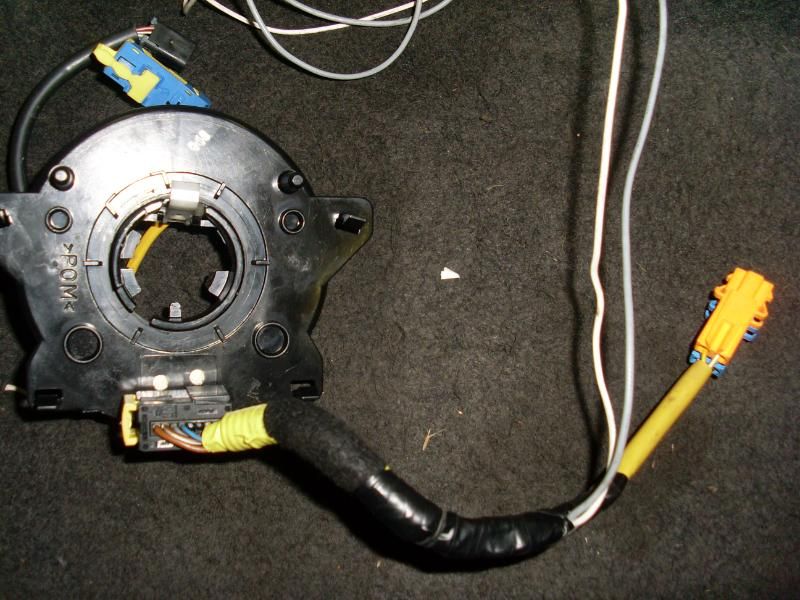
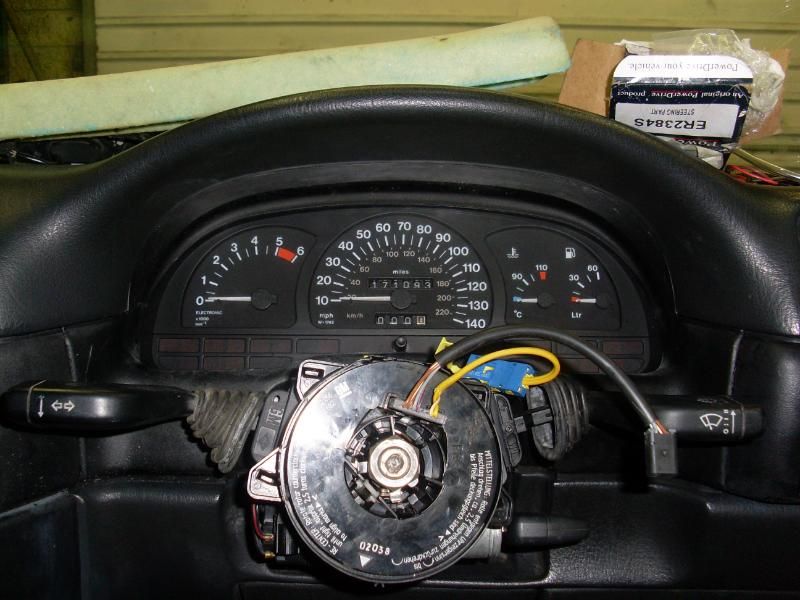
Now the only thing holding me back with the interior is the dreaded electrics. I spent a few hours last night altering the steering wheel loom so I can fit the vectra one with the radio controls.
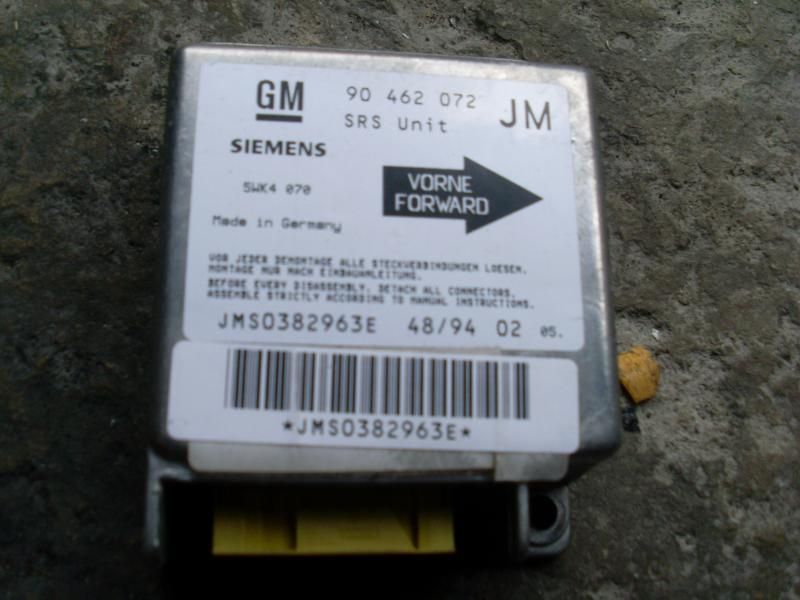
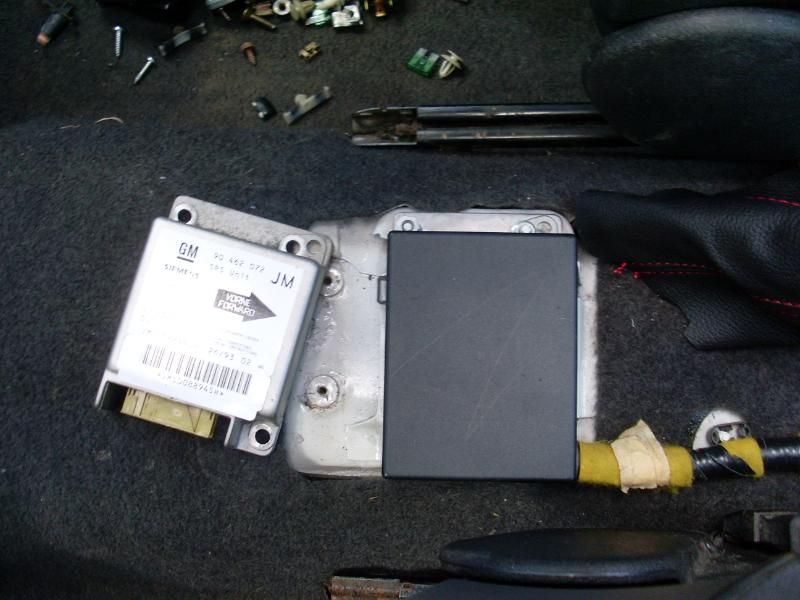
Fairly straight forward job but unfortunitly I had already turned the ignition on without the airbag previously, so I think I need tech 1 to clear the fault and get the light out. Anyone know of another way? (Disconnecting battery doesnt seem to do it.)
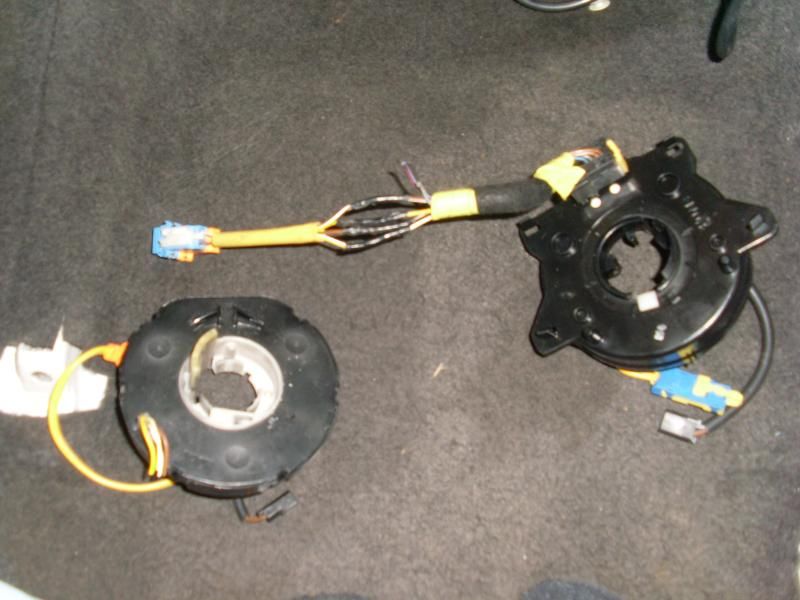
Cavalier left - Vectra Right
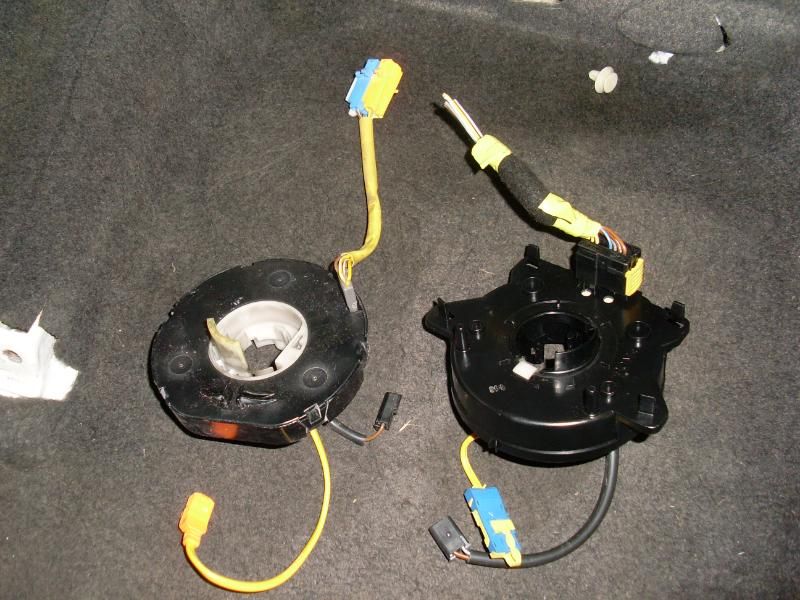
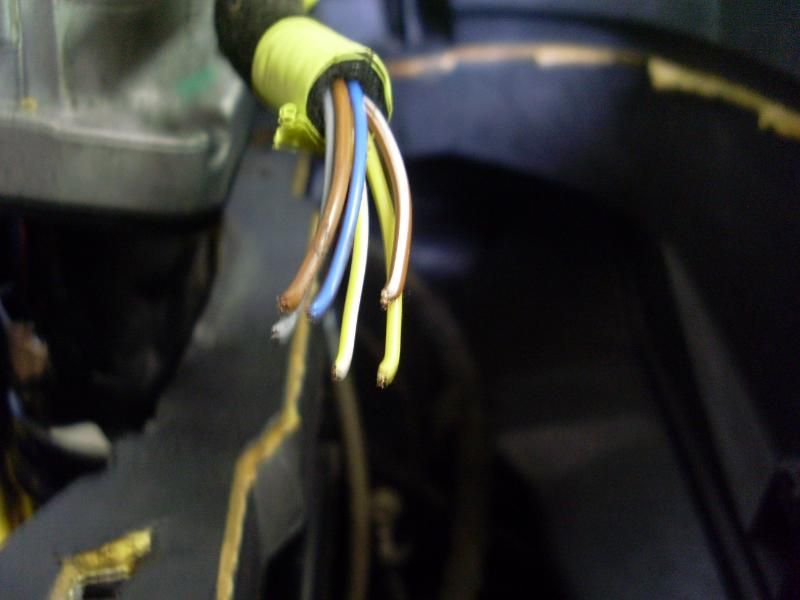
Connections that need switched..
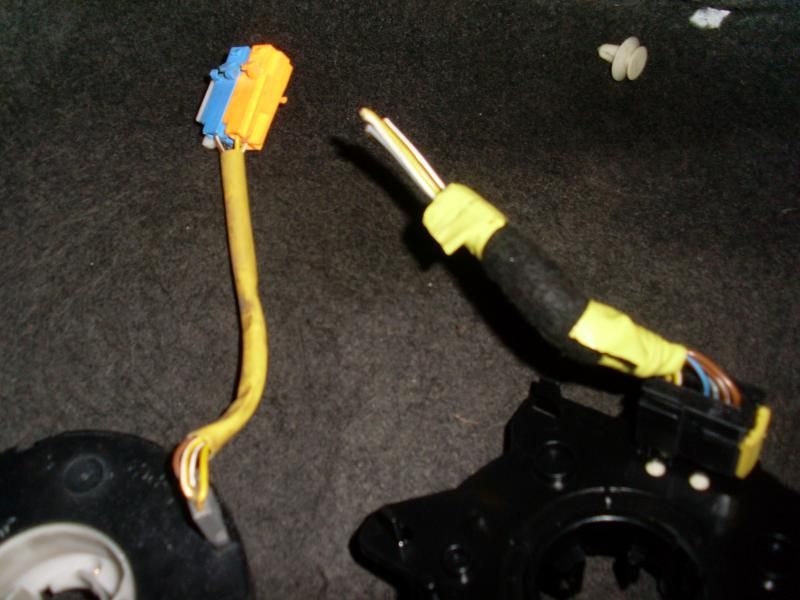
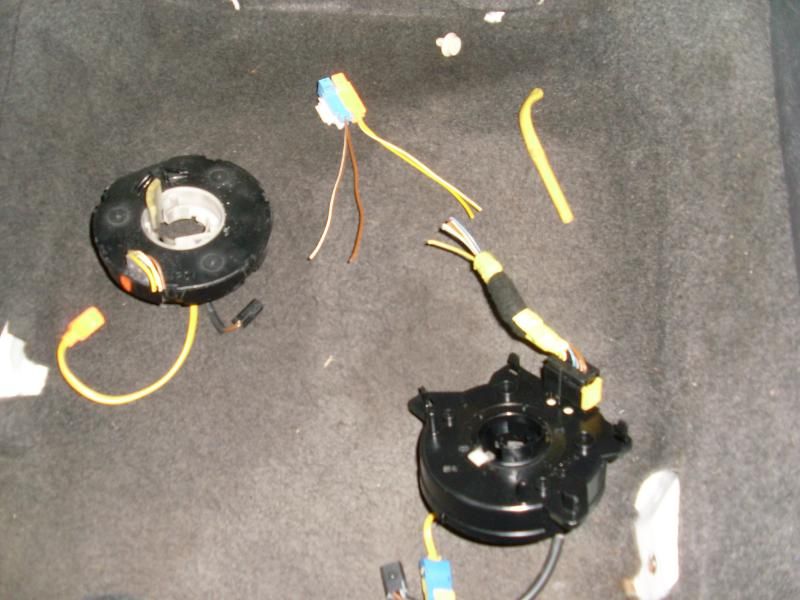
Then the two extra wires for the ilumination and radio control.
Also wired up an ignition live (black wire) required for the interior light.
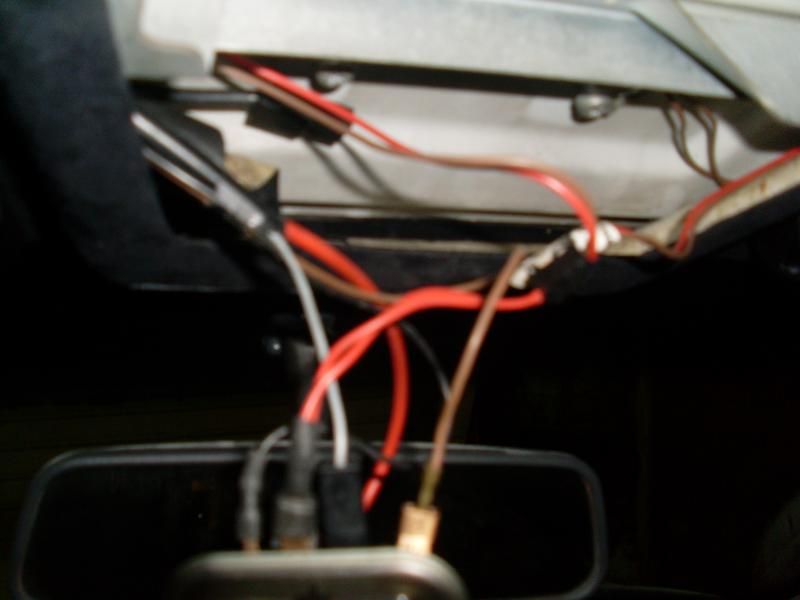
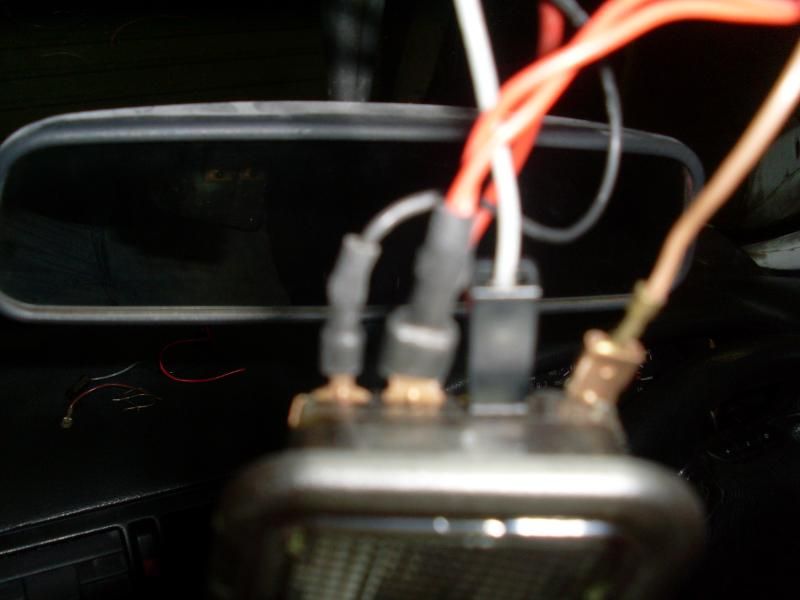
The wire comes down through the passenger A piller...
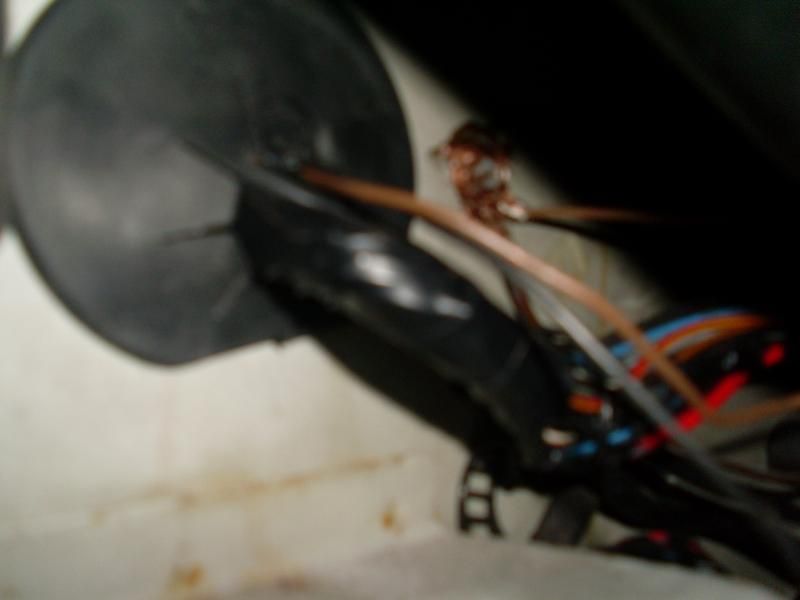
I couldnt get access to splice it in where it would normally go so I extented it. (Didnt have black wire)
I now have all the speakers wired up tho including my new OEM+ door speakers.
Unfortunitly the camera was dead when I made them but il take the driverside off and take a photo of the rear. Basically I just gutted out the insides of the original speaker, then using the metal clips that came with the new ones, I clamped it onto the remaining surround. I also soldered the remaining wires onto the new speaker so I can just plug these directly onto the door looms.
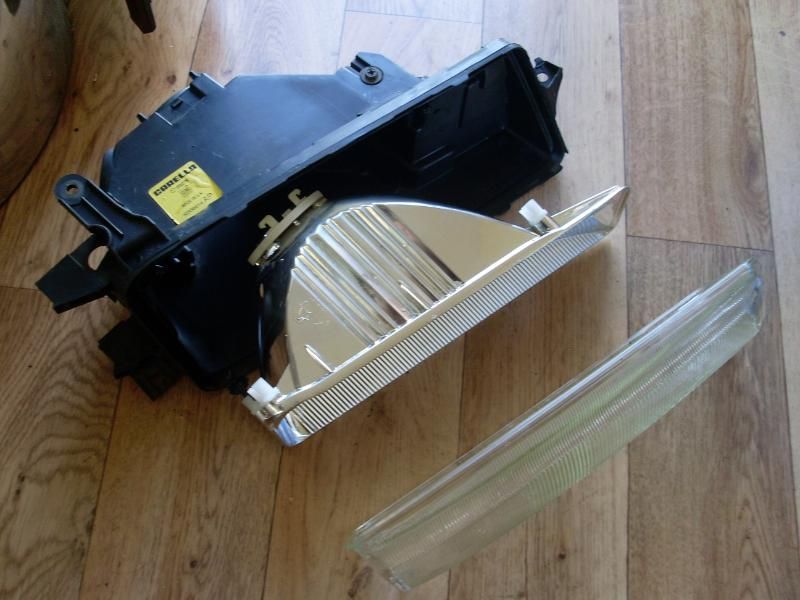
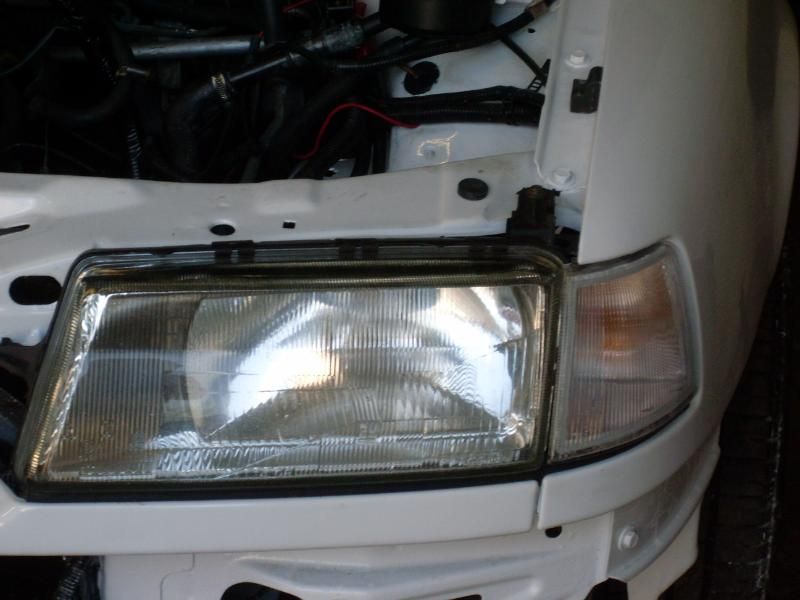
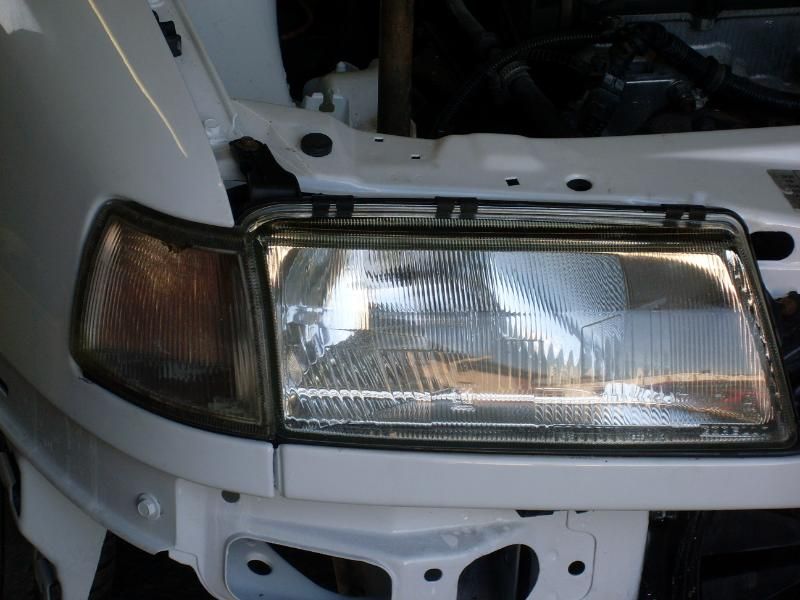
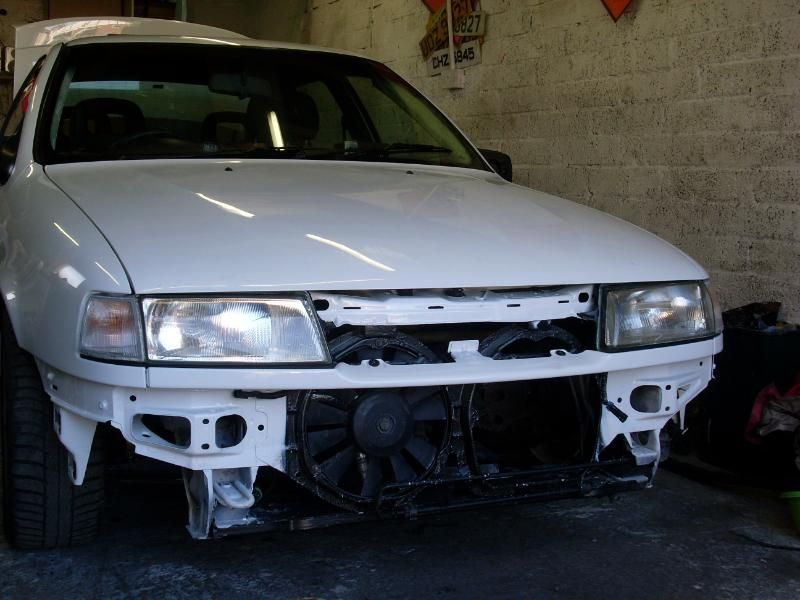
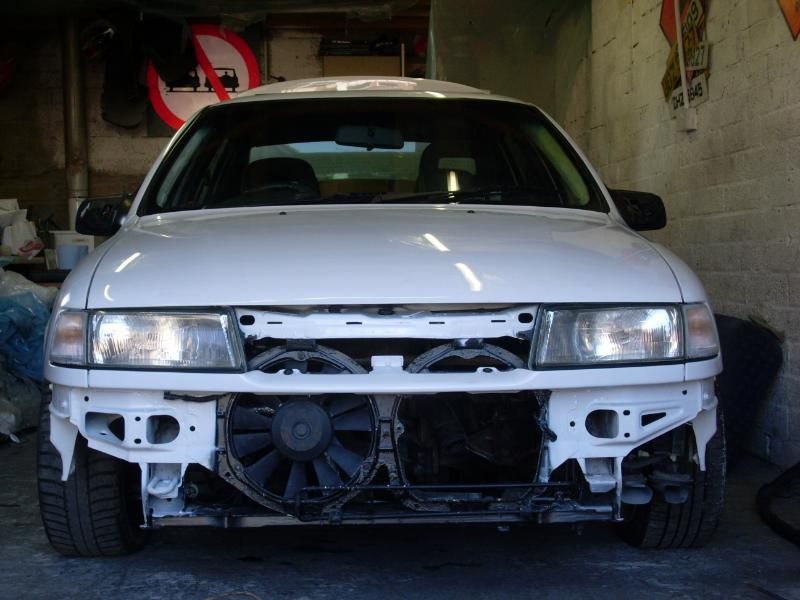
Tonight I sorted through all the lights I have and made up two with the best of all the parts, including surrounds with all 3 mounting lugs still intact. Fogs yet to be cleaned and grille still needs painted...

Next up..
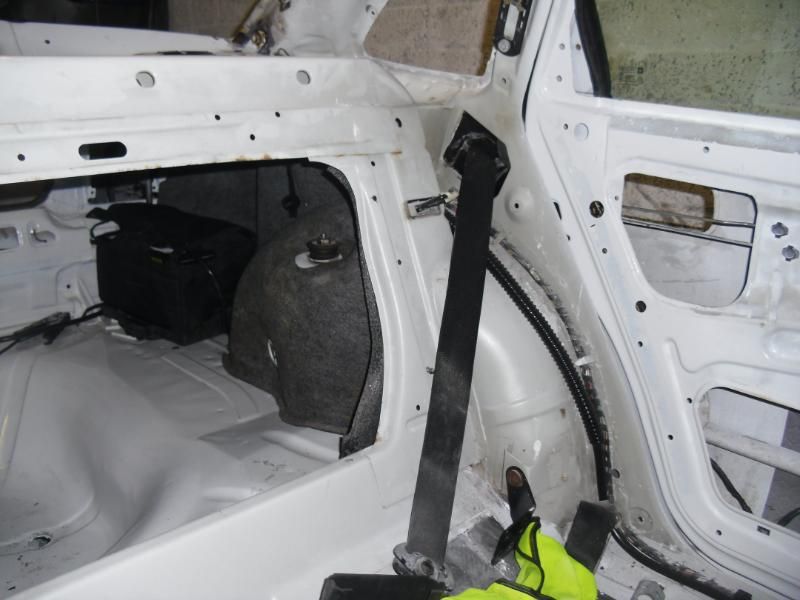
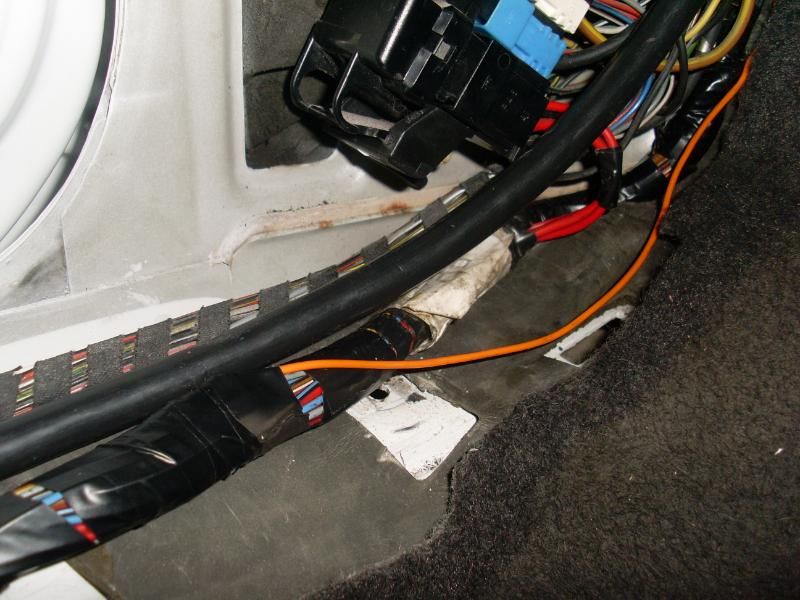
- Reroute the battery cable as I cant get the plastics back on over it.
-Run a hose to the A piller from the engine bay and wire an Ignition live and Earth for a boost gauge.
-Some wiring for the new vectra central locking module so that it works off the door lock, incase the battery dies.
The car is now watertight. This is one job I didnt want to risk doing myself, so I got a local fella that fits windscreens to put the rear window in. I would highly recomend him as it was a perfect job for a very reasonable price.
And with the window in I finished off the rear interior parts...
Now the only thing holding me back with the interior is the dreaded electrics. I spent a few hours last night altering the steering wheel loom so I can fit the vectra one with the radio controls.
Fairly straight forward job but unfortunitly I had already turned the ignition on without the airbag previously, so I think I need tech 1 to clear the fault and get the light out. Anyone know of another way? (Disconnecting battery doesnt seem to do it.)
Cavalier left - Vectra Right
Connections that need switched..
Then the two extra wires for the ilumination and radio control.
Also wired up an ignition live (black wire) required for the interior light.
The wire comes down through the passenger A piller...
I couldnt get access to splice it in where it would normally go so I extented it. (Didnt have black wire)
I now have all the speakers wired up tho including my new OEM+ door speakers.
Unfortunitly the camera was dead when I made them but il take the driverside off and take a photo of the rear. Basically I just gutted out the insides of the original speaker, then using the metal clips that came with the new ones, I clamped it onto the remaining surround. I also soldered the remaining wires onto the new speaker so I can just plug these directly onto the door looms.
Tonight I sorted through all the lights I have and made up two with the best of all the parts, including surrounds with all 3 mounting lugs still intact. Fogs yet to be cleaned and grille still needs painted...
Next up..
- Reroute the battery cable as I cant get the plastics back on over it.
-Run a hose to the A piller from the engine bay and wire an Ignition live and Earth for a boost gauge.
-Some wiring for the new vectra central locking module so that it works off the door lock, incase the battery dies.
Re: Subject: ddohertys... 1.7 Isuzu Cavalier Project *pic he
absouletly awesome mate!
-
ddoherty406
- Registered user
- Posts: 54
- Joined: Wed Jun 29, 2011 11:23 am
- Location: Northern Ireland - Derry
Re: Subject: ddohertys... 1.7 Isuzu Cavalier Project *pic he
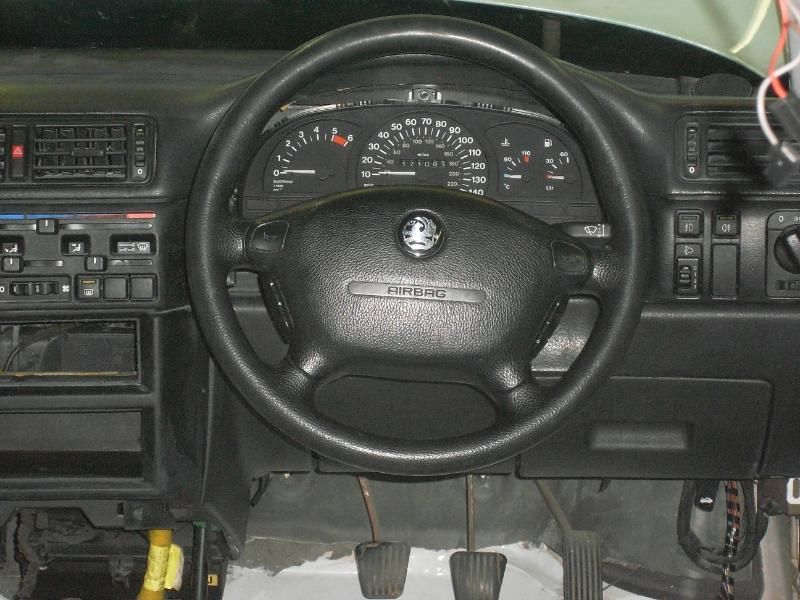
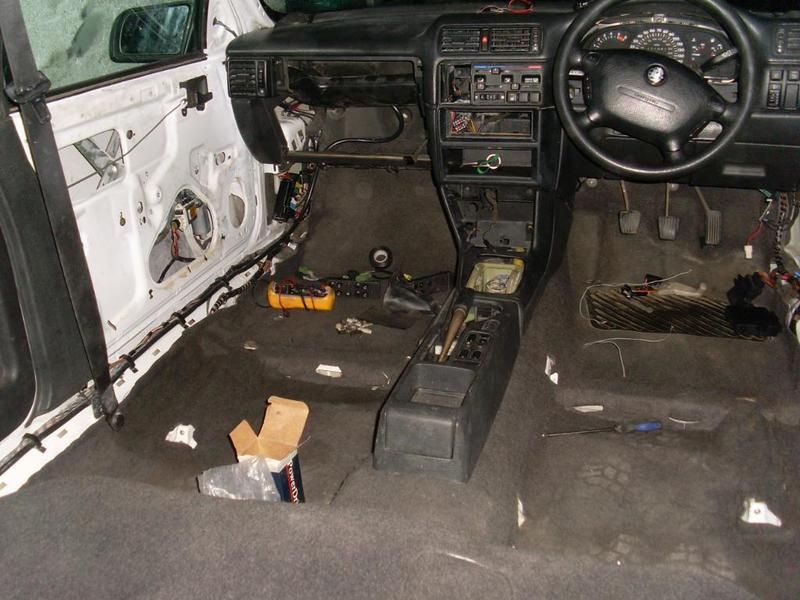
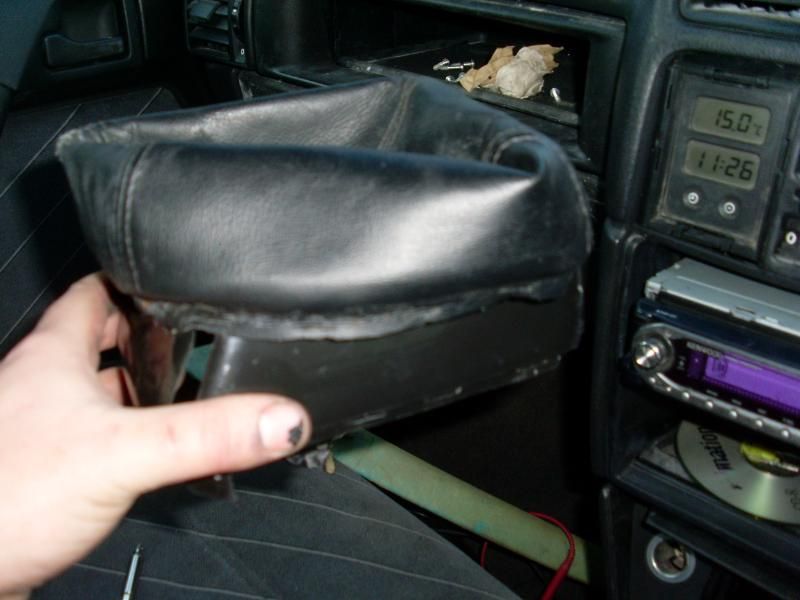
Well it doesnt look like much, but ive finally got the interior back in bar a few things still needing painted for the roof and the boot is built back up. Im not 100% happy with it but after I get it through mot then il look about doing a proper boot build to fit my 2 subs and that way I can dump the soiled carpets. Everything still needs a good wipe down and cleaned but il not be doing that till im finished.
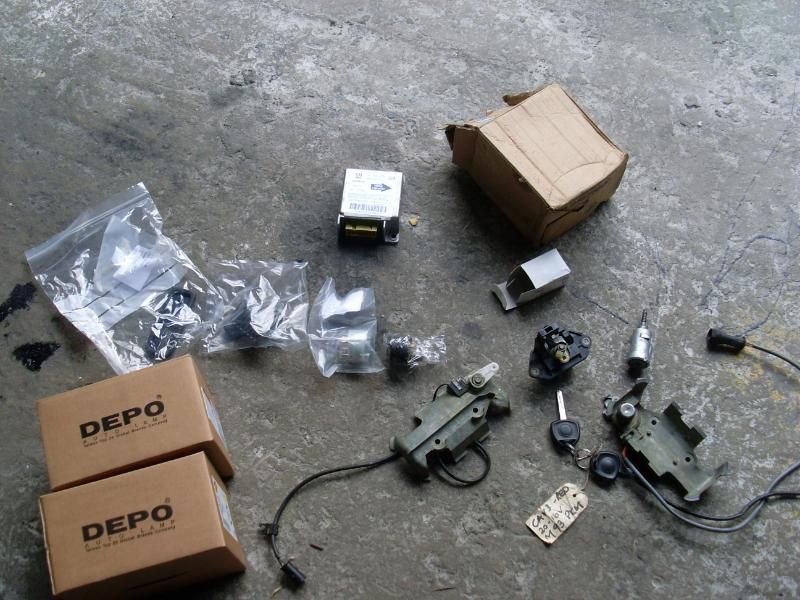
I also got a bit carried away when on the hunt for an ignition switch and ended up spending a little more on new parts. il post up when they arrive.
Heres where im at now...
Battery in its new home. (Will be tidied up with boot build)
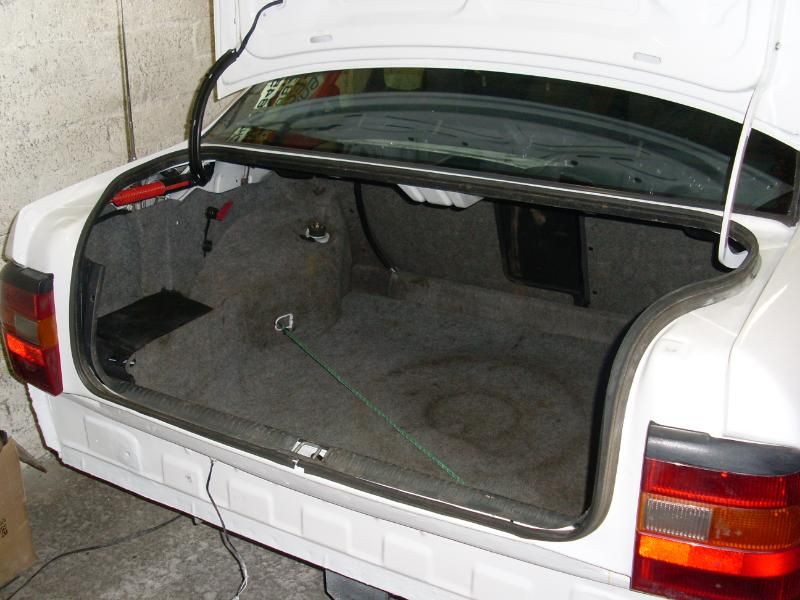
Undecided whether to cut the carpet, so it can be removed easily or just leave it.

Rear panel on (may be colour coded yet)...
Seats back in...
Boost gauge piping and wiring done so dials are back in.
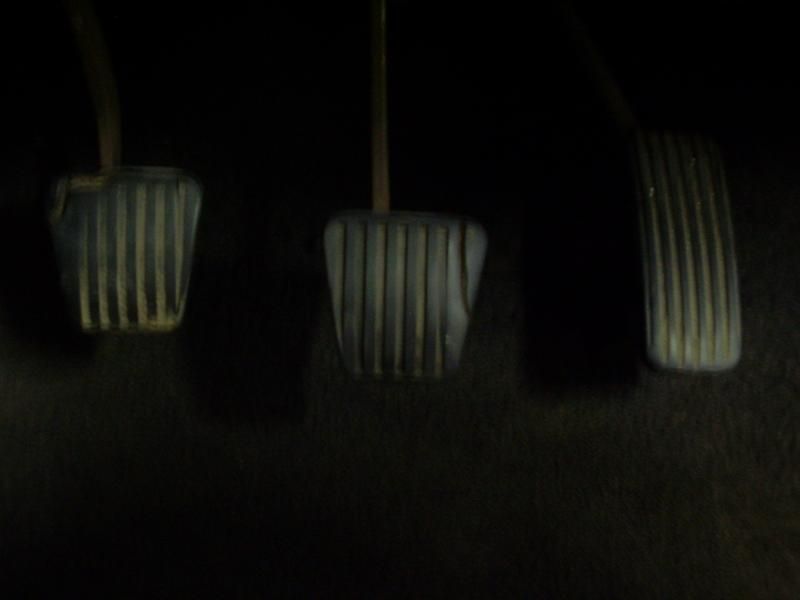
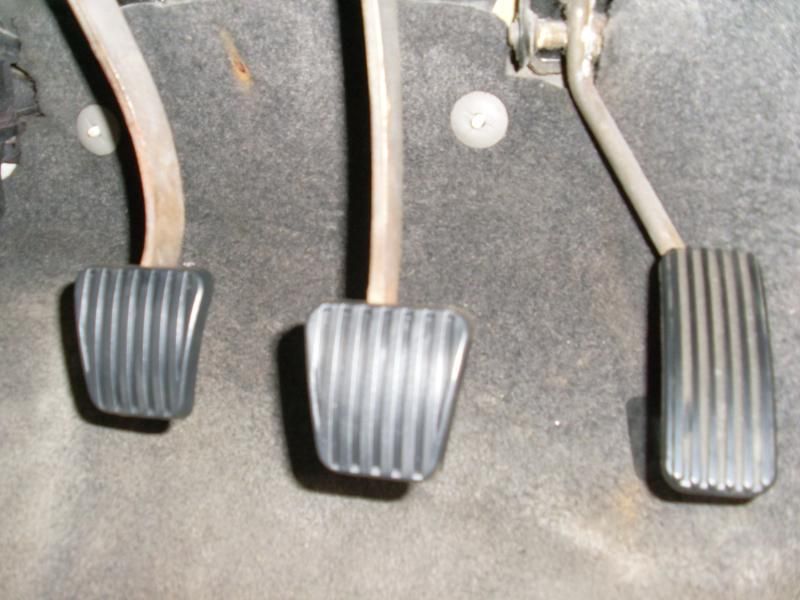
and lastly a wee before pic of the pedals...
Few of the things ive ordered turned up on friday which gave me a kick to do a bit more. Well the suade wasnt the same as the headlining, the black was just as standard and I figured the white wouldnt stay white for long, sooo...
Just sitting in. will look better when the interior is cleaned...
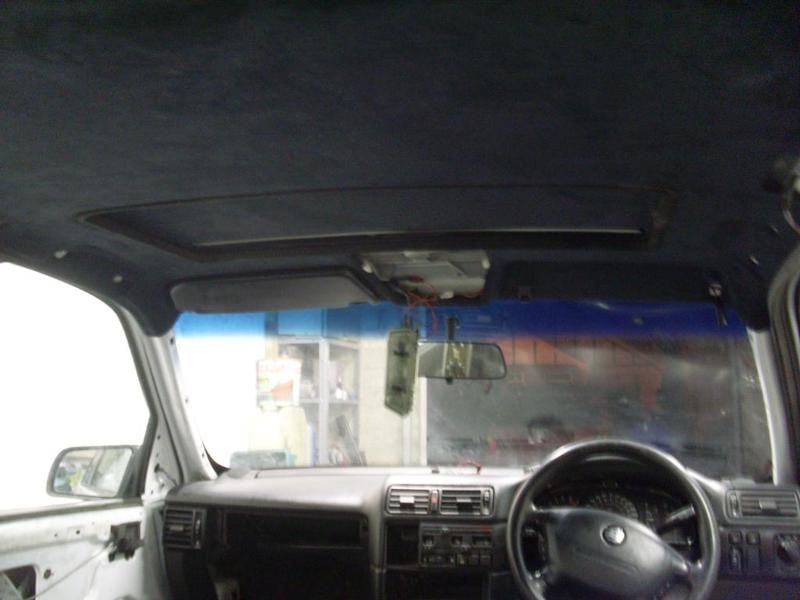
I wasnt 100% happy with the roof lining, but now ive all the parts painted black and back on, im more than happy with how its turned out. Very hard to get good pics of it as its dark inside the car and with the flash it looks even worse.
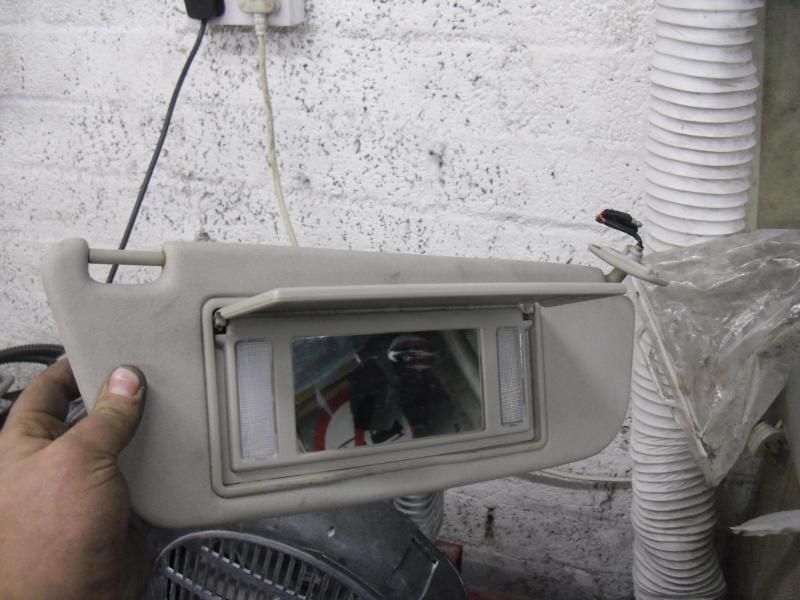
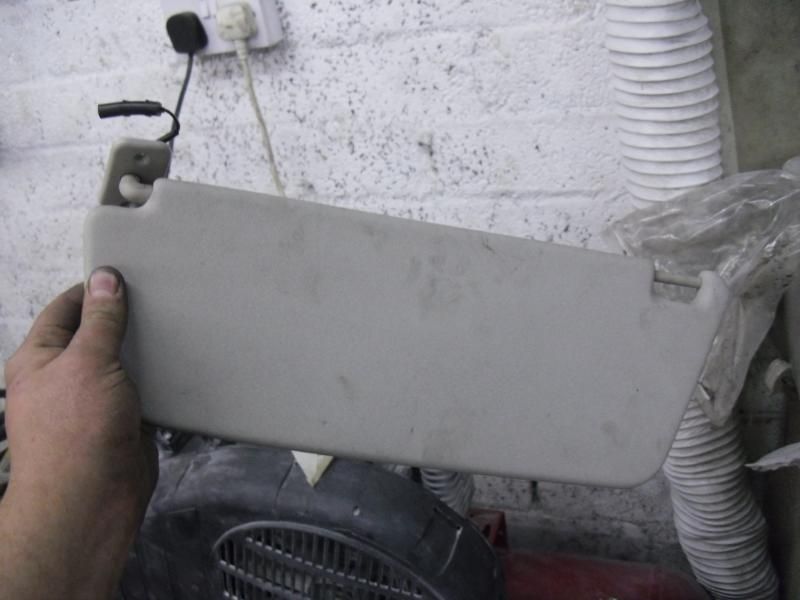
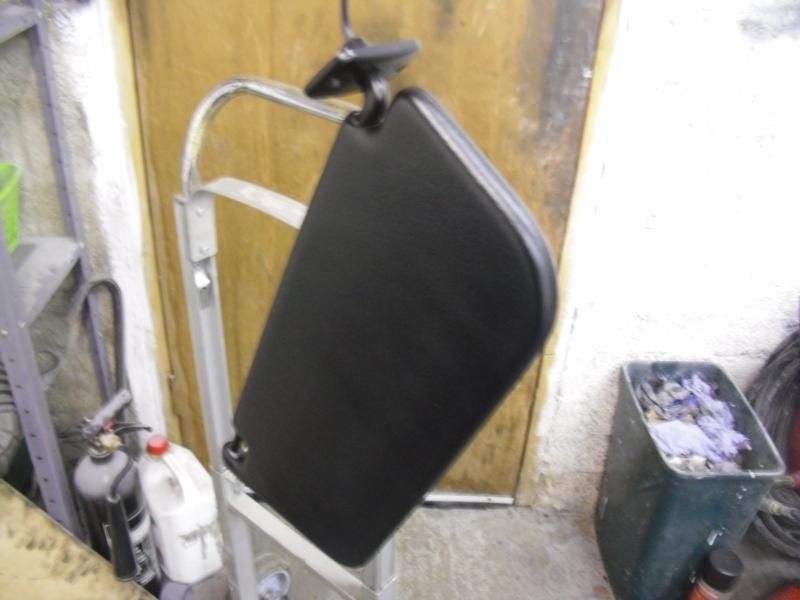
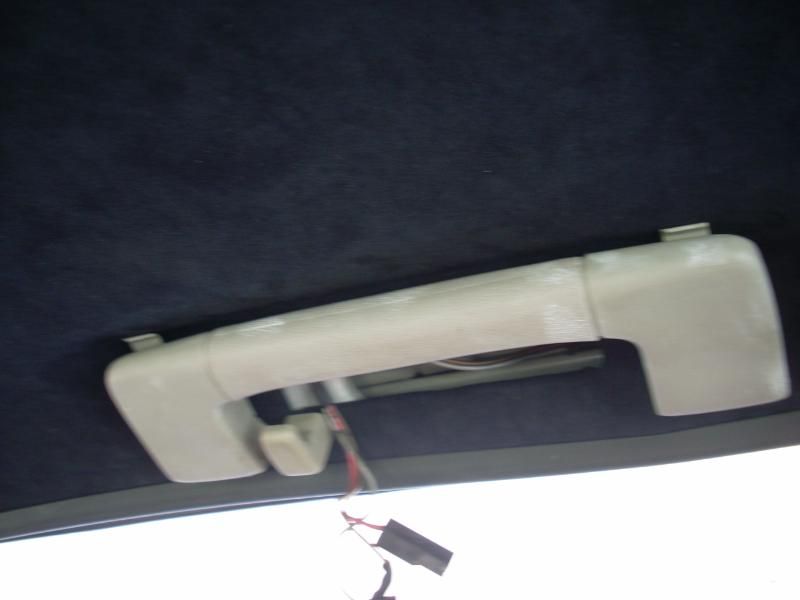
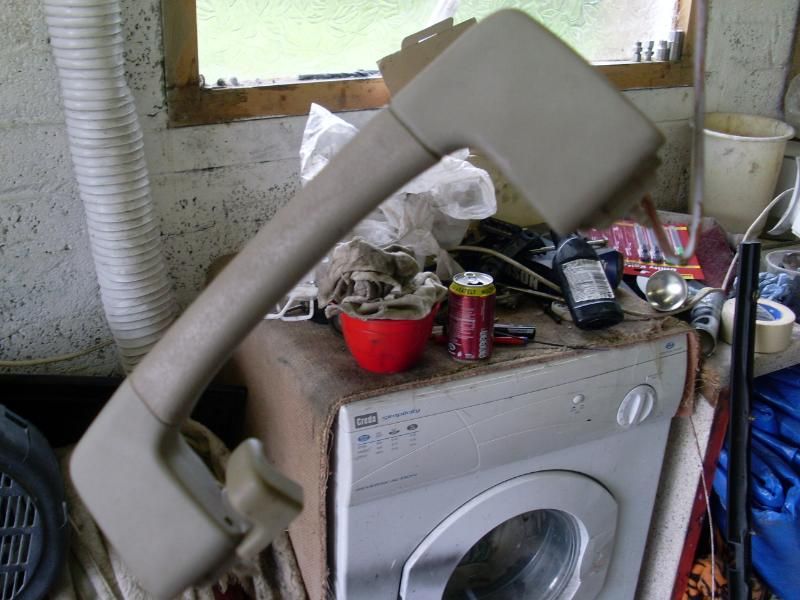
I was putting the drivers sunvisor on and the very last thing I had to do was clip it into place to finish. Was raging when the wee fudgery snapped. So need ti get another and get it sprayed.

Pushed it outside to paint the parts, I couldnt resit a couple of snaps while it was out in the sun...
I was hoping to have the interior completely finished today but as usual things didnt go as planned. The passenger window wasnt going up as smooth as I liked so I decided to strip the door down again and find out why. Turned out the mechanism was bent and the rivits had worn and was moving about. I replaced it with a spare one and used nut and bolts instead to take up the slack. Atleast its fixed now and while I was at it heres how the speakers are made up...

Another wee package which arived on friday ment I could finish the driverside door and get the steering wheel back on, but for whatever reason ive ended up deadlocking the car so ended up wasting a few hours trying to fix it. Still no joy.
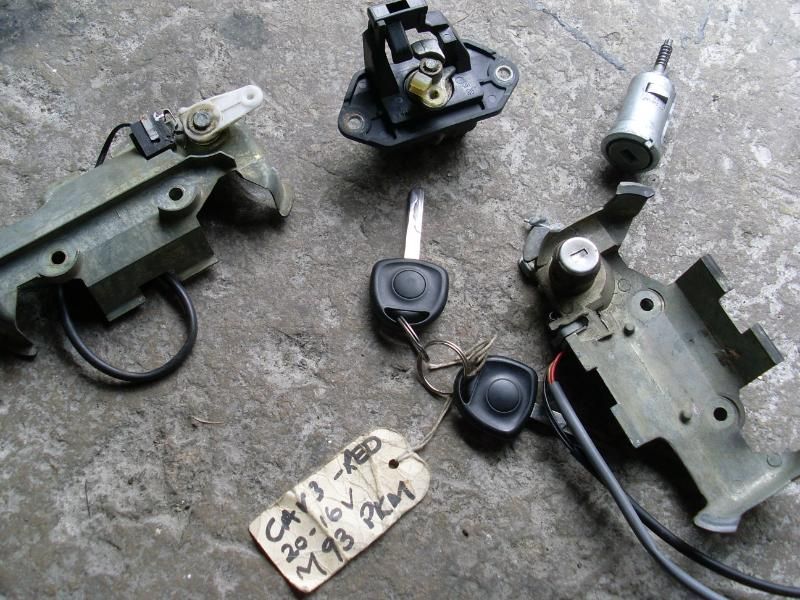
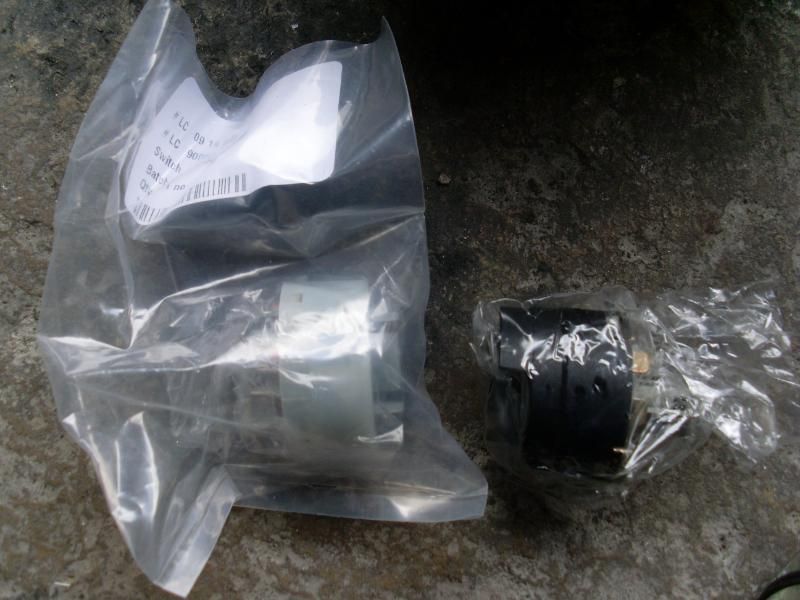
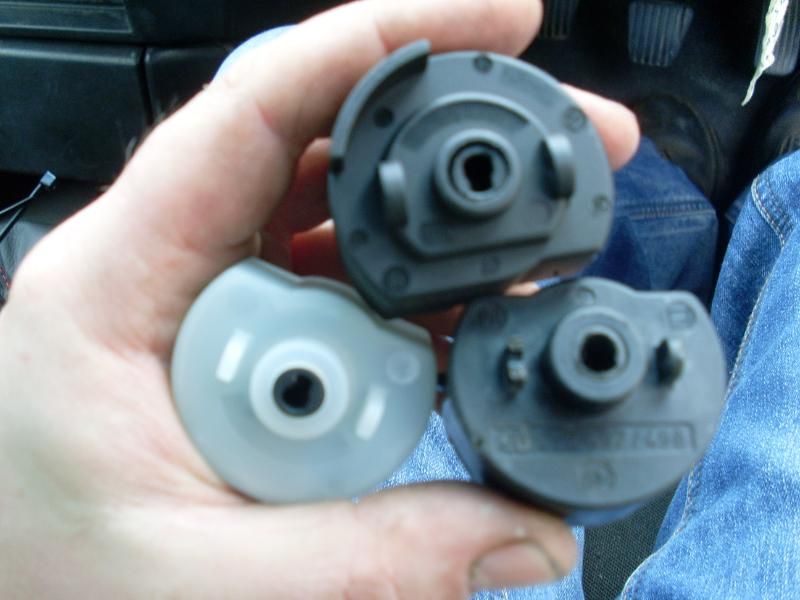
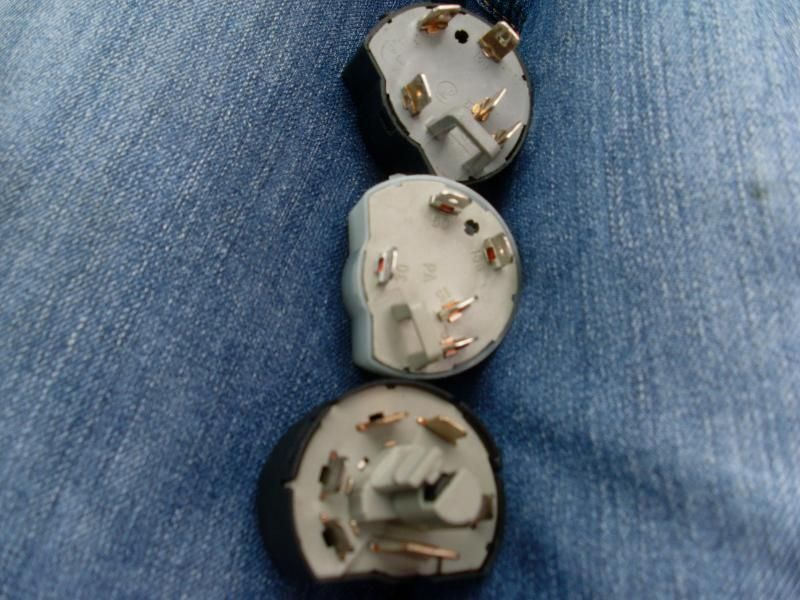
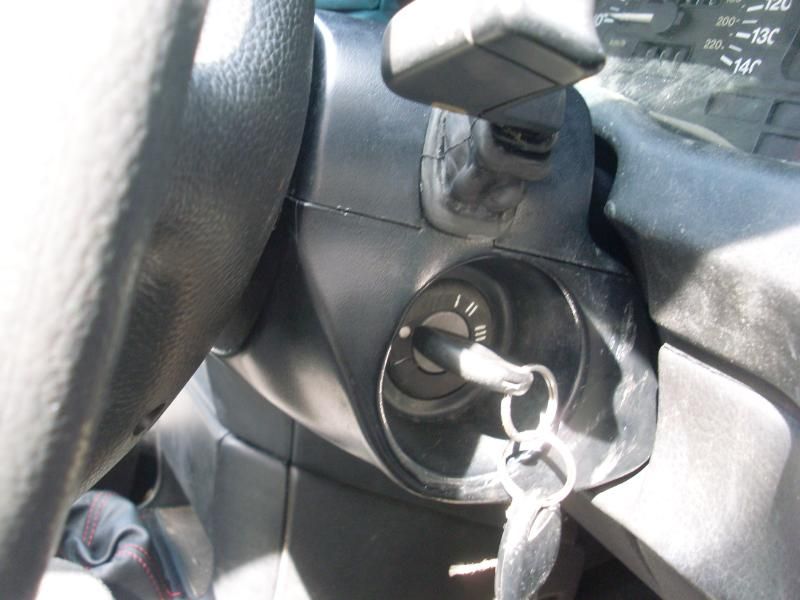
When I was ordering the ignition switch I was planning on just getting the black one as mine is black, good job I ordered the other one too as it turned out to be the one ~I needed. You can see in the second photo mine was worn into a circle.
All back together...
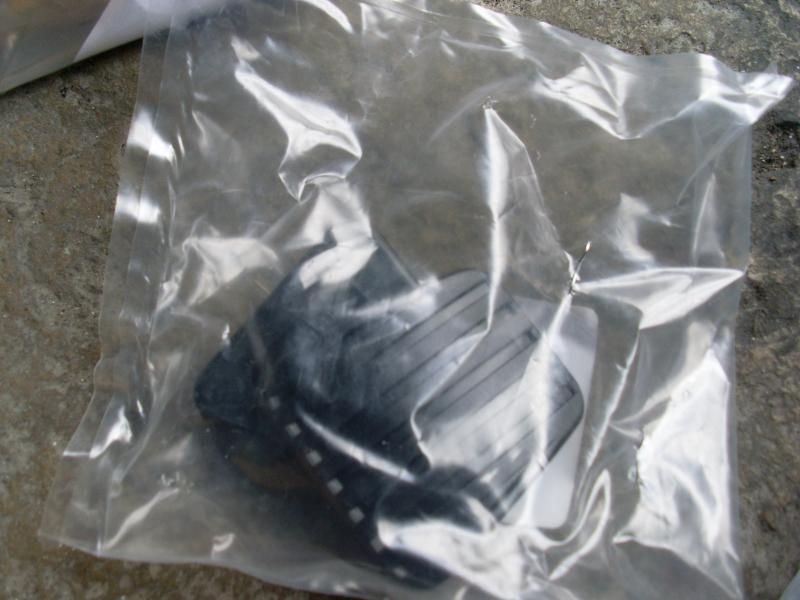
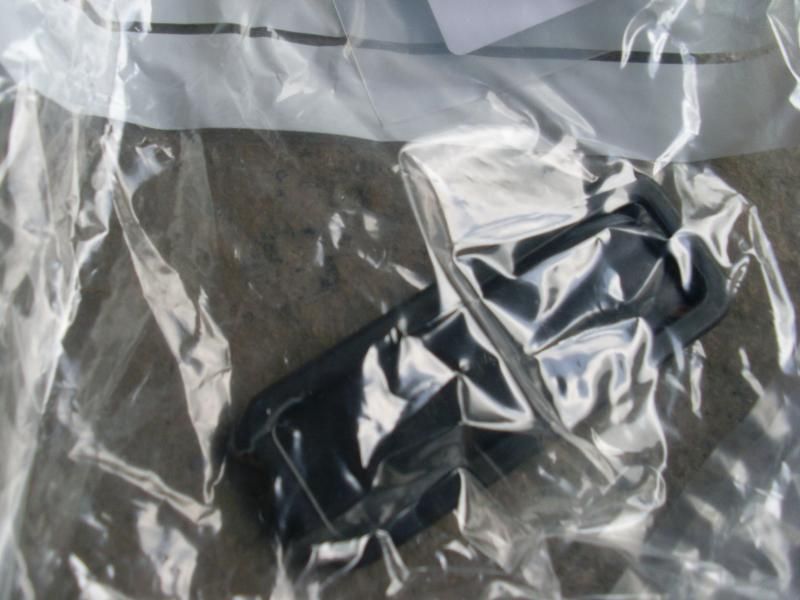
Next up the reason I posted up the pedals previously, nice new ones. (Tip heat them up 1st and theyll go on easier)
£10 for someone to plug the car in to turn off the airbag light or... brand new unit for a 5er.
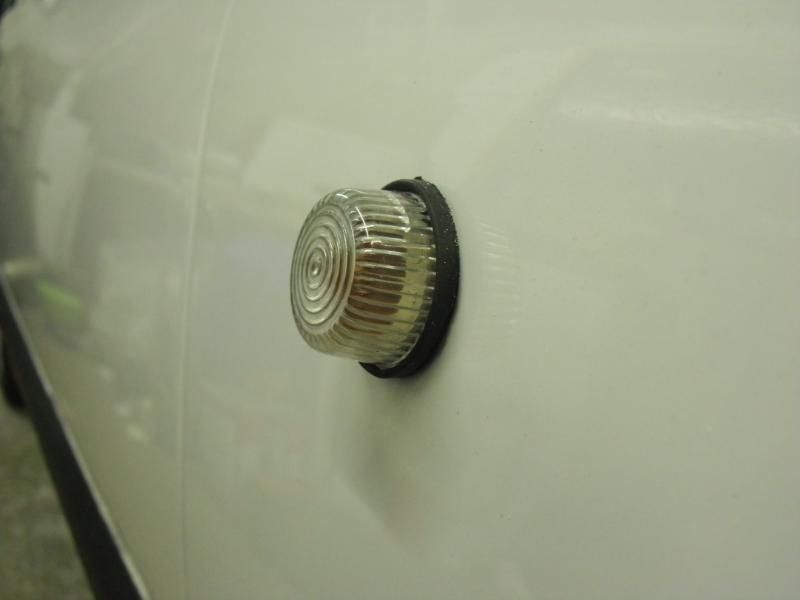
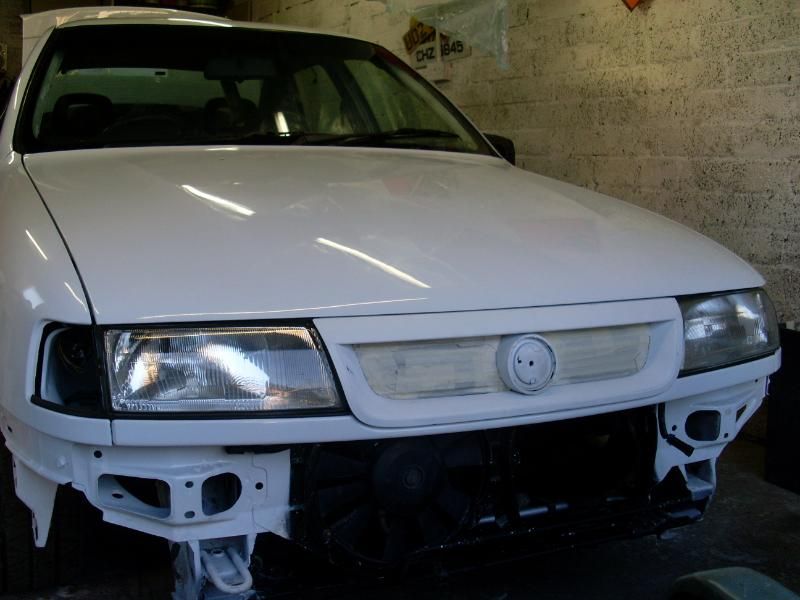
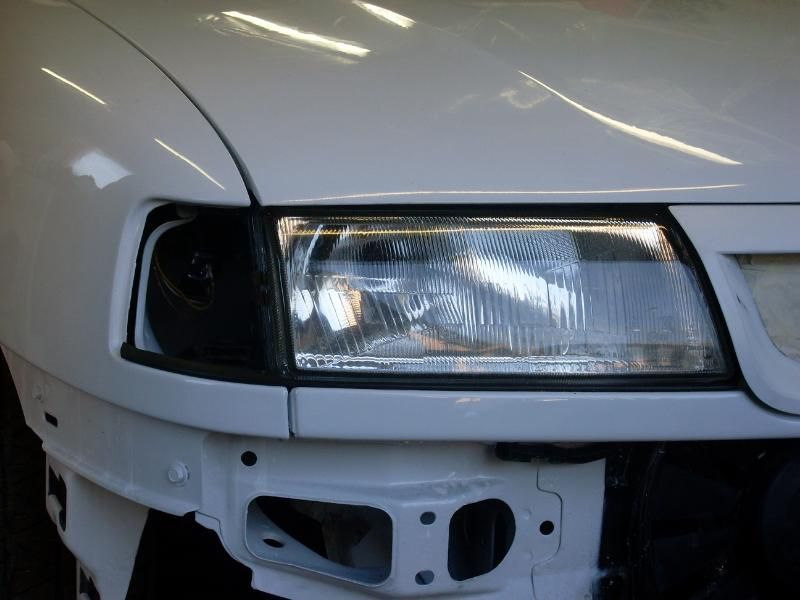
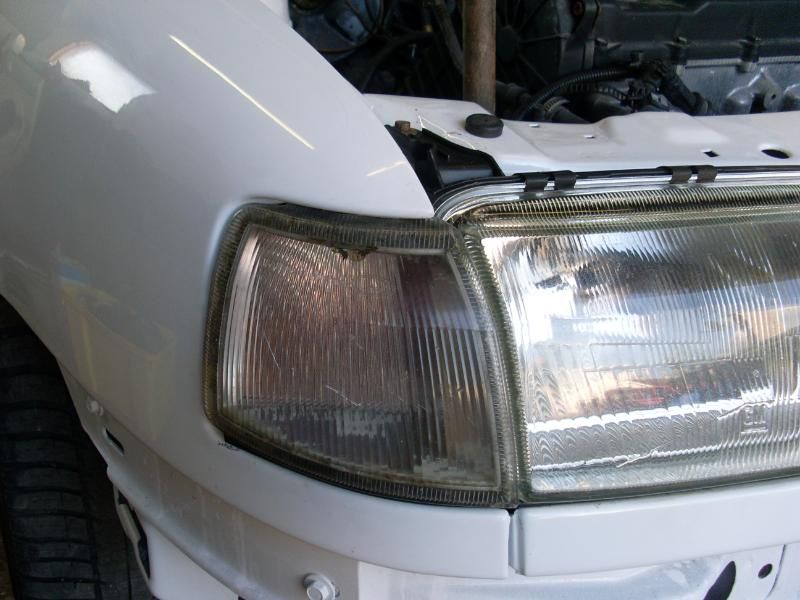
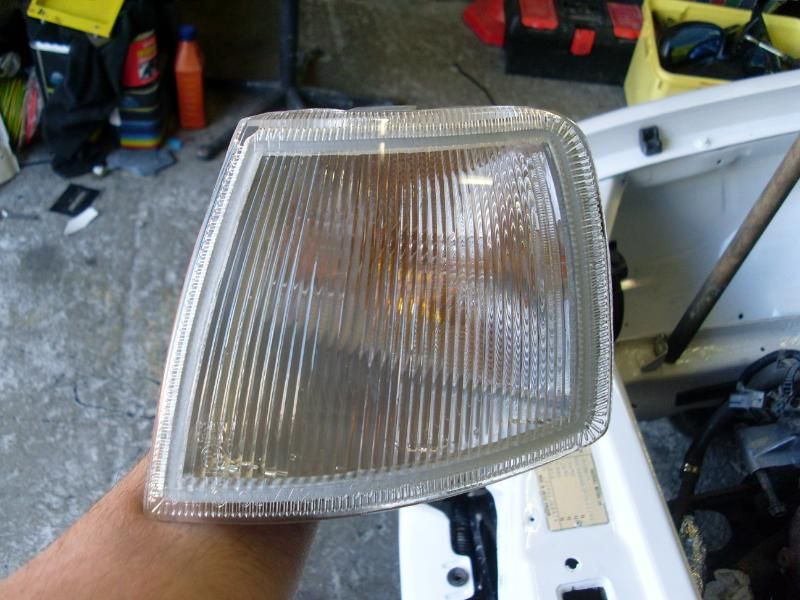
Lastly nice new clean indicators. The old ones were ruining the look of the front. However these are a different type and do not sit flush with the headlights which I didnt realise when I bought them. Cant decide if I like them or not.
oldies...
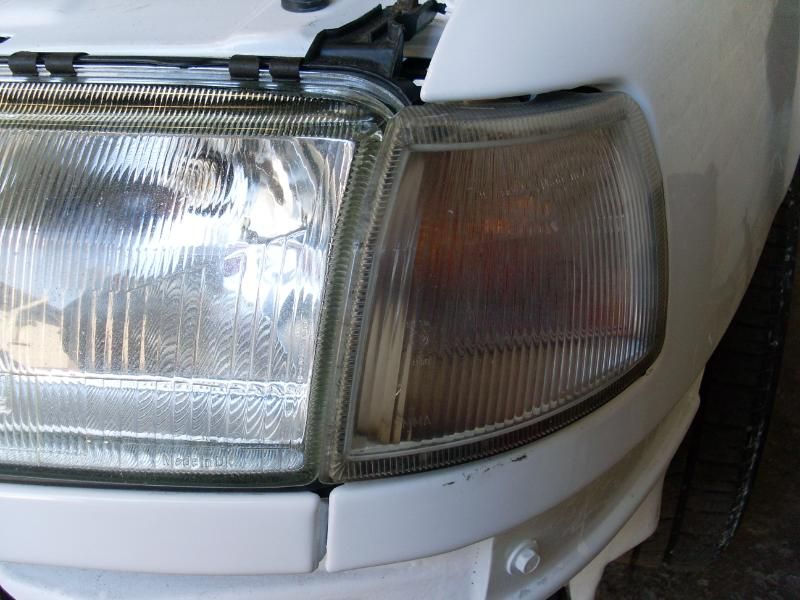
New ones...
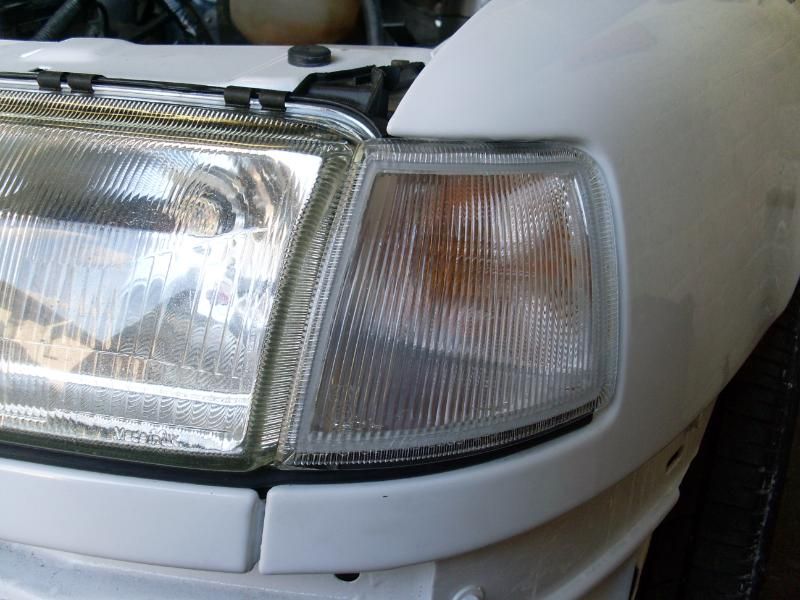
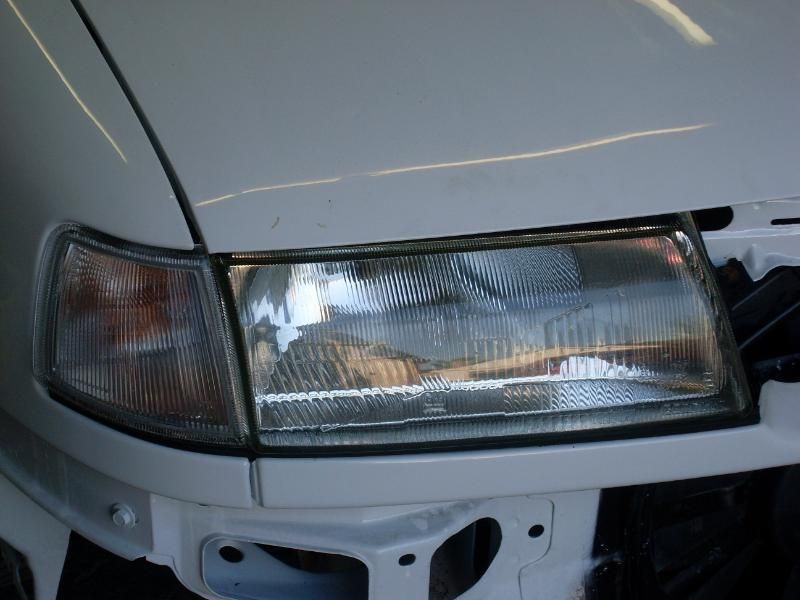
They can stay on now but I may end up stripping down the old ones and try cleaning them. Hopefully il get these locks fixed tomorrow and be finshed with the interior so I can make a start on painted the remaining parts.
I also got a bit carried away when on the hunt for an ignition switch and ended up spending a little more on new parts. il post up when they arrive.
Heres where im at now...
Battery in its new home. (Will be tidied up with boot build)
Undecided whether to cut the carpet, so it can be removed easily or just leave it.
Rear panel on (may be colour coded yet)...
Seats back in...
Boost gauge piping and wiring done so dials are back in.
and lastly a wee before pic of the pedals...
Few of the things ive ordered turned up on friday which gave me a kick to do a bit more. Well the suade wasnt the same as the headlining, the black was just as standard and I figured the white wouldnt stay white for long, sooo...
Just sitting in. will look better when the interior is cleaned...
I wasnt 100% happy with the roof lining, but now ive all the parts painted black and back on, im more than happy with how its turned out. Very hard to get good pics of it as its dark inside the car and with the flash it looks even worse.
I was putting the drivers sunvisor on and the very last thing I had to do was clip it into place to finish. Was raging when the wee fudgery snapped. So need ti get another and get it sprayed.
Pushed it outside to paint the parts, I couldnt resit a couple of snaps while it was out in the sun...
I was hoping to have the interior completely finished today but as usual things didnt go as planned. The passenger window wasnt going up as smooth as I liked so I decided to strip the door down again and find out why. Turned out the mechanism was bent and the rivits had worn and was moving about. I replaced it with a spare one and used nut and bolts instead to take up the slack. Atleast its fixed now and while I was at it heres how the speakers are made up...
Another wee package which arived on friday ment I could finish the driverside door and get the steering wheel back on, but for whatever reason ive ended up deadlocking the car so ended up wasting a few hours trying to fix it. Still no joy.
When I was ordering the ignition switch I was planning on just getting the black one as mine is black, good job I ordered the other one too as it turned out to be the one ~I needed. You can see in the second photo mine was worn into a circle.
All back together...
Next up the reason I posted up the pedals previously, nice new ones. (Tip heat them up 1st and theyll go on easier)
£10 for someone to plug the car in to turn off the airbag light or... brand new unit for a 5er.
Lastly nice new clean indicators. The old ones were ruining the look of the front. However these are a different type and do not sit flush with the headlights which I didnt realise when I bought them. Cant decide if I like them or not.
oldies...
New ones...
They can stay on now but I may end up stripping down the old ones and try cleaning them. Hopefully il get these locks fixed tomorrow and be finshed with the interior so I can make a start on painted the remaining parts.
-
steven240374
- Registered user
- Posts: 415
- Joined: Sun Apr 11, 2010 8:20 pm
- Location: silsden near bradford
- Contact:
Re: Subject: ddohertys... 1.7 Isuzu Cavalier Project *pic he
Thats alot of work but looks really good for it what paint did you use for the roof lining and bits
Re: Subject: ddohertys... 1.7 Isuzu Cavalier Project *pic he
Mate your puttin some serious work into this car looks lethal. How ya ever price a car like that to sell when the time ever comes.
Vauxhall once driven forever smitten.
-
ddoherty406
- Registered user
- Posts: 54
- Joined: Wed Jun 29, 2011 11:23 am
- Location: Northern Ireland - Derry
Re: Subject: ddohertys... 1.7 Isuzu Cavalier Project *pic he
Just used halfords plastic primer and satin black. I didnt want the bother of getting the spraying gear out just to do them wee bits. Would work out roughly the same price anyway.
Thanks Dee, hopefully that time never does come as I plan on keeping it for a long long time. It wouldnt be worth it to do all these wee extra bits if i was planning on selling it soon after its done.
Thanks Dee, hopefully that time never does come as I plan on keeping it for a long long time. It wouldnt be worth it to do all these wee extra bits if i was planning on selling it soon after its done.
Re: Subject: ddohertys... 1.7 Isuzu Cavalier Project *pic he
very neat work!
Vauxhall Astra van - T22 JFF
Vauxhall Cavalier SRi - J551 AHJ
Vauxhall Cavalier SRi - J551 AHJ
-
ddoherty406
- Registered user
- Posts: 54
- Joined: Wed Jun 29, 2011 11:23 am
- Location: Northern Ireland - Derry
Re: Subject: ddohertys... 1.7 Isuzu Cavalier Project *pic he
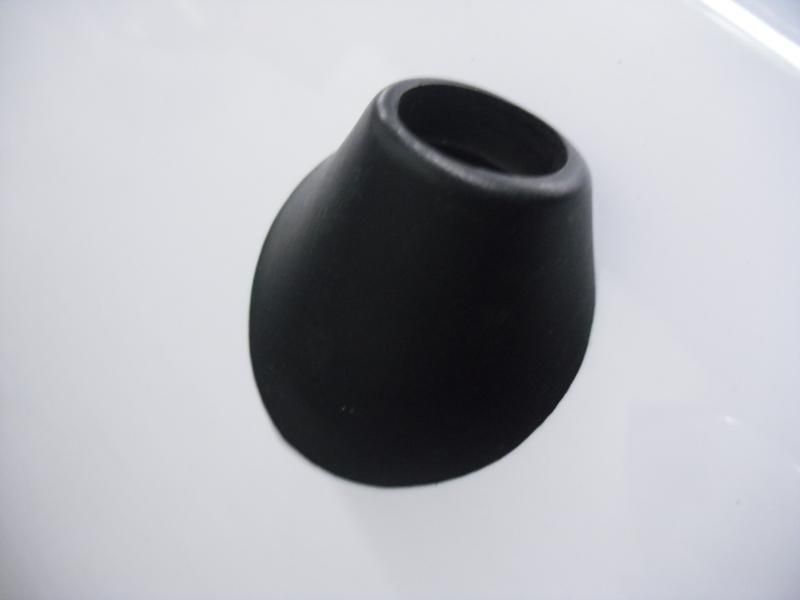
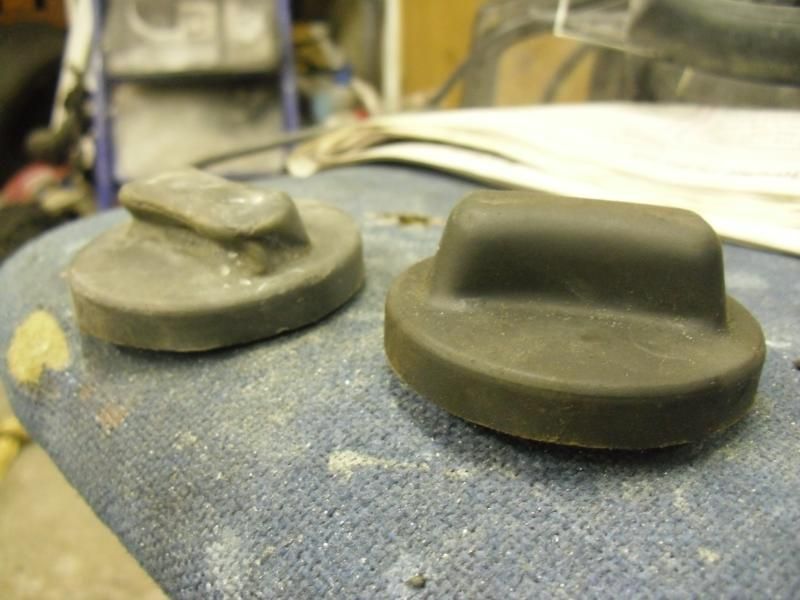
Nothing exciting. Dont no how or why but the central locking is now fixed which ment I could put the drivers door back together. I didnt have the electric mirror covers so I just put a rubber gromet in the hole, but then last night I purchased the right ones along with a larger water bottle. Il put the photos up anyway incase some one needs to do the same.
The gromet is one that is found on the outside at the bottom of the 'B' piller. Its a perfect fit...
Next up was working out how long my new rerouted powersteering pipes have to be. Hopefully have them made up and fitted by the weekend.
The gromet is one that is found on the outside at the bottom of the 'B' piller. Its a perfect fit...
Next up was working out how long my new rerouted powersteering pipes have to be. Hopefully have them made up and fitted by the weekend.