Bedford Astravan MK2

An area of the forum dedicated to the other marques and models sat on your driveway (please post only one thread per car)
3cav3
Registered user
Posts: 1469
Joined: Sun May 22, 2016 6:07 pm

Re: Bedford Astravan MK2

Post by 3cav3 »

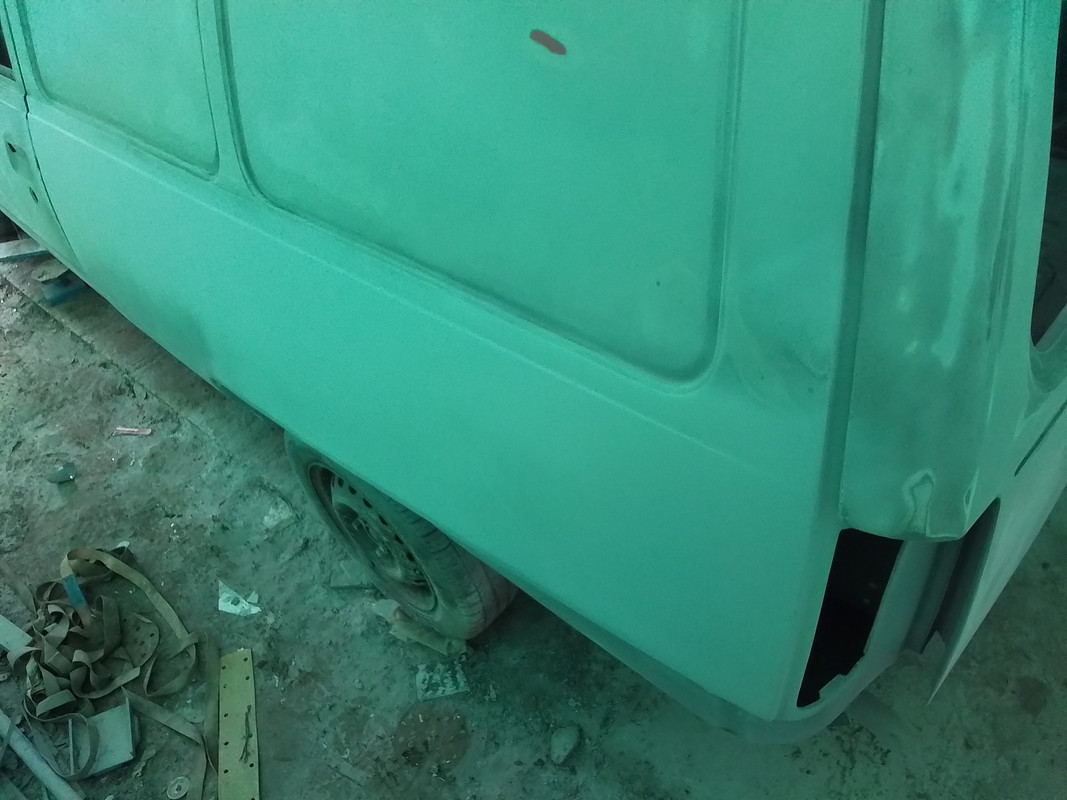
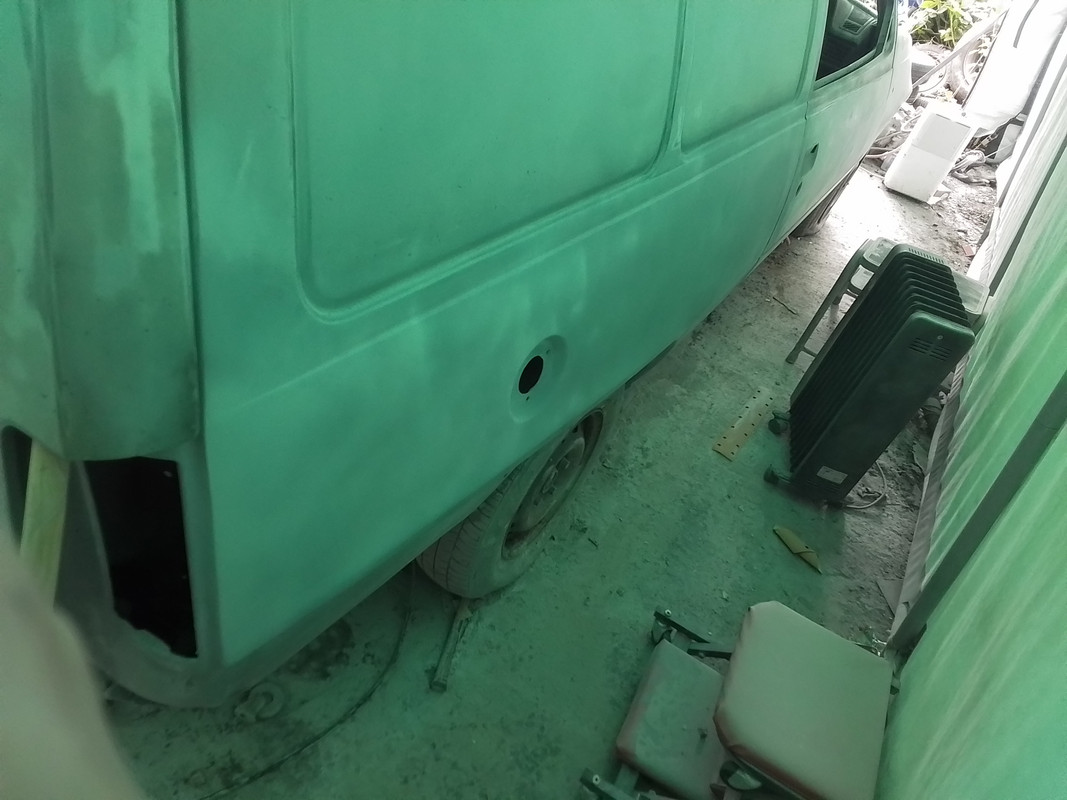
An on going theme with this project has been me struggling with the filling work in general, but particularly with the rear quarter panels. Recently, even though I still wouldn't say that I'm any good at it, I've started to get a bit better at the process.
Over the last few weeks I've been trying to get these panels smoothed off, particularly on the seems and edges. However one thing I had failed to notice was how much the panel curved inwards towards the rear, i had been trying to level the panel so when I rechecked the rear lights in place the panels were sitting proud.

Image

As gutting as it is to write off all the work I've put in, this morning I decided to bite the bullet and attack the panels back to bare metal with 60 grit paper.


Image


Image
3cav3
Registered user
Posts: 1469
Joined: Sun May 22, 2016 6:07 pm

Re: Bedford Astravan MK2

Post by 3cav3 »

The above process took over 2 hours of sanding. I was absolutely covered in filler dust from head to toe, plus even with gel filled gloves, my hands virtually lost all feeling.

This time I will be hopefully using a lot less filler.
Here it is with its second skim applied, hopefully one more, then a very light skim of dolphin glaze and it'll be ready for high build primer.

Image

Image

Before I was taking the filler seem to seem, even though it was only microscopic it still changed the profile very slightly. but this time I'll only be filling the area where I joined the estate rear quarter in.
It's all a learning curve. Fingers crossed by next week I'll get the feeling back in my hands and be able to repeat the process on the drivers side.
User avatar
ilovedmymantas
Registered user
Posts: 1224
Joined: Sat Jan 12, 2013 2:54 am

Re: Bedford Astravan MK2

Post by ilovedmymantas »

I admire your dedication and i wish i had a fraction of your patience, bodywork and me just don't get on despite knowing preparation is key.

Keep up the good work, you're getting there👍
" It's not rust. It's age-related patina " ;)

1980 vauxhall cavalier MK1 1.6L, 1982 opel manta berlinetta 1.8s, 1985 opel manta 2.0 gte, 1990 cavalier 2.0 gl ,1994 cavalier sri x20xev

-1995 cdx x20xev

---------------
Matt
3cav3
Registered user
Posts: 1469
Joined: Sun May 22, 2016 6:07 pm

Re: Bedford Astravan MK2

Post by 3cav3 »

ilovedmymantas wrote: Sat May 18, 2024 5:52 pm I admire your dedication and i wish i had a fraction of your patience, bodywork and me just don't get on despite knowing preparation is key.

Keep up the good work, you're getting there👍
Thanks for the words of encouragement, it's more a case of having to for financial constraints rather than having the patience.

Here's the drivers side stripped back aswell, with hopefully it's last skim of filler.

Image

Here's the passenger side with its first skim of stopper, after guide coating and blocking. All very boring to look at but several more hours gone. I know I'll get there eventually but I'm not really enjoying this part of the project, and that's putting it mildly!

Image
User avatar
Robsey
Club Admin
Posts: 10685
Joined: Fri Dec 12, 2008 1:42 pm
Location: East Manchester

Re: Bedford Astravan MK2

Post by Robsey »

I am trying not to think about when it will be my turn, on that bloody big hoofer of a camper van.
It will be like prepping an aircraft hanger.

Thinking positively, I presume the rear wings are the last two panels to dress and prep. :)
3cav3
Registered user
Posts: 1469
Joined: Sun May 22, 2016 6:07 pm

Re: Bedford Astravan MK2

Post by 3cav3 »

Yes they are the last panels to dress up. Then it'll be another coat of filler primer and epoxy. Then flatten the whole van down again and remove any minor imperfections that show up.
The biggest amount of work on these rear quarters has been caused by the fact that I had to splice Estate car versions in. It would of been easier if I could of obtained whole van rear quarters instead and fitted the whole sides, however with such a rare vehicle its a case of making do with what you can get hold of. I've been watching YouTube recently with people restoring things like minis and MGB's, and am almost envious of how easy replacement parts are. You can literally build a new car if you wanted to as there appears to be nothing that isn't available off the shelf.
With hindsight, with this project I'd of probably been better to use the quarter panels to make repair sections up and just cut out the minimal bits rather than the whole sides,and not have such a long seam to join. However its all a learning curve. I did what I thought was right at the time. Although being realistic I probably shouldn't of tried to save something as rotten as this van was in the first place. Its solid now and hopefully once painted should outlast me by the time I've totally finished rust proofing it.
cavalier1990
Registered user
Posts: 1473
Joined: Wed Jun 29, 2011 9:15 pm
Location: Paisley, Scotland

Re: Bedford Astravan MK2

Post by cavalier1990 »

That's some amount of filling and prepping you've got done there, I try my best to replace panels with new or as new as possible to avoid filling and sanding bits as I struggle to get it looking right. I always wondered if I was doing it right though I usually just use a tin of basic cataloy then sand it down, all these special techniques and materials just spin my brain around. Defo hats off to the work you are doing it looks like it'll be a top notch finish when all said and done.
3cav3
Registered user
Posts: 1469
Joined: Sun May 22, 2016 6:07 pm

Re: Bedford Astravan MK2

Post by 3cav3 »

cavalier1990 wrote: Thu May 30, 2024 5:33 pm That's some amount of filling and prepping you've got done there, I try my best to replace panels with new or as new as possible to avoid filling and sanding bits as I struggle to get it looking right. I always wondered if I was doing it right though I usually just use a tin of basic cataloy then sand it down, all these special techniques and materials just spin my brain around. Defo hats off to the work you are doing it looks like it'll be a top notch finish when all said and done.
To be perfectly honest with you its almost too big a line to fill. By the time you get to the end of the panel the filler is already starting to go hard.
Like you I really struggle with getting the filler to blend in properly, I always get there in the end but am very wasteful with the filler etc, most of it seems to end up as sanded dust on the floor. I will be very relieved when I am finally able to get the van in top coat.
User avatar
Envoy CDX
Club Admin
Posts: 9706
Joined: Sun Sep 23, 2007 3:51 pm
Location: Jarrow, Newcastle Upon Tyne

Re: Bedford Astravan MK2

Post by Envoy CDX »

One of the tricks with filling is to mix up in small batches, and don't try and fill to the the level in the first skim. build it up. This is where joggling panels and a small 1-2mm gap between the panels comes into its own.

If the panels aren't structural, you could even use knifing putty and glazes / self levelling compounds on divots etc.

What is it you use to sand it back down? Do you block sand it? Just folded paper and your hand pressure?
Curious really. It really is a testament to your dedication in finishing the van :)
Check the Rules!

Raw 8v Power! - Bad Cav, Naughty Cav... Cav want's to do 90!

The How2 Index
3cav3
Registered user
Posts: 1469
Joined: Sun May 22, 2016 6:07 pm

Re: Bedford Astravan MK2

Post by 3cav3 »

The way that I do it is to knock the first couple of skims back with my electric da. Then I tend to guide coat and block it back with a long board. Any remaining areas of low spots are then gone over with dolphin glaze, then guide coated again, blocked and then if anywhere is left the process is repeated again, and again...
It seems to take forever, I've watched countless videos on YouTube etc and I just must be missing the point somewhere.
I'm almost dreading put the Highbuild primer on as I sure there will still be a line showing, and that means I will have to repeat the process again and again.
3cav3
Registered user
Posts: 1469
Joined: Sun May 22, 2016 6:07 pm

Re: Bedford Astravan MK2

Post by 3cav3 »

Small update, during my lunch hour I finished flattening the glaze off , on the passenger side and etch primed it. Oh dear I thought- or words much stronger. It looked absolutely pants. Then I hit it with epoxy primer at a distance and am delighted to announce its all but there. Just the drivers side to do now. Photos to follow.
User avatar
Envoy CDX
Club Admin
Posts: 9706
Joined: Sun Sep 23, 2007 3:51 pm
Location: Jarrow, Newcastle Upon Tyne

Re: Bedford Astravan MK2

Post by Envoy CDX »

Kool beans, light and touch help a lot but sounds like repetition is working for you too.
Check the Rules!

Raw 8v Power! - Bad Cav, Naughty Cav... Cav want's to do 90!

The How2 Index
3cav3
Registered user
Posts: 1469
Joined: Sun May 22, 2016 6:07 pm

Re: Bedford Astravan MK2

Post by 3cav3 »

Another 5 hours gone this morning but I've now managed to get the drivers side done aswell.

Passenger side,

Image

Drivers side, it's a bit patchy as I have run out of the epoxy primer.

Image
User avatar
Robsey
Club Admin
Posts: 10685
Joined: Fri Dec 12, 2008 1:42 pm
Location: East Manchester

Re: Bedford Astravan MK2

Post by Robsey »

Oooh - rubbing my palms on my thighs in anticipation.
It is getting so close.
A stage I can only dream of reaching before my 90th birthday - lol.

When you get around to laying that last coat of epoxy on, it will be a huge weight off your mind. Finally seeing things coming together.
3cav3
Registered user
Posts: 1469
Joined: Sun May 22, 2016 6:07 pm

Re: Bedford Astravan MK2

Post by 3cav3 »

I hope towards the end of next week to give it a blow over with high build and epoxy in the spray gun . Then a full rub down and hopefully then hit with original red,(finally). Will still probably be a month or two yet before it fully painted. It will probably take that long to get the feeling back in my hands and arms anyway.
3cav3
Registered user
Posts: 1469
Joined: Sun May 22, 2016 6:07 pm

Re: Bedford Astravan MK2

Post by 3cav3 »

One thing I have found that is amazing is this epoxy primer for the filling process. Held at a slight distance and put on heavy it seems to blend in the filler line almost invisibily, particularly after leaving to set for 24hours. Not cheap but worth it's weight in gold. Plus it should help seal the moisture out.

Image
3cav3
Registered user
Posts: 1469
Joined: Sun May 22, 2016 6:07 pm

Re: Bedford Astravan MK2

Post by 3cav3 »

Yesterday I applied what I hope to be the last coat of primer.

Image
3cav3
Registered user
Posts: 1469
Joined: Sun May 22, 2016 6:07 pm

Re: Bedford Astravan MK2

Post by 3cav3 »

Image

Image
3cav3
Registered user
Posts: 1469
Joined: Sun May 22, 2016 6:07 pm

Re: Bedford Astravan MK2

Post by 3cav3 »

Image

As before I purposely applied the paint thick to try and help fill in any minor blemishes. To achieve this I didn't add any thiners, which I've now learnt the hard way is fine in cooler weather, but when it's like yesterday in hotter weather then thinners is needed. I also found again that the hardener I'm using is great in cold weather, but when the temperature goes up it causes the paint to practically dry as it comes out the gun, hence an almost sandy finish in some places.

To overcome this, yesterday I ordered some slow hardener, nearly 3 times the price of fast hardener. To my surprise it has already arrived today. Why can't everything come so fast off ebay?

Image
3cav3
Registered user
Posts: 1469
Joined: Sun May 22, 2016 6:07 pm

Re: Bedford Astravan MK2

Post by 3cav3 »

The next step was to fully guide coat the van.

Image

Image
3cav3
Registered user
Posts: 1469
Joined: Sun May 22, 2016 6:07 pm

Re: Bedford Astravan MK2

Post by 3cav3 »

Followed by about 3 hours sanding with 600 grit this morning until I lost all feelings in my hands.

Image


Image

Image
User avatar
Robsey
Club Admin
Posts: 10685
Joined: Fri Dec 12, 2008 1:42 pm
Location: East Manchester

Re: Bedford Astravan MK2

Post by Robsey »

That is 3 hours now behind you...
It is looking good though. :thumb 8-)
3cav3
Registered user
Posts: 1469
Joined: Sun May 22, 2016 6:07 pm

Re: Bedford Astravan MK2

Post by 3cav3 »

Robsey wrote: Sun Jun 09, 2024 7:32 pm That is 3 hours now behind you...
It is looking good though. :thumb 8-)
I guess that is one way to look at it. Wish it was only going to be another 3 hours to go...
Looking forward to finally get it in top coat.
cavalier1990
Registered user
Posts: 1473
Joined: Wed Jun 29, 2011 9:15 pm
Location: Paisley, Scotland

Re: Bedford Astravan MK2

Post by cavalier1990 »

Certainly handy that wee lock up tent thing you've got there, be ideal up on my drive but it would get blown away I think with the wind up here! That's looking dapper now with all the paintwork going into it, can start to see it coming together.

Cheers

Andy
3cav3
Registered user
Posts: 1469
Joined: Sun May 22, 2016 6:07 pm

Re: Bedford Astravan MK2

Post by 3cav3 »

cavalier1990 wrote: Thu Jun 13, 2024 8:06 pm Certainly handy that wee lock up tent thing you've got there, be ideal up on my drive but it would get blown away I think with the wind up here! That's looking dapper now with all the paintwork going into it, can start to see it coming together.

Cheers

Andy
You'd be surprised as to what it'll withstand. All the main legs are anchored down into the ground, plus a heavy lump tied in all 4 corners. If the wind is forecast to be over 40mph I ratchet it down to the wheels of the van aswell as an extra precaution. It survived several hefty storms with us, the worst being the last but one which was supposed to of reached upto 90mph, it certainly blew some morta off my house roof.

The biggest gripe I've got with it is the condensation that forms on the inside during the winter months, to the extent that I sheet the van up from Octoberish through to about March.( Just a tarpaulin that takes seconds to roll back to enable work to be carried out).
Definitely good value for money though. I can see in the next few years it'll need a new skin but I won't be complaining from the time its stood. Machinemart sell them with next day delivery, just be warned it takes most of a day to erect.
Post Reply