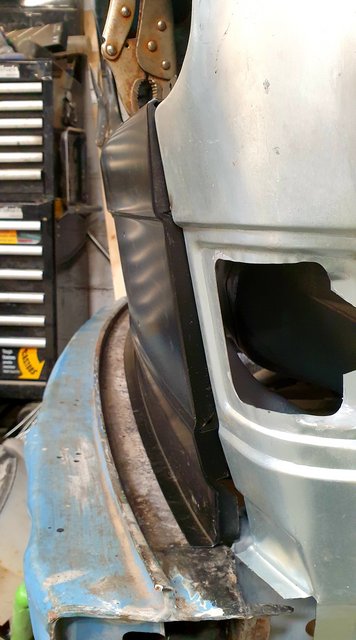
It is scandalous what they charge for them and then do not give you good quality parts, hopefully it'll fettle out. Options are limited unfortunately which is rather frustrating.Robsey wrote: ↑Sat Mar 09, 2024 10:34 am I don't know...
but these pattern panels are the worst I have ever seen.
A huge 16 to 19mm (5/8" to 3/4") out at the bottom.
Only Klokkerholme in Denmark make them.
So even the best UK suppliers, Heritage and Brickwerks have to sell them as there is no alternative.
---‐---‐-----------
The body cut for the left / near side has a fair bit of hammer rash, but this can all be dealt with during final body prep. I am not too concerned at the moment.
Better than the rusty original parts, and as said, a hugely better fit than new parts.
My VERY RUSTY VW T25 Camper Van Project
-
Envoy CDX

- Club Admin
- Posts: 9681
- Joined: Sun Sep 23, 2007 3:51 pm
- Location: Jarrow, Newcastle Upon Tyne
Re: My VERY RUSTY VW T25 Camper Van Project
-
ilovedmymantas
- Registered user
- Posts: 1202
- Joined: Sat Jan 12, 2013 2:54 am
Re: My VERY RUSTY VW T25 Camper Van Project
I used to be told Klokkerholm panels were the best available, now i realise it's because they're almost the only ones out there.
Looking at the website they boast "We love classic cars! Klokkerholm has a large selection of panels and other parts for restorations as well as rust and damage repair.
Since 1969, we have developed and manufactured our own cast-iron tools for the production of body parts for all types of classic and vintage cars, and we continue to develop new tools. Cast-iron tools ensure the best possible quality and items that last.
Many Classic cars have become conservation-worthy icons in the automotive world and represent nostalgia, quality and a romantic, bygone age. A classic car is characterised by being more than 25 years old."
I think they may have been good at one time but now it seems they're the best of a bad lot, continually pressing/drawing from the original die even if it's no longer anywhere near oem.
Looking at the technical specs they're introducing galvanized steel so i suspect these parts are later pressings, the black ones are earlier so in theory should be a better fit though that wasn't the case with my cav outer arch repair panels.
" It's not rust. It's age-related patina " 
1980 vauxhall cavalier MK1 1.6L, 1982 opel manta berlinetta 1.8s, 1985 opel manta 2.0 gte, 1990 cavalier 2.0 gl ,1994 cavalier sri x20xev
-1995 cdx x20xev
---------------
Matt
1980 vauxhall cavalier MK1 1.6L, 1982 opel manta berlinetta 1.8s, 1985 opel manta 2.0 gte, 1990 cavalier 2.0 gl ,1994 cavalier sri x20xev
-1995 cdx x20xev
---------------
Matt

Re: My VERY RUSTY VW T25 Camper Van Project
Same here,
I have had just one right lower A pillar pressing, but as many as four for the left.
One of those was a black coated panel.
I have bought one from every well known supplier in the hope that one would be okay. Sadly not.
I reiterate, not the suppliers' fault, but the manufacturers.
And they all state that the pressings are quite poor, unless you can afford a complete A pillar from the bottom of the bumper, to the roof line.
Typically about £300 a pop. Thankfully at that price, delivery is always free and within 48 hrs.
Re: My VERY RUSTY VW T25 Camper Van Project
Hammerite is okay for alloy castings, but no good on steel. As per most other chemicals, Hammerite was much better on steel 30 years ago, compared to the modern stuff.
Hammerite declined greatly in quality when it was taken over by Azco-Nobel - it now seems no better protectant for steel than any other ordinary gloss paint. White spirit is now the recommended solvent for cleaning up - this was never the case with the original Hammerite which required its own brand solvent or cellulose thinners.
Claims that the Azco-nobel stuff can be painted directly over rust without any other treatment (other than removing loose rust) are just not true.
I have also noticed that Dulux house paints (both oil based gloss and water based emulsion paints) also declined in quality when they were taken over by Azco-Nobel. The old ICI-made paints were some of the best paints around, but the new stuff doesn't flow well, leaves brush marks and provides poor coverage.
1993 Cavalier V6 Auto in Smoke Grey Metallic
Re: My VERY RUSTY VW T25 Camper Van Project
Last week, I took my MAPP gas home to free up the manifold studs on the engine in my back yard.
I seem to think it has been there since May of 2012... so nigh on twelve years ago.
It has been drained of coolant in all that time, so hopefully internal corrosion is not too bad.
Anyway, of the eight studs, six released their nuts with minimal effort.
The other two studs were heavily corroded and the nuts had erroded badly.
A special nut removal socket removed one nut complete with it's stud.
And the final stud sheared level with the manifold flange.
It could have been a lot worse.
----------------
Onto tonight -
I took the MAAP gas, my socket set, a few other spares and my Digi-dash back to the unit.
First job - trial fit the rear left bumper iron bracket.
I managed to locate two M12x1.5 bolts.
The rear valance needs repairing, so the iron was removed again
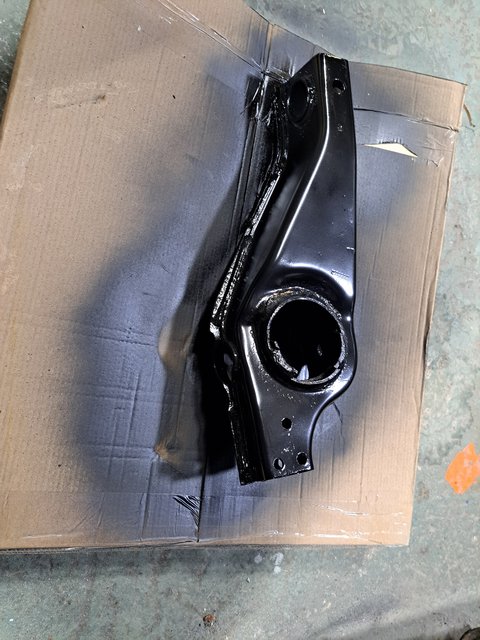
Next - bead blast, clean, prime and paint the left front lower wishbone / tracking arm thingy.
Black primer...
Blue top coat...
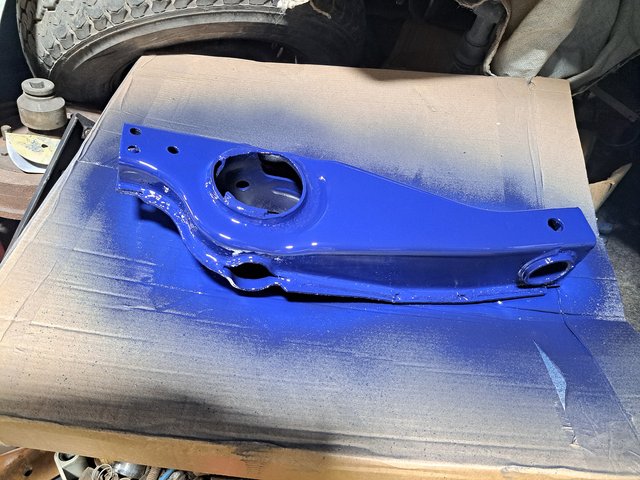
I was thinking that there was too much black under the van... hmmm - I may repaint black next week.
Final job
See if I can close the gap on the anti-roll bar bush.
If manipulated round the bar, the gap closes.
But when the clamp is fitted the gap exists.

I used a bit of red rubber grease to see if it would settle into place better -
Only time will tell.
I seem to think it has been there since May of 2012... so nigh on twelve years ago.
It has been drained of coolant in all that time, so hopefully internal corrosion is not too bad.
Anyway, of the eight studs, six released their nuts with minimal effort.
The other two studs were heavily corroded and the nuts had erroded badly.
A special nut removal socket removed one nut complete with it's stud.
And the final stud sheared level with the manifold flange.
It could have been a lot worse.
----------------
Onto tonight -
I took the MAAP gas, my socket set, a few other spares and my Digi-dash back to the unit.
First job - trial fit the rear left bumper iron bracket.
I managed to locate two M12x1.5 bolts.
The rear valance needs repairing, so the iron was removed again
Next - bead blast, clean, prime and paint the left front lower wishbone / tracking arm thingy.
Black primer...
Blue top coat...
I was thinking that there was too much black under the van... hmmm - I may repaint black next week.
Final job
See if I can close the gap on the anti-roll bar bush.
If manipulated round the bar, the gap closes.
But when the clamp is fitted the gap exists.
I used a bit of red rubber grease to see if it would settle into place better -
Only time will tell.
-
Envoy CDX
- Club Admin
- Posts: 9681
- Joined: Sun Sep 23, 2007 3:51 pm
- Location: Jarrow, Newcastle Upon Tyne
Re: My VERY RUSTY VW T25 Camper Van Project
Sounds like the clamp is pulling the bushing out of shape, hopefully the rubber grease prevents that!
As for the blue on black, it probably works if more bits were painted to offset the one piece that said its a matter of taste and I tend to think red/ black, or a darker shade of blue.
Looks like its coming together - extracting that last stud, or drilling it out and re-tapping the hole your plan of action Rob?
Re: My VERY RUSTY VW T25 Camper Van Project
It is an odd one - The clamp is the perfect profile for the bush.
And the bush is the correct size for the anti-roll bar.
I think the bush needs to be loaded by the weight of the van on it's wheels and worked a bit before we will find out if the bush will close up.
I was surprised how pale that blue looks in the photo.
It is almost navy blue when seen by the naked eye.
It just needs a pivot bush, and then the whole suspension leg can be reassembled. (Less brake caliper at this stage).
-
Envoy CDX
- Club Admin
- Posts: 9681
- Joined: Sun Sep 23, 2007 3:51 pm
- Location: Jarrow, Newcastle Upon Tyne
Re: My VERY RUSTY VW T25 Camper Van Project
Happy days, Hopefully it's as a simple as dropping it on its wheels and letting it settle.
Re: My VERY RUSTY VW T25 Camper Van Project
I didn't mention the exhaust stud.
That all depends on how nice it will play.
I am hoping that it will extract willingly.
Although I seem to have been handed regular sessions of drilling out studs recently.
That can wait for fair weather, before I will start stripping the old exhaust off properly ready for taking to the unit.
I plan to minimise the weight before transporting the engine - I am not as young as I was 12 years ago
I will fit the flywheel and clutch to the engine once it is in the unit.
Followed by the exhaust, water pipes and finally the induction system.
They were all attached to the engine when I dragged it home back then.
It nearly killed me on that baking-hot day in May 2012, weighed a ton...
-
Envoy CDX
- Club Admin
- Posts: 9681
- Joined: Sun Sep 23, 2007 3:51 pm
- Location: Jarrow, Newcastle Upon Tyne
Re: My VERY RUSTY VW T25 Camper Van Project
Aye, it'll be worth it in the end. But yeah, lighter the better for moving of that lump!
Re: My VERY RUSTY VW T25 Camper Van Project
Now that I have my car back, I was reminded by Troy that there was a unit....
I had got out of the habit of going
So tonight - I finished painting the bottom wishbone (if you can call it that), and then assembled the bottom eyelet and radius rod to it.
The blue looks correct in this photo.
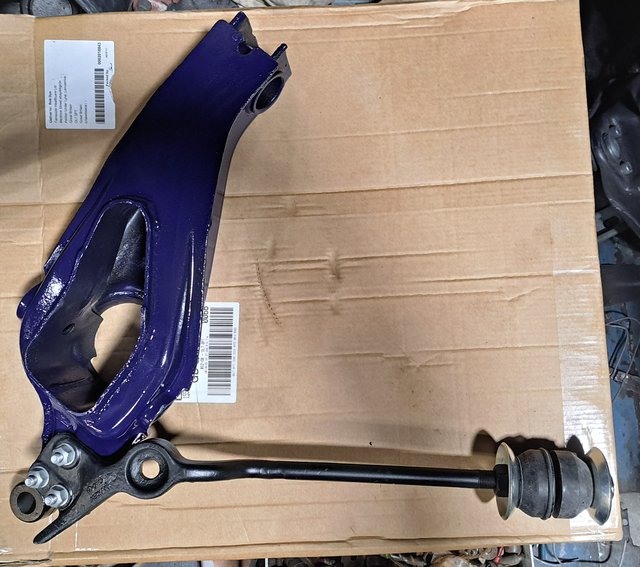
It just needs a pivot bush and the big pivot bolts to assemble it all to the van.
Next job...
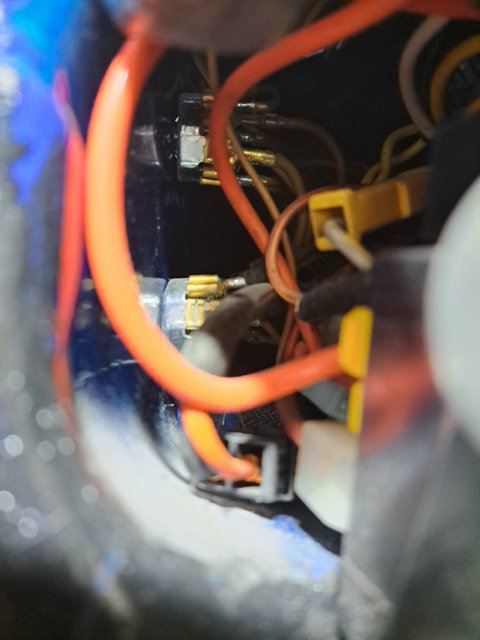
I had noticed an earth wire that had detached from the bottom earth crown.
Dropping the fuse box out of the way allowed me to refit the errant wire.
And my O.C.D. bit...
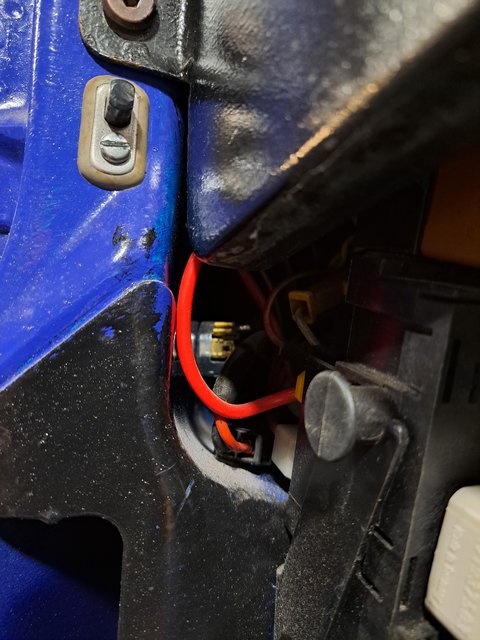
Fitting the passenger side door dip-switch rubber gasket.
I am not convinced that I am happy with the wiring.
I fancy fitting a captive nut (clinch nut) or two, and replacing all the earth spades with eyelets.
Then bolting the wires, rather than relying on the tightness of the connectors on the crowns.
Potential for the whole dash to be coming back out again later in the year.
I had got out of the habit of going
So tonight - I finished painting the bottom wishbone (if you can call it that), and then assembled the bottom eyelet and radius rod to it.
The blue looks correct in this photo.
It just needs a pivot bush and the big pivot bolts to assemble it all to the van.
Next job...
I had noticed an earth wire that had detached from the bottom earth crown.
Dropping the fuse box out of the way allowed me to refit the errant wire.
And my O.C.D. bit...
Fitting the passenger side door dip-switch rubber gasket.
I am not convinced that I am happy with the wiring.
I fancy fitting a captive nut (clinch nut) or two, and replacing all the earth spades with eyelets.
Then bolting the wires, rather than relying on the tightness of the connectors on the crowns.
Potential for the whole dash to be coming back out again later in the year.
-
Envoy CDX
- Club Admin
- Posts: 9681
- Joined: Sun Sep 23, 2007 3:51 pm
- Location: Jarrow, Newcastle Upon Tyne
Re: My VERY RUSTY VW T25 Camper Van Project
Do it now, whilst its fresh in your head and before you get other things fitted. That would be my thoughts. It's then ticked off, and removes any doubts about connections later if something goes finicky, or just don't work as expected later down the line.
You owe it to yourself to make sure you're happy with it
You owe it to yourself to make sure you're happy with it
Re: My VERY RUSTY VW T25 Camper Van Project
I have a clinch-nut (or riv-nut) tool and inserts on their way.
Plus a pack of fifty 5.2mm ring connectors (crimps).
They are all due approx. Sat 27th April
Hmm - dash out job, it will be... again - lol
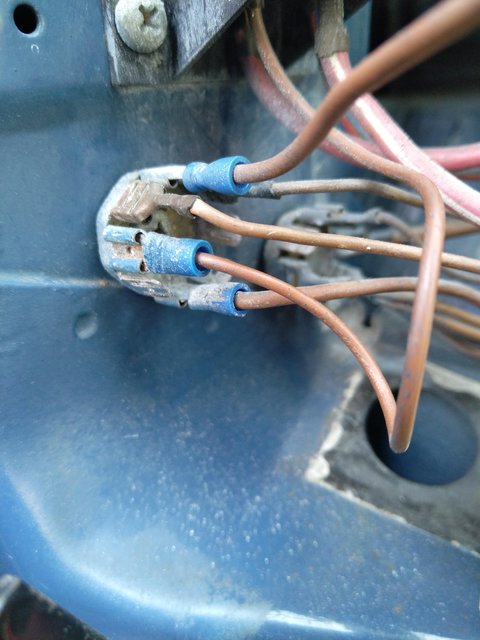
Images from Silverbullet's thread on the Club8090 forum.
And the source of my plan of an upgrade..
His old earth crowns.
And his nice shiny new captive bolts and loops

But me being me.
I don't trust just crimping... I will solder mine, and coat in a film of petroleum jelly to minimise future moisture and corrosion.
---------------------------
To allow me to finish the building of the lower arm, I have ordered a set of poly-bush pivot bushes with a lifetime guarantee.
And all the mounting nuts and bolts.
It will be nice to get the van in a situation where it can be sat on all four wheels again, if needed.
Plus a pack of fifty 5.2mm ring connectors (crimps).
They are all due approx. Sat 27th April
Hmm - dash out job, it will be... again - lol
Images from Silverbullet's thread on the Club8090 forum.
And the source of my plan of an upgrade..
His old earth crowns.
And his nice shiny new captive bolts and loops
But me being me.
I don't trust just crimping... I will solder mine, and coat in a film of petroleum jelly to minimise future moisture and corrosion.
---------------------------
To allow me to finish the building of the lower arm, I have ordered a set of poly-bush pivot bushes with a lifetime guarantee.
And all the mounting nuts and bolts.
It will be nice to get the van in a situation where it can be sat on all four wheels again, if needed.
-
Envoy CDX
- Club Admin
- Posts: 9681
- Joined: Sun Sep 23, 2007 3:51 pm
- Location: Jarrow, Newcastle Upon Tyne
Re: My VERY RUSTY VW T25 Camper Van Project
For me, it would be crimp and a drop of solder with liquid 'heatshrink' painted over anything that doesn't need to be left exposed. but otherwise it looks much better than the first picture.
Re: My VERY RUSTY VW T25 Camper Van Project
I have miles of sleeving, but being earth wires, it should not be an issue.
I am usually quite pedantic with the +12v wires for insulation anyway.
Double sleeving on the higher current carrying wires.
26/4/24 @ 21:00
UPDATE - Polybushes received already.
I hope to pick up the rest of the bits on Monday, ready to play on Tuesday night.
I am usually quite pedantic with the +12v wires for insulation anyway.
Double sleeving on the higher current carrying wires.
26/4/24 @ 21:00
UPDATE - Polybushes received already.
I hope to pick up the rest of the bits on Monday, ready to play on Tuesday night.
-
Envoy CDX
- Club Admin
- Posts: 9681
- Joined: Sun Sep 23, 2007 3:51 pm
- Location: Jarrow, Newcastle Upon Tyne
Re: My VERY RUSTY VW T25 Camper Van Project
Funky. I'm sure it'll be a cracking job however you approach it Rob