I too had a lot of fun and games trying to remove suspension parts on my van, particularly with the front wishbone bolts.
Its always nice to find something isn't as corroded as you first feared.
My VERY RUSTY VW T25 Camper Van Project
-
Envoy CDX

- Club Admin
- Posts: 9680
- Joined: Sun Sep 23, 2007 3:51 pm
- Location: Jarrow, Newcastle Upon Tyne
Re: My VERY RUSTY VW T25 Camper Van Project
Progress is progress Rob, and a happy surprise no doubt.
-
cavalier1990
- Registered user
- Posts: 1463
- Joined: Wed Jun 29, 2011 9:15 pm
- Location: Paisley, Scotland
Re: My VERY RUSTY VW T25 Camper Van Project
As always a supposedly simple job turns into a nightmare; you end up spending more time on an ancilliary job rather than the original job you were working on! At least from now on you shouldn't have any issues with the arm and it's fixings. Looks like good progress and coming along nicely 

Re: My VERY RUSTY VW T25 Camper Van Project
Sadly no progress for weeks - my heart and bank balance just aren't in it.
I only spent two hours there the other night.
No real motivation and no real direction.
I bead blasted,
and high-temp painted one of four exhaust pipes (rear right cylinder)
----------------------------
It looks like Troy has spent a brief moment of madness welding a small repair panel in.
Unfortunately he was not aware that I had bought a whole panel that would include the repair piece he'd made.
Re: My VERY RUSTY VW T25 Camper Van Project
I'm with you on the struggling with motivation and bank balance. Hopefully your van will be finished for you sooner than mine.Robsey wrote: ↑Sun Dec 17, 2023 9:41 pm Sadly no progress for weeks - my heart and bank balance just aren't in it.
I only spent two hours there the other night.
No real motivation and no real direction.
I bead blasted,
and high-temp painted one of four exhaust pipes (rear right cylinder)
----------------------------
It looks like Troy has spent a brief moment of madness welding a small repair panel in.
Unfortunately he was not aware that I had bought a whole panel that would include the repair piece he'd made.
Re: My VERY RUSTY VW T25 Camper Van Project
I have so much to do, from so many different directions.
The body,
Steering and suspension,
Brakes,
Clutch, gears and linkage,
The engine
And the interior.
I have hired a really knackered 20 reg Combo van whilst the Vectra gets some overdue maintenance.
The plan is to take the boxer engine from my back yard, to the unit in the van -
With an eventual plan to fit the engine, gearbox and ancillaries into the engine bay.
Thus reducing more crap at home, and less overall space taken up by van parts.
Re: My VERY RUSTY VW T25 Camper Van Project
I forgot to mention that I attempted to test fit the left headlamp.
The beam alignment was a mile off.
And then I realised that the glass lens was not fitted properly - it had slipped a good inch to the right from the light bowl.
Looks like naff grey sealant was used to bond the glass to the bowl.
A bit of a shock, for a proper Hella part.
(H4 upgraded part).
Still not worked out how I will sort the beam direction.
Cannot quite get my head round it.
Another reason for the motivation to falter.
It would be nice for things to just 'fit' and 'work' every once in a while.
-
Envoy CDX
- Club Admin
- Posts: 9680
- Joined: Sun Sep 23, 2007 3:51 pm
- Location: Jarrow, Newcastle Upon Tyne
Re: My VERY RUSTY VW T25 Camper Van Project
It would be nice, but I see VW and think 'over priced tat'.Robsey wrote: ↑Sun Dec 17, 2023 10:35 pm I forgot to mention that I attempted to test fit the left headlamp.
The beam alignment was a mile off.
And then I realised that the glass lens was not fitted properly - it had slipped a good inch to the right from the light bowl.
Looks like naff grey sealant was used to bond the glass to the bowl.
A bit of a shock, for a proper Hella part.
(H4 upgraded part).
Still not worked out how I will sort the beam direction.
Cannot quite get my head round it.
Another reason for the motivation to falter.
It would be nice for things to just 'fit' and 'work' every once in a while.
It's not ideal, but I am sure you'll get there Rob, not the best time of year to be doing anything outdoors.
Re: My VERY RUSTY VW T25 Camper Van Project
Fortunately the van is indoors, so it is dry.
It is still a bit chilly, but if I am working hard enough then I should keep myself warm.
First job tonight was to assemble the three bits of exhaust that I have. Still need to buy 3 more pieces.

Fitted with new copper / brass nuts, gaskets and tail-pipe bolts.
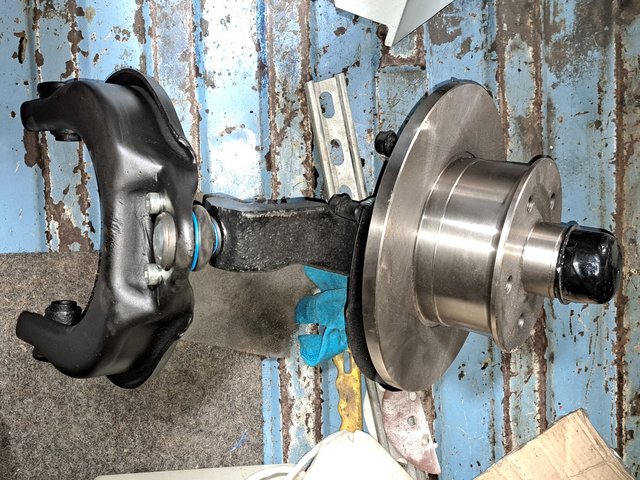
Next job - after getting frustrated waiting for parts to build my front suspension leg,
I decided to shot blast and paint the upper wishbone.

And after blasting it with a hot air gun, I assembled the leg.
I was going to cut away some metal from the rear left alcove next to the engine bay, where the injection control unit would be. But it took me an age to find my angle grinder and cutting disc.
The van is made up with multiple layers of over-lapping panels. A nightmare to cut or pick apart.
It is still a bit chilly, but if I am working hard enough then I should keep myself warm.
First job tonight was to assemble the three bits of exhaust that I have. Still need to buy 3 more pieces.
Fitted with new copper / brass nuts, gaskets and tail-pipe bolts.
Next job - after getting frustrated waiting for parts to build my front suspension leg,
I decided to shot blast and paint the upper wishbone.
And after blasting it with a hot air gun, I assembled the leg.
I was going to cut away some metal from the rear left alcove next to the engine bay, where the injection control unit would be. But it took me an age to find my angle grinder and cutting disc.
The van is made up with multiple layers of over-lapping panels. A nightmare to cut or pick apart.
-
Envoy CDX
- Club Admin
- Posts: 9680
- Joined: Sun Sep 23, 2007 3:51 pm
- Location: Jarrow, Newcastle Upon Tyne
Re: My VERY RUSTY VW T25 Camper Van Project
It's all good progress. Excellent 
Re: My VERY RUSTY VW T25 Camper Van Project
Its great to see you've found your motivation back and have started making progress again.
Re: My VERY RUSTY VW T25 Camper Van Project
I cannot say I am motivated.
just grudgingly pushing myself forward.
Barely scratching the surface, but I suppose every little bit helps.
UPDATE:-
(24/12/2023)
I was going to take the engine to the unit whilst I had the hire van on Friday.
But that never happened - bad weather (strong winds and rain) meant that I stayed home to keep warm and dry.
But - to appease the Campervan gods, I bought the last few bits of exhaust needed to re-build the engine to the original format. That and a cranked near-side drop link so that I can finish the front left suspension assembly.
Looks like I will be busy in mid to late January 2024.
Re: My VERY RUSTY VW T25 Camper Van Project
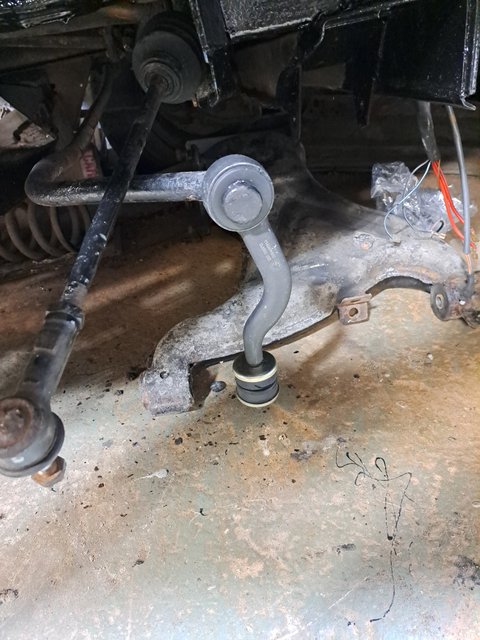
New Year and a new attempt at working on the van.
First job is fit a brand new cranked drop link.

Broke into a sweat trying to lever the top bush onto the anti-roll bar. There is a big flat mushroon end to the bar.
After a lot of grunting and straining success was eventually achieved.
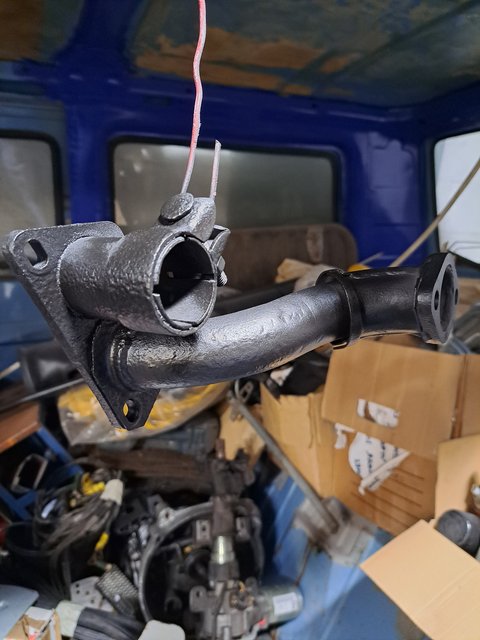
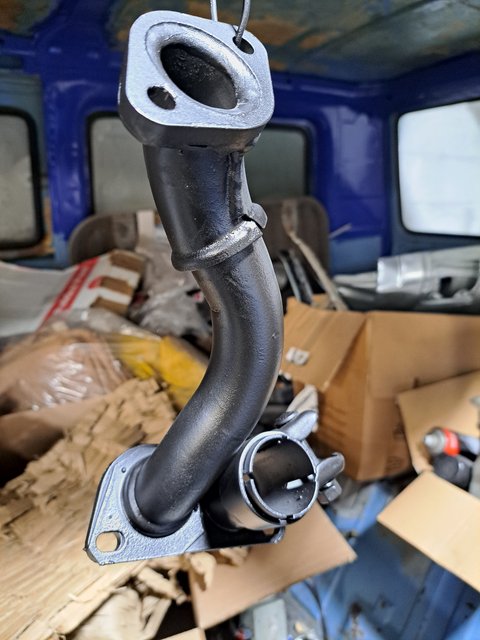
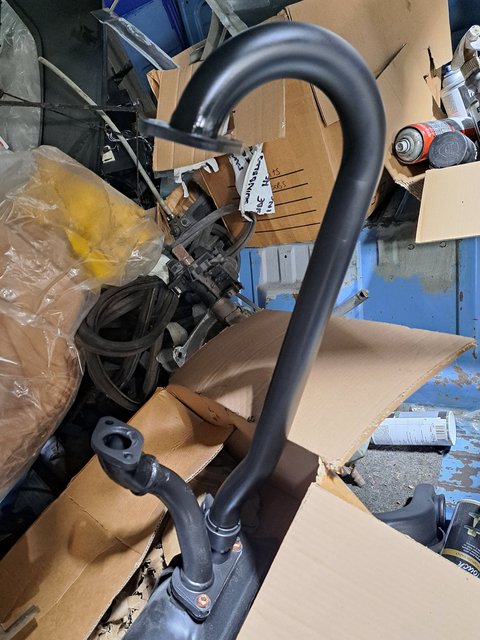
Next job was to paint the No4 manifold pipe.
High temperature paint for the win.
Whilst that baked off, I fitted the outer rear wishbone pivot bush.
And finally -
Fit the No4 manifold pipe to the rear silencer.
That was it for tonight.
First job is fit a brand new cranked drop link.
Broke into a sweat trying to lever the top bush onto the anti-roll bar. There is a big flat mushroon end to the bar.
After a lot of grunting and straining success was eventually achieved.
Next job was to paint the No4 manifold pipe.
High temperature paint for the win.
Whilst that baked off, I fitted the outer rear wishbone pivot bush.
And finally -
Fit the No4 manifold pipe to the rear silencer.
That was it for tonight.
Re: My VERY RUSTY VW T25 Camper Van Project
I always find the bushes to be a bit of abugger to fit, usually I warm them up first in boiling water, then with a bit of lube they usually slip over easier.
-
Envoy CDX
- Club Admin
- Posts: 9680
- Joined: Sun Sep 23, 2007 3:51 pm
- Location: Jarrow, Newcastle Upon Tyne
Re: My VERY RUSTY VW T25 Camper Van Project
Progress is progress
Re: My VERY RUSTY VW T25 Camper Van Project
Back in the day, I seem to recall that any rubber parts were lubed with Swarfega.
Windscreen rubbers, bushes... always worked a treat.
Windscreen rubbers, bushes... always worked a treat.
-
cavalier1990
- Registered user
- Posts: 1463
- Joined: Wed Jun 29, 2011 9:15 pm
- Location: Paisley, Scotland
Re: My VERY RUSTY VW T25 Camper Van Project
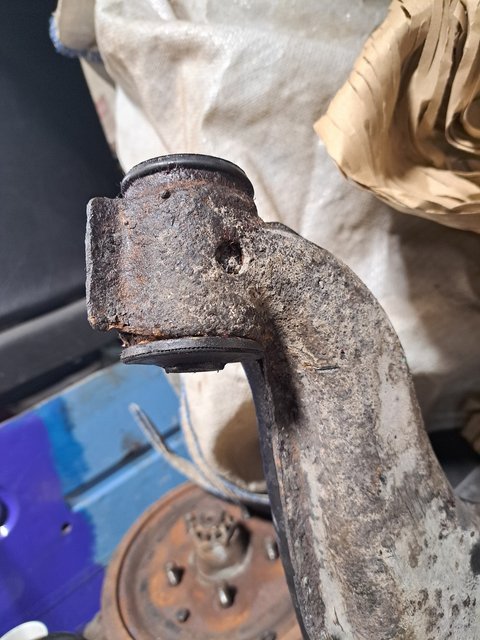
That drop link looks like the one fitted to the earlier cavs, lord knows how you are supposed to fit those ones on to the bar without smashing it to pieces! Any progress this time of Year is better than nothing, even if it feels like 1 step forward and 10 back.
Re: My VERY RUSTY VW T25 Camper Van Project
My 1993 Cavalier has anti-roll bar drop links that fit in the same way - the rubber bush has a nylon or similar internal surface and it's just a force fit over the end of the ARB. I can confirm that it's a real struggle to force it into place - the Haynes manual recommends that you take the ARB completely off the car to fit the drop links! I eventually managed to fit a new one to replace one where the steel bit had broken, without doing what Haynes recommends, by using copious amounts of Swarfega, a fair bit of swearing, and hammering it on with a large socket of the appropriate size to fit over the ARB
1993 Cavalier V6 Auto in Smoke Grey Metallic
-
cavalier1990
- Registered user
- Posts: 1463
- Joined: Wed Jun 29, 2011 9:15 pm
- Location: Paisley, Scotland
Re: My VERY RUSTY VW T25 Camper Van Project
I think half the problem with those ones is the bar rusts under the plastic collar, which makes the bar end lumpy and hard to fit the new one, and if you grind the rust away it makes it a loose fit. I remember doing one on my old 2.0 cav and I had to force it in a circular motion while pushing it inwards and I couldn't quite get it to sit vertical so it was twisted a bit. I was trying to do it with the arm in place so difficult to push it to vertical without the pin hitting the arm.chrisp wrote: ↑Thu Jan 04, 2024 11:46 pm My 1993 Cavalier has anti-roll bar drop links that fit in the same way - the rubber bush has a nylon or similar internal surface and it's just a force fit over the end of the ARB. I can confirm that it's a real struggle to force it into place - the Haynes manual recommends that you take the ARB completely off the car to fit the drop links! I eventually managed to fit a new one to replace one where the steel bit had broken, without doing what Haynes recommends, by using copious amounts of Swarfega, a fair bit of swearing, and hammering it on with a large socket of the appropriate size to fit over the ARB
Re: My VERY RUSTY VW T25 Camper Van Project
Yes, the lower suspension arm does get in the way of pushing the drop link onto the ARB. I resorted to breaking the taper joint on the lower ball joint so I could push the suspension arm down and out of the way, keeping it down with a weight on it. What a faff!
It's really not a good design and clearly was designed with no thought about replacement.
It's really not a good design and clearly was designed with no thought about replacement.
1993 Cavalier V6 Auto in Smoke Grey Metallic
Re: My VERY RUSTY VW T25 Camper Van Project
I am finding with bushes, it is getting harder to find decent original spec bushes.
A lot of the recommended VW specialist suppliers tend to be advertising the mega expensive Polybush kits for sale, rather than the old fashioned JP Group / Meyle rubber bushes.
Yes Polybushes tend to give a better life expectancy, but they do not have the original compliance and give that would recreate the 'magic carpet' type ride that factory built Transporter T3's were renowned for.
Besides - at my age, and the amount of use the van will get. (Based on running at a typical 25mpg).
Even cheap and tacky bushes will probably out-live me - lol
On the plus side - Polybushes tend to come as split bushes inserted from each side.
So they 'should' be much easier to fit.
Pity about the price. - typically 3 to 4 times the price of original spec rubber items.
Re: My VERY RUSTY VW T25 Camper Van Project
I did purchase a polybush kit for my van, that the seller assured me would fit, however when I came to fit it a couple of years later only about 2 would, so I went all original instead.
-
Envoy CDX
- Club Admin
- Posts: 9680
- Joined: Sun Sep 23, 2007 3:51 pm
- Location: Jarrow, Newcastle Upon Tyne
Re: My VERY RUSTY VW T25 Camper Van Project
If you can get polypushes that won't rattle your bones and from a reputable seller you'd be fine Rob.
Re: My VERY RUSTY VW T25 Camper Van Project
After 24 days of apathy, I finally got off my butt and did some more on the van exhaust.
The wasserboxer is a flat four engine, so the left bank is cylinder 3 at the front and 4 at the rear.
The right bank is 1 at the front and 2 at the rear.
Or if you will -
[ 3 ========= 1 ]
)============(
[ 4 ========= 2 ]
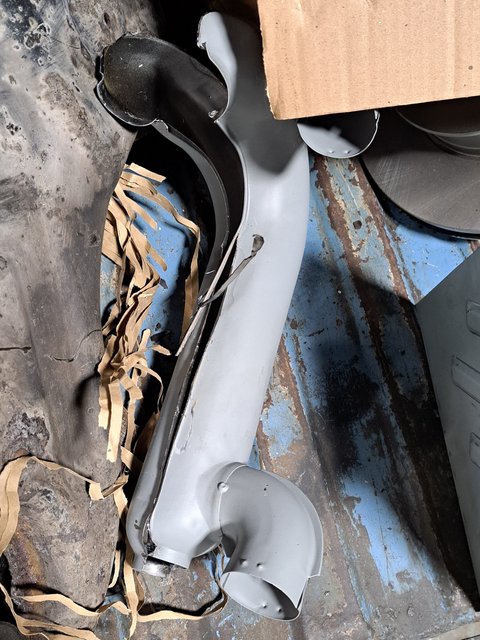
The rear flanges (4 and 2) had been painted a few weeks ago.
This left two front pipes with flanges. (3 and 1).
3 is a doddle, just clean and paint.
Loosely fitted for now.

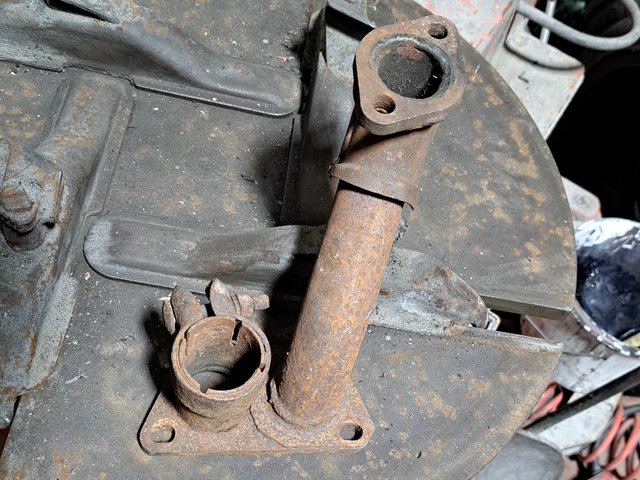
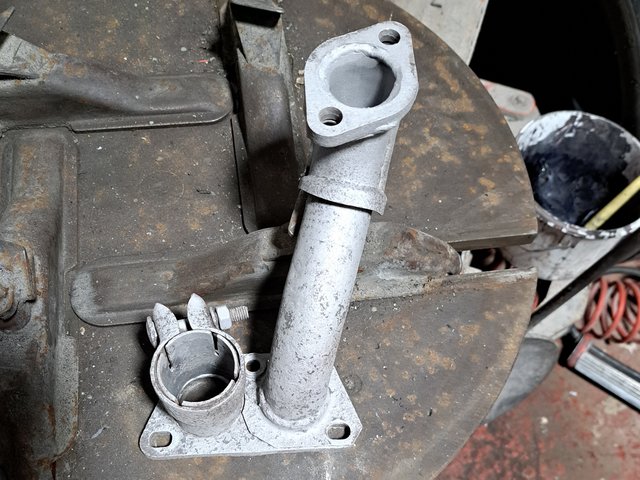
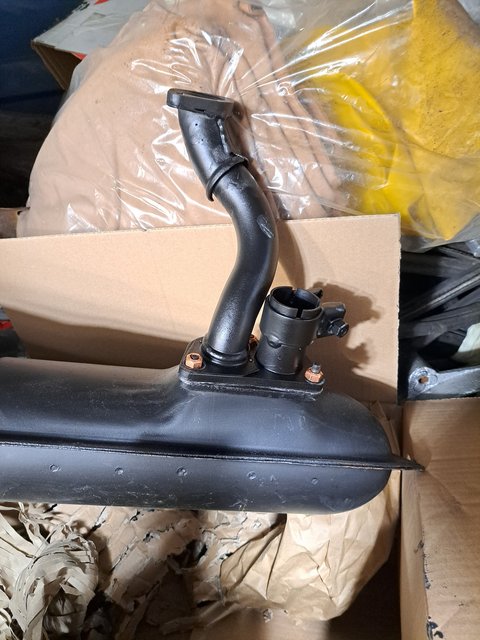
Pipe 1 needed a bit of tidying.
The early exhaust was only used with carb engines in the UK, and so the pipe is fitted with hot-air take off ports for the air-filter warm air intake.
Not needed on my injection engine, so ten minutes with a cutting disc, and the hot-air ports are off.
This left a quick clean up and paint, to end up with this.
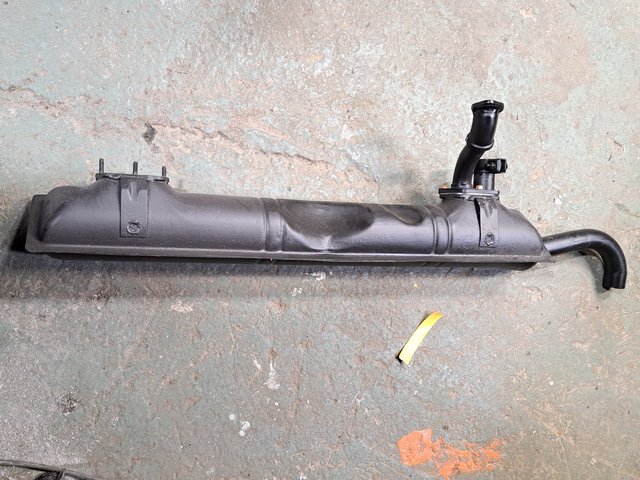
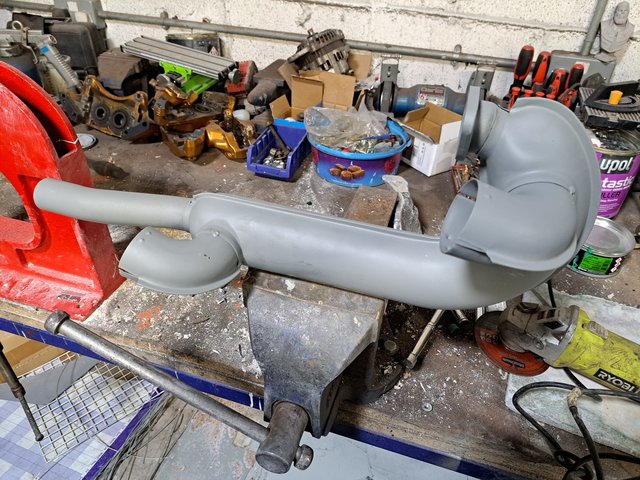
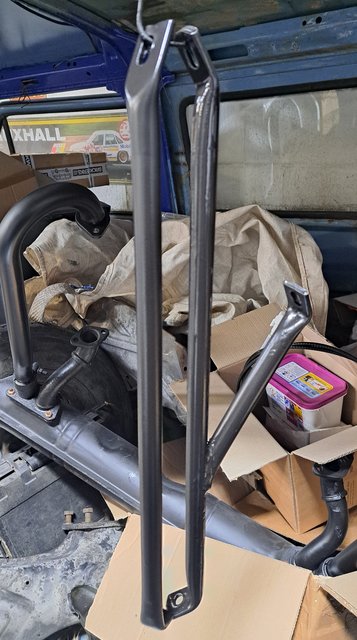
On the early wasserboxer, the exhaust is hung off the engine, so requires extra bracing steady bars.
These were bead blasted, cleaned and painted.
Et voila..
The engine is still at home, so no point fitting the exhaust assembly yet.
----------------------
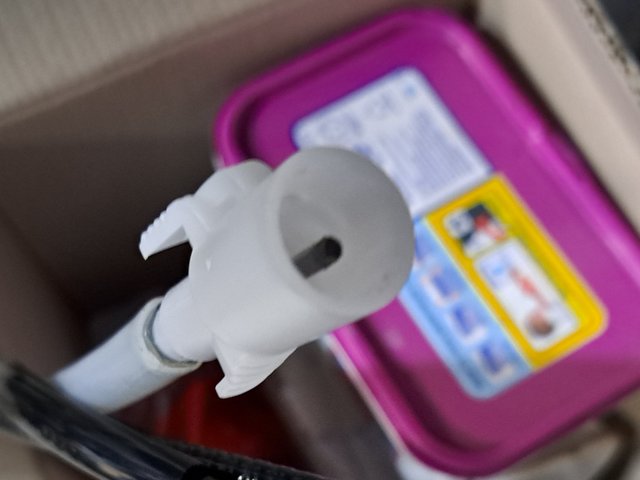
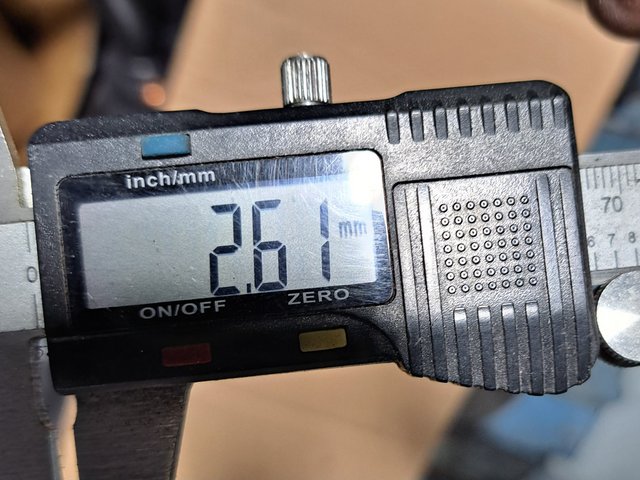
Next task was to measure my speedo cable - it took a year for Gemo to re-stock their UK distributors.
As you can see - the cable's drive is a 2.6mm x 2.6mm square shaft.
And that was it for the night.
I couldn't find my speed transducer - that is probably at home too, with the digi-dash. Ooops!
UPDATE -
I just realised from my photos, that pipes 1 and 3 are the wrong way round.
The silencer is upside down. - lol.
Good job I left them loose.
The wasserboxer is a flat four engine, so the left bank is cylinder 3 at the front and 4 at the rear.
The right bank is 1 at the front and 2 at the rear.
Or if you will -
[ 3 ========= 1 ]
)============(
[ 4 ========= 2 ]
The rear flanges (4 and 2) had been painted a few weeks ago.
This left two front pipes with flanges. (3 and 1).
3 is a doddle, just clean and paint.
Loosely fitted for now.
Pipe 1 needed a bit of tidying.
The early exhaust was only used with carb engines in the UK, and so the pipe is fitted with hot-air take off ports for the air-filter warm air intake.
Not needed on my injection engine, so ten minutes with a cutting disc, and the hot-air ports are off.
This left a quick clean up and paint, to end up with this.
On the early wasserboxer, the exhaust is hung off the engine, so requires extra bracing steady bars.
These were bead blasted, cleaned and painted.
Et voila..
The engine is still at home, so no point fitting the exhaust assembly yet.
----------------------
Next task was to measure my speedo cable - it took a year for Gemo to re-stock their UK distributors.
As you can see - the cable's drive is a 2.6mm x 2.6mm square shaft.
And that was it for the night.
I couldn't find my speed transducer - that is probably at home too, with the digi-dash. Ooops!
UPDATE -
I just realised from my photos, that pipes 1 and 3 are the wrong way round.
The silencer is upside down. - lol.
Good job I left them loose.
Re: My VERY RUSTY VW T25 Camper Van Project
Fitting stuff on backwards is easy to do, can be frustrating if you've spent hours trying to get to line up.
I remember the days when cars used to always come with vents from the exhaust to the carb, some even used to have a flap that you manually flipped over in the winter and summer to switch on or off. 9 times out of 10 though the flexi pipe had rotted off so didn't work anyway.
I remember the days when cars used to always come with vents from the exhaust to the carb, some even used to have a flap that you manually flipped over in the winter and summer to switch on or off. 9 times out of 10 though the flexi pipe had rotted off so didn't work anyway.