Bedford Astravan MK2
Re: Bedford Astravan MK2
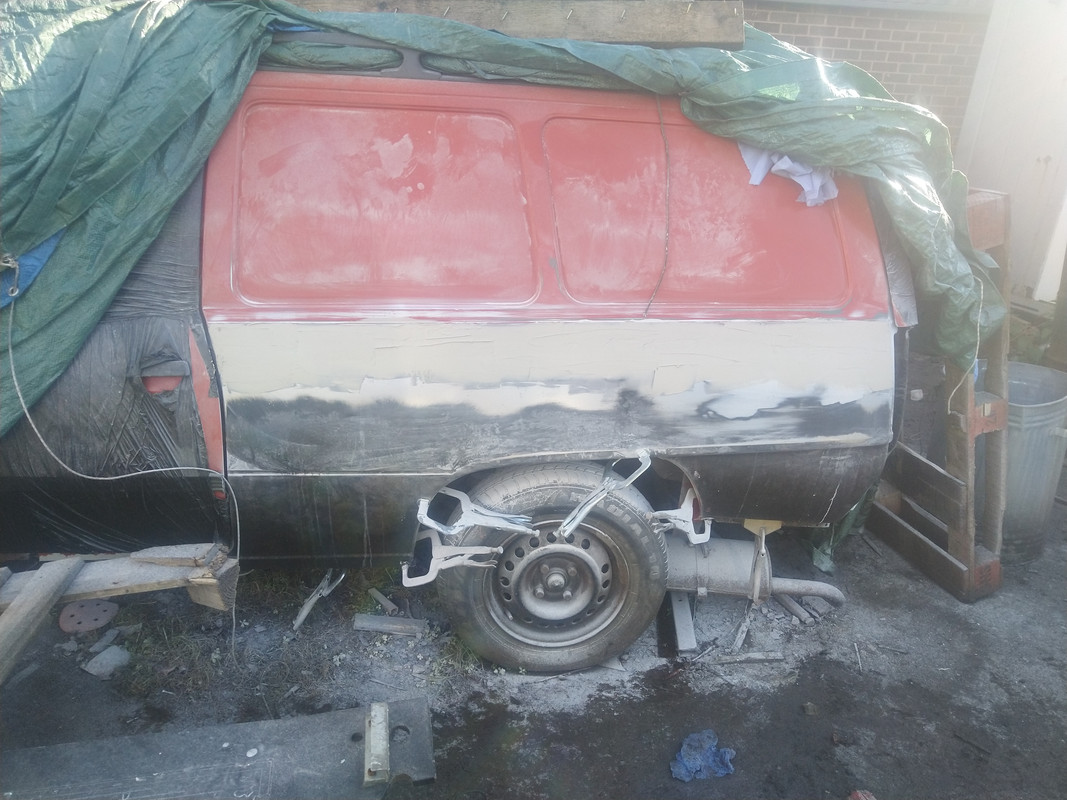
Have now ground the seam down and have started the laborious task of filling it.

Re: Bedford Astravan MK2
Oh joy...
Never knew boredom or tedium until I set about filling and sanding a previous car's body a fair few years ago.
Sadly it cannot be rushed, otherwise it will look like a dogs dinner.
Still - it is all good progress, and will be well worth it in due course.
Never knew boredom or tedium until I set about filling and sanding a previous car's body a fair few years ago.
Sadly it cannot be rushed, otherwise it will look like a dogs dinner.
Still - it is all good progress, and will be well worth it in due course.
Re: Bedford Astravan MK2
What gets me is that when you think the filler is spot on, then you put the primer on and it looks kack. Takes me days to get right.
Re: Bedford Astravan MK2
Photos of Fridays progress.
Another 3 hours spent sanding and filling. It's now 95 percent there.
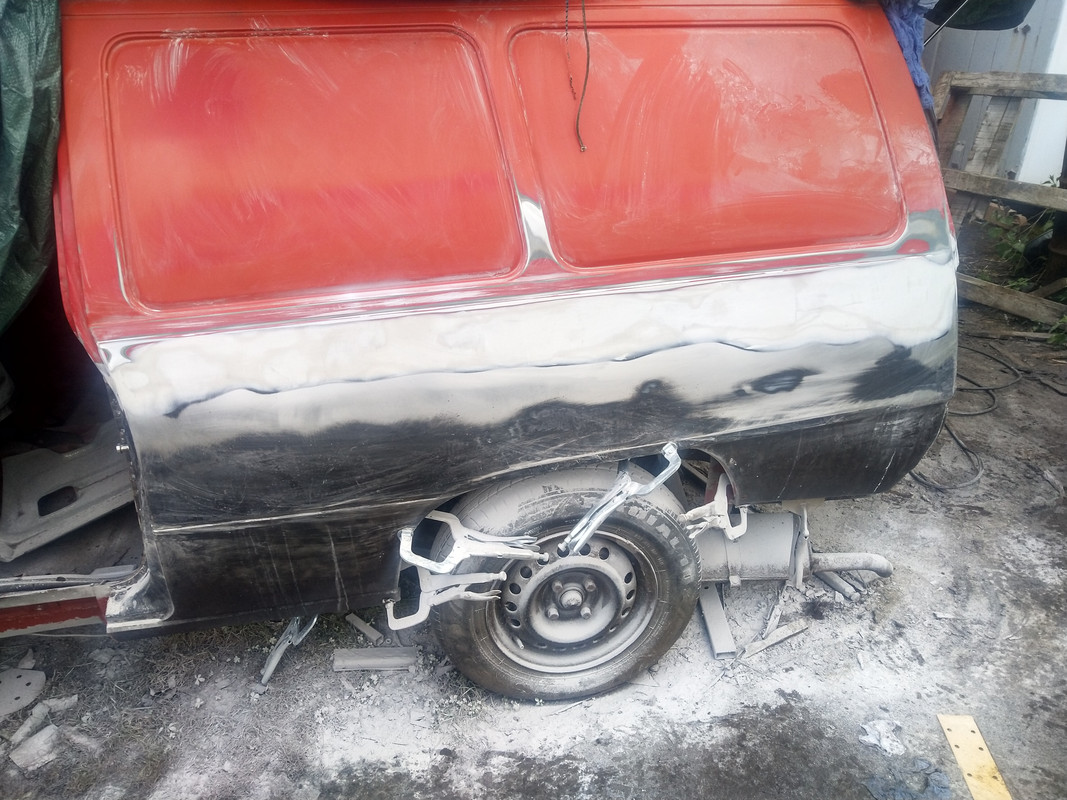
As sanded, about 4 separate skims of filler.
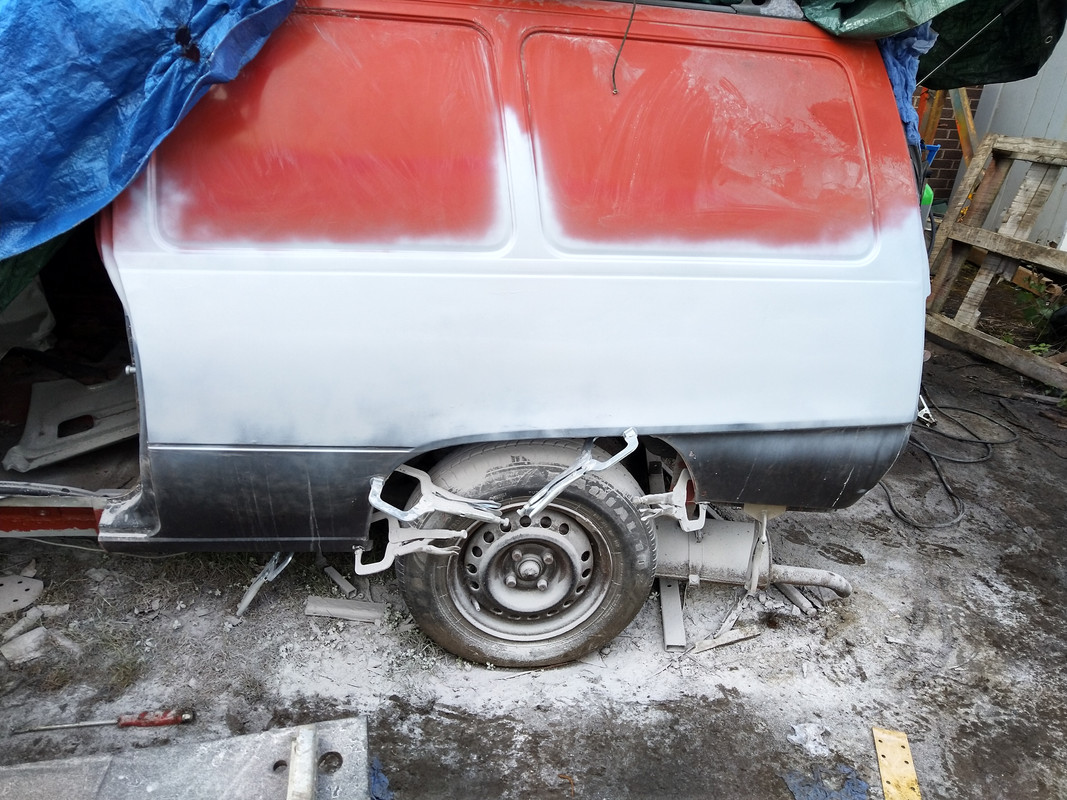
Epoxy primed
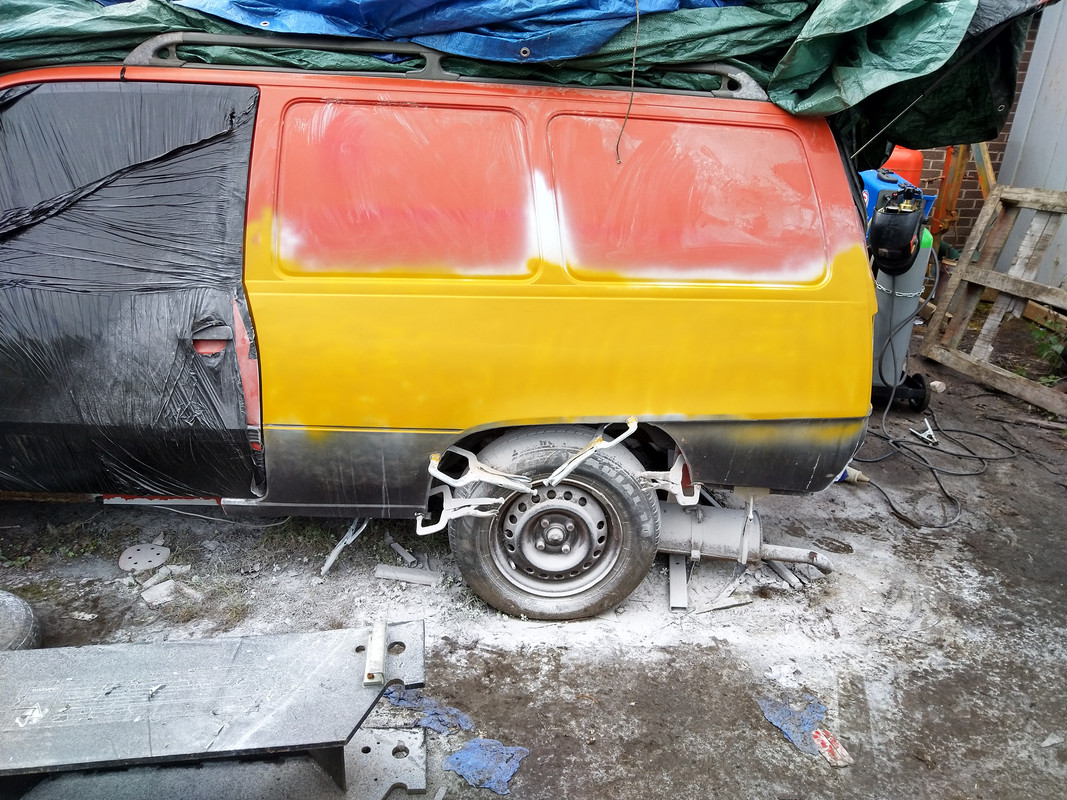
Filler primer
There's still a very slight line left. Going to get some guide coat then do a bit more filling.
Another 3 hours spent sanding and filling. It's now 95 percent there.
As sanded, about 4 separate skims of filler.
Epoxy primed
Filler primer
There's still a very slight line left. Going to get some guide coat then do a bit more filling.
Re: Bedford Astravan MK2
I know that some photos can hide a million sins, but that looks chuffin' great.
Excellent work dear chap.
Really taking shape.
I am in deep admiration of your patience and persistance, getting the van just right.
Excellent work dear chap.
Really taking shape.
I am in deep admiration of your patience and persistance, getting the van just right.
Re: Bedford Astravan MK2
Thankyou for the compliments, got to admit there's been a fair few times when I've felt like throwing in the towel. I dread to think how much it's cost, plus how many hours I've put in. I bet without the labour costs I will have spent more than my Mk5 van cost me 3.5 years ago.Robsey wrote:I know that some photos can hide a million sins, but that looks chuffin' great.
Excellent work dear chap.
Really taking shape.
I am in deep admiration of your patience and persistance, getting the van just right.
-
cavalier1990
- Registered user
- Posts: 1465
- Joined: Wed Jun 29, 2011 9:15 pm
- Location: Paisley, Scotland
Re: Bedford Astravan MK2
Good job there man I've yet to tackle the filling rubbing down part of my bodywork, I don't know if my arms/wrists can take all sanding work lol!
Re: Bedford Astravan MK2
I can sympathize with you, I suffer with rhumatism in a lot of my joints, including my wrists and that evening they were in agony. I'm going to have to do the body prep in stages, but so it's not left unprotected over winter I've decided once I've finished welding the cabin up I'll paint that part. Then prep and paint the panels, then finally weld up the front end. Got to admit I'm starting to get fatigue from all the seemingly never ending cutting out and welding.cavalier1990 wrote:Good job there man I've yet to tackle the filling rubbing down part of my bodywork, I don't know if my arms/wrists can take all sanding work lol!
-
thomas

- Registered user
- Posts: 236
- Joined: Sat Dec 31, 2011 11:18 pm
- Location: Roxburghshire, Scotland
Re: Bedford Astravan MK2
"Mountains of Mourne". That's what the tradesman, old-Charlie I apprenticed with in panel-beating used to say of my (early) cataloy sanding efforts, after taking his pipe out his mouth and passing his hand across it. In that environment time on the job was everything whereas if you've more time to let things shrink and contract fully, it'll turn out really well and remain that way. Dark faint guide-coat over the hi-build primer was a luxury not often availed of, but well recommended. It's very satisfying, if fatiguing work. Love what you're doing here.

--
Cav 1994 1.8LSi 5-dr Jungle Green Pearl: Daily.
Cav 1994 1.8LSi 5-dr Jungle Green Pearl: Daily.
Re: Bedford Astravan MK2
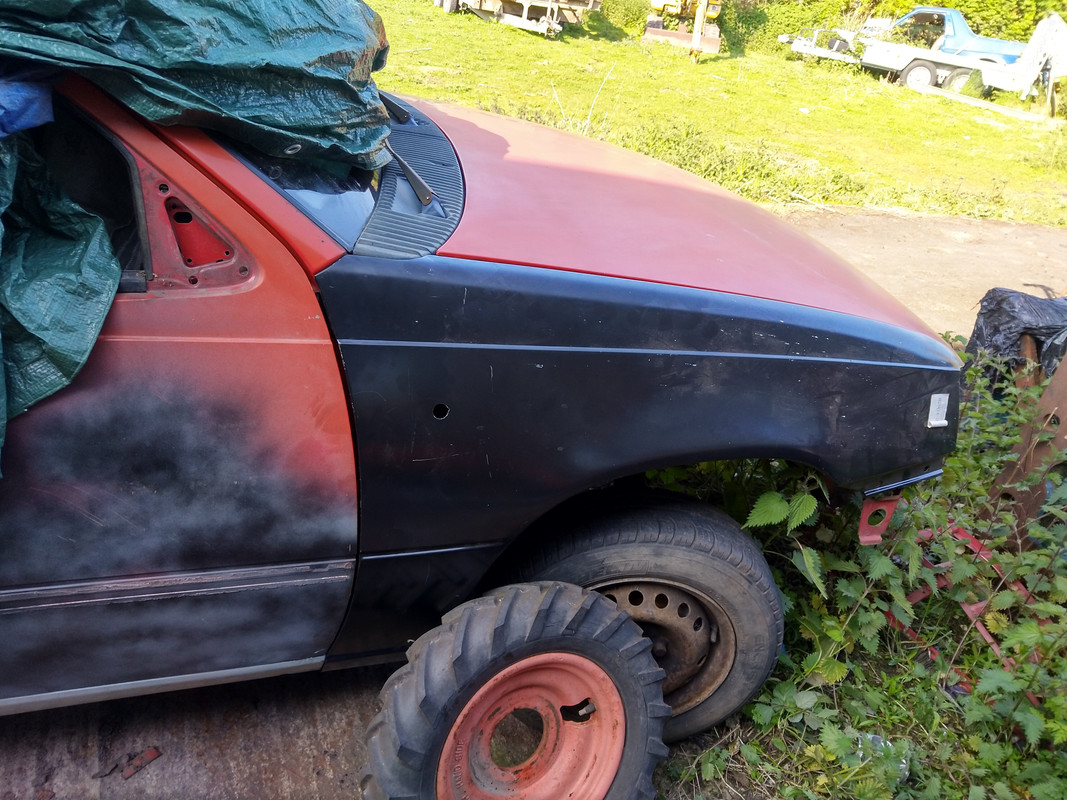
Thought I'd have a go at trial fitting the wings. Being pattern parts I was expecting them to fit bad.
The passenger side was supprisingly close, will just need the back triming very slightly.
However when it came to fitting the driver's side, oh dear. I almost think it was made for a different car. It will take a lot of cutting and tweaking to get it to fit.
It amazes me with how accurate things can be measured with a computer these days that Pattern parts aren't made a better fit. I'd happily pay for genuine wings if I could find any, but after searching most of the world online it appears there's non left .
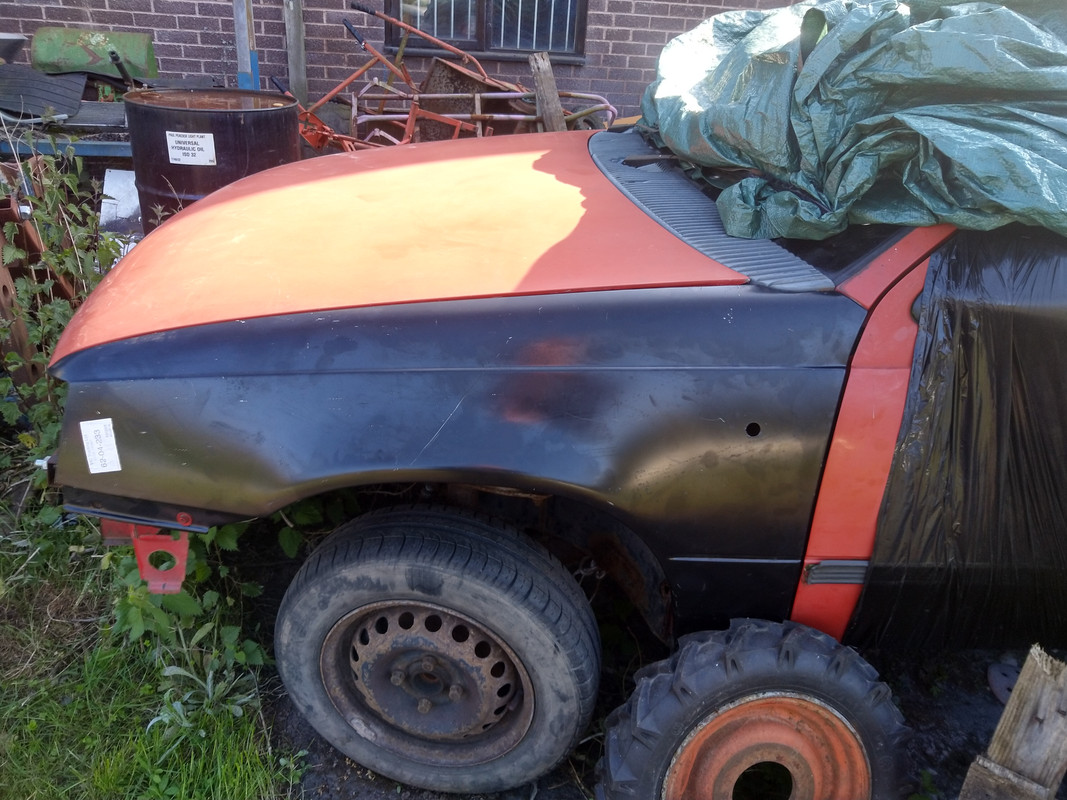
The wheel is only there to hold the bottom of the wing in place until I replicate the holes in the sill.
The passenger side was supprisingly close, will just need the back triming very slightly.
However when it came to fitting the driver's side, oh dear. I almost think it was made for a different car. It will take a lot of cutting and tweaking to get it to fit.
It amazes me with how accurate things can be measured with a computer these days that Pattern parts aren't made a better fit. I'd happily pay for genuine wings if I could find any, but after searching most of the world online it appears there's non left .
The wheel is only there to hold the bottom of the wing in place until I replicate the holes in the sill.
Re: Bedford Astravan MK2
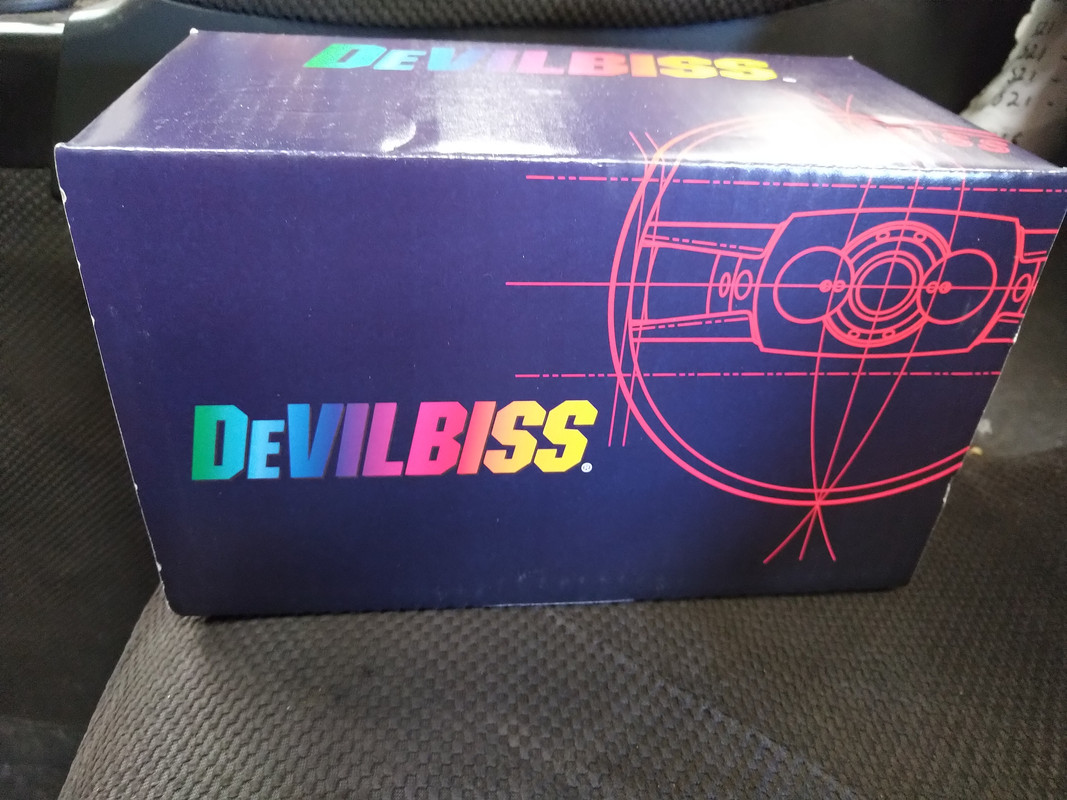
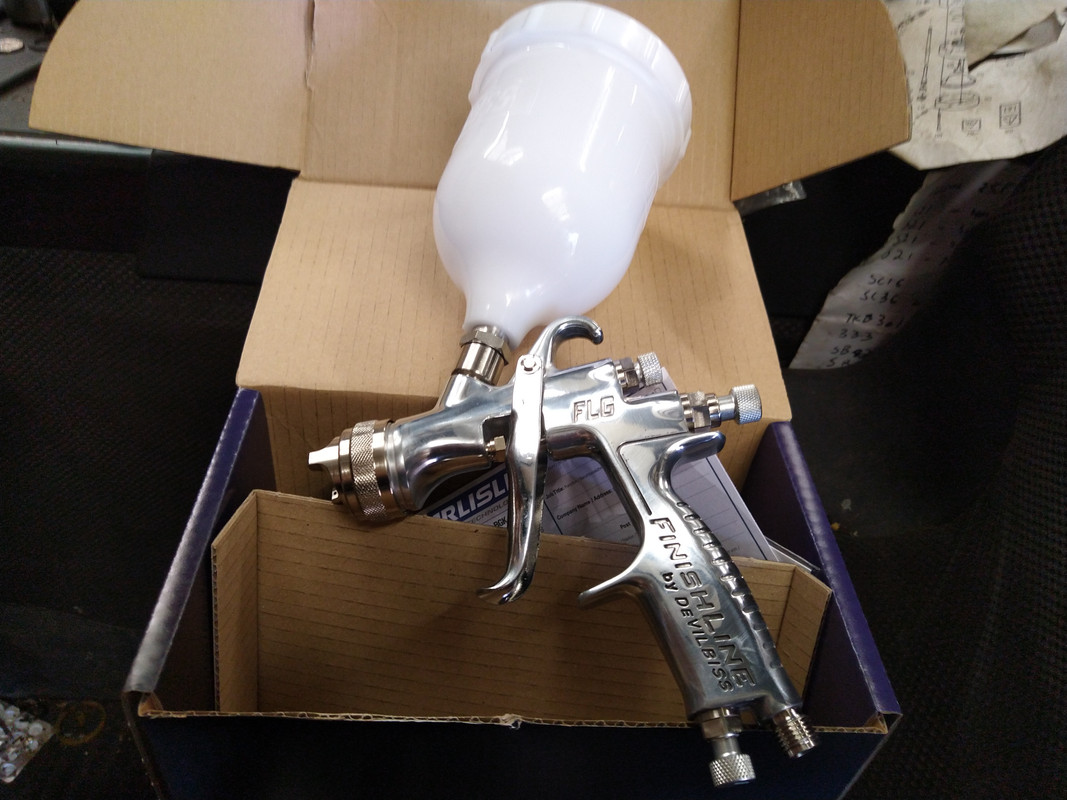
Hopefully in a couple of months the main cabin will be ready for paint. With this in mind I've been considering my options regarding spraying.
It's been at least 4 years since I've held a spray gun and even then it was to apply it to plant, which the finish is a lot less critical than with a vehicle.
I dug my old spray gun out. It's only a cheapy one so will probably be ok for the primer. However for the top coat I really want better so have purchased this new mid range gun made by devilbiss. The finish will hopefully come out ok with it.
 [url=https:/
It's been at least 4 years since I've held a spray gun and even then it was to apply it to plant, which the finish is a lot less critical than with a vehicle.
I dug my old spray gun out. It's only a cheapy one so will probably be ok for the primer. However for the top coat I really want better so have purchased this new mid range gun made by devilbiss. The finish will hopefully come out ok with it.
[url=https:/Re: Bedford Astravan MK2
Looking at the pictures, those wings look fine. Judging by crease lines and general shape.
I guess it is the mounting points out of view that are rubbish.
I have used deVilbiss sprayers before.
A reasonably competent piece of kit, even in my novice hands.
I guess it is the mounting points out of view that are rubbish.
I have used deVilbiss sprayers before.
A reasonably competent piece of kit, even in my novice hands.
Re: Bedford Astravan MK2
It's mainly on the rear. If you look closely at the sill the Driver's wing sits proud and continues sticking out up to the trim line. This in turn throws the panel gap out and will really irritate me if I don't manage to sort it.Robsey wrote:Looking at the pictures, those wings look fine. Judging by crease lines and general shape.
I guess it is the mounting points out of view that are rubbish.
The passenger side one just rubs where it meets the bottom of the windscreen pillar.
Many years ago I bought a pair of pattern wings for my Subaru ( again genuine were no longer available) and I made the mistake of not trial fitting before getting them painted. The gap was always miles out as they needed reshaping and didn't want to damage the new paint.
Re: Bedford Astravan MK2
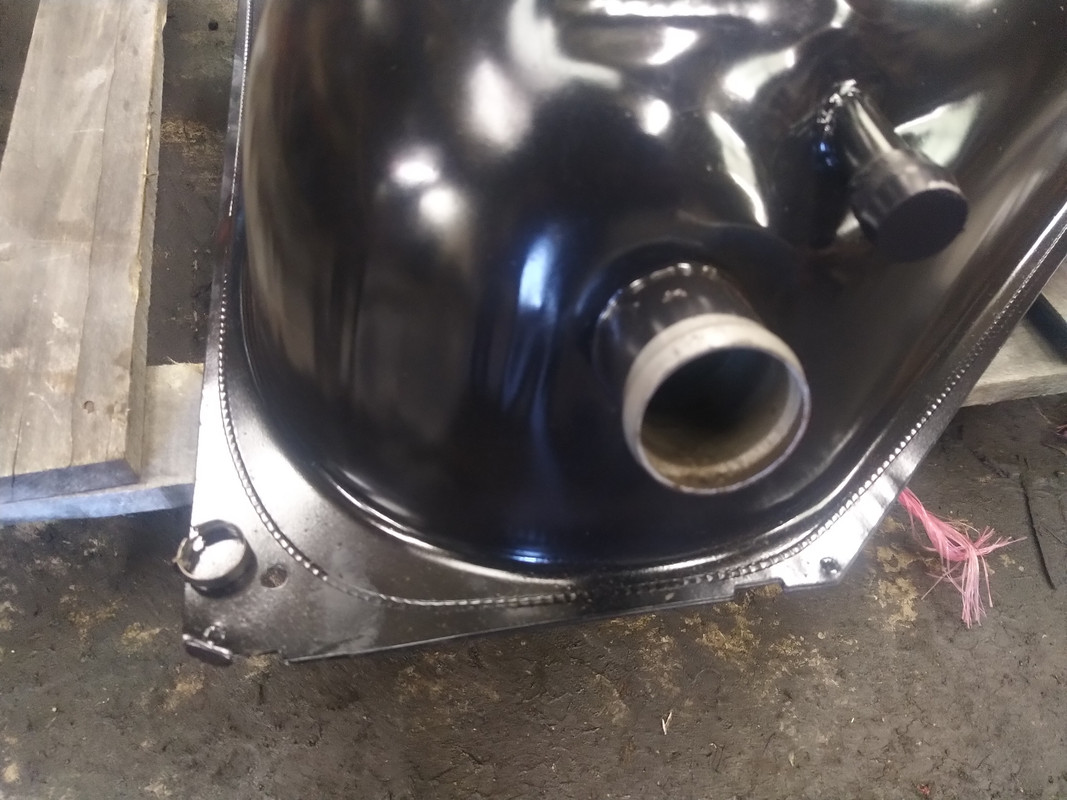
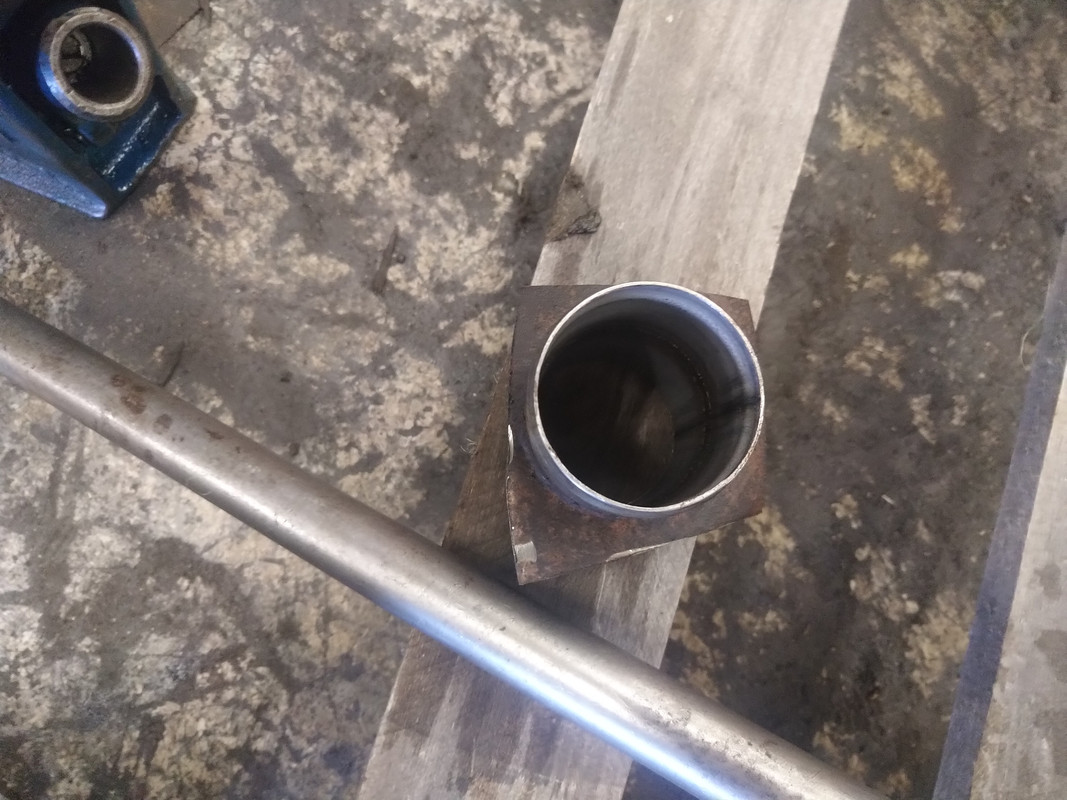
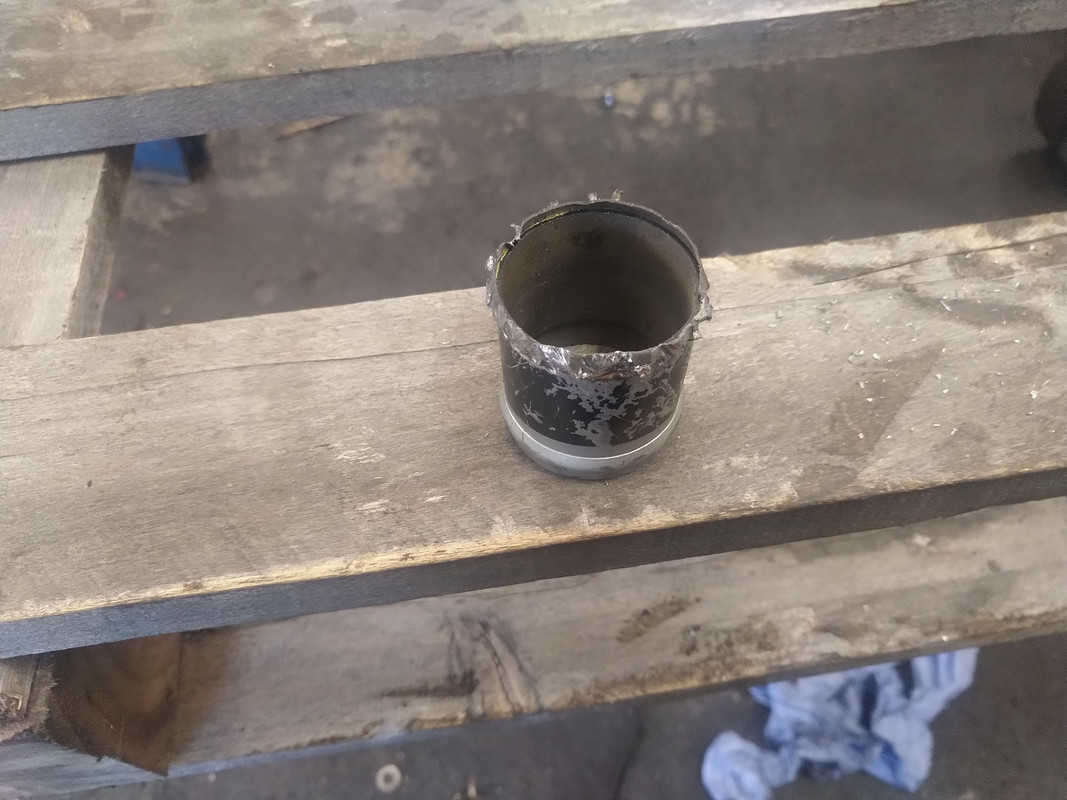
Another issue I noticed is that the filler neck on the MK3 tank that I'm having to use is a smaller diameter than a mk2 one. After hunting high and low for a reducer pipe that is diesel proof I finally gave up and cut the neck off both tanks and had the mk2 welded on to the MK3 one by a mate who is s better welder than me to ensure there was no pin holes to cause a diesel leak.

Re: Bedford Astravan MK2
Ooh - I suppose it is something, to find a tank that will fit from another model.
I never would have thought that it would have been possible.
Excellent welding too.
Just needs re-painting or powder coating to make it last a bit longer.
I never would have thought that it would have been possible.
Excellent welding too.
Just needs re-painting or powder coating to make it last a bit longer.
Re: Bedford Astravan MK2
The shape of the MK3 tank is the same, but the inlet and outlet pipe is different along with the filler neck. No diesel estate/van tanks for the mk2 seem to exist anymore.Robsey wrote:Ooh - I suppose it is something, to find a tank that will fit from another model.
I never would have thought that it would have been possible.
Excellent welding too.
Just needs re-painting or powder coating to make it last a bit longer.
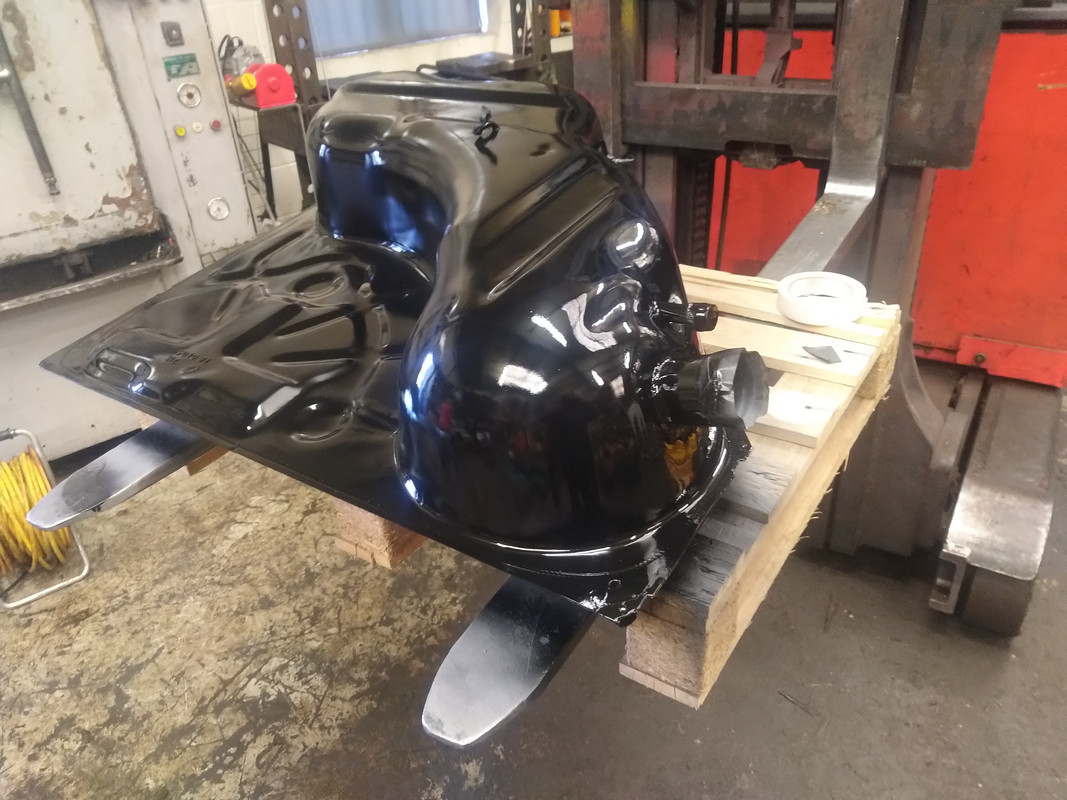
The welded area has been rubbed down etch primed and painted before I left work tonight.
Certainly achieved a better result at welding than I would of, but then again he does weld for a living .
Re: Bedford Astravan MK2
Painted up.
Re: Bedford Astravan MK2
Ooh - very nice indeed.
Re: Bedford Astravan MK2
Today due to covering so many evenings and weekends, my boss said after I'd done a couple of jobs first thing I could have the rest of the day to myself. Great I thought, I'd have a real press on with the van.
After removing the sheet, I started off with spending over an hour trying to get the n/s door to sit tidy. Next I continued with welding up the bottom of the quarter that I had to leave a couple of weeks ago when my gas ran out.
Then came disaster, I received a call from my son's school ( my wife is a key worker) saying that he'd sustained a head injury that required checking out in A+E. I was expecting a very long wait but to be fair the staff at the hospital where nothing short of excellent. As it happens luckily my son turned out to be fine, just has a lump the size of a golf ball on his head.
Here's a full shot of the van panelled up.

Just needs half a sill this side then lots of fettling to get the gaps spot on.
After removing the sheet, I started off with spending over an hour trying to get the n/s door to sit tidy. Next I continued with welding up the bottom of the quarter that I had to leave a couple of weeks ago when my gas ran out.
Then came disaster, I received a call from my son's school ( my wife is a key worker) saying that he'd sustained a head injury that required checking out in A+E. I was expecting a very long wait but to be fair the staff at the hospital where nothing short of excellent. As it happens luckily my son turned out to be fine, just has a lump the size of a golf ball on his head.
Here's a full shot of the van panelled up.
Just needs half a sill this side then lots of fettling to get the gaps spot on.
Re: Bedford Astravan MK2
Cracking job so far mate.
Following.
Following.
Re: Bedford Astravan MK2
Thanks for the compliment.Mazza wrote:Cracking job so far mate.
Following.
Even though I absolutely promised myself no more spending as I need the cash, yesterday I was offered a very good rear axle off a MK3 estate that came off a low mileage car originally from Bulgaria, so theres a lot less corrosion, than normal. These are apparently a direct swap for the mk2 axle. As some pillock has welded the shock absorbers to mine plus there's a bad patch of rot in the one arm I thought this was the best option. Sadly the chap also had a complete MK3 PAS set up for sale but due to funds for the time being I had to decline.
Re: Bedford Astravan MK2
Yep - I just checked -
Part number 90 372 602 fits both the mk2 Astra (Kadett-E), Max, Combo and the Mk3 (Astra-F) Estate and van.
As for the power steering rack, is it a left hand drive or right hand drive rack.
Being from Bulgaria and all that.
You could always fit a Mantasport EPAS at a later date. So less faff with fluid pumps and power steering racks.
Re: Bedford Astravan MK2
The rack was off a rhd, the chap breaks a lot of older Astra's as a part time living.
Apparently the brake hub bolt pattern is different between the mk2/3 but he is sending me enough parts with what Ive got to make up a complete axle assembly that should just bolt straight in.
Apparently the brake hub bolt pattern is different between the mk2/3 but he is sending me enough parts with what Ive got to make up a complete axle assembly that should just bolt straight in.
Re: Bedford Astravan MK2
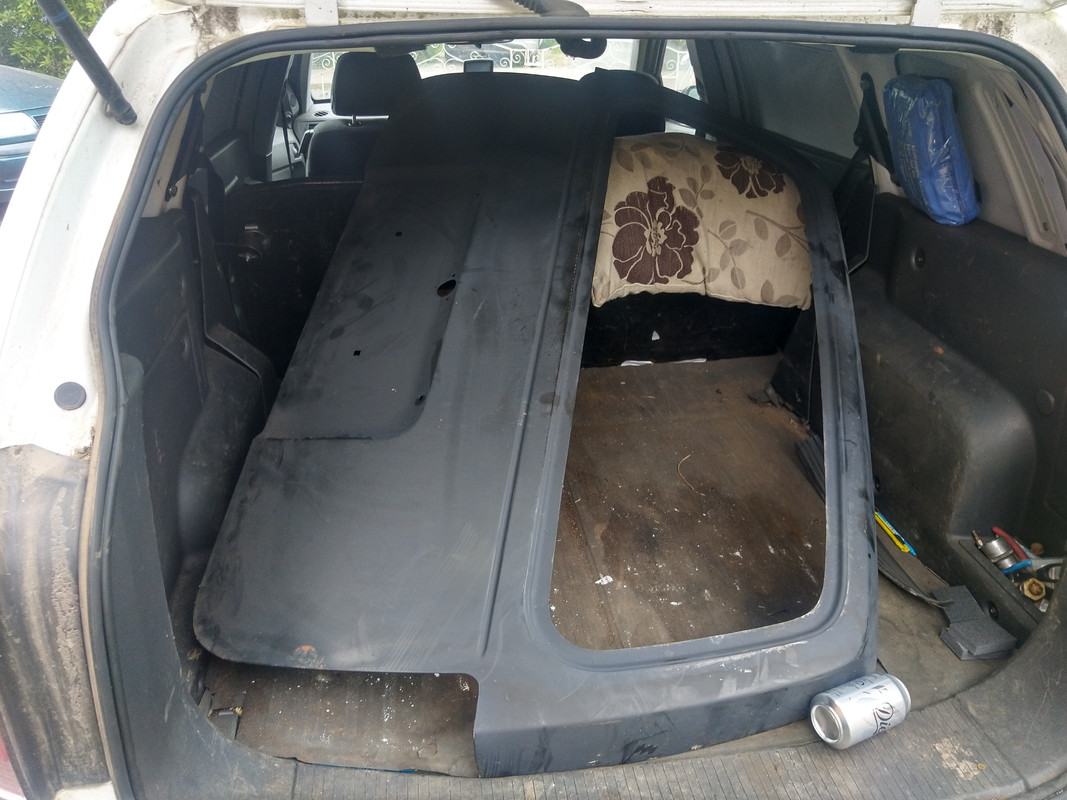
Today I managed to finally collect my new tailgate. After watching online video s I have decided to try taking the screen out of my old one myself, I've ordered the proper kit, fingers crossed it doesn't shatter on removal.
Re: Bedford Astravan MK2
If it isn't a bonded screen, it should be quite straight forward.
Just take your time, and it will be fine.
But I presume that is ages away yet, as you need to have the new hatch prepped and painted first.
The standard parcel string and swarfega technique has worked a few times for me.
In my case, a Cavalier mk2 and a Fiesta mk 2 windscreens.
Just take your time, and it will be fine.
But I presume that is ages away yet, as you need to have the new hatch prepped and painted first.
The standard parcel string and swarfega technique has worked a few times for me.
In my case, a Cavalier mk2 and a Fiesta mk 2 windscreens.