How2 - Full Exterior Valet

An index of useful guides designed to help you care for and maintain your Mk3 Cavalier

Moderator: Robsey

Locked
marksmith
Posts: 49
Joined: Fri Jan 14, 2011 6:47 pm
Location: High Wycombe, Bucks
Contact:

How2 - Full Exterior Valet

Post by marksmith »

Ok, So, I decided to pull my old non running Cav out of the garage for this valet. Its dirty and faded and needs a good clean up inside and out. It was missing a grille, so I popped a spare one on for the valet.

Image

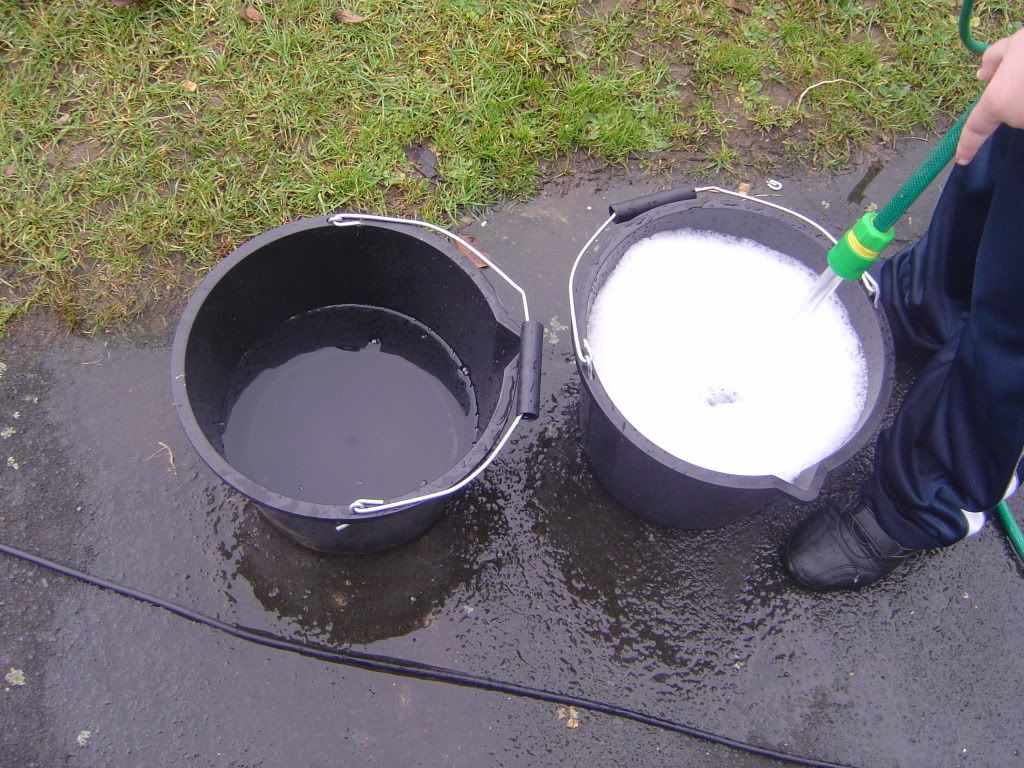
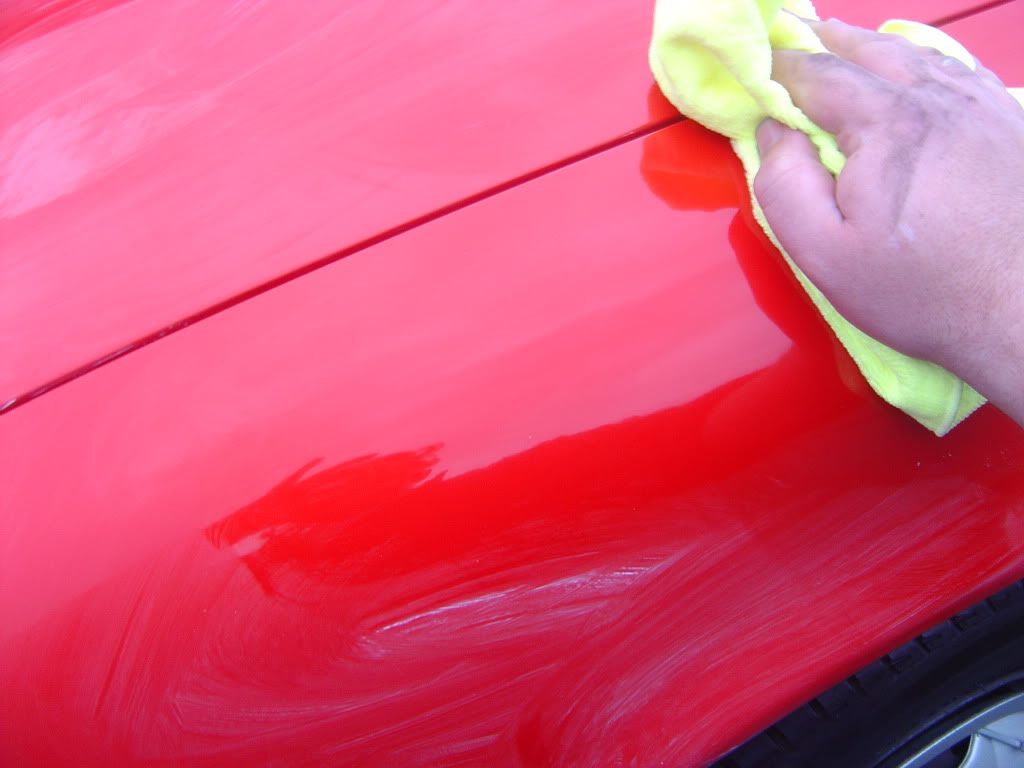
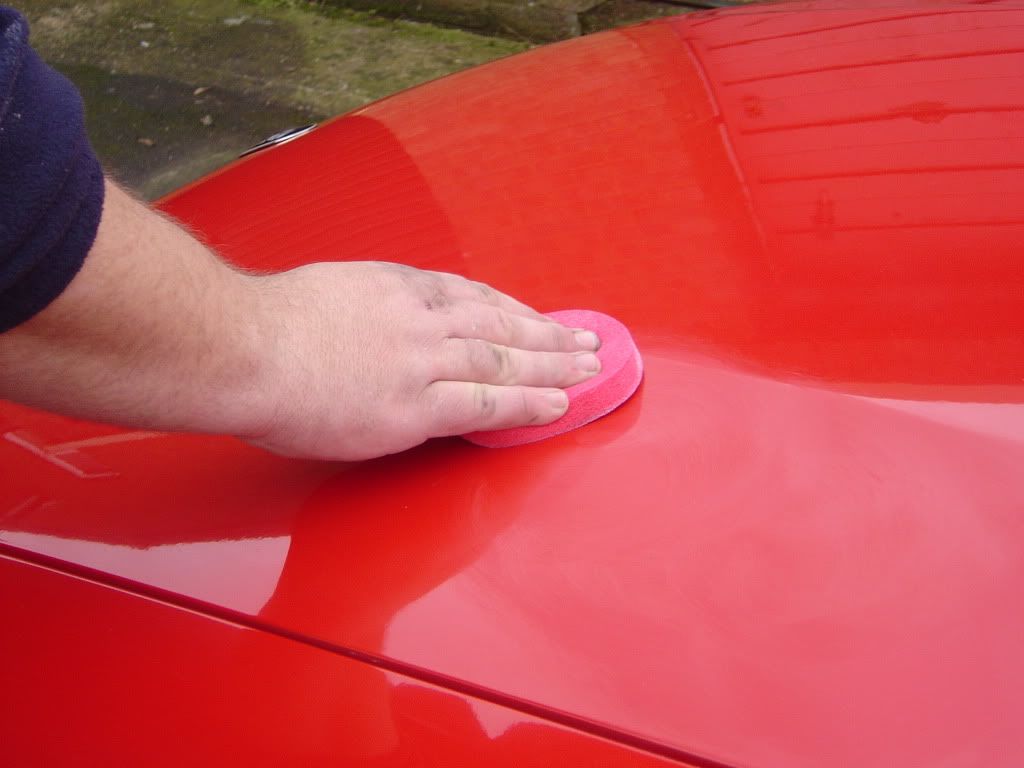
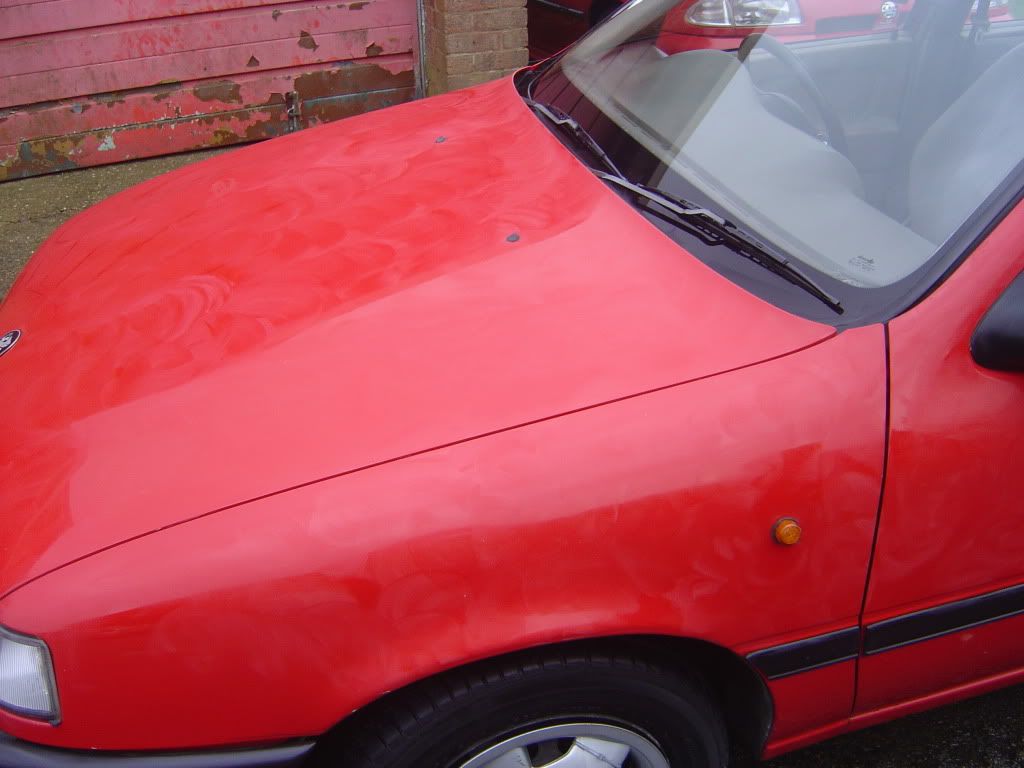
Now, to start, I used a snow foam pre wash. This costs about £15 for 5 litres and its brilliant. It cakes the car in a thick foam that pulls all the loose dirt and grime off the car to make the main wash much safer. To apply this you should have a foam lance which costs about £55 but its equally as good when applied through a £10 pump sprayer. Its just as effective, the only difference is that the foam is not as thick so you may need to repeat this step twice.

Image
Image
Image

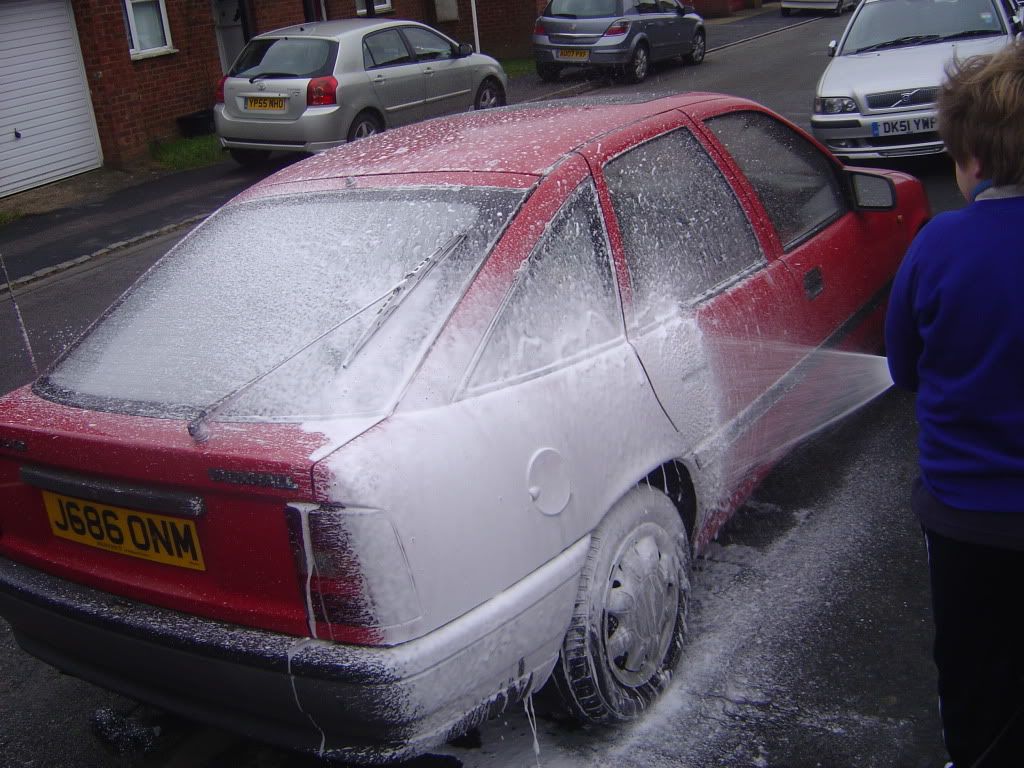
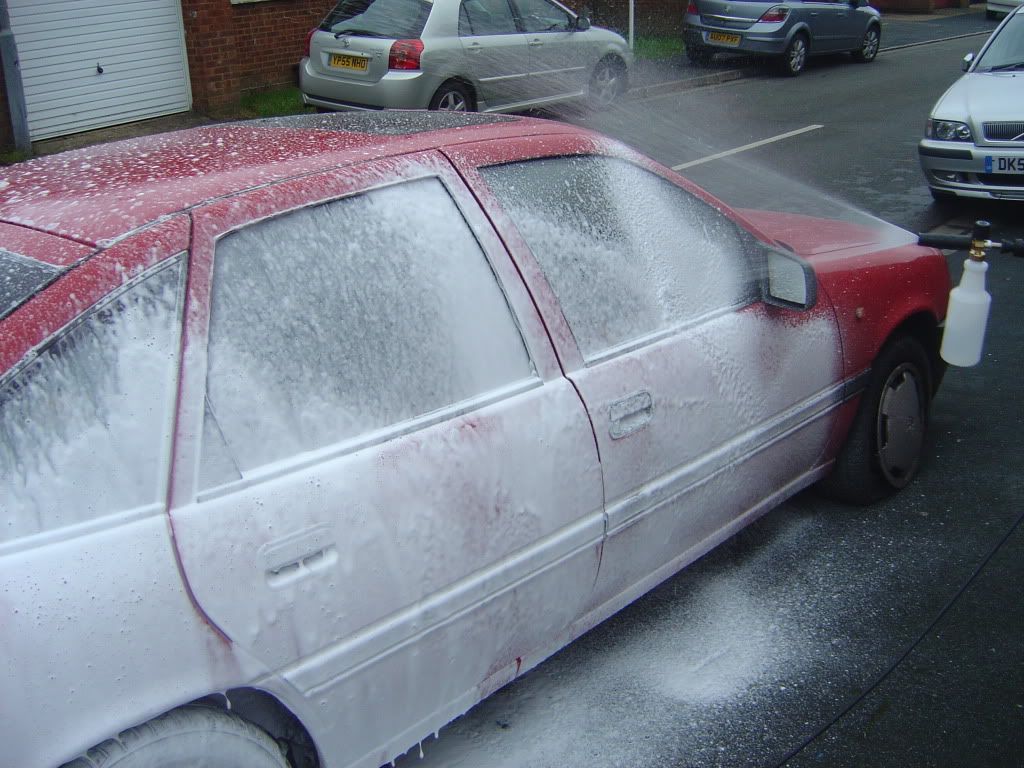
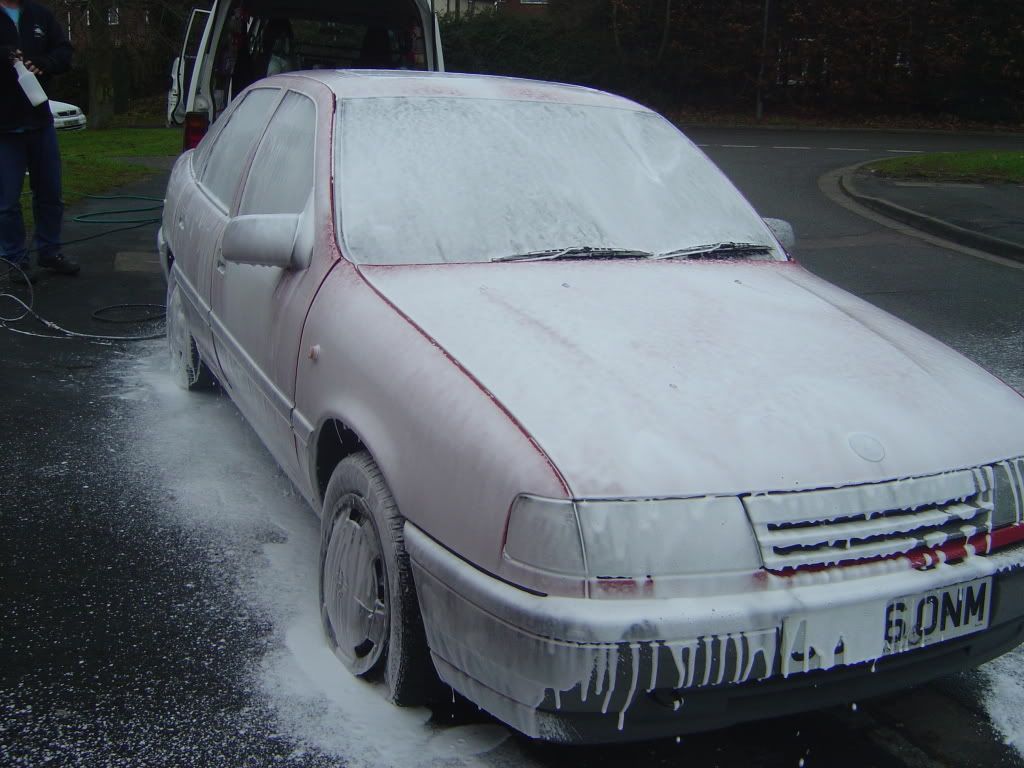
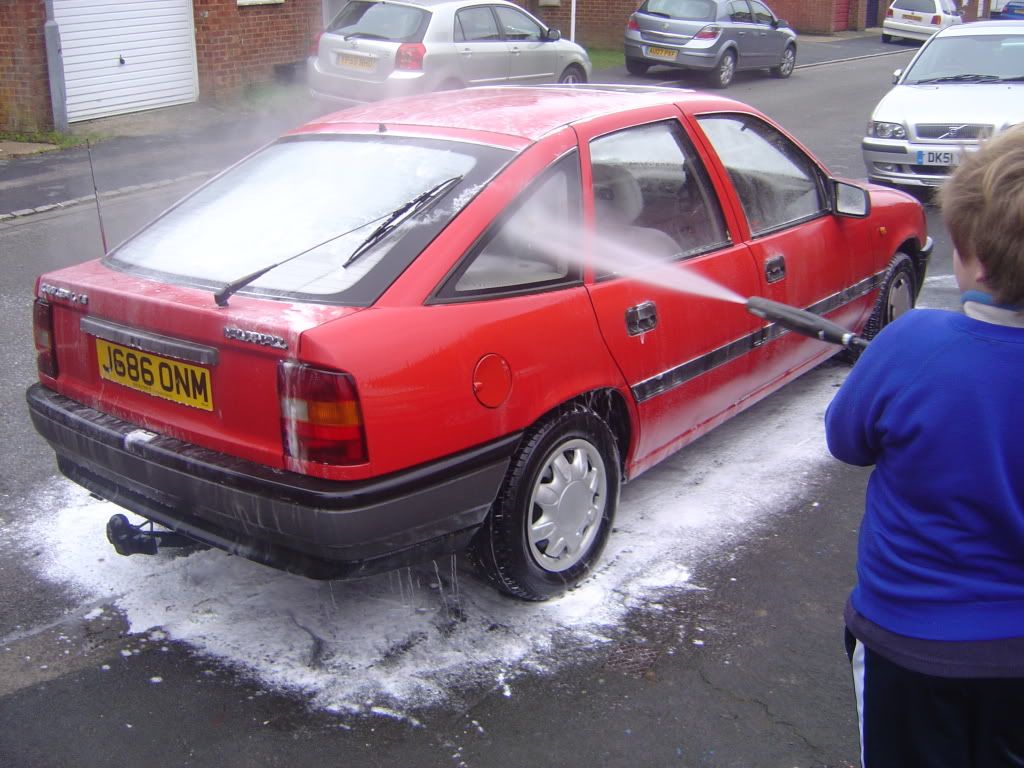
This should be left on the car for about 10 minutes before rinsing off with a jet washer. Always apply the foam to a DRY car as it will stay on the car for the full 10 minutes then. Power wash it off, starting from the bottom and working up - this avaoids streaking.

Image

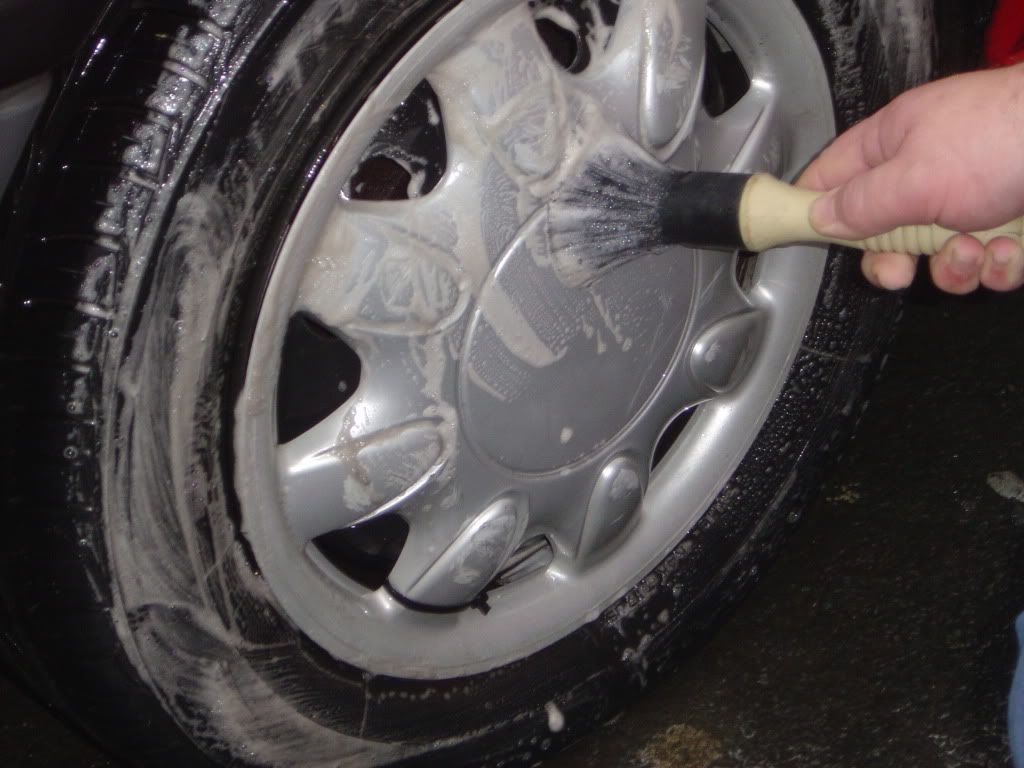
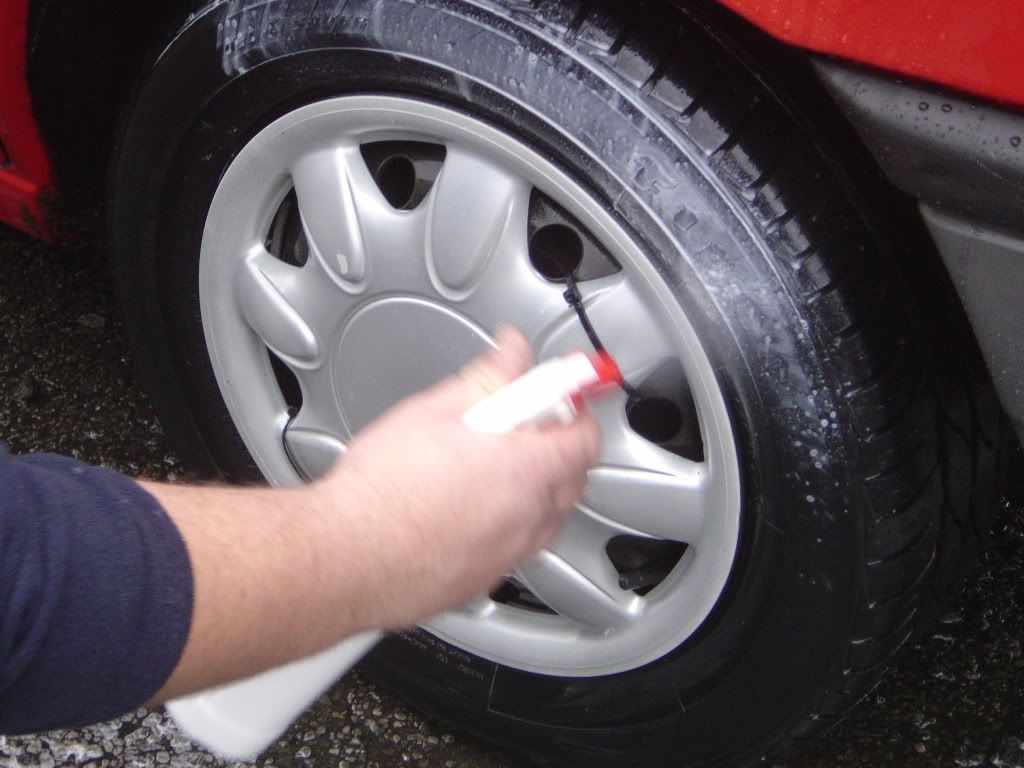
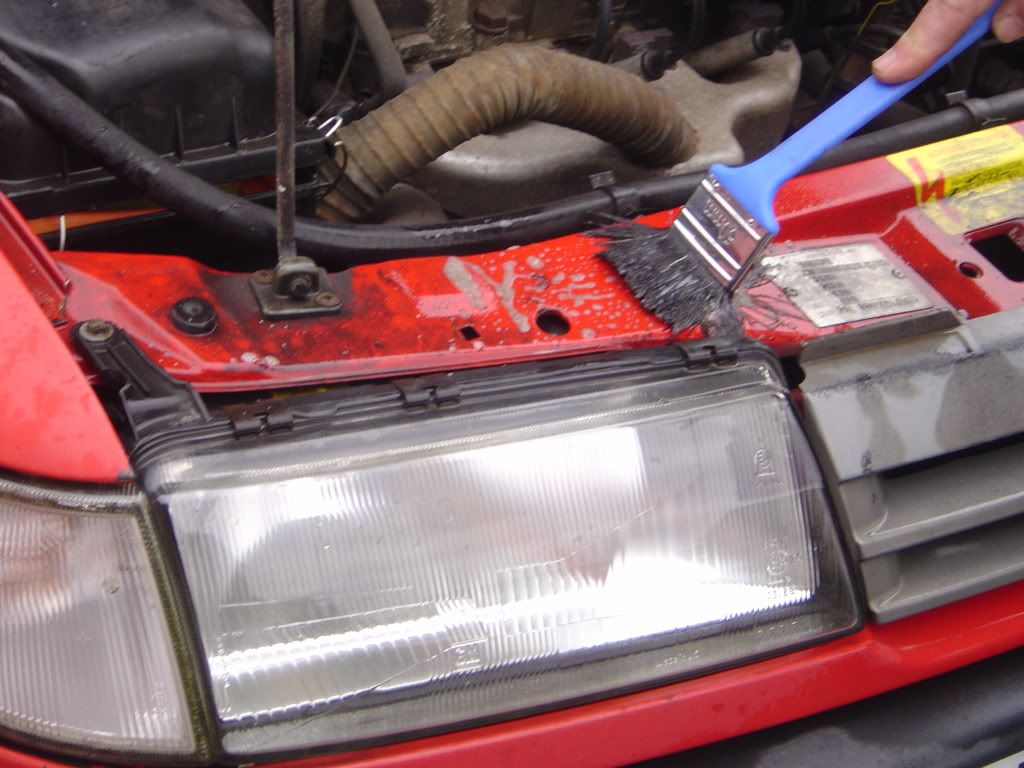
Next, and before the main wash, we go to the wheels and inner arches. I am using Autoglym products here. I feel they are the best, are well priced, and are easily available. To do the wheels and arches, first take some AG Engine Cleaner and spray generously up under the arches. While this is taking hold, spray AG Clean Wheels onto the surface of the wheel. ( for chrome or painted wheels use Custom Wheel Cleaner ).

Agitate the wheel cleaner with a wheel brush, getting off alll the brake dust and then do the same to the inner arches, agitating it all with a brush. I find angled radiator paint brushes are best for this as you can get right up inside the arch.

Image
Image

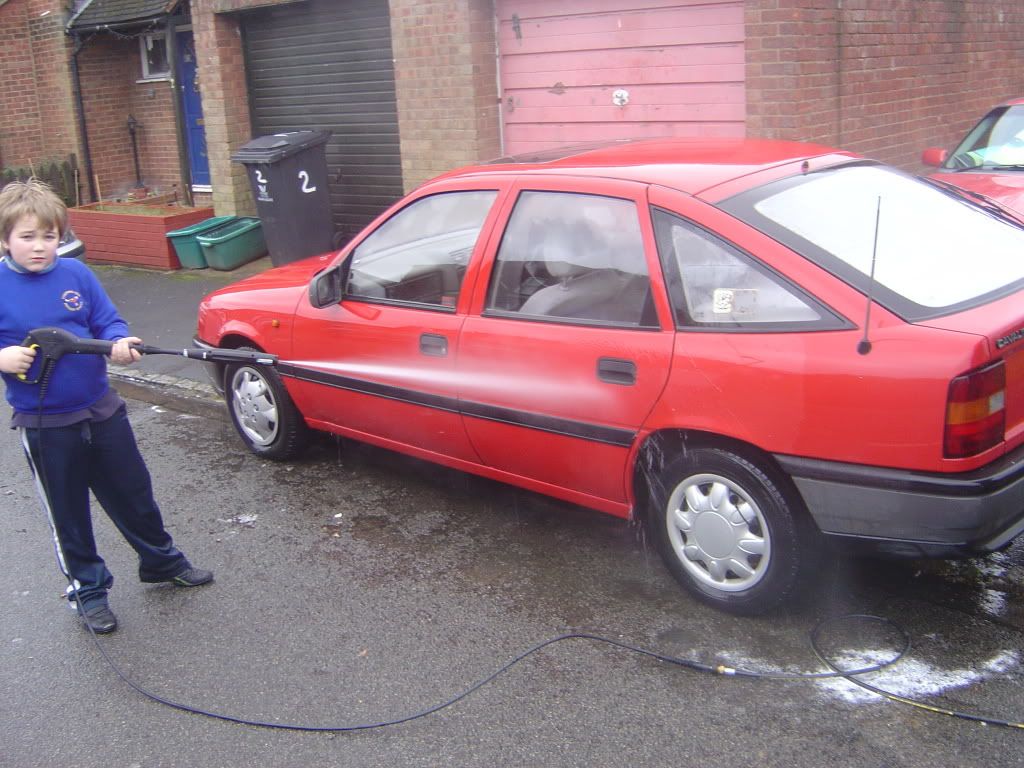
Once this is all done, power wash the wheels with the jet wash and then go onto the next wheel. When all wheels are cleaned, spray the tyres with Autoglym Tyre Dressing ( best sprayed onto a wet tyre ). This is a milky white colour but will dry clear and leave a lovely new look to your tyres.

Image

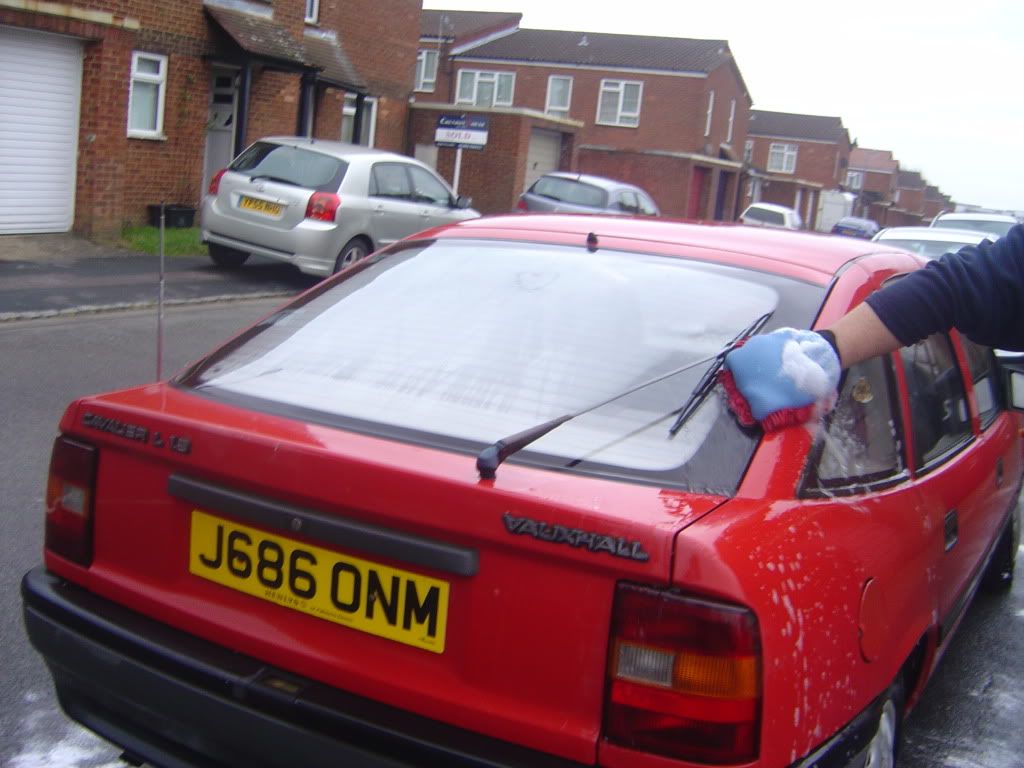
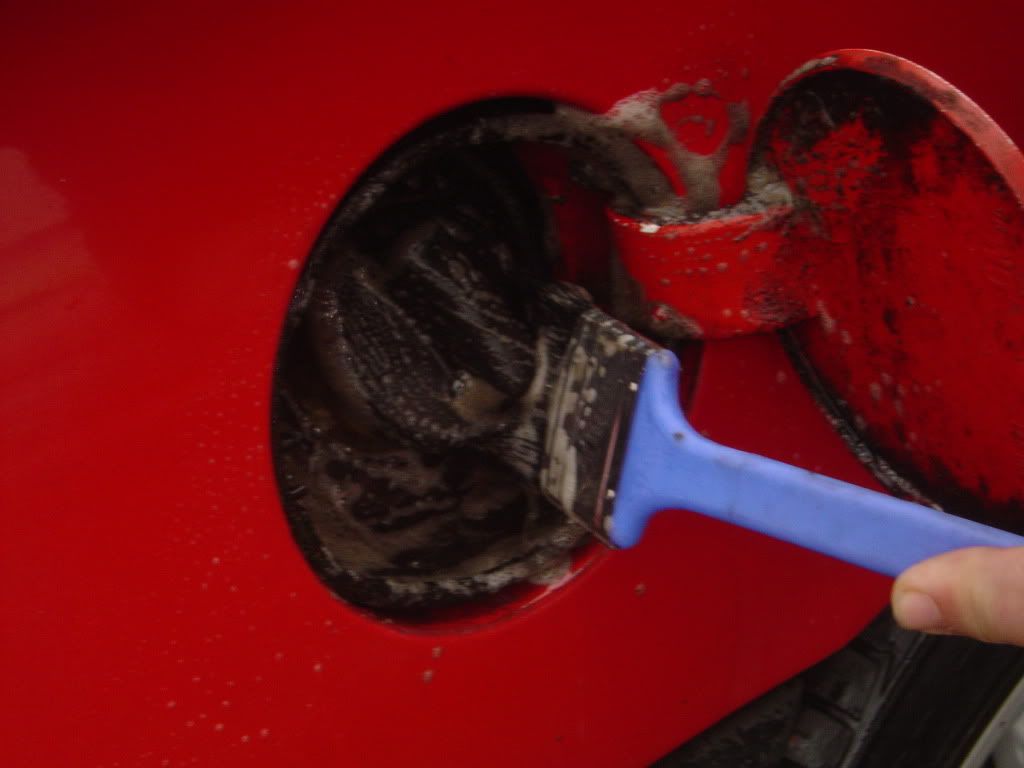
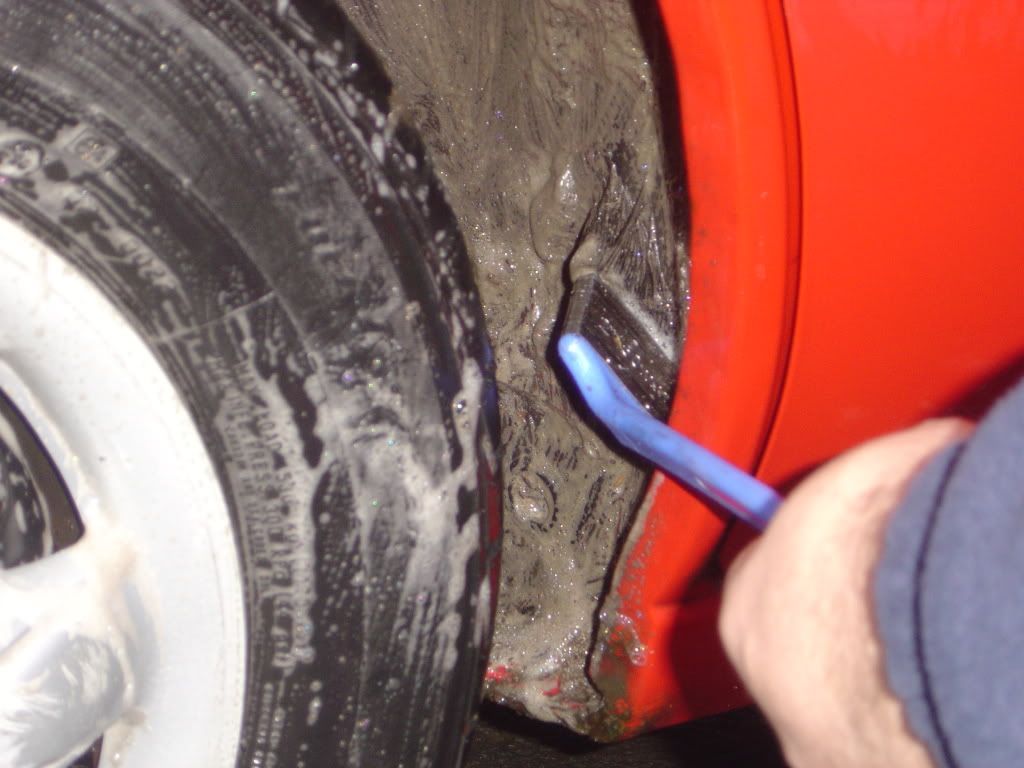
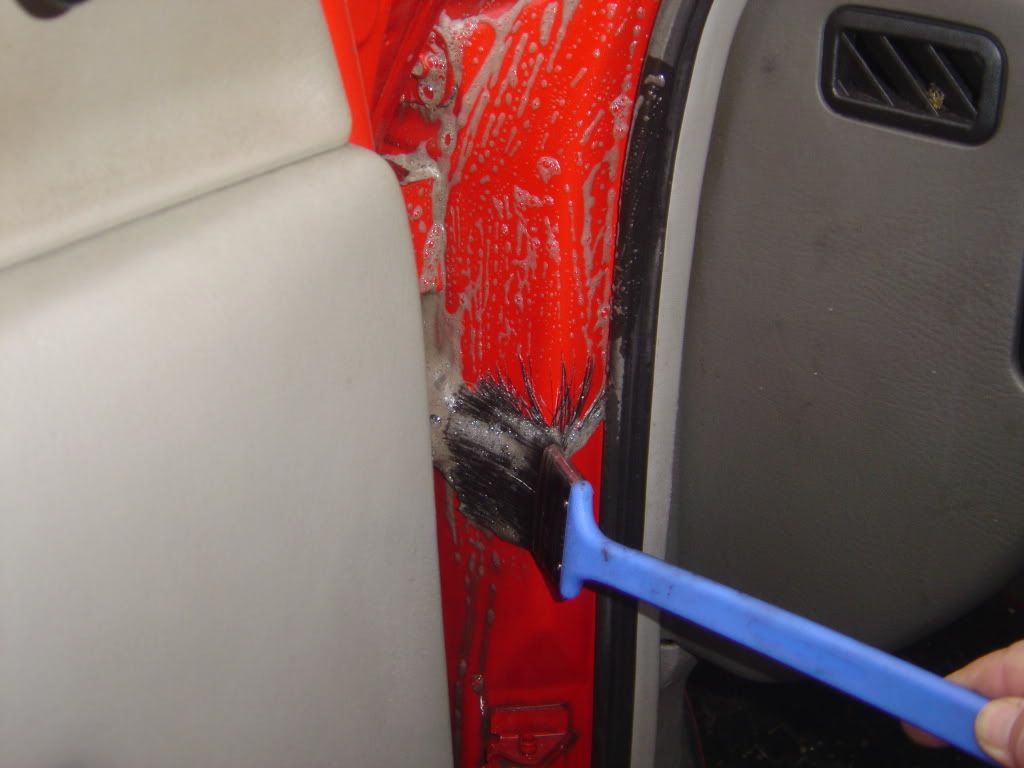
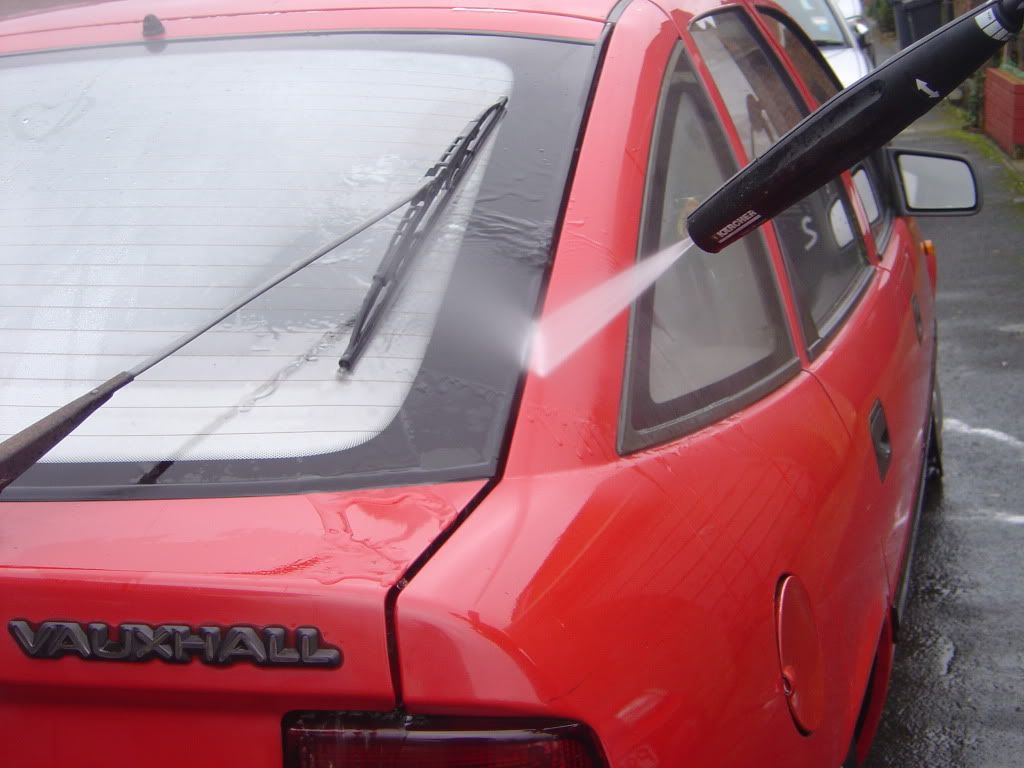
Next we move onto the door shuts. Open the door and spray a good coating of the Engine Cleaner again onto the door shuts. Again, just llike the arches, agitate with a brush and jet wash off. When jet washing, start the washer pointing away from the car and slowly move in towards the cars door shuts. This will stop you from getting the interior soaked. Do the same for all the doors and the under the bonnet.

Image
Image
Image
Image

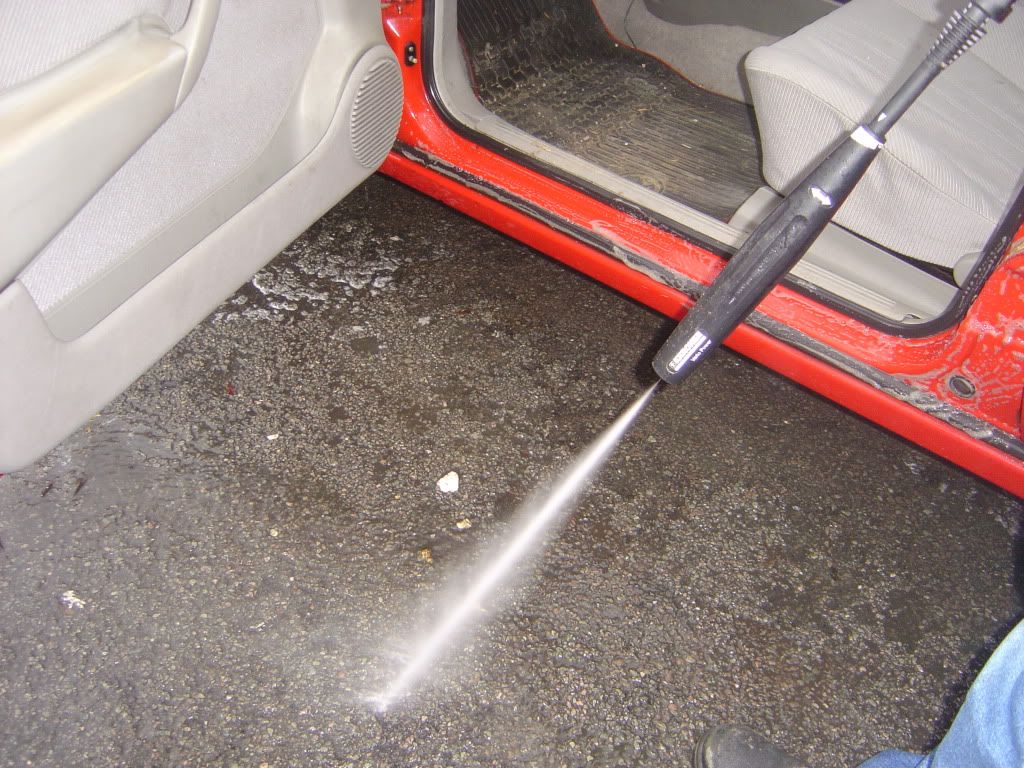
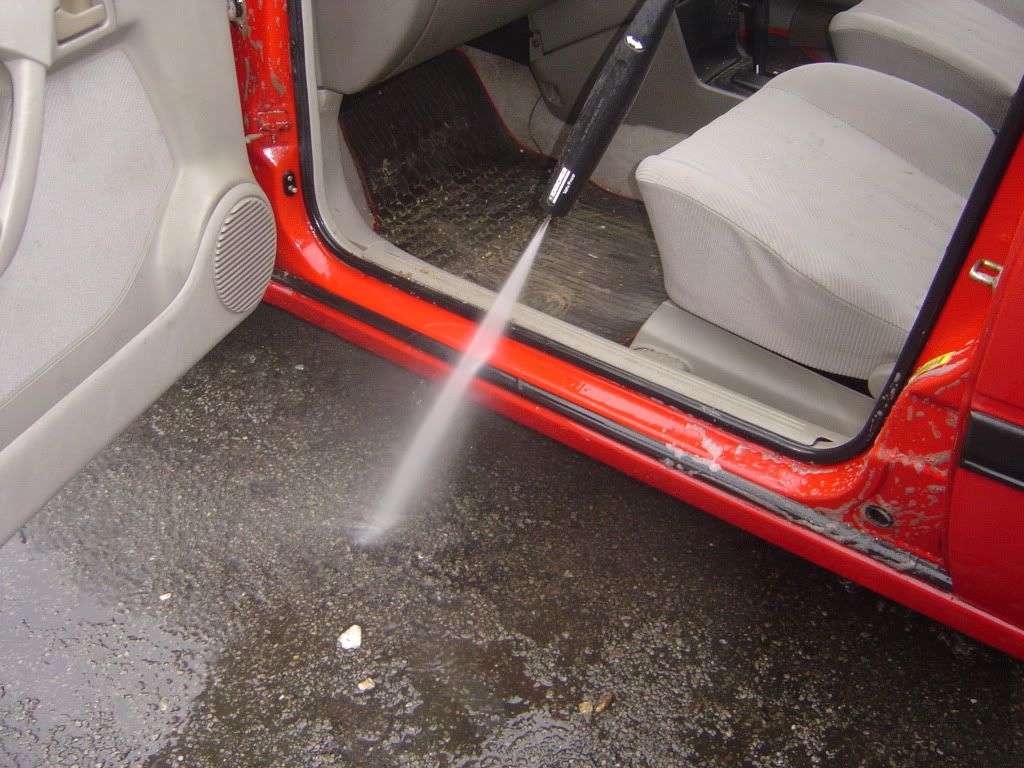
When doing the boot shut, do it the same way but close the boot down before jet washing it. Close it down just one "click" and then jet wash inside the door gaps. This will rinse the boot shuts and very little water will enter the car, if any !

Image
Image

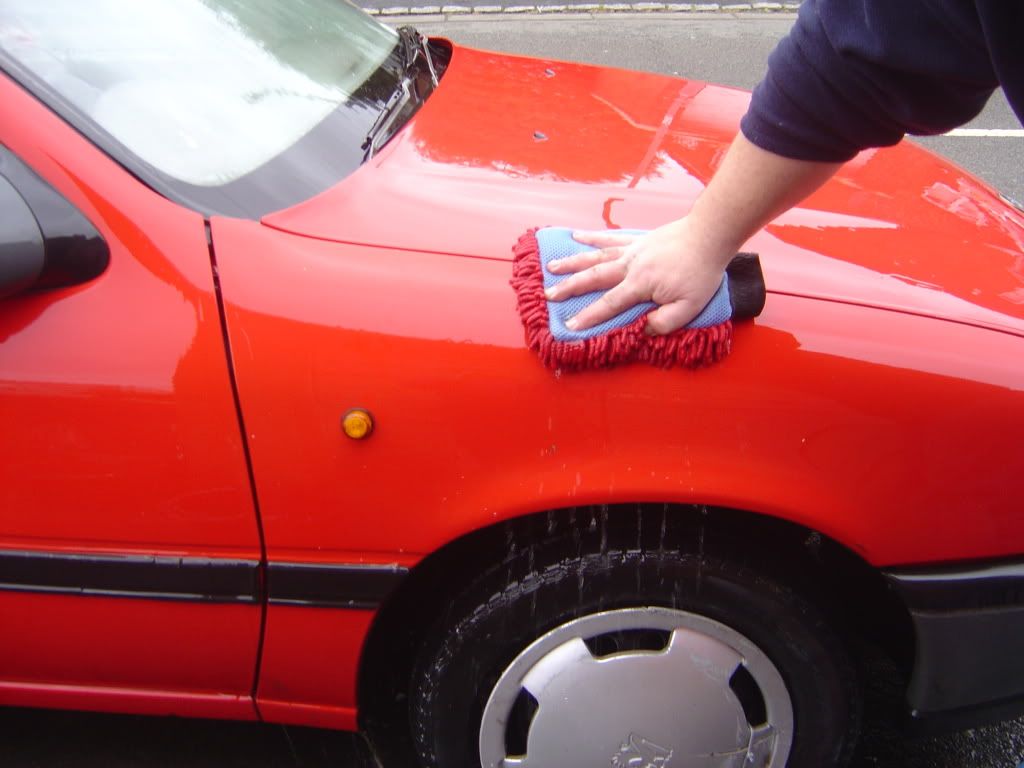
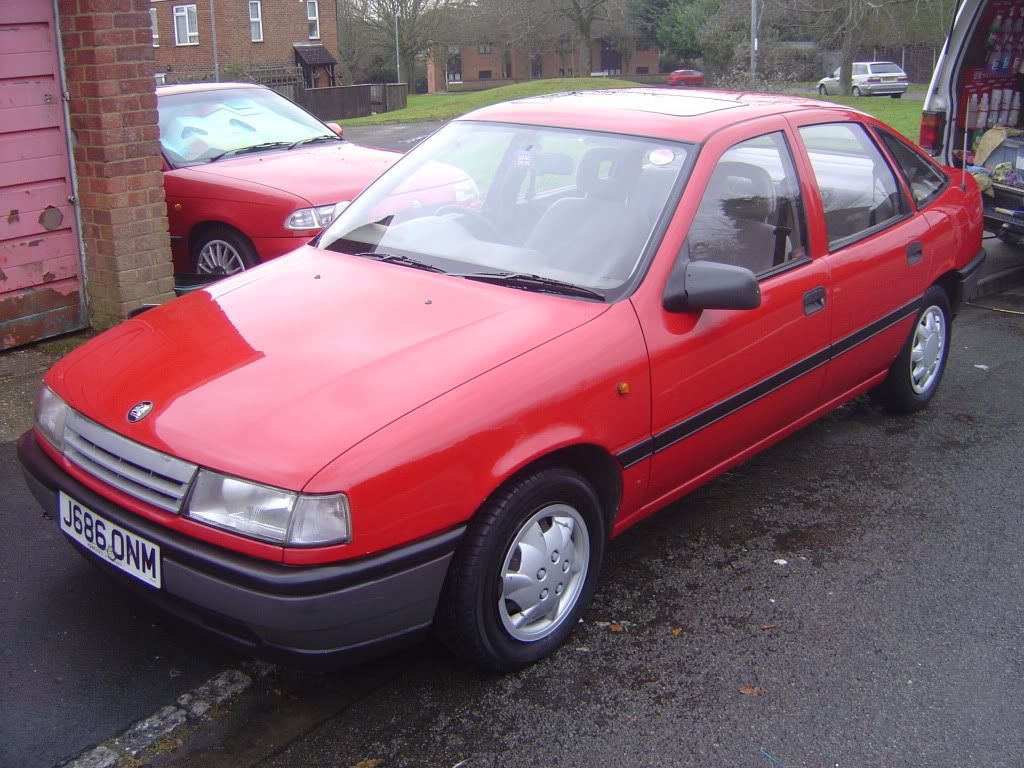
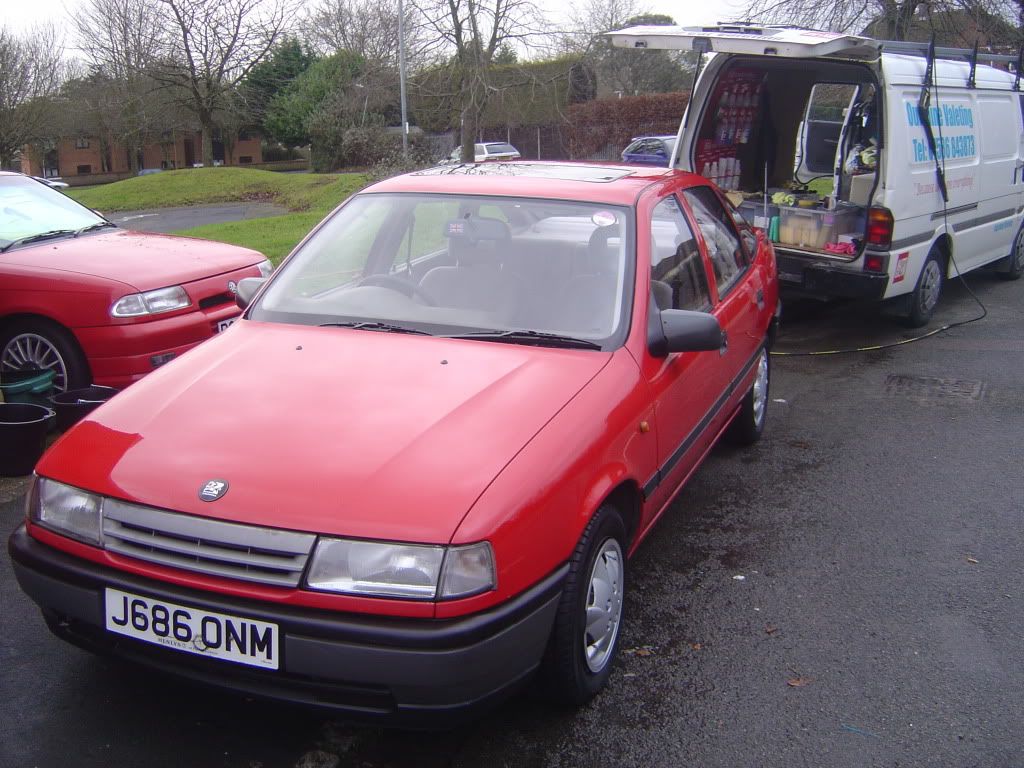
Now thats all the door shuts down, the wheels and arches, and the car has been snow foamed. We can now move onto the main wash..... to follow in next post......
OUTSHINE VALETING

Because Looks Are Everything
marksmith
Posts: 49
Joined: Fri Jan 14, 2011 6:47 pm
Location: High Wycombe, Bucks
Contact:

Re: CAV FULL EXTERIOR VALET

Post by marksmith »

For the main wash I am using Autoglym Shampoo. This does not foam up much but it does not mean its no good. The foam is not what cleans the car, its the solution, and the fact that there is less foam is a good thing as it makes it easier to avoid water marking.

Fill two buckets. One with shampoo solution and one with clean plain water. If you have not got a grit guard, get one, as this stops grit from the bucket from getting on your sponge/mitt.


Image
Image

Also, get a wash mitt instead of a sponge. Sponges can drag grit over your cars paint but a wash mitt is designed to lift the grit off the car and bury it into its fibres, well away from your paintwork. Start by dunking the mitt into the shampoo bucket, wash the car, then always remember to dunk it into the plain water bucket ( rinse bucket ) before dunking it back into the shampoo bucket. Also, if you have the grit guards, rub the mitt over the surface of the girt guard to remove any particles in the mitt.

Use two mitts - one for the top half of the car and one for the bottom half.

When washed, rinse car off and dry with a waffle towell or a microfibre. These are easily better for drying cars than the chamois leathers. Remember, we are polishing this car today so we do not need to worry about any water marks we leave behind at this stage, just so long as its dry. Also, dont forget inside the filler cap, and use a brush to clean this out as it will be easier - just try to avoid getting the brush on your paintwork.

Image
Image
Image
Image
Image

With the car now dry and clean, but with no shine at all, we can start on the paintwork.

First we need to get rid of the awful tar spots that collect on the bottom of the car. For this use Autoglym Tar Remover and spray or wipe the tar remover all over the tar affected spots. Give it a few minutes and this will soften it enough to be easily wiped away with a microfibre cloth.

Image

We are now ready to put the shine back onto this car. To be continued in the next post......
OUTSHINE VALETING

Because Looks Are Everything
marksmith
Posts: 49
Joined: Fri Jan 14, 2011 6:47 pm
Location: High Wycombe, Bucks
Contact:

Re: CAV FULL EXTERIOR VALET

Post by marksmith »

Not only has the old Cav lost its shine, but its started to fade to pink in places too. This was the hardest part of the whole car, the renovating of the paintwork. For this I use Autoglym Paint Renovator. Apply to the whole car with a dry clean cloth and rub into the paint. Apply a reasonable amount of pressure and only in "straight lines" and not "round and round". The paint renavtor takes a small layer of the bad paint off the car and leaves the good layer of paint underneath. You should not use Paint Renovator all the time as otherwise it will wear through all your paint, but its perfect for todays use to get the faded red paint off the car. Once the whoel car is done, use a new clean cloth to remove any excess. Note, we are not trying to get the car to shine with this stage, we are only trying to make it red again ! - The shine will come from the next steps.

Image
Image

Now moving on, we need to polish the car. For this I used Super Resin Polish, which is, in my opinion, the best ! Apply using a cloth in a circular motion to the cars paintwork. Work a panel at a time. DO NOT BUFF IT OFF. We need to just leave the car now and move onto other things to give the Polish time to cure and it will white.

Image
Image

While the Super Resin is curing, grab a bottle of Autoglym Bumper Care. This will make all unpainted exterior plastics look like new. Apply to a cut piece of sponge and wipe onto the trim. Dont worry about getting a small amount onto the paintwork as the Super Resin Polish is there protecting it and we can buff that off later. After you have treated all the exterior plastics with the bumper care, use a clean cloth to gently wipe over the trim to remove any excess gel.

Image
Image

Now its time to sort the grubby windows out. For this use Autoglym Car Glass Polish. This stuff is brilliant !. Wipe onto the windows in the same way as you applied the Super Resin Polsih to the paintwork. Once you have covered all the exterior glass, do not buff it off but instead go inside and apply the glass polish to the inside glass. This again, like the polish, needs to cure to a white colour so leave it well alone to cure for about 4 minutes. Oh, and before I forget, if you have any old or unwanted stickers in the windows, these are easily removed with a razor blade. Any glue adhesive left behind can be removed with the Autoglym Tar Remover but do this before you apply the glass polish.

Image
Image

So the cars starting to take shape now even though its covered in white powder !

This is now the fun part where we can see how are hard work has paid off. Take a clean microfibre cloth and start to buff the polish off. Start from the roof and work down in a circular motion. Super Resin Polish is so easy to buff off and requires very little pressure. Dont forget to buff the windows off at the same time.

Image
Image

The results are amazing, such a difference from the car we started off with this morning. However, we are not finished yet as we still want to pop a good coat of wax on the car. Remember, Polish improves and shines paint, wax protects it.

Image
Image
Image
Image
Image

Will move onto waxing in the next post.....
OUTSHINE VALETING

Because Looks Are Everything
marksmith
Posts: 49
Joined: Fri Jan 14, 2011 6:47 pm
Location: High Wycombe, Bucks
Contact:

Re: CAV FULL EXTERIOR VALET

Post by marksmith »

Moving on now to the wax. For this I used the Autoglym High Definition Wax. Its quite expensive ( abnout £30 on ebay ) but worth every penny as its the finest wax I have ever used and puts many £100 waxes to shame !

In the Wax Kit you also get two red applicating sponges and a microfibre. To apply the wax, dampen one of the red applicating sponges and rub on the top of the open wax pot to pick up enough to start. This stuff goes a long way and each "rub" on the wax should pretty much do a full panel almost.

Apply to the car in a small circular motion. Apply to all the cars paintwork and leave to cure the same way you let the super resin cure. This wax should be left at least 25 minutes, more the better and up to an hour.

Image
Image
Image

When cured, use the clean dry microfibre to buff the wax off, again in a circular motion. Try to avoid rubbing across any trim that you previously appplied Bumper Care too.

Once you have buffed this off, stand back and admire your gleaming car !!! and remember what it was like 4 hours earlier !!!!

Image
Image
Image
Image
Image
Image

Just an extra bit. I have something called a California Car Duster. Its a duster for the outside of the car as it is so soft it will not harm paintwork. It is perfect for a gently dusting over the car after its been polished just to remove any white dust left behind. They are available on ebay for about £10 and will really finish it off a treat !

Image
Image
Image

The finished car......

Image
Image
Image
Image

Tomorrow I will be doing the full works to the very dirty interior and will put a full write up on another thread on here tomorrow night.

Then next week I will do the same again showing the best way, and quickest and easiest way, to keep your car clean with a simple foam, rinse, wash, rinse, wax routine that takes no more than 45minutes to an hour.

Hope this proves to be useful to you.
OUTSHINE VALETING

Because Looks Are Everything
User avatar
Envoy CDX
Club Admin
Posts: 9680
Joined: Sun Sep 23, 2007 3:51 pm
Location: Jarrow, Newcastle Upon Tyne

Re: CAV FULL EXTERIOR VALET

Post by Envoy CDX »

That looks excellent :) well written up, and what looks to be an excellent finish. :thumb
Check the Rules!

Raw 8v Power! - Bad Cav, Naughty Cav... Cav want's to do 90!

The How2 Index
Locked