
Here is my interpretation of working on my C18NZ - back in the day.
(and C16NZ2)
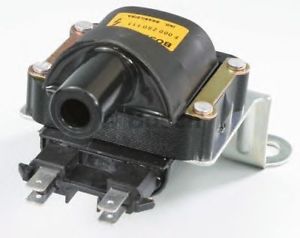
The 2.0 8 valve ( engines are very similar, but they do not have an ignition amplifier, and also have an old fashioned barrel shaped coil. (20NE, 20SEH and C20NE)
With regard to the distributor cap and HT leads, make sure that they are matching versions.
Some distributor caps have a pin inside the sockets - some dont.
Distributorless Ignition systems are different again - obviously.
------------------------------------------
1 - Preparation.
1a - Follow the lead from each plug and trace their paths to the distributor cap.
No1 plug is at the alternator and timing belt end. No4 is at the gearbox end.
1b - Unplug the lead from each plug, putting a marker on the lead so that you know where it came from.
Leave the leads connected to the dizzy cap, for reference.
------------------------------
2 - Plugs
2a - Remove, clean, re-gap and refit each plug.
Or
2b - Fit new plugs after checking the electrode gap.
It is common practice to put coppaslip / copper grease on the plug threads to make it easier to remove them at the next service.
Standard tightening torq is about 35Nm or 25-ish ft/lbs (Haynes says 18 ft/lbs
Gap size seems a little low to me, but quoted settings are...
0.7 to 0.8mm = 18 to 20 thou of an inch.
------------------------------
3 - Distributor Cap.
From memory the Distributor cap is held on by three external torx head bolts, E10 or E11 comes to mind, although a 1/4" standard hex socket will also work.
3a - Undo the three E bolts from the cap.
Depending how well the car is cared for, there should be a black 2-piece shrowd / cover clipped together around the terracotta coloured distributor cap.
Move the Cap aside for reference.
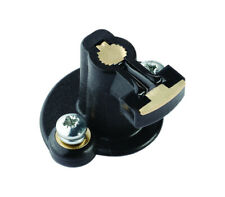
3b - Undo the two torx screws holding the rotor arm on. It is a funky shaped thing, and can only be fitted one way.
Pull the rotor off the spindle.
3c - lift away the black plastic spark insulator cover.
It should have a rubber 'O' ring on it's rear periphery to keep oil in the cam-shaft housing, and out of the distributor.
-------------------------------
4 - Rebuilding.
4a - wipe clean the spark insulator and refit it. (Push it into the bore of the camshaft housing).
4b - clean the edges of the rotor to bright and shiny brass, or replace with a new one.
Then refit the rotor to the spindle and tighten the two torx screws.
4c - if refitting the old distributor, ensure it is clean and dry inside. Also ensure that none of the internal terminals are badly burnt, pitted or damaged.
Light pitting can be gently cleaned up, otherwise replace with a new one.
4d - Fitting a new cap -
If still present, transfer the black shrowd from the old cap to the new one.
You need to remove the HT leads from the cap to remove the shrowd.
If so - mark on the old cap, the markings that you wrote on each lead.
So that if refitting the leads, you know where it came from,
Or for reference for setting up the new leads on the new cap.
4e - Fit the new distributor cap to the cam-shaft housing.
It will only fit one way.
Tighten up the three E bolts.
It should be noted that the 5 'fingers' of the distributor cap point down towards the bell housing.
The middle finger should be the 'king lead' or 'crown lead' to the coil on the nearside inner wing.
----------------------------------
5 - Fitting New Leads-
Lay the lead set out on a surface in size order.
The longest goes to plug one.
They get progressively shorter as you go towards plug 4.
This leaves a different looking lead for the coil connection.
Fit the leads to match the markings / notes that you made earlier.
Here is an image of the distributor cap found in one of James' threads.
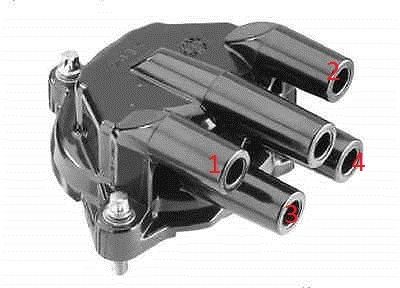
Looking at the cap as if from the lead pins
One --- Coil Lead --- Two
------Three ----- Four ------
Firing order is 1 - 3 - 4 - 2.
----------------------------
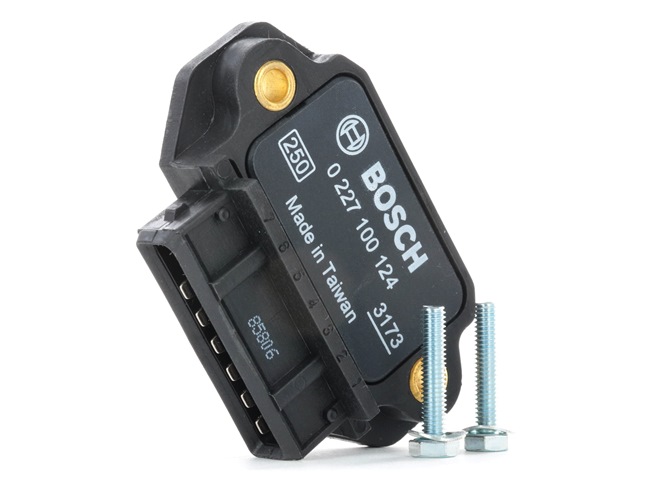
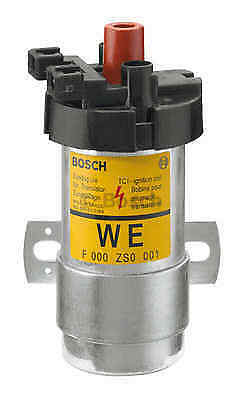
6 - Coil and Ignition Amplifier-
C18NZ and C16NZ2 Ignition Coil.
And Ignition Amplifier
-------------------------------
2.0 litre 8 valve (Single Over-Head Cam) Ignition Coil.
When fitting the coil lead, spend a couple of minutes checking the coil and amplifier for corrosion, dirt or condensation of the terminals - including the coil HT socket.
Clean and dry, then make up the connections ensuring that they are secure.
-------------------------
I have a random sounding tool kit that includes baby oil and vaseline.
Baby oil removes marks and residue from panels and parts.
The vaseline is used to coat electrical terminals to keep out moisture.
---------------------------------
On the amplifier and coil low tension terminals, ensure that they are clean and dry.
Smear with a coating of vaseline, and refit all connections.