Hi all,
Just a quick one, was wondering if removing the front wings is easy or a faff? I've got rust at the bottoms of both - I think where it used to have mud guards and some mud and mousture got trapped between the guard and the wing. Want to knock the rust back and respray the bottom sections before it gets too bad and thought it would be easier to take them off and spray them in the garage but not sure if they come off all that easy??
Cheers
Andrew
Front wing removal
Front wing removal
1991 H White 1.6L
1992 K Burgandy 1.6L
1989 F Lt Blue 2.0 CDI
1992 J Spectral Blue GSI2000
1995 M Black 2.0 SRI 16v Eco
1995 N Grey 1.8 GLS
1990 G Met. Red 2.0 SRi 20seh
1994 L Grey 2.5 V6
1992 J White GSI2000
So far...............
1992 K Burgandy 1.6L
1989 F Lt Blue 2.0 CDI
1992 J Spectral Blue GSI2000
1995 M Black 2.0 SRI 16v Eco
1995 N Grey 1.8 GLS
1990 G Met. Red 2.0 SRi 20seh
1994 L Grey 2.5 V6
1992 J White GSI2000
So far...............

Re: Front wing removal
The first job is to remove the front bumper.
The wings themselves are bolted in place.
About 7 Acme screws along the top edge (under the bonnet.
One at the base of the A pillar,
And probably a couple at the front below the indicators.
---------
Then you have about 8 or so plastic expanding rivets that you knock the centres out of, to release the wheel arch liner (although not 100% necessary as the liner is riveted to the inner wing, not the removable wing.
Other than that -
Remove the side repeater and watch out for corroded connectors.
A good time to change the connectors and bulb.
If you are just titivating, put marks on the other panel to remind you where the acme bolts were.
Just faffy rather than difficult.
Re: Front wing removal
I had a look at a Cavalier tonight in the unit.
There are two acme screw holes in the lower from edge of the wing, where it hides behind the bumper.
Everything else should be as I described above.
There are two acme screw holes in the lower from edge of the wing, where it hides behind the bumper.
Everything else should be as I described above.
Re: Front wing removal
Awesome thanks for this Robsey.
Will I be able to reuse the rivets or are they a write-off when you pop them out?
Will I be able to reuse the rivets or are they a write-off when you pop them out?
1991 H White 1.6L
1992 K Burgandy 1.6L
1989 F Lt Blue 2.0 CDI
1992 J Spectral Blue GSI2000
1995 M Black 2.0 SRI 16v Eco
1995 N Grey 1.8 GLS
1990 G Met. Red 2.0 SRi 20seh
1994 L Grey 2.5 V6
1992 J White GSI2000
So far...............
1992 K Burgandy 1.6L
1989 F Lt Blue 2.0 CDI
1992 J Spectral Blue GSI2000
1995 M Black 2.0 SRI 16v Eco
1995 N Grey 1.8 GLS
1990 G Met. Red 2.0 SRi 20seh
1994 L Grey 2.5 V6
1992 J White GSI2000
So far...............
Re: Front wing removal
If you can find the centre pins, then you can re-use them.
Them little buggers tend to ping off into oblivion.
I would leave them for now.
See if removing the screws is enough, first.
Them little buggers tend to ping off into oblivion.
I would leave them for now.
See if removing the screws is enough, first.

Re: Front wing removal
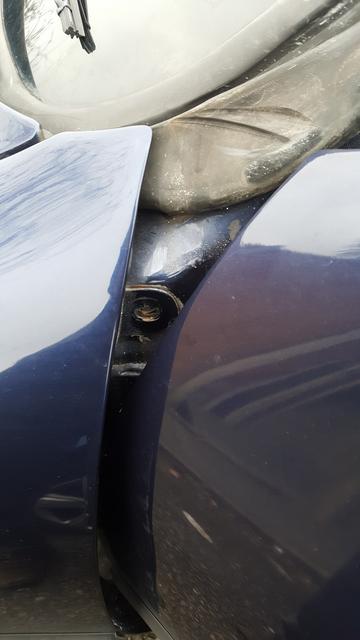
Is there some sort of glue on the top edge of the wing in the engine bay part, or is that a different car I'm thinking of.
David
Re: Front wing removal
I have seen an adhesive backed gasket type strip on some cars.
Some use a thick seam sealant between the panels.
Some use a thick seam sealant between the panels.
Re: Front wing removal
As it is a quiet day, I cranked up the old laptop and checked out the oracle that is TIS2000.
Instructions are as follows:-
Models 86,87,88, and 89.
86 - 4 door saloon / F19
87 - 4 door saloon / M19
88 - 5 door hatch / F66
89 - 5 door hatch / M68
Remove and disconnect
The "Turn Signal"
Assuming they mean the main indicator unit at the front corner.
Being primarily for Opel, they do not mention removal and disconnection of the UK Only side-repeater units.
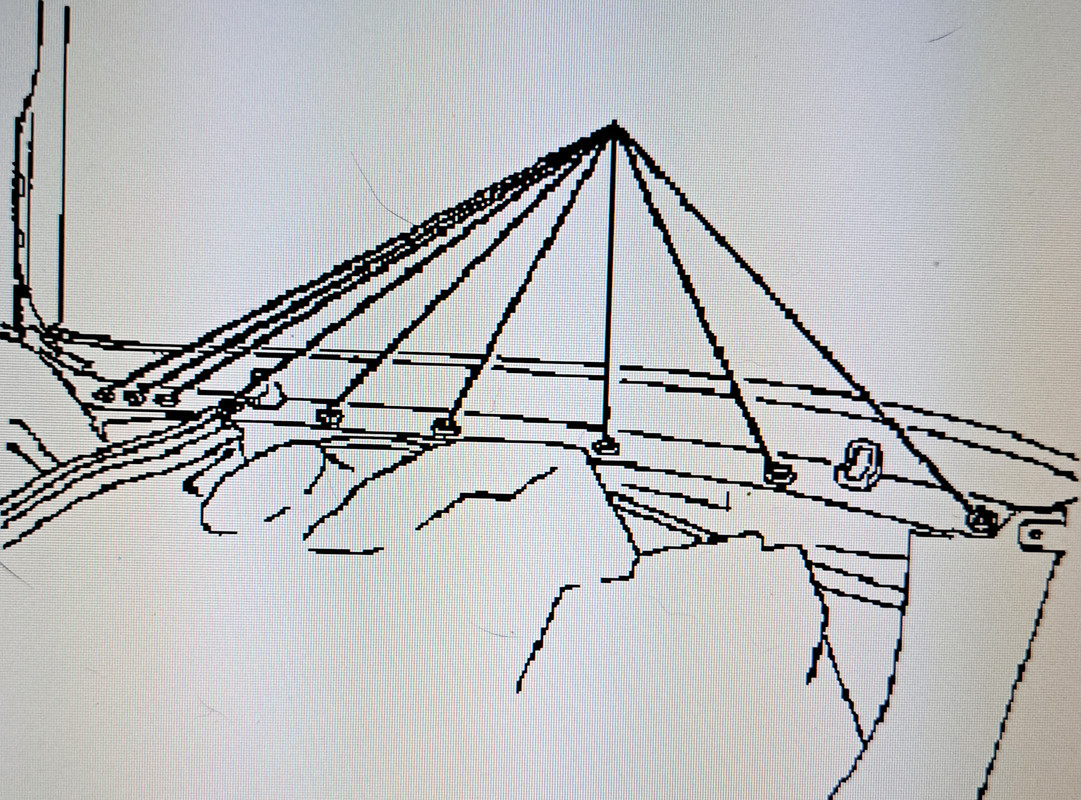
Undo the 9 bolts on the 'comb line' - a new term to me.
Support the bonnet
Protect bonnet and hinges from paint damage.
2 Bolts on the A pillar.
I forgot about the one hidden by the door skin.
Model 85 - The code for 2 door Coupe / Calibra / M07.
Partially loosen stone protector
1 bolt on inner A panel
2 bolts on wheel housing bracket.
Models 86,87,88, and 89
1 bolt on front of panelling.
Headlamp - group N
Illustration shows front wheel removed for clarity.
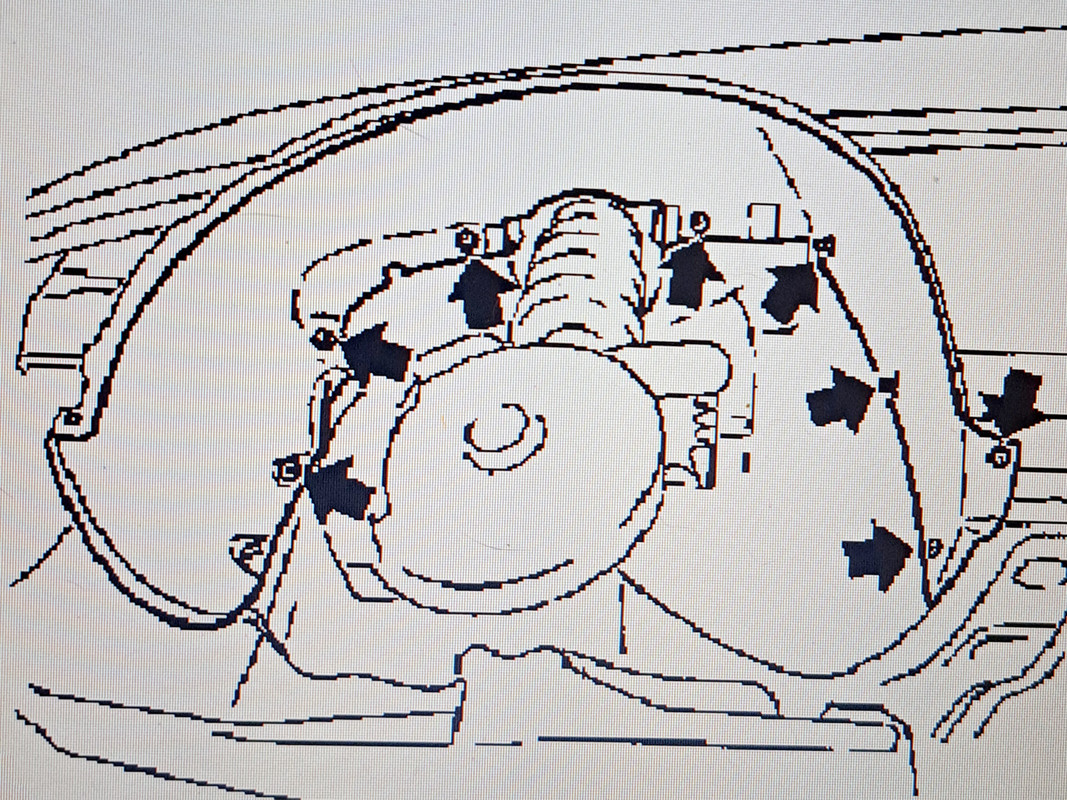
Protective trim from wheel housing.
Body-bound rivets (remove bolts)
(Make your mind up guys - rivets or bolts?)
Personally, I would undo the self tappers between the arch liner and the bumper, and forget about the rivets.
Plastic nuts from fixing bolts (huh ??)
Wing -
Remove sealing compound (thermo blade)
Installation.
Wing
Seal bolt flanges with sealing compound, align wings to neighbouring parts and bolt tightly.
Apply protective wax to inner side of wing.
Refit protective panelling, front panelling (bumper) and headlamp.
Model 85
Stone protector.
Carburettor engines, install water deflector.
Strange that they don't mention the indicators again.
Instructions are as follows:-
Models 86,87,88, and 89.
86 - 4 door saloon / F19
87 - 4 door saloon / M19
88 - 5 door hatch / F66
89 - 5 door hatch / M68
Remove and disconnect
The "Turn Signal"
Assuming they mean the main indicator unit at the front corner.
Being primarily for Opel, they do not mention removal and disconnection of the UK Only side-repeater units.
Undo the 9 bolts on the 'comb line' - a new term to me.
Support the bonnet
Protect bonnet and hinges from paint damage.
2 Bolts on the A pillar.
I forgot about the one hidden by the door skin.
Model 85 - The code for 2 door Coupe / Calibra / M07.
Partially loosen stone protector
1 bolt on inner A panel
2 bolts on wheel housing bracket.
Models 86,87,88, and 89
1 bolt on front of panelling.
Headlamp - group N
Illustration shows front wheel removed for clarity.
Protective trim from wheel housing.
Body-bound rivets (remove bolts)
(Make your mind up guys - rivets or bolts?)
Personally, I would undo the self tappers between the arch liner and the bumper, and forget about the rivets.
Plastic nuts from fixing bolts (huh ??)
Wing -
Remove sealing compound (thermo blade)
Installation.
Wing
Seal bolt flanges with sealing compound, align wings to neighbouring parts and bolt tightly.
Apply protective wax to inner side of wing.
Refit protective panelling, front panelling (bumper) and headlamp.
Model 85
Stone protector.
Carburettor engines, install water deflector.
Strange that they don't mention the indicators again.