Update #40 (otherwise known as ‘The Case of the Confusing Wing Mirrors’)...
I requested that the colour coded parts of both wing mirror plastics were painted while the car was at the bodyshop. Typically, the driver’s side cover had a hairline crack in it, so I decided to send a replacement to use instead of attempting to fix the broken part. The donor item was removed from one of my other cars, but Tom reported that he had difficulty in getting it to sit properly on the original mirror housing. The problem seems to be that the cracked cover was OEM, whereas the donor cover was an aftermarket part. Further inspection revealed a completely different design between locating points on mirror covers and, to my surprise, the mirror mounts themselves. Both are heated/motorised, but with very different internals. Needless to say, I raided the parts bin in an effort to get each side to sit without fault. What should have been a simple swap soon became a drawn out process involving three offside mirrors!
Before (the passenger side mirror casing was also causing problems):

During (different mirror internals, different locating points and case shapes. Time to mix and match! The third mirror kindly donated its glass and backing panel):


Locating points on a spare OE case I had lying around:

I managed to crack the nearside interior mirror panel during removal. Fortunately, I had a replacement ready and waiting. Even so, it was still pretty annoying:

After (the rubber seal is absent in this pic but was applied before reattaching the mirror to the car):


That was a thoroughly boring update. Suffice to say, the freshly painted mirrors are now in place and sat as they should be. Bravo etc.
The car was back home, taxed and ready for action. It seemed like a good time to get rid of the rough ol’ wheels that it wears during the winter months and return the powdercoated rims to their rightful home. Swapping the wheels also provided an opportunity for a timely inspection of each corner. Looks fine to me!

The inside of each wheel was washed, polished and waxed before repatriation:

And back where they belong (minus air, centre caps and a clean face!). Engine crane threatening more involved work in the not-too-distant future:

First oil change of the year. The magnetic sump plug seems to be doing a good job:


All cleaned up and ready to be screwed back in:


With the wing mirrors, wheels and rubber back in place (not to mention a sump full of fresh GM 10w40), it was almost time to meet up with NickSRi at Rockingham Motor Speedway where we would be flying the flag for the Mk3 Cavalier at the Retro Cars catch up and track session. All that was left for me to do was to undertake a thorough detailing of the car so that she was ready for her close up (the event will be featured in forthcoming issue of the mag).
A long day spent washing, polishing and waxing every inch of the car followed, although you can hardly tell from the following picture as I was running out of daylight by the time that I remembered to get snapping. I’ve got some photos from the event itself to post up shortly, although it was touch and go regarding my attendance; in spite of my efforts to detail the car, the battery refused to kick in when it was time to drive back into the garage! I temporarily robbed the Saab of its juicebox and put the Cavalier’s on an overnight charge. I think the battery is on its way out tbh, which is a bit of a pain as the MV6 is demanding a new battery too. Yay, more expense! Bah.

Despite the Saab’s best intentions, this failed to help matters:

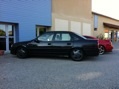
And a sneak peek from the following day at Rockingham. More to follow...