
Looks like a possible -
"How 2 - Strip and rebuild your front MacPherson Strut suspension legs"
Could be on the way...
Depends on the weather this weekend I suppose.
The actual procedure is simple enough - I just find that manuals, do not give clear details of individual bush and spacer locations.
So - I will produce a thread shortly to aid others.
Although by far the most important consideration will be using good quality spring compressors to allow the springs to be compressed, removed and refitted safely.
Enough said.
1994 Cavalier LSi C20NE (was C18NZ) Work-horse
Re: 1994 Cavalier LSi C20NE (was C18NZ) Work-horse
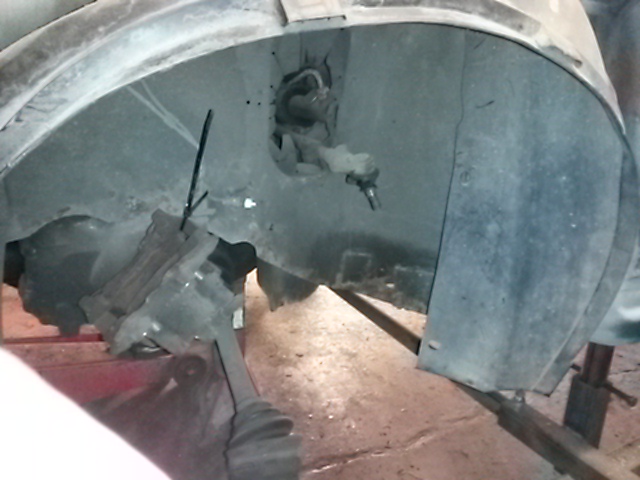
Last night I visited Troy's unit in order to drop the front suspension and subframe whilst he continued with the welding at the back of the car.
Typical for me, I did not do much of the work. Troy used his windy impact wrench to get most of the bolts out and he separated all the ball joints.
I dropped the exhaust down pipe to allow the subframe to be extricated.
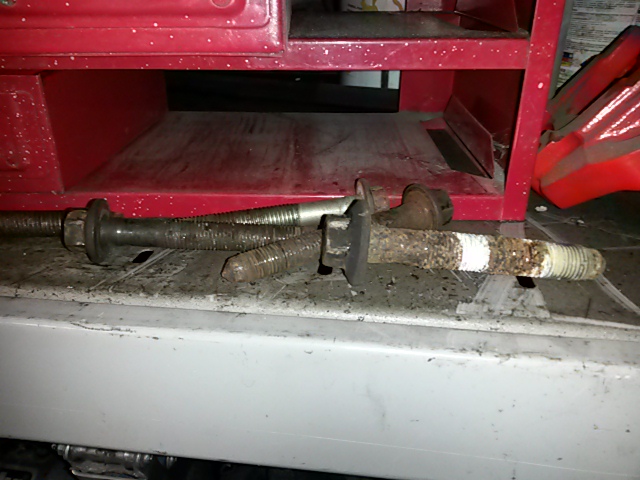
Here are some very poorly looking Subframe bolts
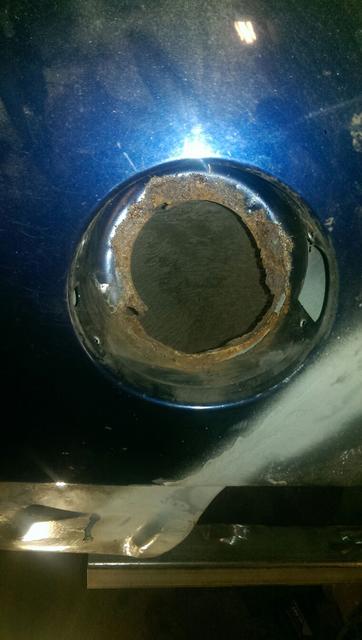
No major issues really until I put my right / off-side strut on the floor, and found this.
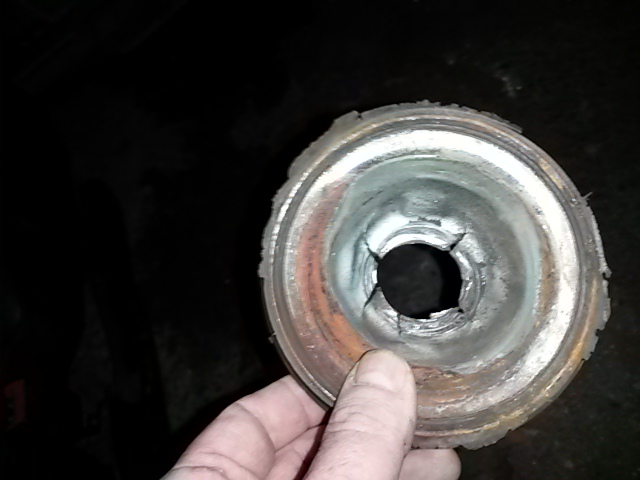
yup - the top mount was so worn after 250,000 miles, that it simply fell off the strut top. You can clearly see all the distortion and cracking around the hole.
Thank goodness that I bought 2 complete strut top mount assemblies.
Sadly -all my disruption meant that Troy did not get much progress on the off-side chassis rail. It is partially in, but still plenty to do before the rear beam can be dropped out, cleaned and powder coated.
Sorry Troy - I will try not to get in the way at the refit stage.
One last thing that niggled me - and apologies if this is a bit random.
but for a long time I had some paranoia over what looked like a hacksaw mark at the base of my wiper spindle.
Troy advises that it is a crack in the outer skin of the hatch, caused by the wiper spindle flexing the skin as it sweeps back and forth.
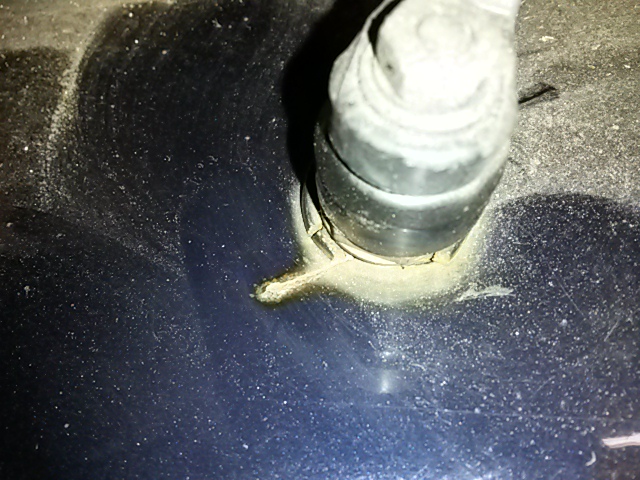
More skin repairs / welding to do.
Oops - sorry again.
Typical for me, I did not do much of the work. Troy used his windy impact wrench to get most of the bolts out and he separated all the ball joints.
I dropped the exhaust down pipe to allow the subframe to be extricated.
Here are some very poorly looking Subframe bolts
No major issues really until I put my right / off-side strut on the floor, and found this.
yup - the top mount was so worn after 250,000 miles, that it simply fell off the strut top. You can clearly see all the distortion and cracking around the hole.
Thank goodness that I bought 2 complete strut top mount assemblies.
Sadly -all my disruption meant that Troy did not get much progress on the off-side chassis rail. It is partially in, but still plenty to do before the rear beam can be dropped out, cleaned and powder coated.
Sorry Troy - I will try not to get in the way at the refit stage.
One last thing that niggled me - and apologies if this is a bit random.
but for a long time I had some paranoia over what looked like a hacksaw mark at the base of my wiper spindle.
Troy advises that it is a crack in the outer skin of the hatch, caused by the wiper spindle flexing the skin as it sweeps back and forth.
More skin repairs / welding to do.
Oops - sorry again.
Re: 1994 Cavalier LSi C20NE (was C18NZ) Work-horse
As a side note - I took and only used my own tools for the work.
Troy did give me full reign over his tools and equipment -
But I am from the old skool of engineers, where you treat your friend's / colleagues tools like you would treat his wife.
You can look, but you never touch.
Troy did give me full reign over his tools and equipment -
But I am from the old skool of engineers, where you treat your friend's / colleagues tools like you would treat his wife.
You can look, but you never touch.
Re: 1994 Cavalier LSi C20NE (was C18NZ) Work-horse
Almost the last of the parts for the Cav.
It will have virtually completely new front suspension legs.
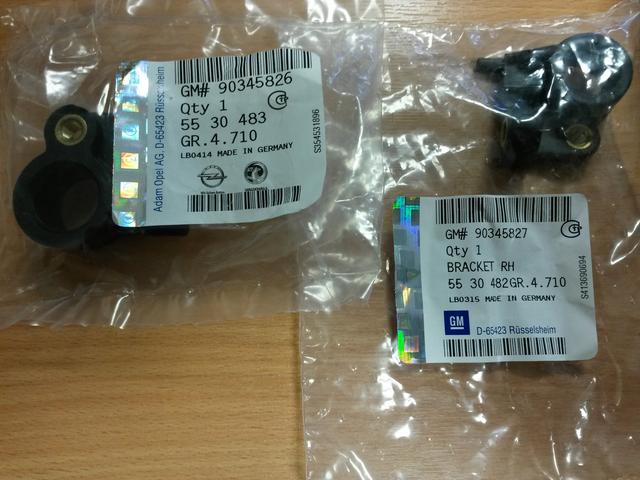
As usual, all parts are showing the relevant GM part numbers on the packaging.
The only original 21 year old parts will be the legs, hubs and ABS sensors.
So here are the parts
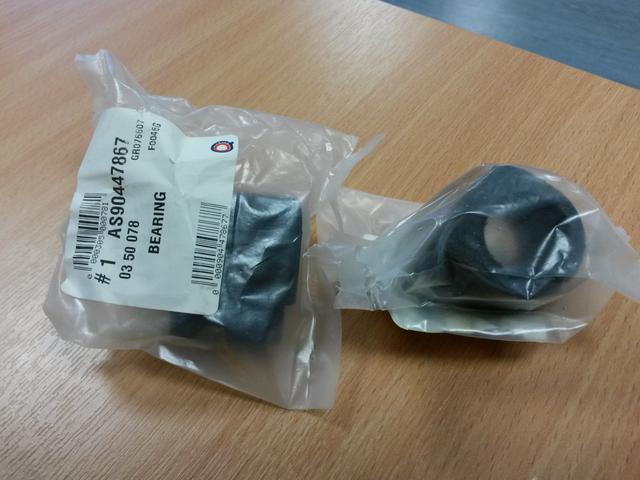
Original GM bearings.

Original GM ABS sensor mounts.
(After 21 years the originals become brittle and break easily, or the fixture bolt rusts solid into place).
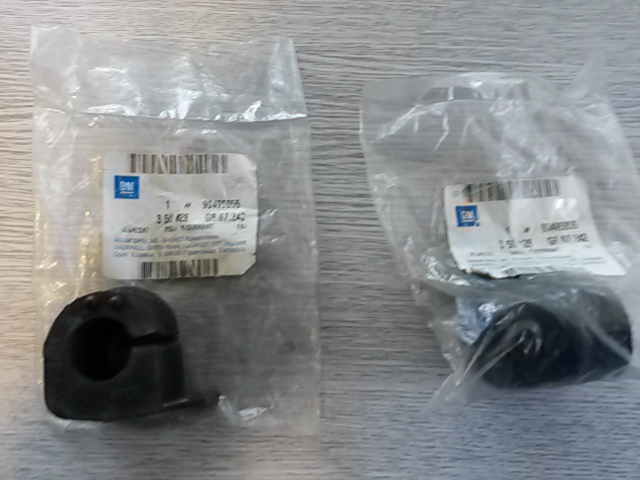
Original front ARB bushes.
Don't know why, but I ordered the wrong size bushes.
These are for 22mm anti-roll bars.
My bar is of the later type with the eyelets on the ends for the drop-links.
This type of bar should be 20mm diameter.
It will have virtually completely new front suspension legs.
As usual, all parts are showing the relevant GM part numbers on the packaging.
The only original 21 year old parts will be the legs, hubs and ABS sensors.
So here are the parts
Original GM bearings.
Original GM ABS sensor mounts.
(After 21 years the originals become brittle and break easily, or the fixture bolt rusts solid into place).
Original front ARB bushes.
Don't know why, but I ordered the wrong size bushes.
These are for 22mm anti-roll bars.
My bar is of the later type with the eyelets on the ends for the drop-links.
This type of bar should be 20mm diameter.
Re: 1994 Cavalier LSi C20NE (was C18NZ) Work-horse
I was looking at those little metal sleeves on ebay the other night for the vertical wishbone bolts.
Typical prices for pattern parts was £6.50 each - so £26.00 for a set of 4.
Genuine parts search price was 22p each.
Wtf !!
88p for all 4 - gulp!!
So the moral to this is - don't expect ebay to be cheaper that Vauxhall original parts.
Admittedly, this was a special offer price.
Normal price is about 50 or 60 pence each.
Still a 10th of the ebay price!!
Even with courier delivery you save £20 !! compared to ebay.
-
joe cavalier sri

- Registered user
- Posts: 1238
- Joined: Thu Dec 29, 2011 2:16 am
- Location: sunny old yorkshire
- Contact:
Re: 1994 Cavalier LSi C20NE (was C18NZ) Work-horse
is one of the front wheel bearings bigger than the other the outer diameter ?
Re: 1994 Cavalier LSi C20NE (was C18NZ) Work-horse
Nope - they shouldn't be as they are the same part number.
Re: 1994 Cavalier LSi C20NE (was C18NZ) Work-horse
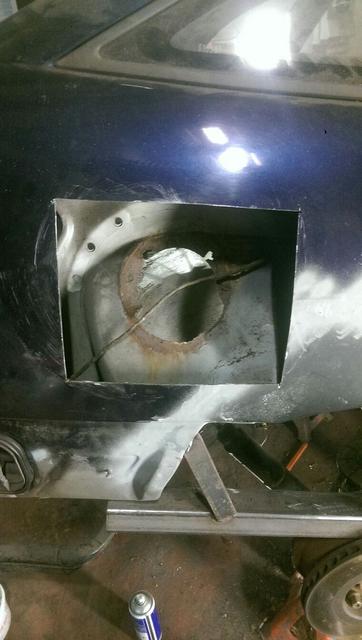
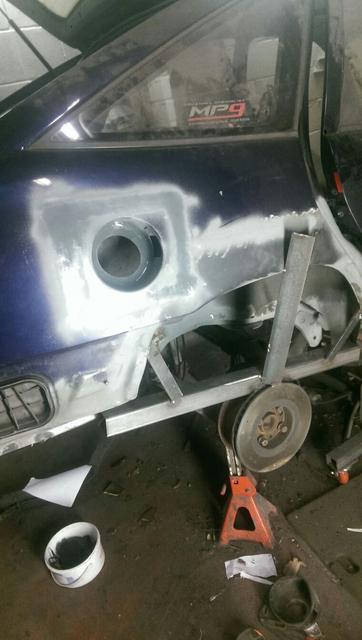
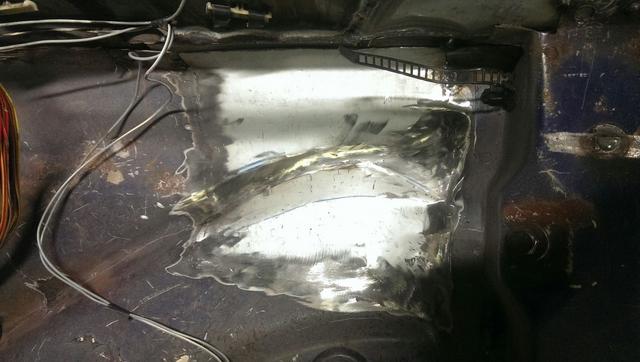
A little selection of pictures portraying Troy's repair to my petrol filler neck in the rear wing.
He cut out a big section of wing to provide better access to the necessary panels.
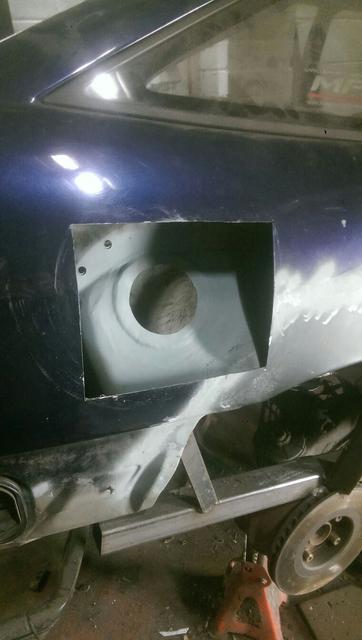
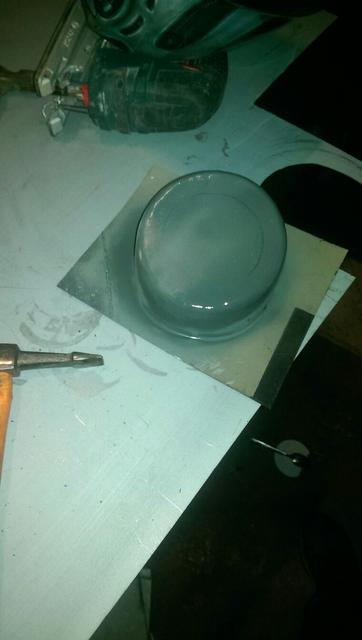
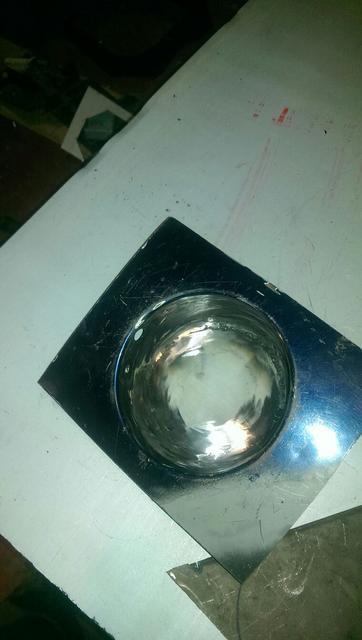
And finished...
He cut out a big section of wing to provide better access to the necessary panels.
And finished...
-
James McGrath
- Club Admin
- Posts: 2897
- Joined: Tue Aug 11, 2009 11:35 am
- Location: East Sussex
Re: 1994 Cavalier LSi C20NE (was C18NZ) Work-horse
Very neat work indeed.
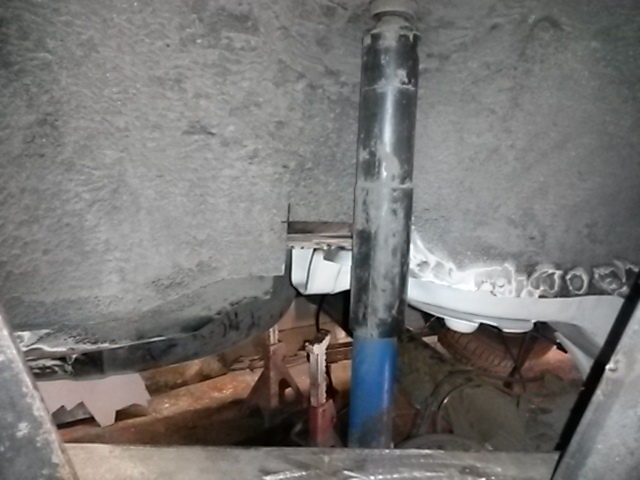
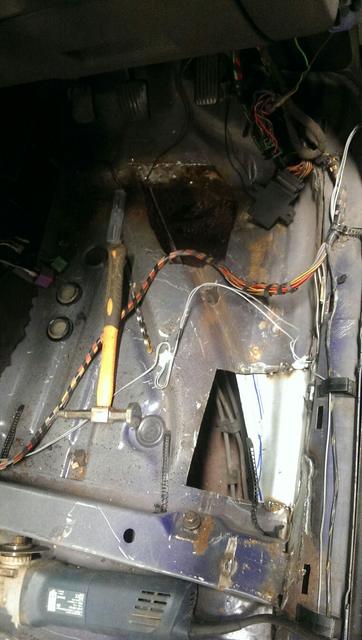
Interesting makeshift support frame. Is that an extra brake disc bolted on top of the hub?
Interesting makeshift support frame. Is that an extra brake disc bolted on top of the hub?
Re: 1994 Cavalier LSi C20NE (was C18NZ) Work-horse
Yes - it is indeed a brake disc fitted inside-out and bolted through the rear drum of my car into the hub.
It is done like this to ensure that the trailing arm maintains it's position.
The front trailing arm mount holes in the chassis rails are used to ensure that the chassis rail itself is fitted 100% spot-on.
A much simpler and more accurate method than the usual spacer frames that you normally see tacked onto the underside of the car.
-
James McGrath
- Club Admin
- Posts: 2897
- Joined: Tue Aug 11, 2009 11:35 am
- Location: East Sussex
Re: 1994 Cavalier LSi C20NE (was C18NZ) Work-horse
The correct front Anti Roll Bar bushes arrived today.
These are the only part number quoted on ECAT24 for the anti roll bar with bolt through drop links.
90 495 055
These are the only part number quoted on ECAT24 for the anti roll bar with bolt through drop links.
90 495 055
-
Lowrider Dave

- Club Admin
- Posts: 2993
- Joined: Wed Dec 22, 2010 10:00 am
- Location: Southampton
- Contact:
Re: 1994 Cavalier LSi C20NE (was C18NZ) Work-horse
Superb fabrication work!
Re: 1994 Cavalier LSi C20NE (was C18NZ) Work-horse
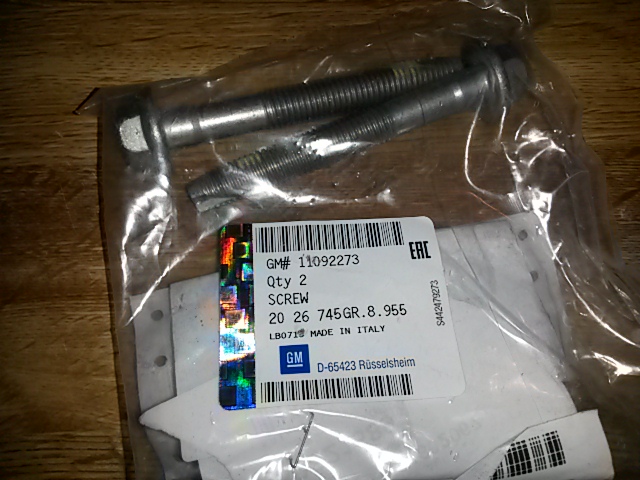
For the part number loving people,
Here are the bolts and part numbers for the front subframe and wishbone,
11091633
M12 x 27 front subframe screw
11091643
M12 x 90 rear wishbone screw.
90304130 although the number is different below -9179555.
M14 x 91 main subframe screw
11092273
M12 x 90 horizontal wishbone screw
and the 5 pack of bolts is the rear damper bottom mounting bolt.

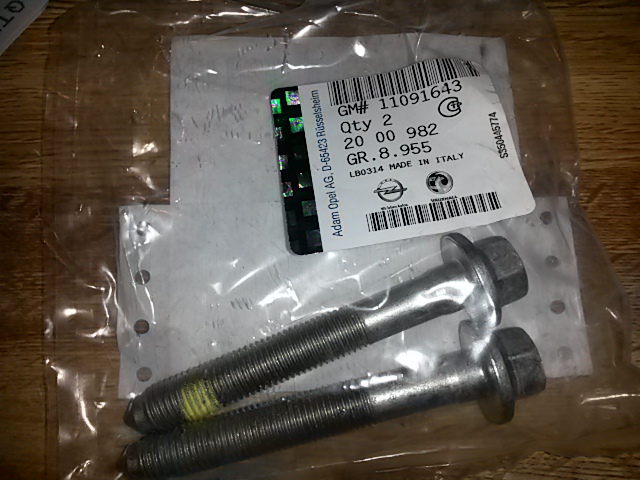

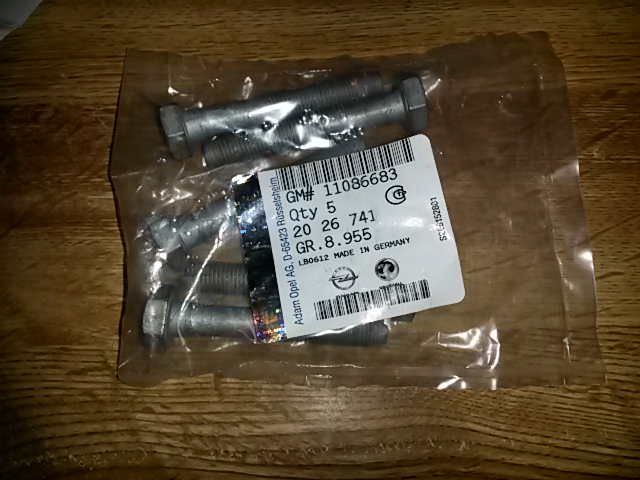
The rear damper bottom bolts can only be ordered in packs of 5... so I now have 3 spares. M10 x 63mm or something springs to mind.
(Not suitable for IRS set ups, as these have M14 bolts instead).
Here are the bolts and part numbers for the front subframe and wishbone,
11091633
M12 x 27 front subframe screw
11091643
M12 x 90 rear wishbone screw.
90304130 although the number is different below -9179555.
M14 x 91 main subframe screw
11092273
M12 x 90 horizontal wishbone screw
and the 5 pack of bolts is the rear damper bottom mounting bolt.
The rear damper bottom bolts can only be ordered in packs of 5... so I now have 3 spares. M10 x 63mm or something springs to mind.
(Not suitable for IRS set ups, as these have M14 bolts instead).
Re: 1994 Cavalier LSi C20NE (was C18NZ) Work-horse
Regarding the welding work -
I believe that the off-side / driver's side rear chassis rail is now welded in complete.
So looks like it is the foot-wells and the front wheel wells left to do.
I have finally finished remaking the display surround to accommodate the sat nav display properly.
Just trying to find a paint finish that I like.
Satin black is still too shiny, and shows all the minor imperfections.
May resort to a very thin vinyl layer, or trying "dash wrinkle" spray paint to recreate a vinyl / leatherette dash looking effect.
We shall see.
-
James McGrath
- Club Admin
- Posts: 2897
- Joined: Tue Aug 11, 2009 11:35 am
- Location: East Sussex
Re: 1994 Cavalier LSi C20NE (was C18NZ) Work-horse
Nice updates! 
Loving the genuine parts haul.
Loving the genuine parts haul.
Re: 1994 Cavalier LSi C20NE (was C18NZ) Work-horse
Where suspension and brake parts are concerned, I wanted to fit original bolts.
There are so many inferior parts out there, and I didn't want to start cutting bolts to length and so on.
There are so many inferior parts out there, and I didn't want to start cutting bolts to length and so on.
Re: 1994 Cavalier LSi C20NE (was C18NZ) Work-horse
http://www.amazon.co.uk/Wayside-Plastic ... B00DHHZ54E
this will blend the plastic look better if your being criticle :thumb
this will blend the plastic look better if your being criticle :thumb
Re: 1994 Cavalier LSi C20NE (was C18NZ) Work-horse
btcctroy wrote:http://www.amazon.co.uk/Wayside-Plastic ... B00DHHZ54E
this will blend the plastic look better if your being criticle
Thanks for that.... most links that I have searched point to VHT crackle finish paint for engines.
Definitely one for my bookmarks.
Re: 1994 Cavalier LSi C20NE (was C18NZ) Work-horse
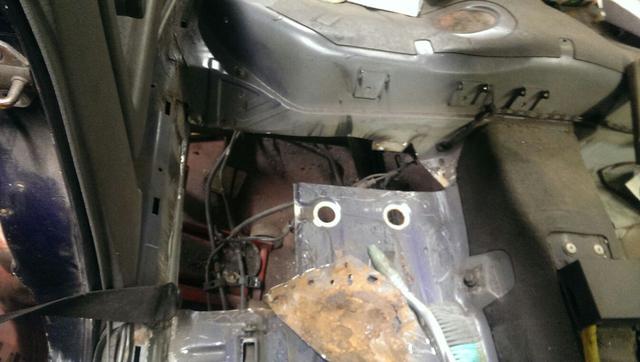
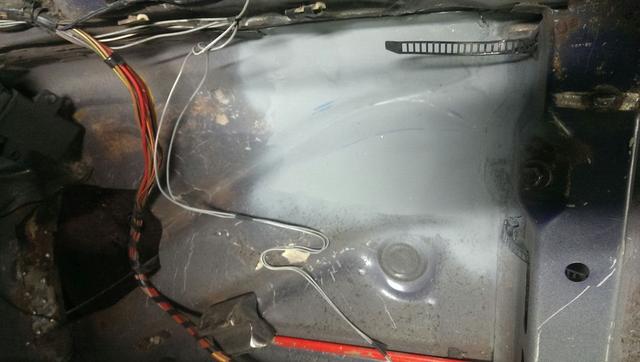
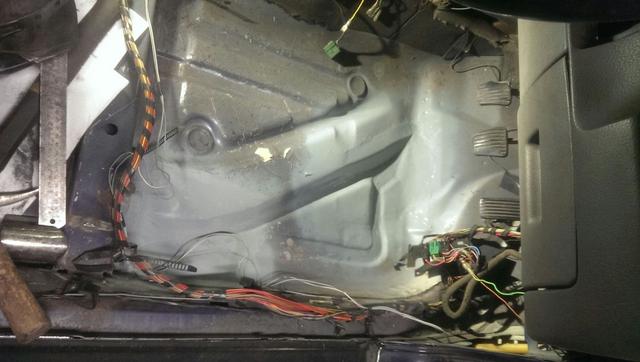
Well Troy has been a busy bunny again..
Repairing the front driver's floor pan and footwell.
Surprisingly, unlike previous cars, the VIN stamp was free of rust and so still remains intact.
Anyway -
Here are some more images sent to me by Troy.
Repairing the front driver's floor pan and footwell.
Surprisingly, unlike previous cars, the VIN stamp was free of rust and so still remains intact.
Anyway -
Here are some more images sent to me by Troy.
Re: 1994 Cavalier LSi C20NE (was C18NZ) Work-horse
As for me...
More parts ordering...ordered a pair of front disc shields and front damper gaiters.
my gaiters / bellows were splitting and worn.
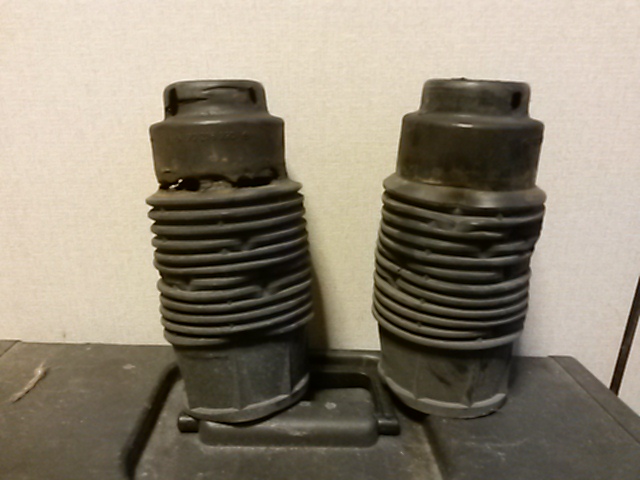
Pictures to follow when the new parts arrive later this week.
Yesterday, Troy dropped off all my subframes, strut legs and anti-roll bars for stripping down, cleaning and powder coating ready for reassembly and returning to Troy's unit for the final rebuilding to begin.
I have some Por 15 Marine Clean and Por 15 etch prime / metal prep on it's way, so that I can clean and protect as much as possible prior to assembly.
As a final comment - Troy advised that both (original) front bearings were shot, even before the hubs were pressed out of the legs. Ooops!!
More parts ordering...ordered a pair of front disc shields and front damper gaiters.
my gaiters / bellows were splitting and worn.
Pictures to follow when the new parts arrive later this week.
Yesterday, Troy dropped off all my subframes, strut legs and anti-roll bars for stripping down, cleaning and powder coating ready for reassembly and returning to Troy's unit for the final rebuilding to begin.
I have some Por 15 Marine Clean and Por 15 etch prime / metal prep on it's way, so that I can clean and protect as much as possible prior to assembly.
As a final comment - Troy advised that both (original) front bearings were shot, even before the hubs were pressed out of the legs. Ooops!!
Re: 1994 Cavalier LSi C20NE (was C18NZ) Work-horse
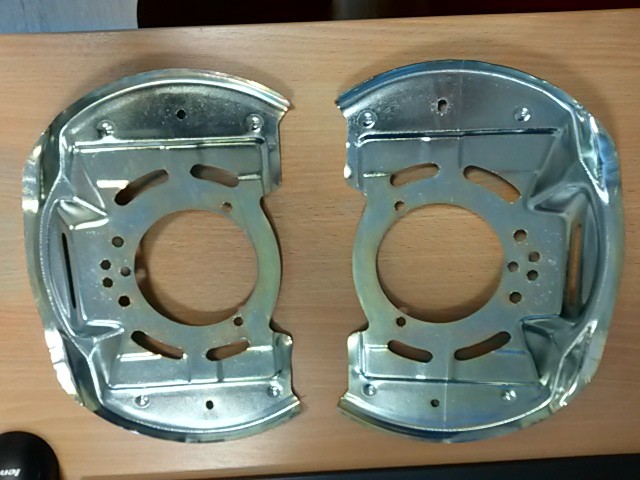
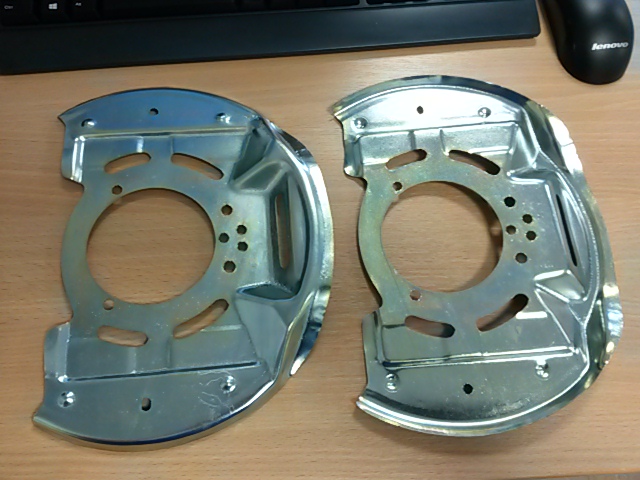
Front disc shields arrived.
Shiny zinc plated.
Not original or original quality but better than nothing.
Klokkerholm parts ordered through ebay.
A bit rough (see the rough edged laser cut holes and wavey profiled slots).
Shiny zinc plated.
Not original or original quality but better than nothing.
Klokkerholm parts ordered through ebay.
A bit rough (see the rough edged laser cut holes and wavey profiled slots).
-
Envoy CDX

- Club Admin
- Posts: 9683
- Joined: Sun Sep 23, 2007 3:51 pm
- Location: Jarrow, Newcastle Upon Tyne
Re: 1994 Cavalier LSi C20NE (was C18NZ) Work-horse
Nice work on the dash there Rob! Troy has it on the money with the textured paint I think. However, if you want it smooth, use a matt rather than a satin.
Nice metalwork Troy - you'll be knocking up repair panels next!
Nice metalwork Troy - you'll be knocking up repair panels next!
Re: 1994 Cavalier LSi C20NE (was C18NZ) Work-horse
The display surround came up okay with textured paint...
less shiny and more pronounced texture if sprayed from approx 18 inches away
(46cm for you young 'uns).
Still too smooth and shiny if sprayed any closer than that.
It should be noted that there are various grades of texture available.
I used fine texture.. A proper "pinseal" texture would require a coarse texture paint.
-
Envoy CDX
- Club Admin
- Posts: 9683
- Joined: Sun Sep 23, 2007 3:51 pm
- Location: Jarrow, Newcastle Upon Tyne
Re: 1994 Cavalier LSi C20NE (was C18NZ) Work-horse
Handy to know 