This is my new cavalier project. Ive been a member here before and this is now my 4th cavalier ive owned.
My first car was a 1.7TD Cavalier in green which i did a lot of restoration work and mods to around 14 years ago. Unfortunately i lost the storage for it and had to get rid. A couple years later i picked up a 1.8 8v which was our first family car, i did the work to get it back on the road and ran it for a while before selling it on. Next up is the one is miss the most, 2.5 v6 Cesaro which i only had for a short period as i had to sell it too.
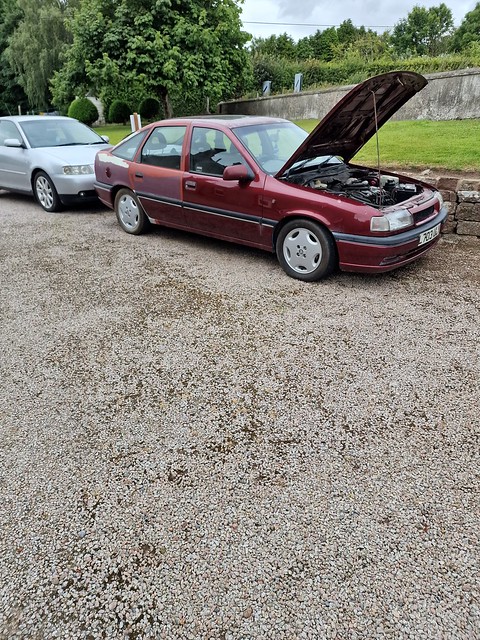
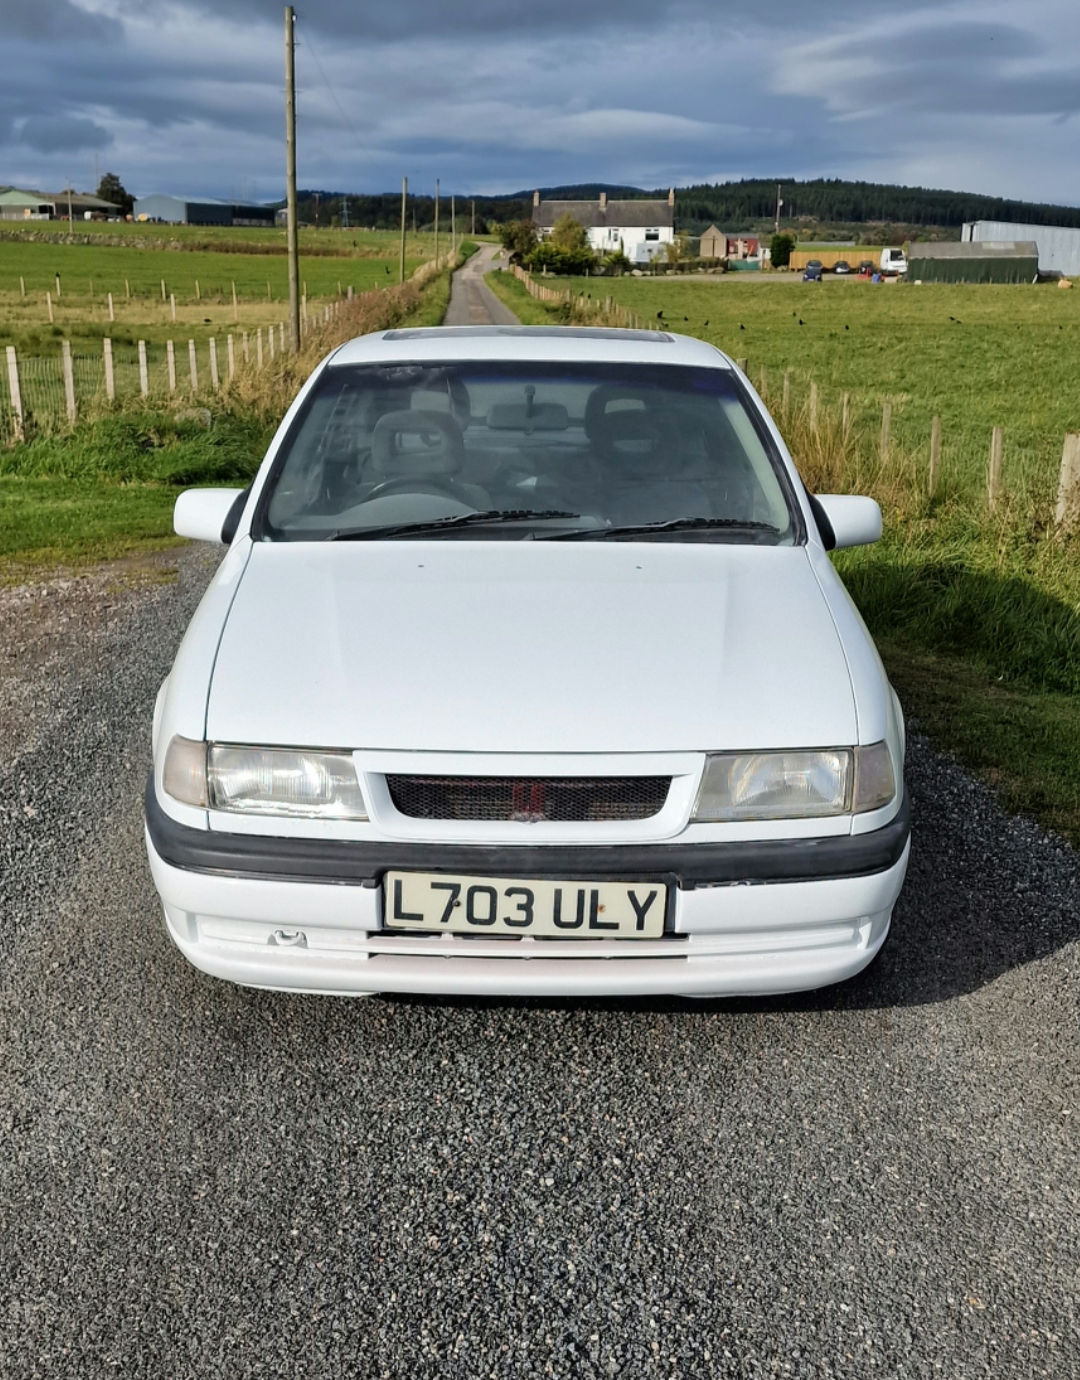
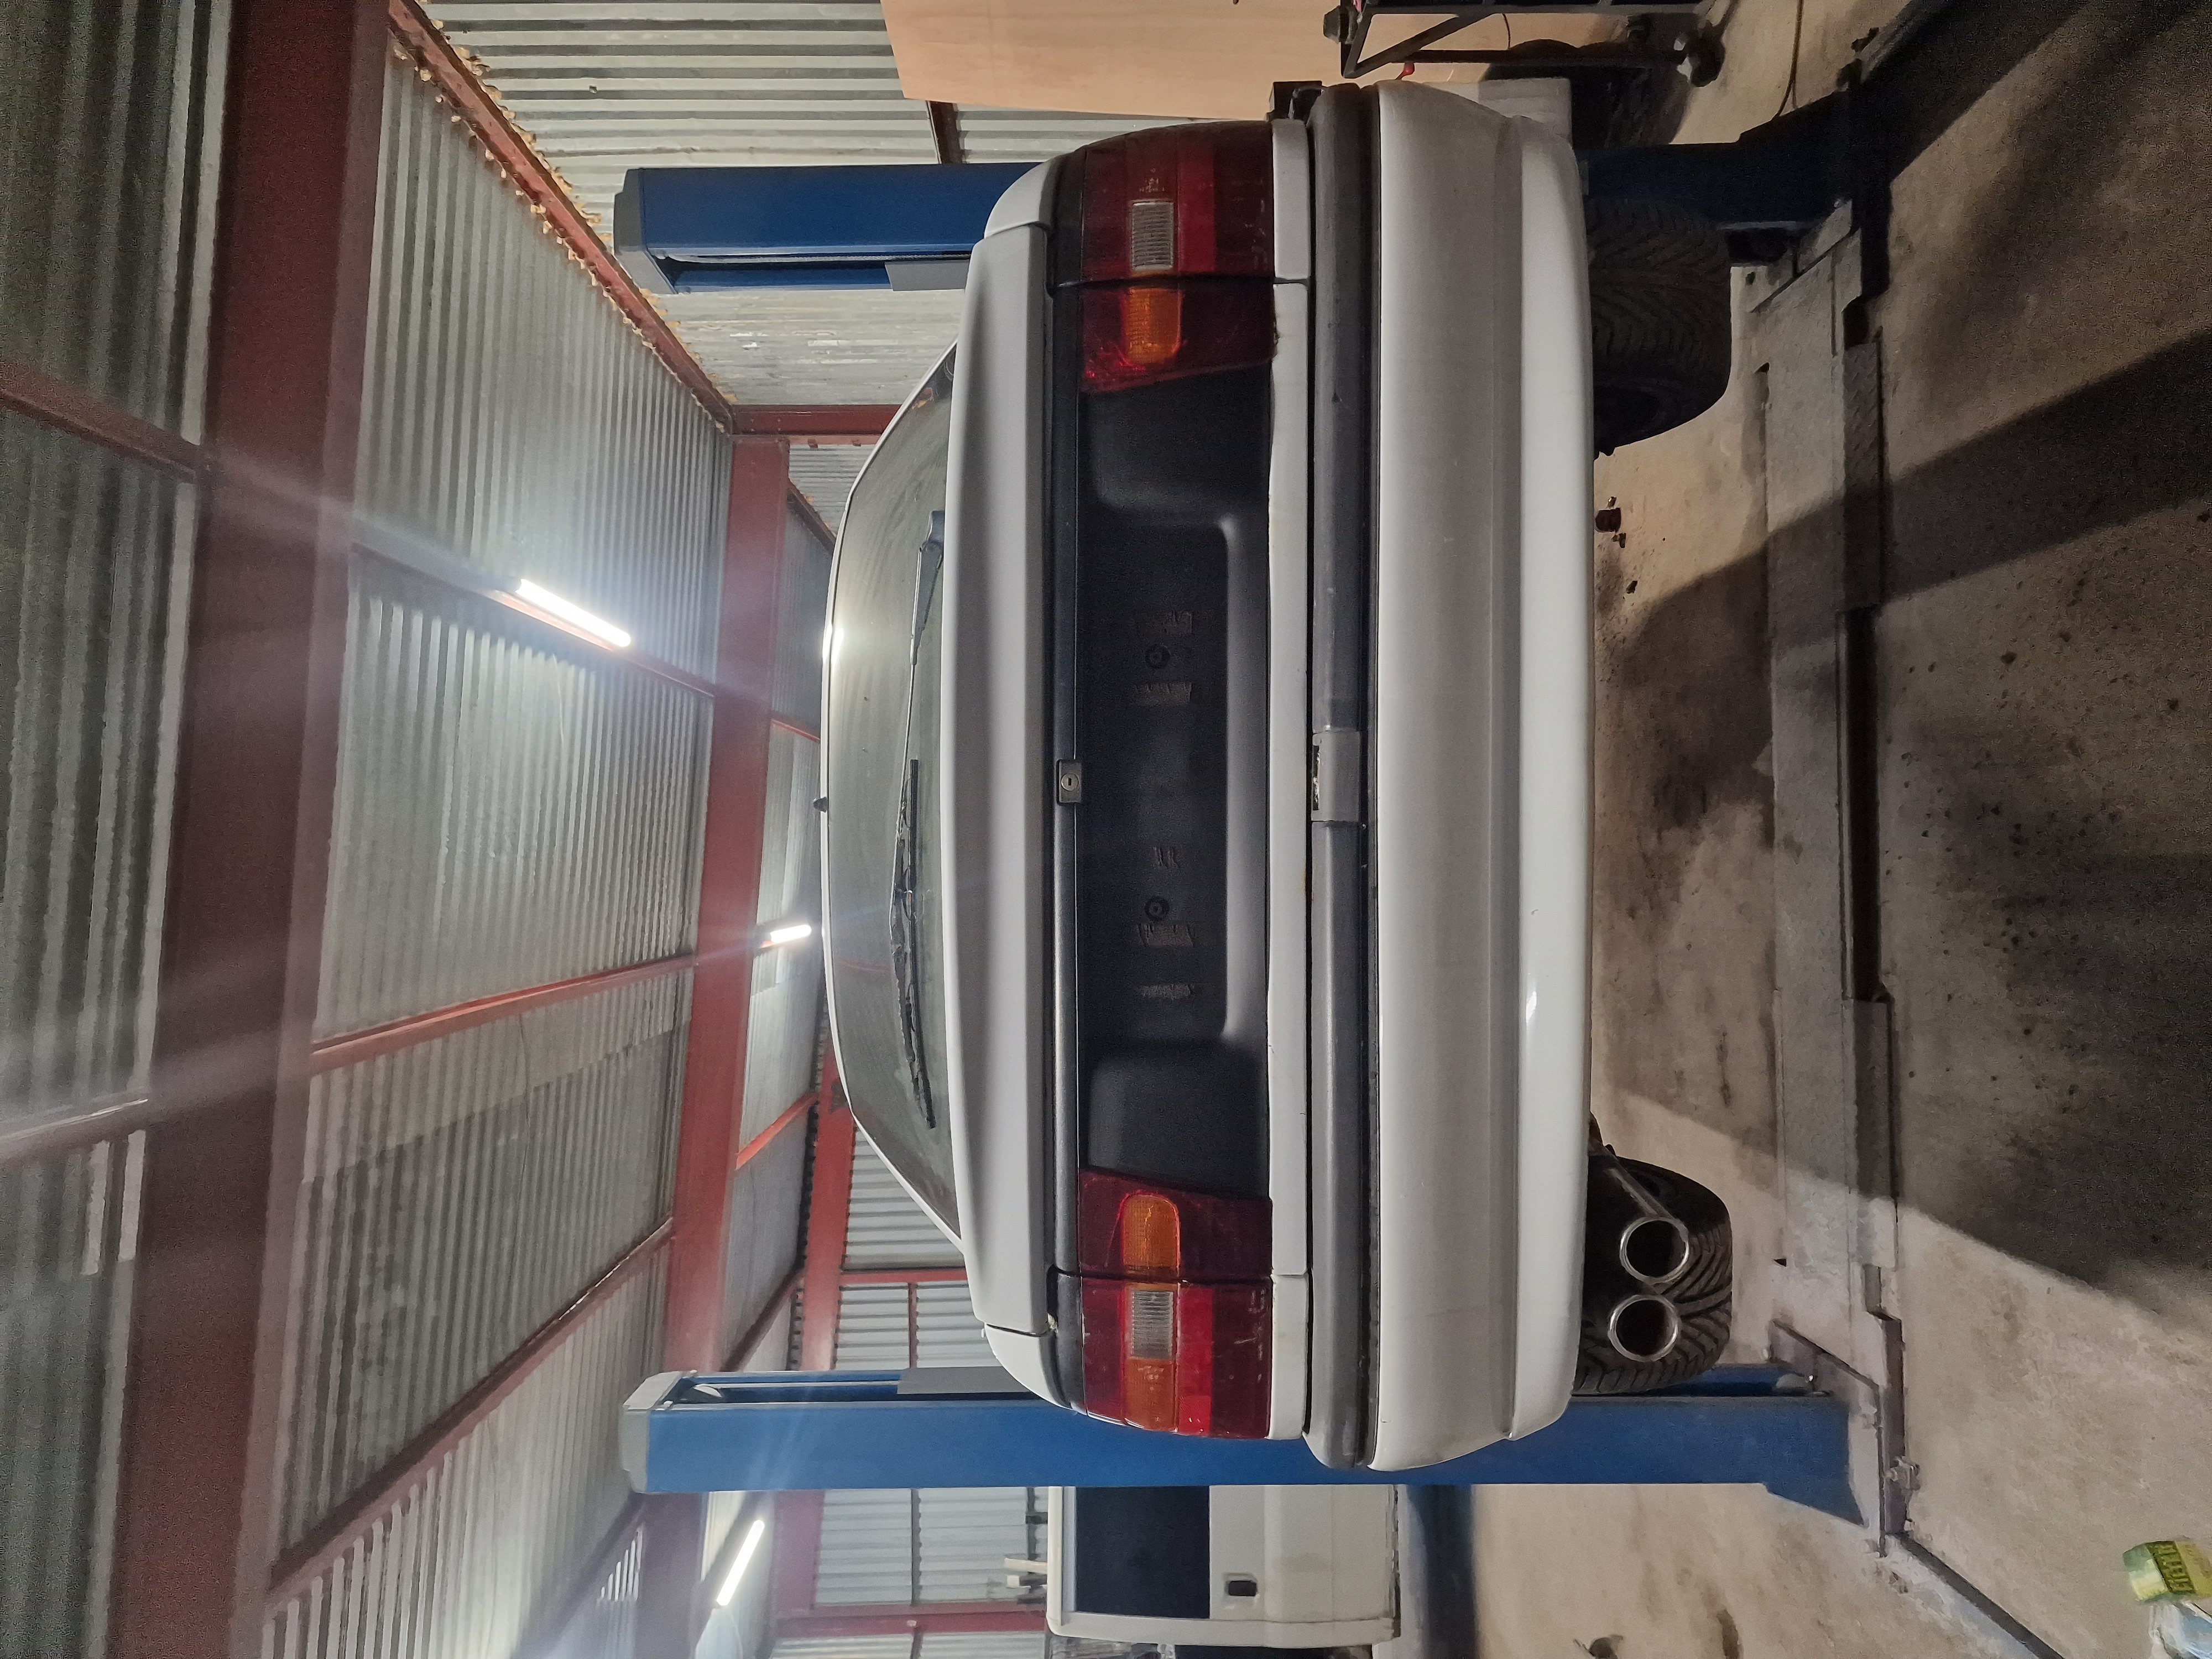
On to my new cavalier, its a 2.0 8v GLS Auto. 1993 'L' Reg model, it came up local to me and i couldnt resist it as ive always told myself ill get another one. Its extremely rough cosmetically with a huge amount of lacquer peel which the previous owner sanded and tried to work with but i think he just made it worse as theres alot of surface rust.
I got no service history with it but it starts and drove home, planning to a semi restoration on it with some upgraded parts along the way. I have no intentions of selling it any time soon so will be doing the best i can to get the car to a decent condition.
First plans are:
New rear arches
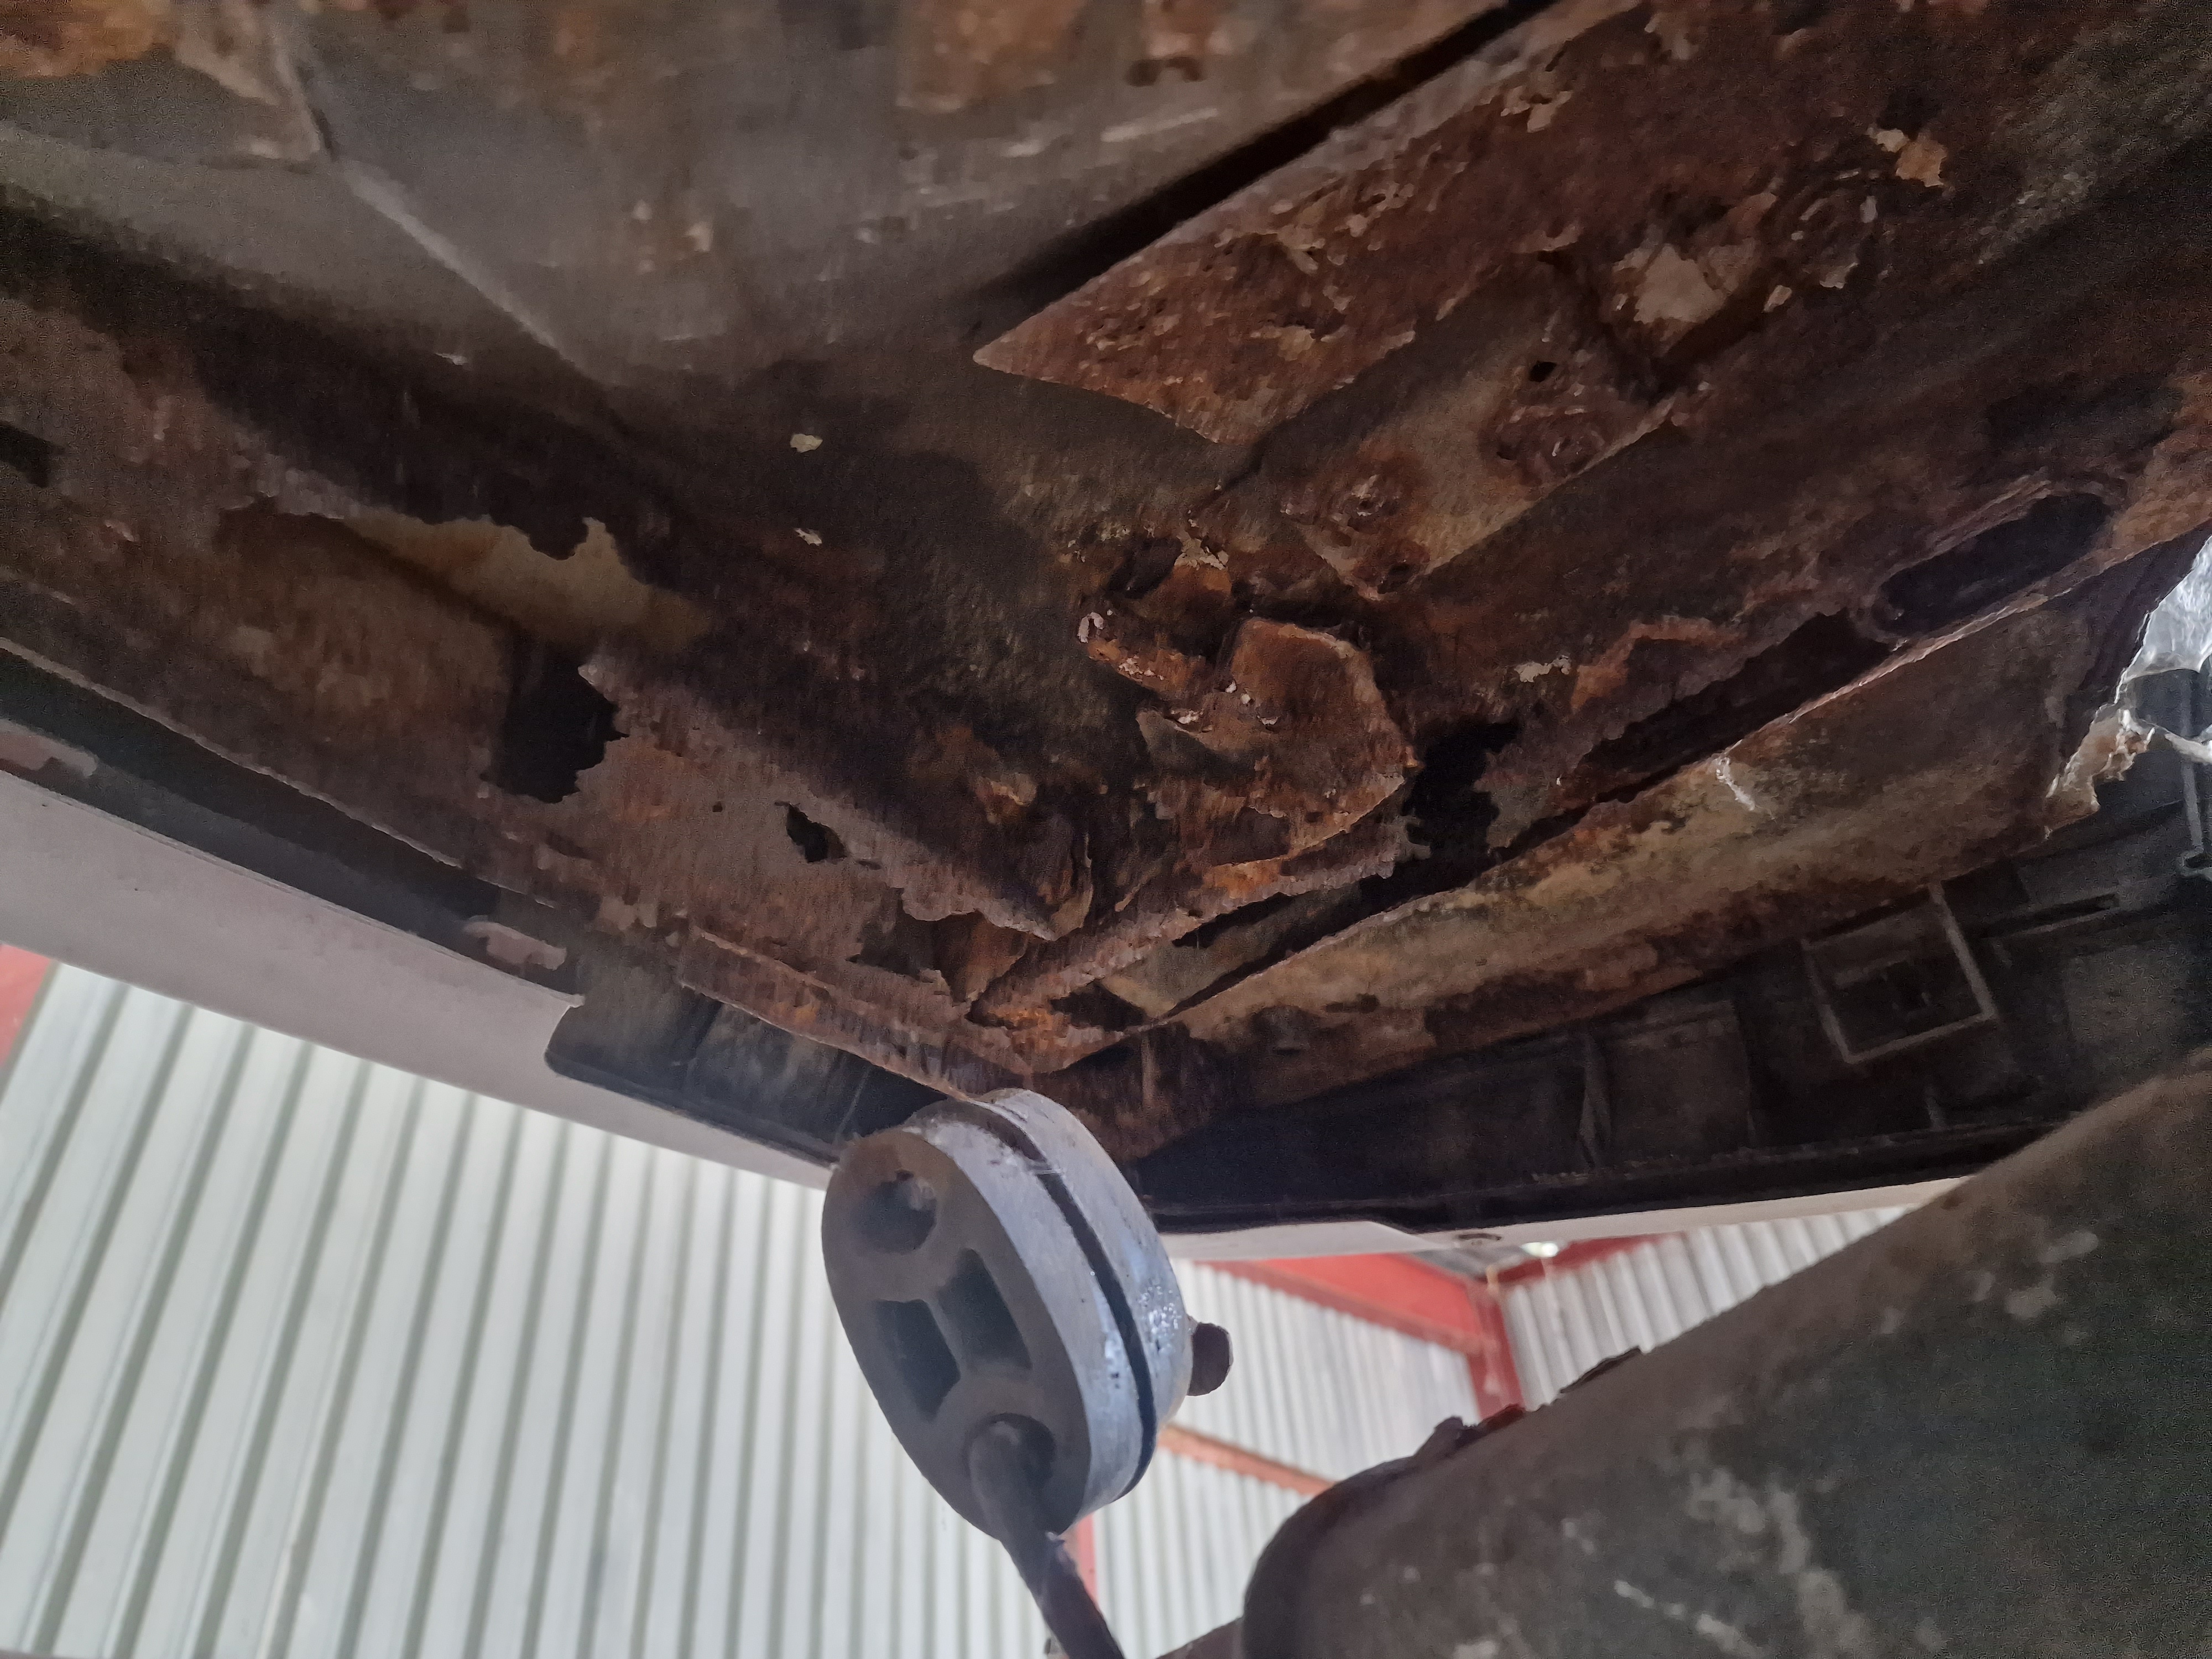
Rear crossmember and sill repairs
Fix idle as it just cuts out if throttle isnt held on
Fix the lacquer peel and bodywork issues
New tyres and service
Once its motd and back on the road im planning a turbo conversion keeping the c20ne engine
1993 Cavalier Project, 2.0 GLS AUTO, Restoration Work & Start Of Full Black Respray
-
thomas

- Registered user
- Posts: 236
- Joined: Sat Dec 31, 2011 11:18 pm
- Location: Roxburghshire, Scotland
Re: 1993 'L' Cavalier Project, 2.0 GLS AUTO, My 4th Cavalier
Good luck, Sean, it sounds a good one, looking forward to seeing how you do and how it progresses. GLS must have lots of goodies, nice interior trim.
--
Cav 1994 1.8LSi 5-dr Jungle Green Pearl: Daily.
Cav 1994 1.8LSi 5-dr Jungle Green Pearl: Daily.

Re: 1993 'L' Cavalier Project, 2.0 GLS AUTO, My 4th Cavalier
A quick check of your registration number with the .gov website should allow you to see any historic MOT issues.
It will also confirm mileages for the MOTs since approx 2010.
The GLS is the one below the CD / CDX.
I note from your other thread you are looking for a leather interior. Combined with the C20NE Auto, that will bring it near to a Diplomat. (Air Con would seal the deal).
It will also confirm mileages for the MOTs since approx 2010.
The GLS is the one below the CD / CDX.
I note from your other thread you are looking for a leather interior. Combined with the C20NE Auto, that will bring it near to a Diplomat. (Air Con would seal the deal).
Re: 1993 'L' Cavalier Project, 2.0 GLS AUTO, My 4th Cavalier
First time using flickr so sorry if pics dont work.
Here was my first pic of the car when i went to get it:
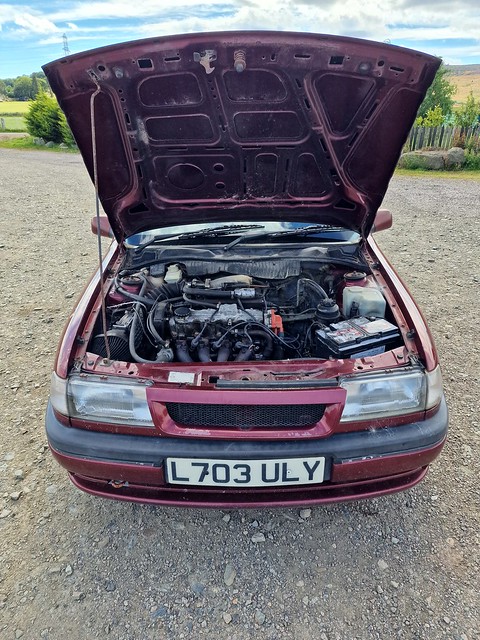
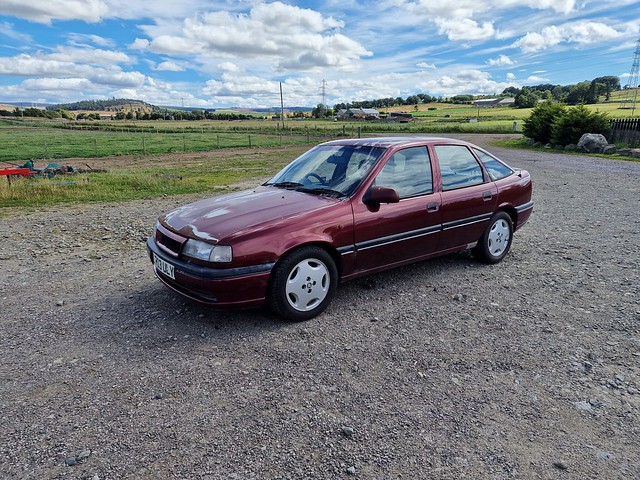
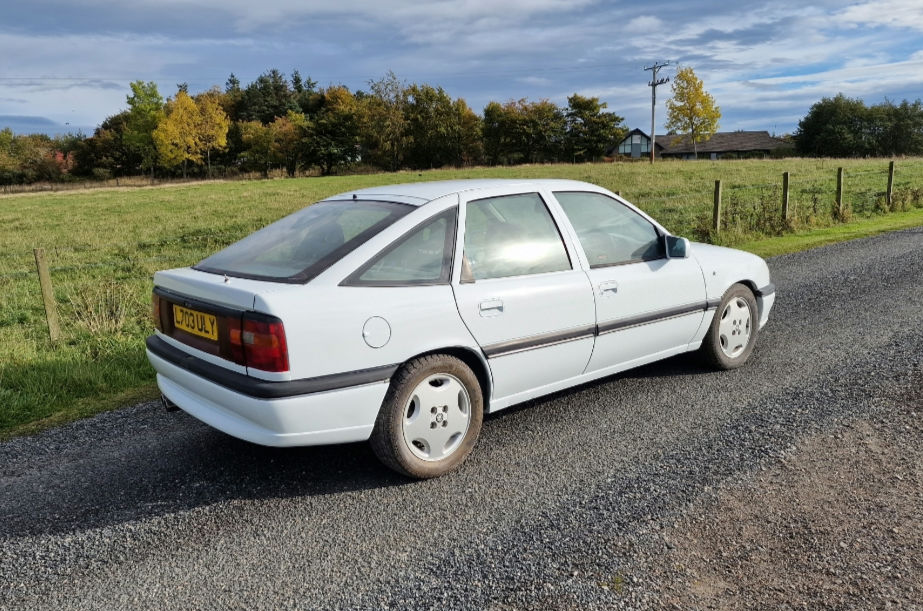
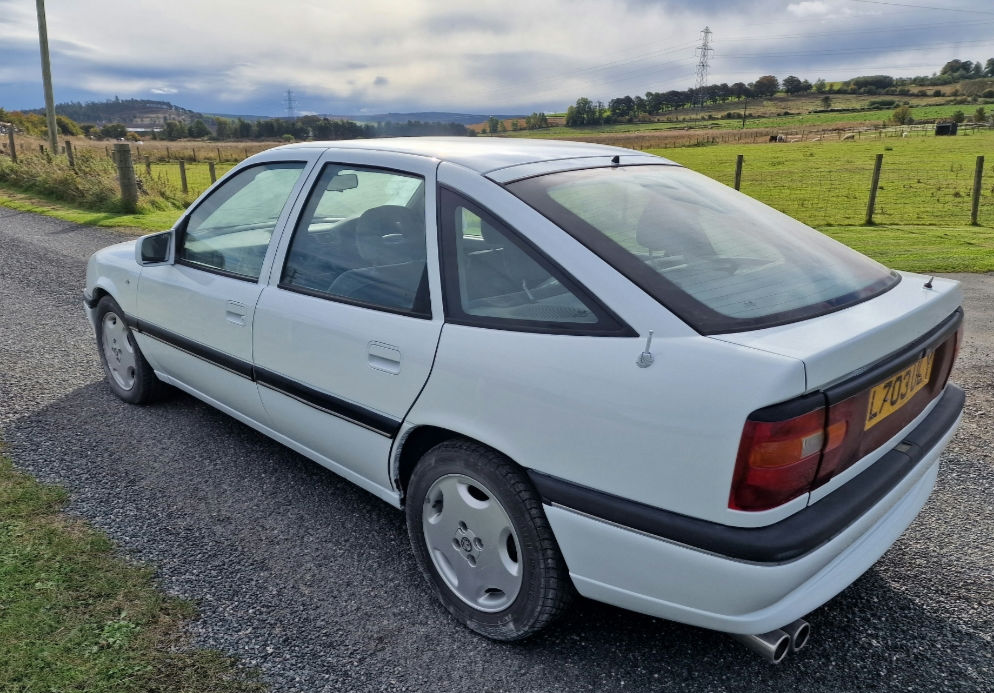
Some more pics of once it was home:

Here was my first pic of the car when i went to get it:
Some more pics of once it was home:
Re: 1993 'L' Cavalier Project, 2.0 GLS AUTO, My 4th Cavalier
Thanks, yeah it had some nice surpises, electric windows and mirrors. I will need to work out what the GLS Spec actually consists of? Pics of it are up now and ill be posting updates as i get started on it.
I will really need to learn the different models again, im hoping to be able to upgrade and keep to mainly OEM parts if possible but so far parts seem few and far apart nowadays.Robsey wrote: ↑Mon Aug 08, 2022 1:08 am A quick check of your registration number with the .gov website should allow you to see any historic MOT issues.
It will also confirm mileages for the MOTs since approx 2010.
The GLS is the one below the CD / CDX.
I note from your other thread you are looking for a leather interior. Combined with the C20NE Auto, that will bring it near to a Diplomat. (Air Con would seal the deal).
Thanks for the info on mots ive checked back and no major red flags. Will be trying to get it motd then have a rolling restoration
Re: 1993 'L' Cavalier Project, 2.0 GLS AUTO, My 4th Cavalier
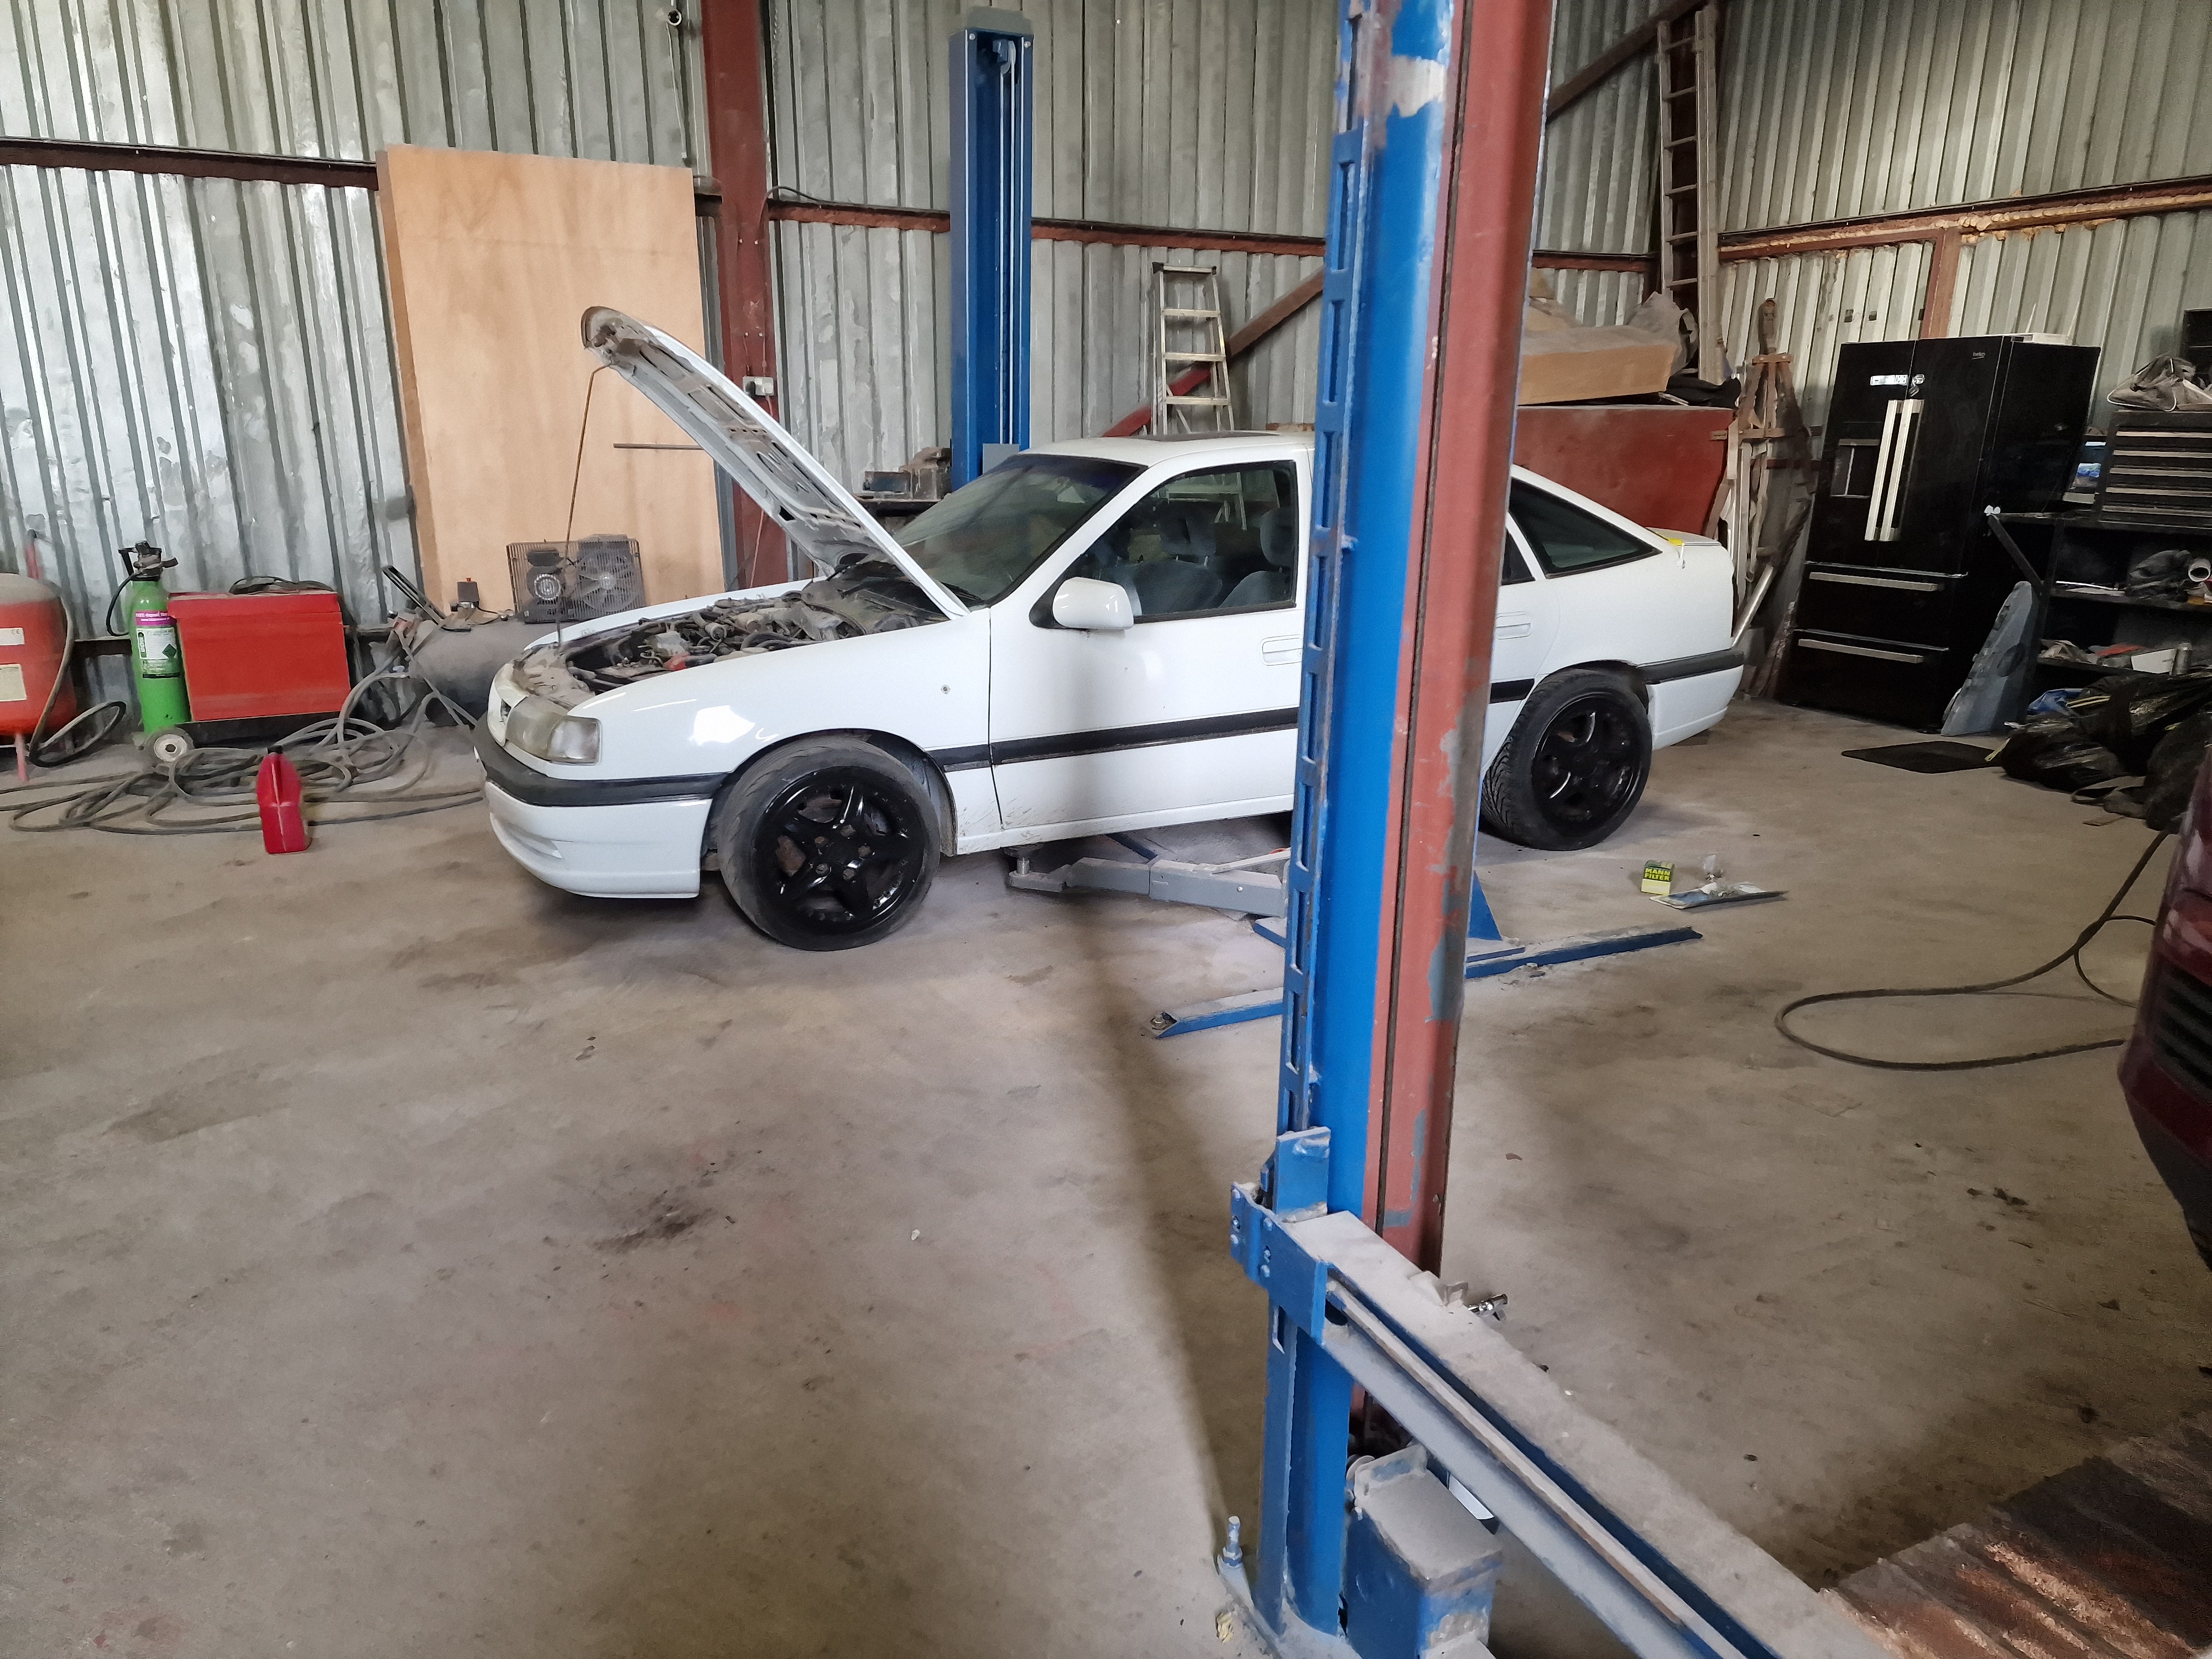
I see it has one of those hi-pass cone filters fitted.
Not ideal if you plan to put a turbo on it.
A lot of heat sucked straight in will cause a few running issues.
The door mouldings have the Chrome strips on.
I suppose the choice is to leave as-is for the GLS / CDX / Diplomat look, paint red for the SRi look, or completely remove for the sleak understated look.
Overall, it looks mainly cosmetic - paint and corrosion.
Nothing overly scary.
As for the turbo - are you looking Lexmaul or an aftermarket unit?
Whilst you are stripping out - don't forget new ethanol compliant fuel lines. Should be 7.3mm bore hoses on 8mm dia rigid lines.
Re: 1993 'L' Cavalier Project, 2.0 GLS AUTO, My 4th Cavalier
Yeah with the bodywork its mainly light surface corrosion and few bubbles at the bottoms of the doors. I will get some pictures of the rot underneath today but the floorpan and usual areas all seem pretty solid just the rear crossmember and sills that have turned into holes but that was with being harsh with screwdriver to see whats needing sorted.Robsey wrote: ↑Mon Aug 08, 2022 10:52 am I see it has one of those hi-pass cone filters fitted.
Not ideal if you plan to put a turbo on it.
A lot of heat sucked straight in will cause a few running issues.
The door mouldings have the Chrome strips on.
I suppose the choice is to leave as-is for the GLS / CDX / Diplomat look, paint red for the SRi look, or completely remove for the sleak understated look.
Overall, it looks mainly cosmetic - paint and corrosion.
Nothing overly scary.
As for the turbo - are you looking Lexmaul or an aftermarket unit?
Whilst you are stripping out - don't forget new ethanol compliant fuel lines. Should be 7.3mm bore hoses on 8mm dia rigid lines.
The turbo conversion started as an idea from my last 8v cavalier and the C20 NE should lend itself pretty well to low boost setup due to the low compression.
I have won a stainless tubular manifold on ebay with a t25 flange so that will form the main part of it. Everything else i plan to fabricate myself if possible.
Turbo plans are:
Make a T25 to TD04 adapter
TD04 Subaru Turbo running 7 psi to start with
Wideband sensor and guage
3" Downpipe with lambda boss added
Front mount intercooler
Some things i need to work out is:
Oil feed - does this come from oil pressure sensor or somewhere else?
Injectors - Should i run C20let injectors or is there something better?
Management - Can the standard ecu be remapped or do i need to go standalone
Door mouldings im uncertain on whether to do the strips red or remove them, will need to see what parts i can come across would ideally like to get a full gsi kit but struggling to find any online
-
ilovedmymantas
- Registered user
- Posts: 1212
- Joined: Sat Jan 12, 2013 2:54 am
Re: 1993 'L' Cavalier Project, 2.0 GLS AUTO, My 4th Cavalier
Hi,
nice find
My first cav was a pre-facelift gls. First time i had electric mirrors and windows(front only) and a digital clock/temp gauge - sheer luxury
Hopefully you got it at a good price, I haven't seen that much lacquer peel in years! When i did I always pictured a 1970's bodger out with his brush and a tin of yacht varnish, so thick it looks like it could be removed with a can of wd40 and a plastic spatula
OEM parts are difficult to find after so many years and if you do, it usually means blank cheque time. Gsi parts are even rarer, anyone with one will have snapped up parts years ago and are unlikely to sell.
I like your turbo idea, that would be a nice sleeper .
I would stick with some form of door moulding unless the car will never spend time in a car park. They don't protect against shopping trolleys unfortunately but my chrome strips and bumpers have taken a battering from other cars
Looking forward to seeing your progress
nice find
My first cav was a pre-facelift gls. First time i had electric mirrors and windows(front only) and a digital clock/temp gauge - sheer luxury
Hopefully you got it at a good price, I haven't seen that much lacquer peel in years! When i did I always pictured a 1970's bodger out with his brush and a tin of yacht varnish, so thick it looks like it could be removed with a can of wd40 and a plastic spatula
OEM parts are difficult to find after so many years and if you do, it usually means blank cheque time. Gsi parts are even rarer, anyone with one will have snapped up parts years ago and are unlikely to sell.
I like your turbo idea, that would be a nice sleeper
I would stick with some form of door moulding unless the car will never spend time in a car park. They don't protect against shopping trolleys unfortunately but my chrome strips and bumpers have taken a battering from other cars
Looking forward to seeing your progress
" It's not rust. It's age-related patina " 
1980 vauxhall cavalier MK1 1.6L, 1982 opel manta berlinetta 1.8s, 1985 opel manta 2.0 gte, 1990 cavalier 2.0 gl ,1994 cavalier sri x20xev
-1995 cdx x20xev
---------------
Matt
1980 vauxhall cavalier MK1 1.6L, 1982 opel manta berlinetta 1.8s, 1985 opel manta 2.0 gte, 1990 cavalier 2.0 gl ,1994 cavalier sri x20xev
-1995 cdx x20xev
---------------
Matt
Re: 1993 'L' Cavalier Project, 2.0 GLS AUTO, My 4th Cavalier
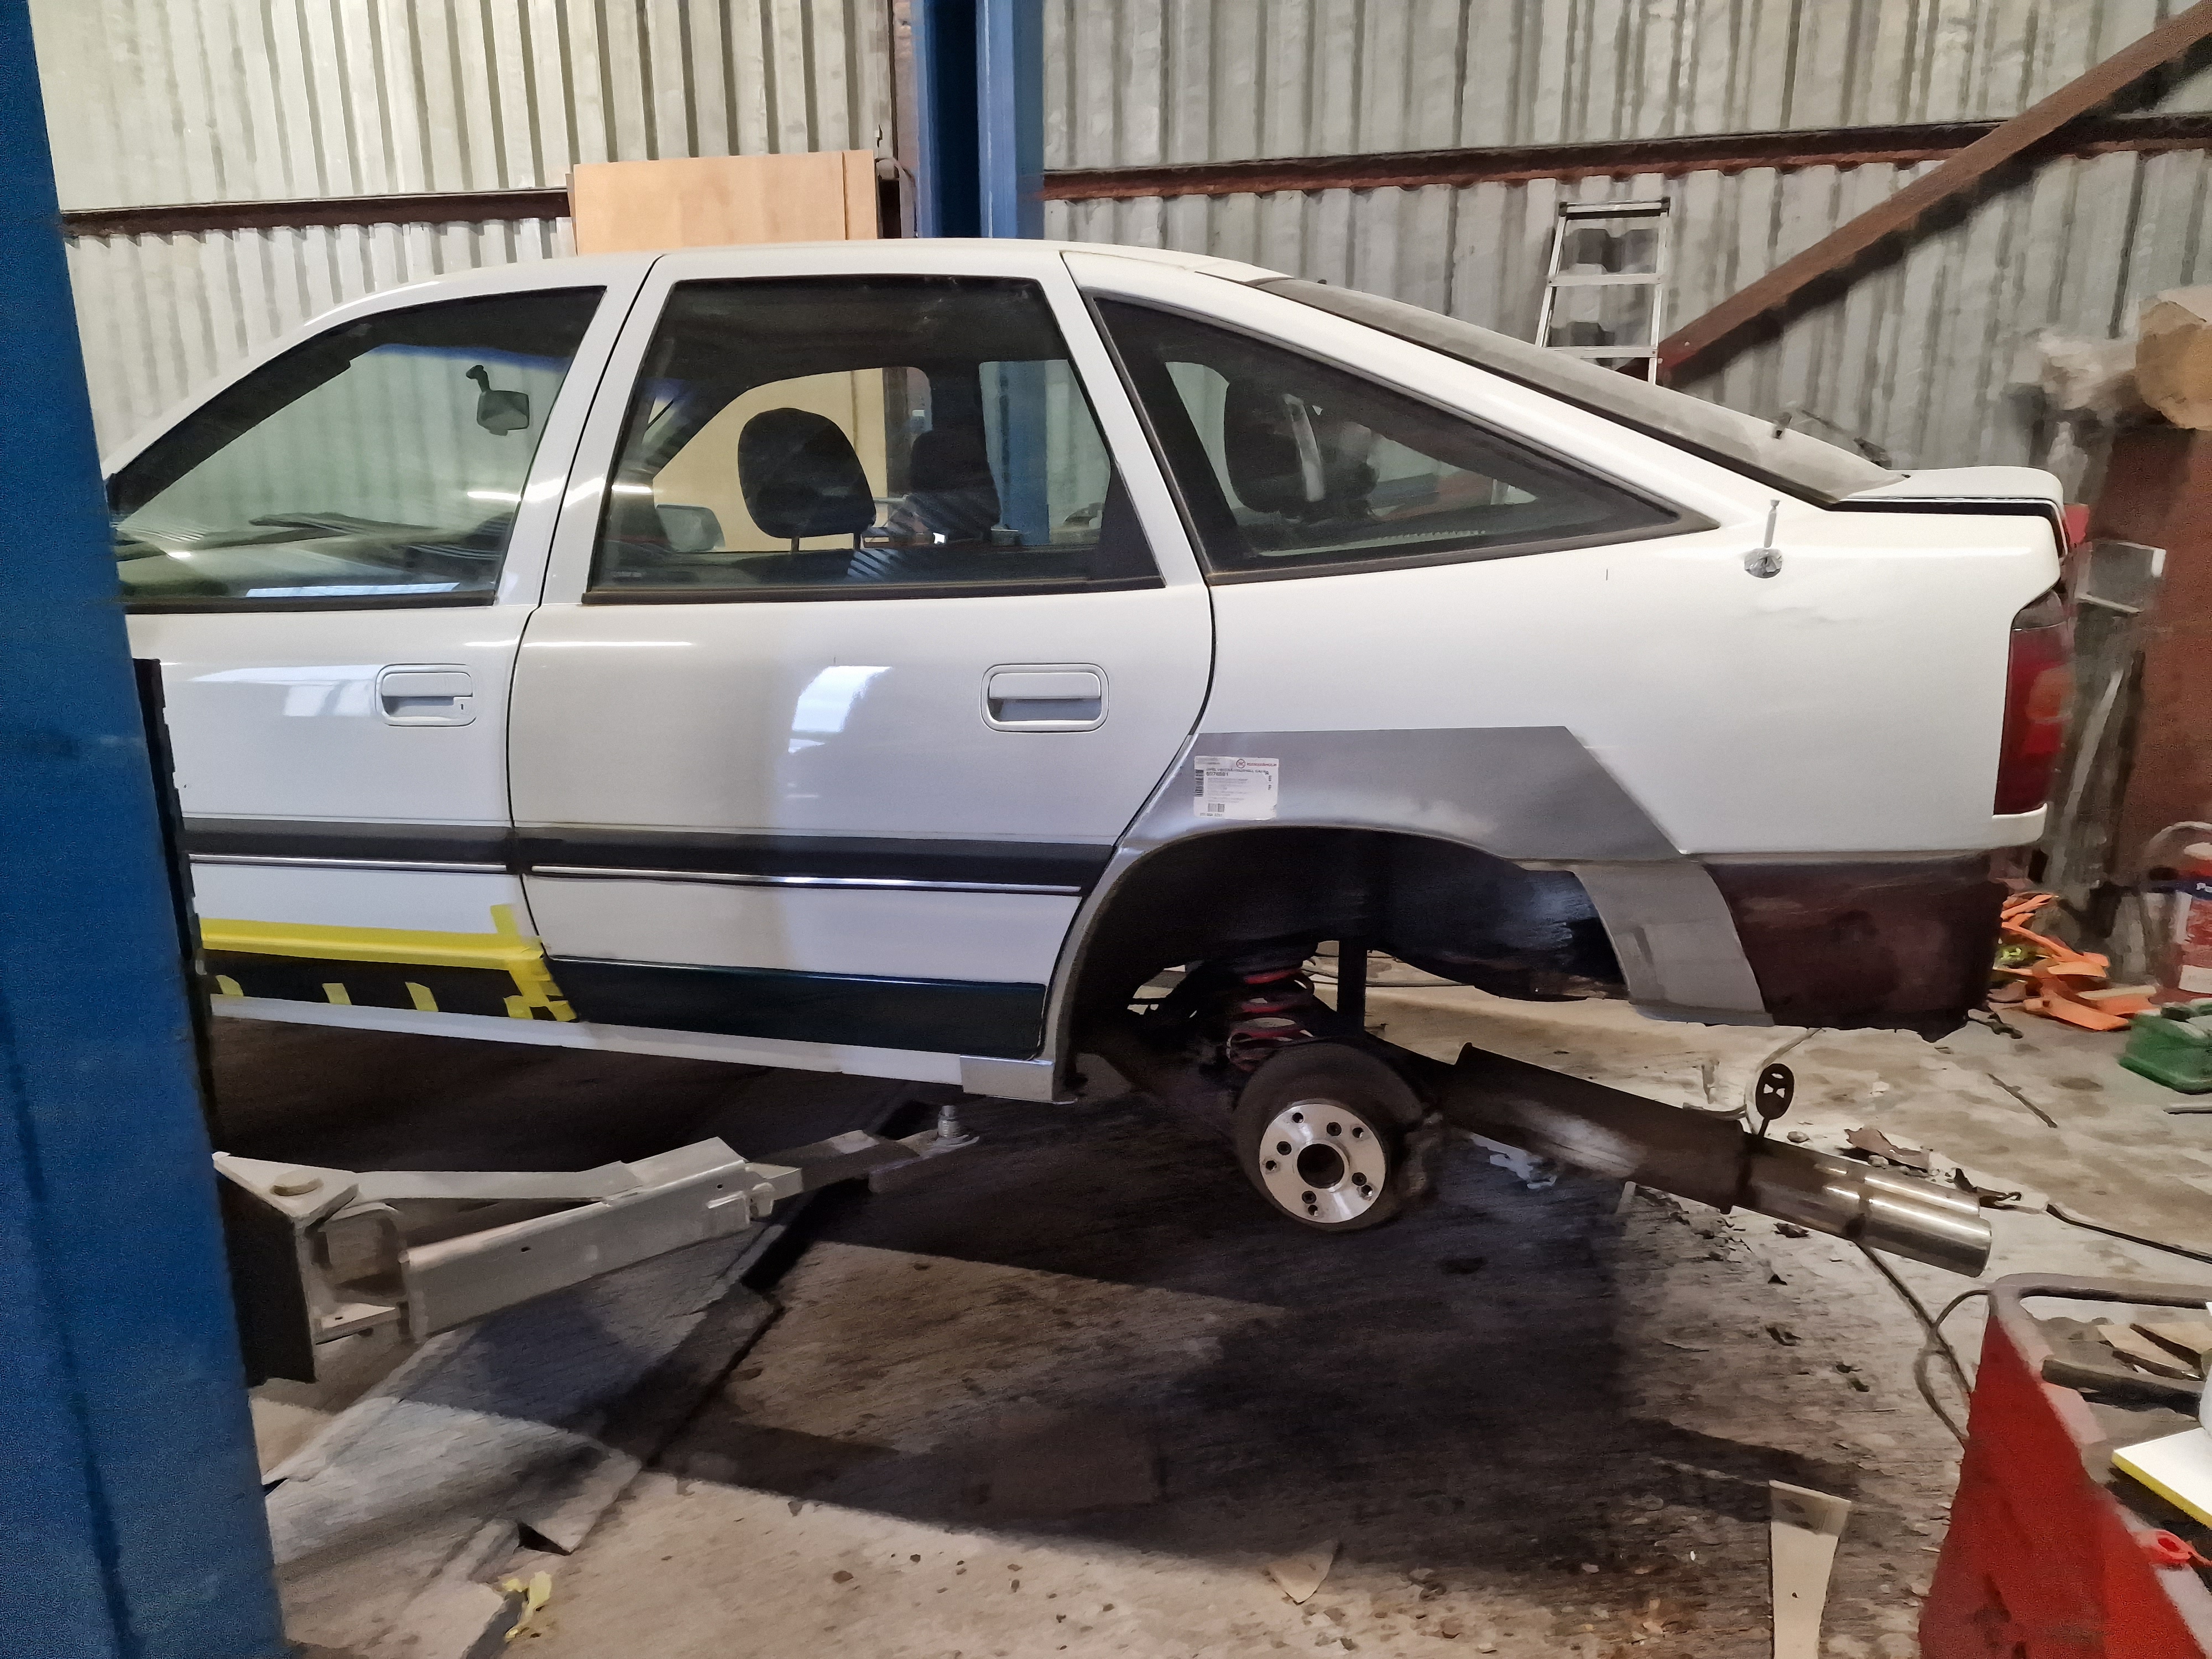
Not updated this in a while as it had to take a back seat.
I did all the body work repairs I could. I still have some more to do along with replacing rear arches and sills.
Before it came off the ramp I masked it all and resprayed the outside Ford Frozen white just to seal all my work up and to get it all one colour.
 Front respray by Sean Boyle, on Flickr
 2023-03-16_09-53-43 by Sean Boyle, on Flickr
 2023-03-16_09-54-05 by Sean Boyle, on Flickr
I did all the body work repairs I could. I still have some more to do along with replacing rear arches and sills.
Before it came off the ramp I masked it all and resprayed the outside Ford Frozen white just to seal all my work up and to get it all one colour.
Front respray by Sean Boyle, on Flickr2023-03-16_09-53-43 by Sean Boyle, on Flickr2023-03-16_09-54-05 by Sean Boyle, on FlickrRe: 1993 'L' Cavalier Project, 2.0 GLS AUTO, My 4th Cavalier
That does look very nice.
The extra white of the door handles and lower front valance oddly works.
I initially thought that it may have been too much white, but it grew on me quite quickly.
The only down side to white is that every blemish shows quite quickly. Especially if you have bubbling arches etc.
How is the turbo upgrade going.
It is always good to see something different from the norm, every once in a while.
Re: 1993 'L' Cavalier Project, 2.0 GLS AUTO, My 4th Cavalier
Thanks, I was hesitant with so much white too but I just wanted it all sealed as it was a real eye sore.
It was painted a while ago now and all the repairs seem to be fine, the rear arches were only just starting to go but as they are so cheap on ebay I bought them and plan to replace them more as peace of mind.
Turbo project is slowly coming together. I want to get it motd first then get it turbod.
Any opinions on what colour it should get painted when it's finished? The white is growing on me though.
Next update should be the tyres, I have full set of toyo proxes tr1s for the slabs and also I've got 4x100 to 5x130 wheel adapters now along with 18" wheels powdercoated grey.
Will try them on and see which wheels I prefer. I was thinking of keeping the slabs mint and just run the porsche wheels if they fit ok
Re: 1993 'L' Cavalier Project, 2.0 GLS AUTO, My 4th Cavalier
If you are doing the SRi look, then there are only three "popular" colours to go for.
Although who says you have to go an original GM colour? It is down to your own personal taste.
The Polar white is the classic non-metallic colour.
But if you want a metallic finish, then I believe Smoke Grey is awesome...
having worked on a Cav recently, I do like the Diamond Black too.
I will be biased again in the summer when I will hopefully be pounding the roads in my Polar Sea Blue Cav.
Polished up, the blue metallics really pop in the sunshine.
Re: 1993 'L' Cavalier Project, 2.0 GLS AUTO, My 4th Cavalier
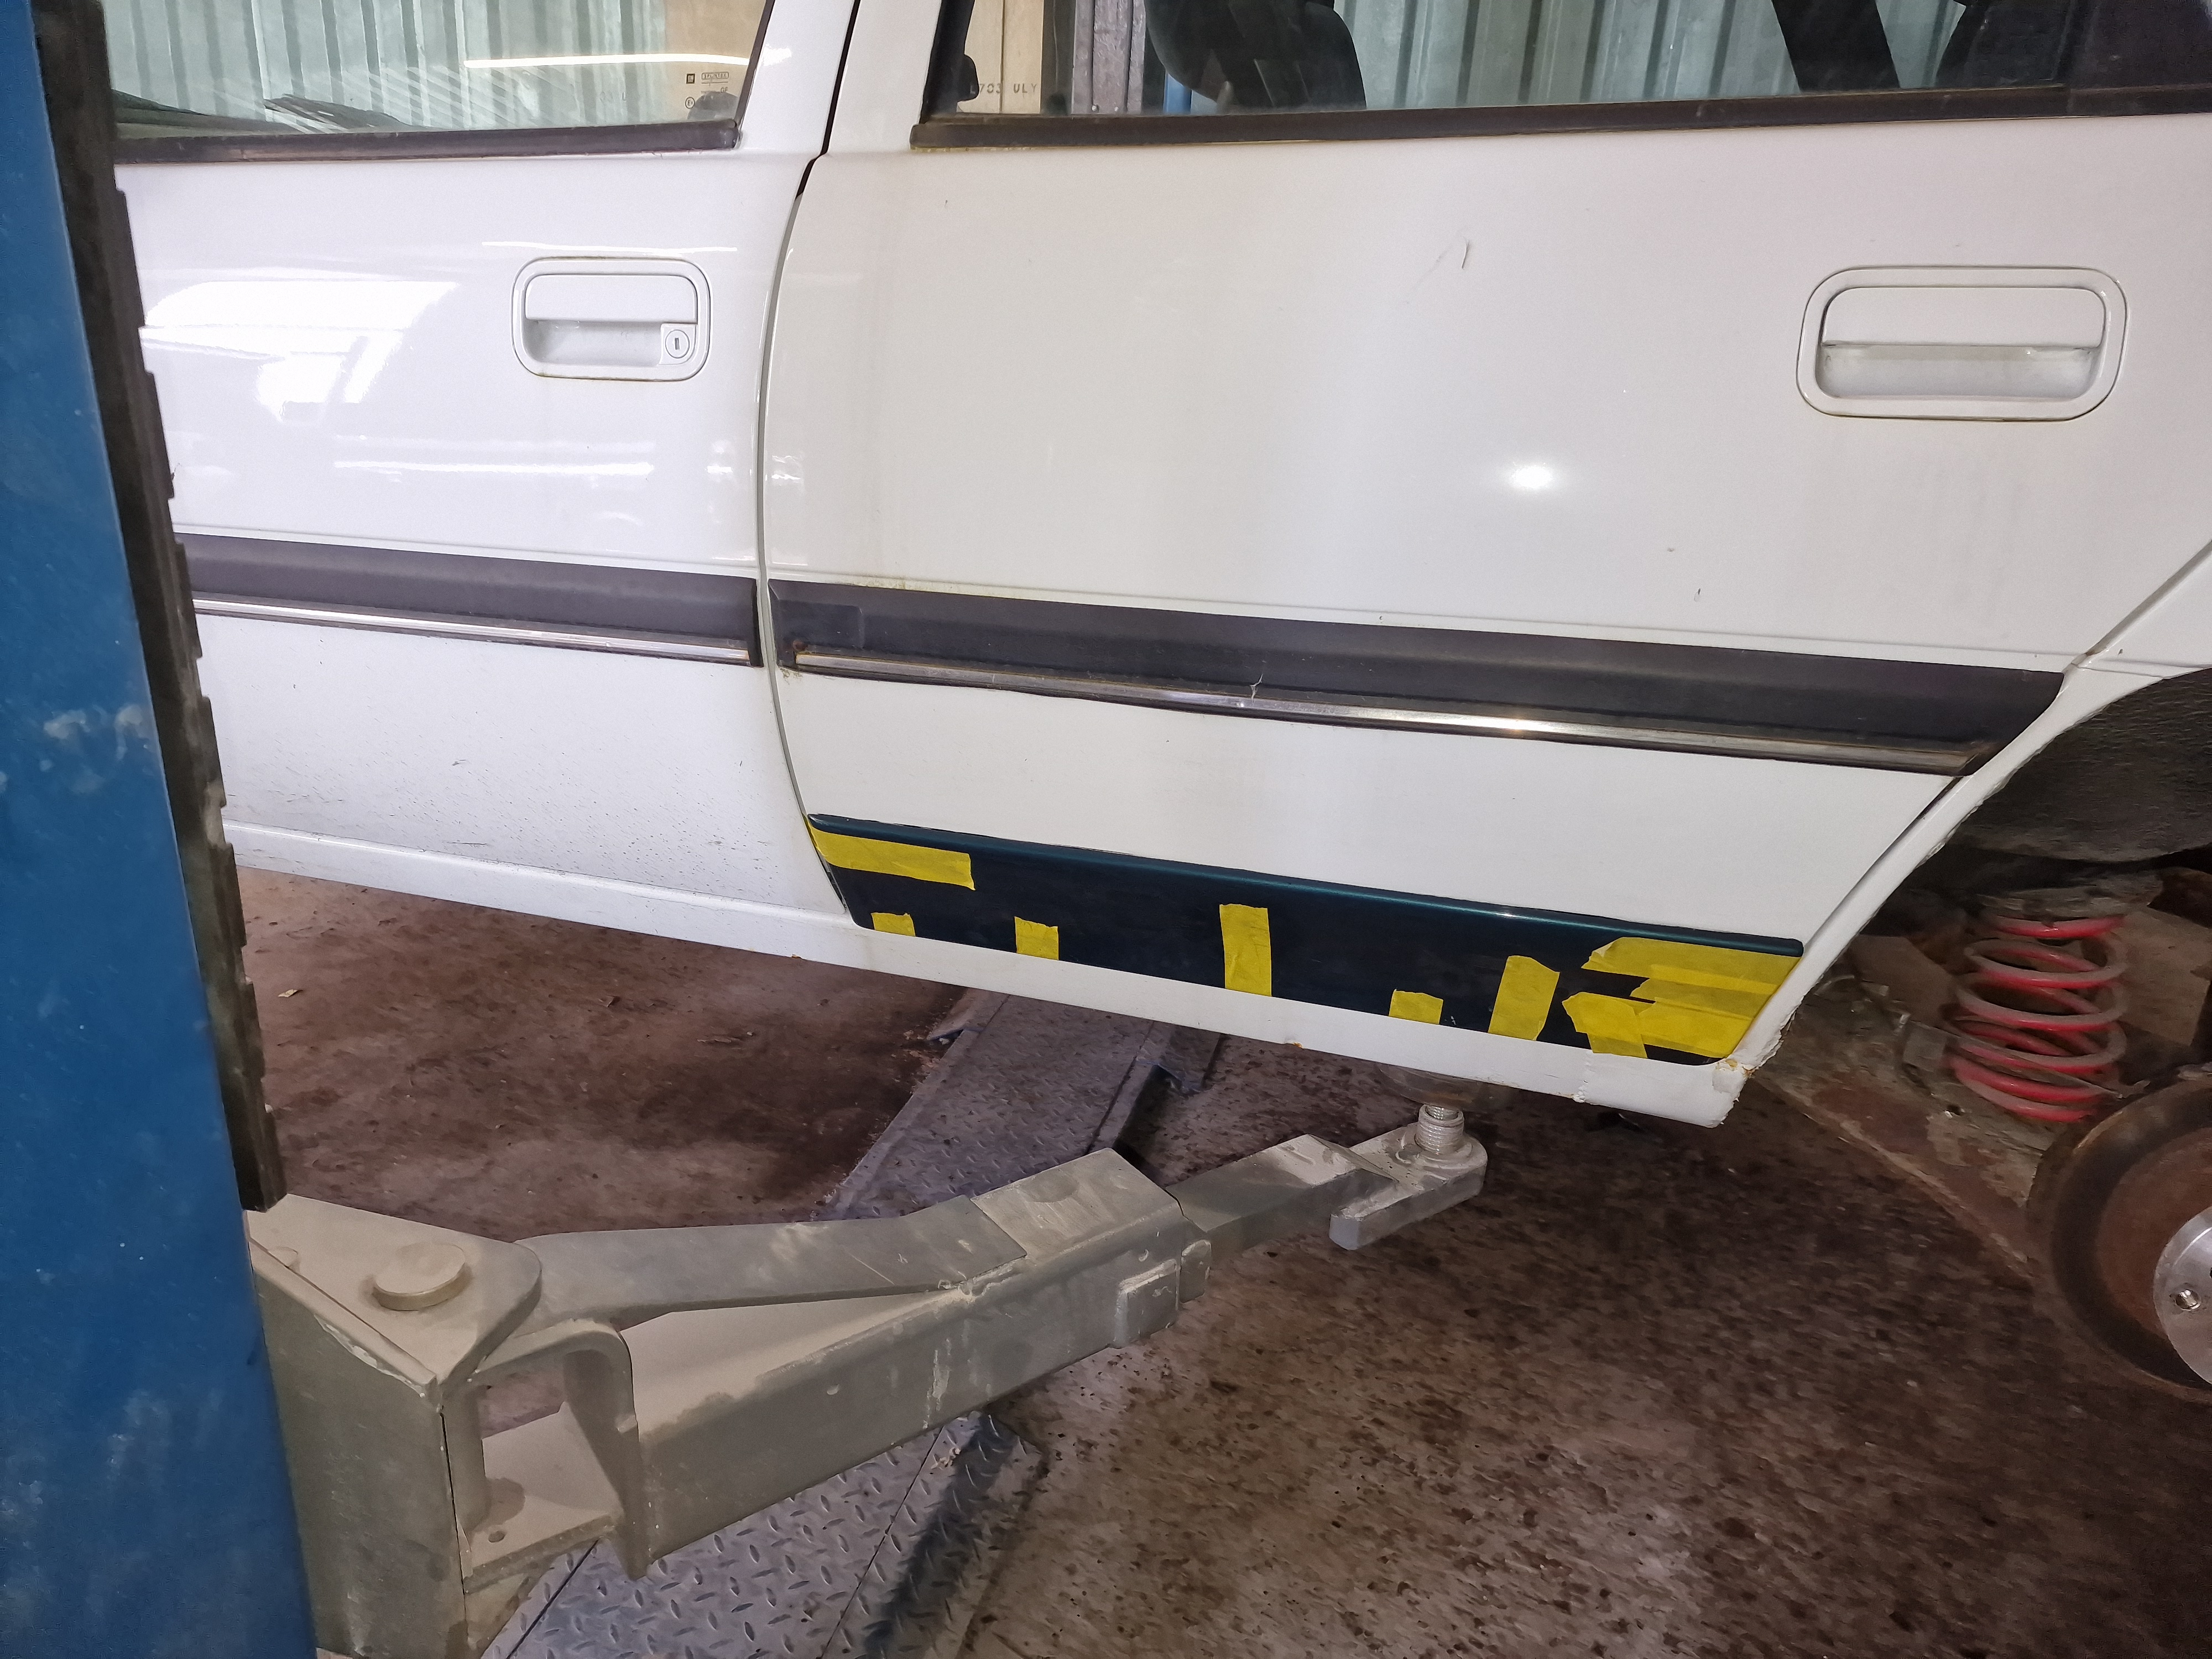
A few months back I managed to win some turbo side skirts, 4 in fact along with 3 door strips and the jacking covers.
Finally I came across the missing door strips on ebay as a set of 4 so now I have everything to fit the side skirts apart from the 2 rear small pieces.
 Cavy updates by Sean Boyle, on Flickr
Will be making a start on fitting these today and will see if something can be fabricated for the rear end caps.
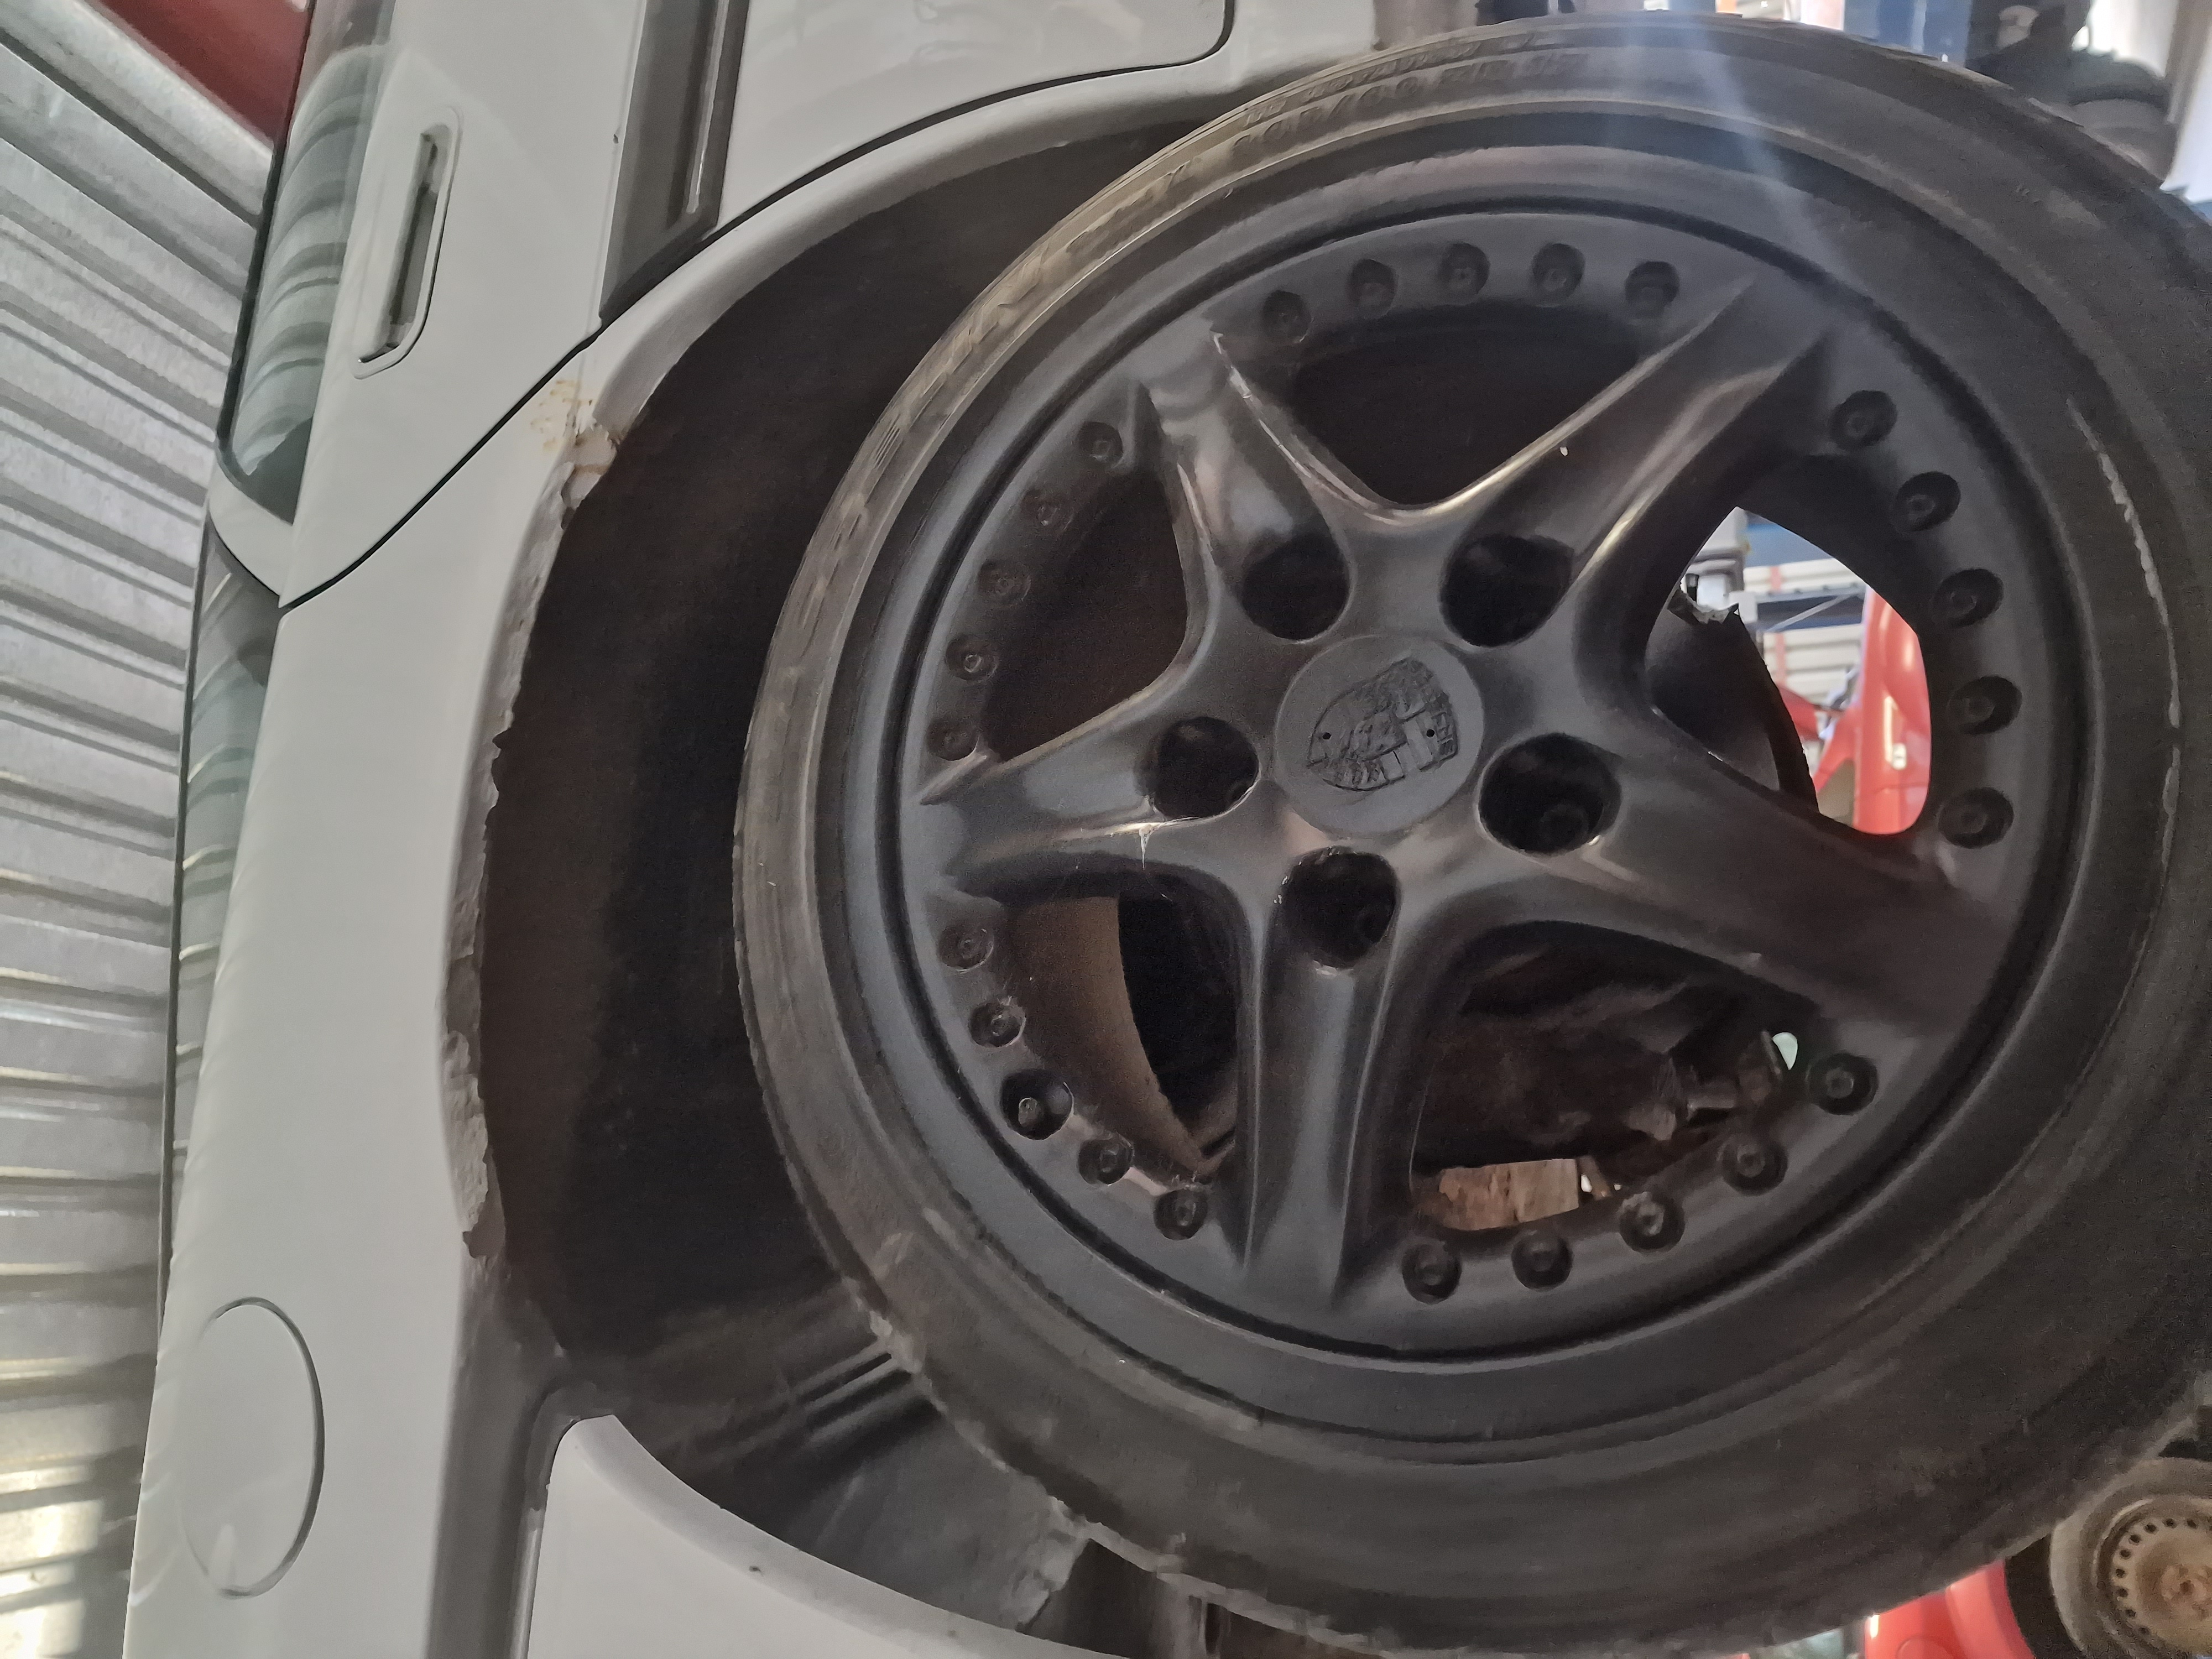
Other updates are a oil and filter change along with new ht leads, rotor arm and plugs. I also refitted the Sri spoiler and swapped over to the 17" forged split rims.
 20230923_175130 by Sean Boyle, on Flickr
 Cavy updates by Sean Boyle, on Flickr
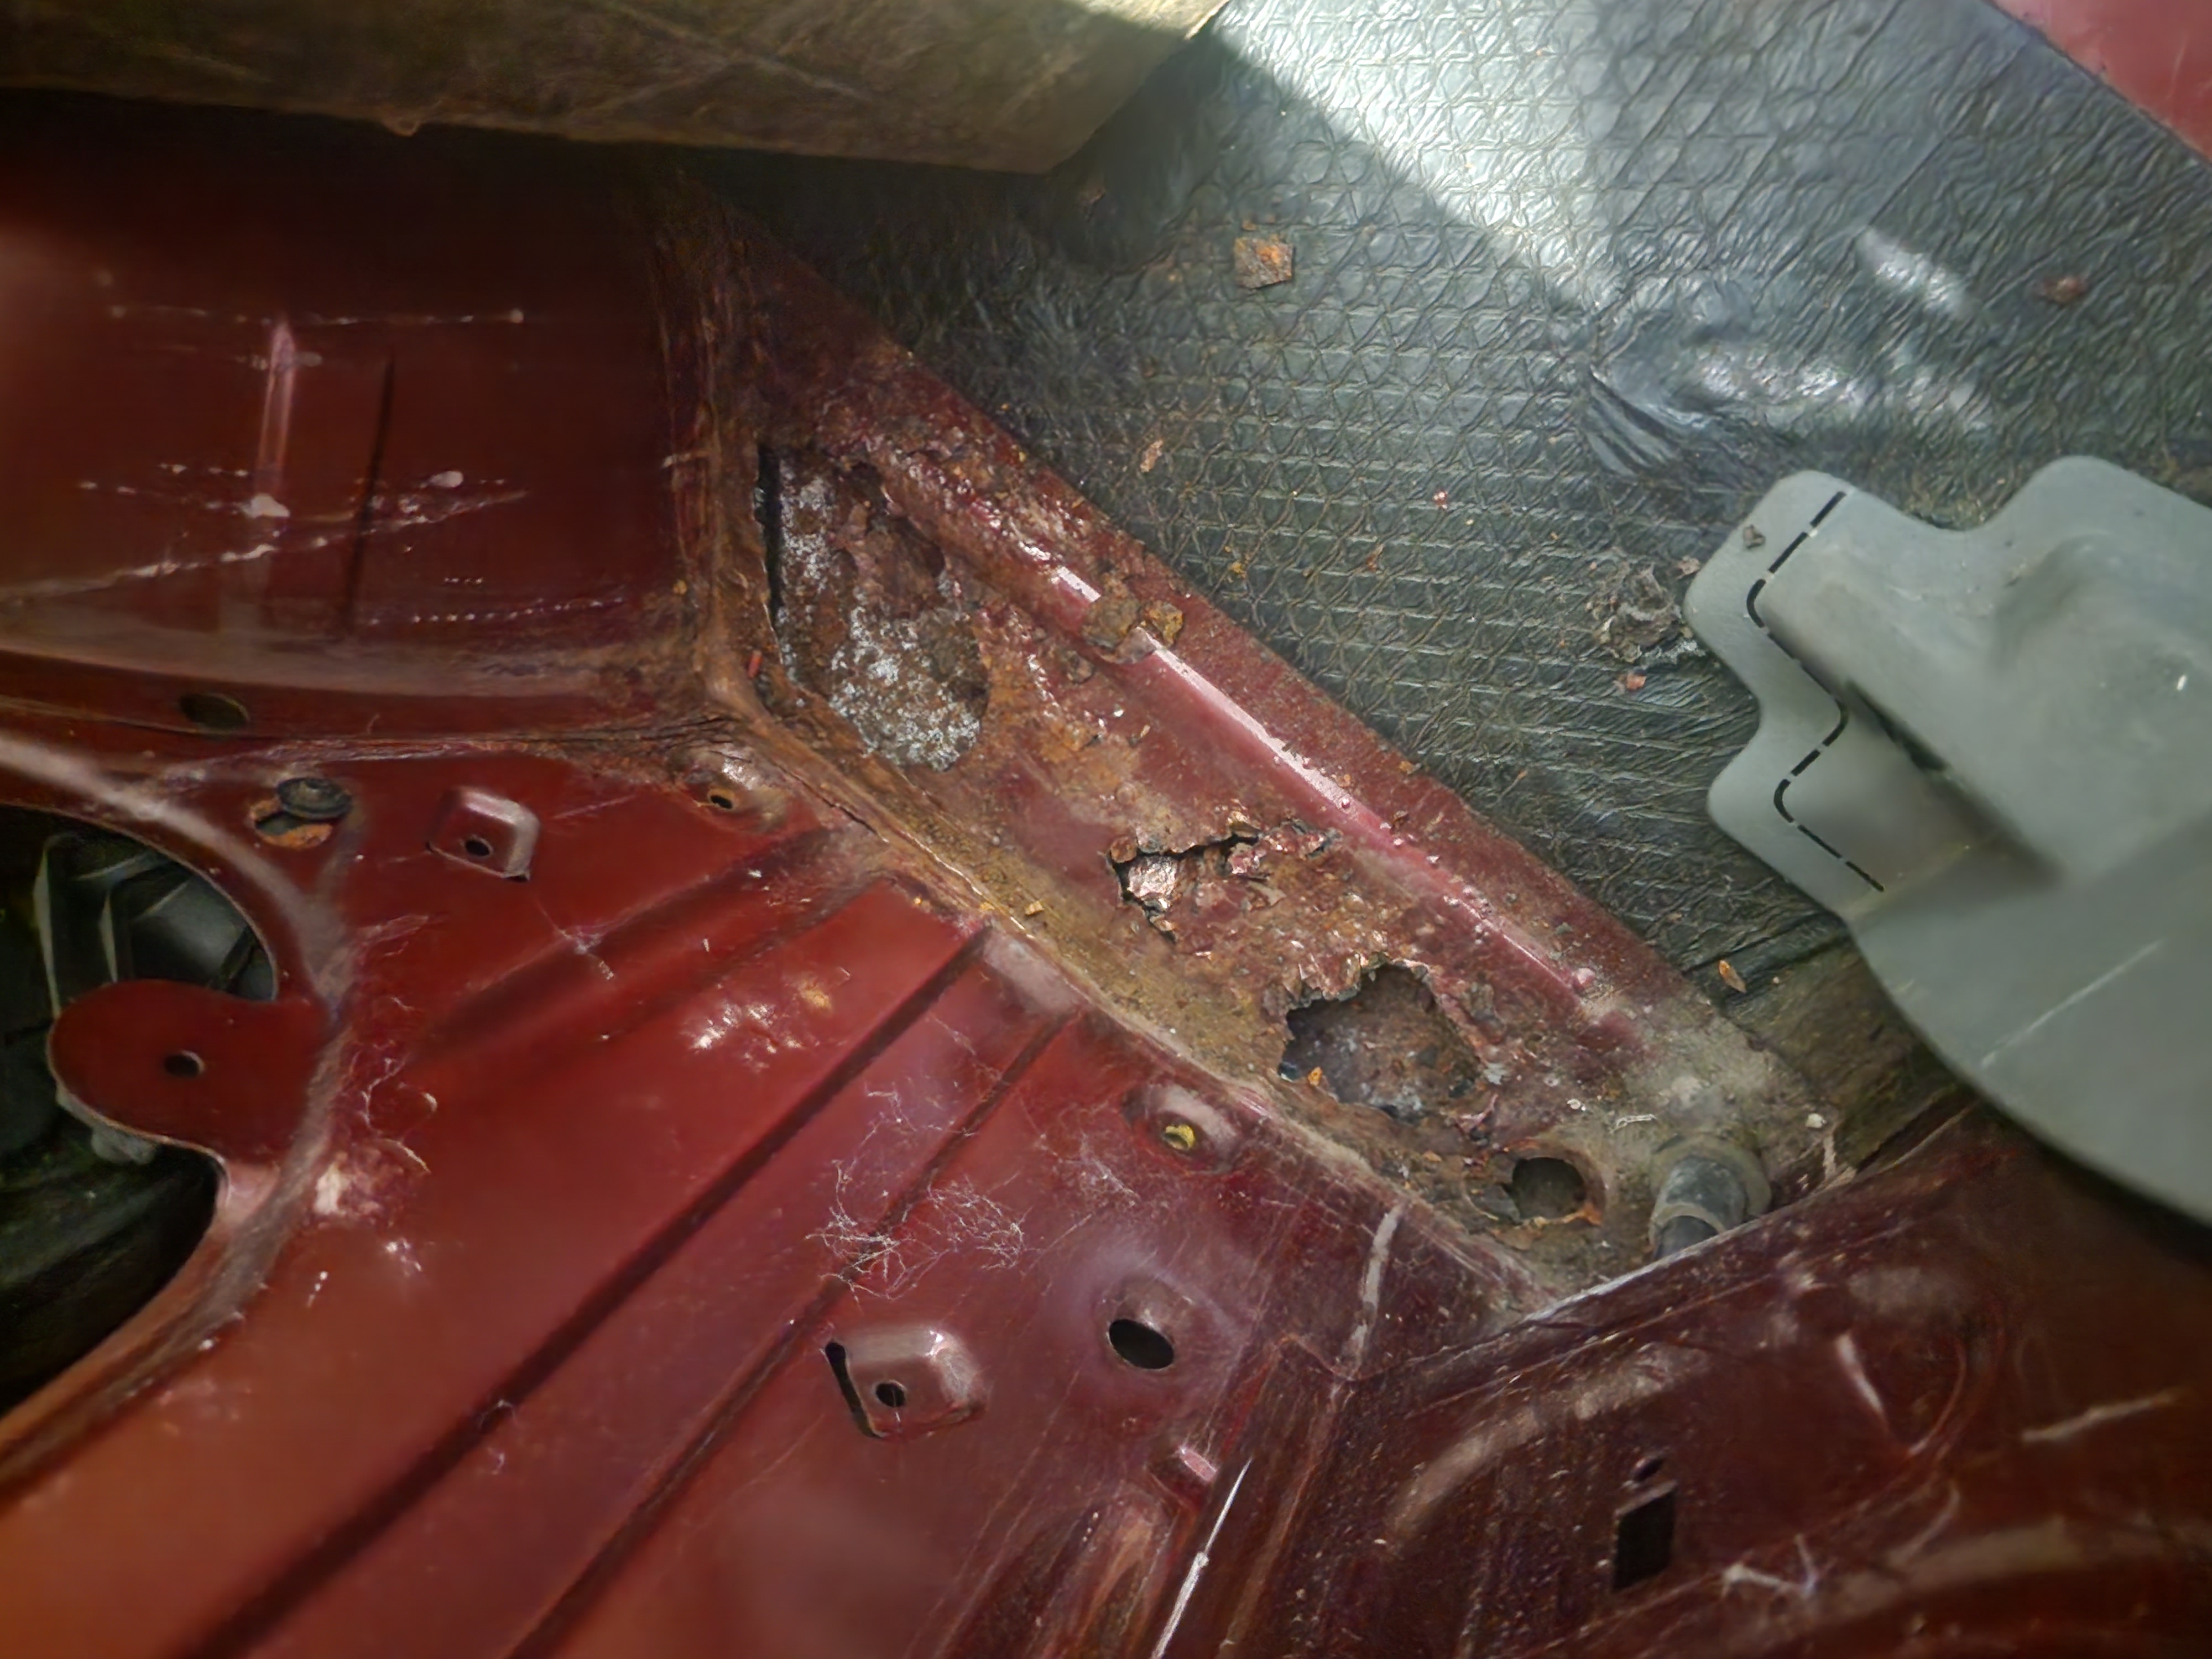
Later this week will be new osf caliper and fixing the rear rot ( crossmember, floor and nsr chassis leg)
Hoping to have it ready to try in for a mot soon.
Finally I came across the missing door strips on ebay as a set of 4 so now I have everything to fit the side skirts apart from the 2 rear small pieces.
Cavy updates by Sean Boyle, on FlickrWill be making a start on fitting these today and will see if something can be fabricated for the rear end caps.
Other updates are a oil and filter change along with new ht leads, rotor arm and plugs. I also refitted the Sri spoiler and swapped over to the 17" forged split rims.
20230923_175130 by Sean Boyle, on FlickrCavy updates by Sean Boyle, on FlickrLater this week will be new osf caliper and fixing the rear rot ( crossmember, floor and nsr chassis leg)
Hoping to have it ready to try in for a mot soon.
Re: 1993 'L' Cavalier Project, 2.0 GLS AUTO, My 4th Cavalier
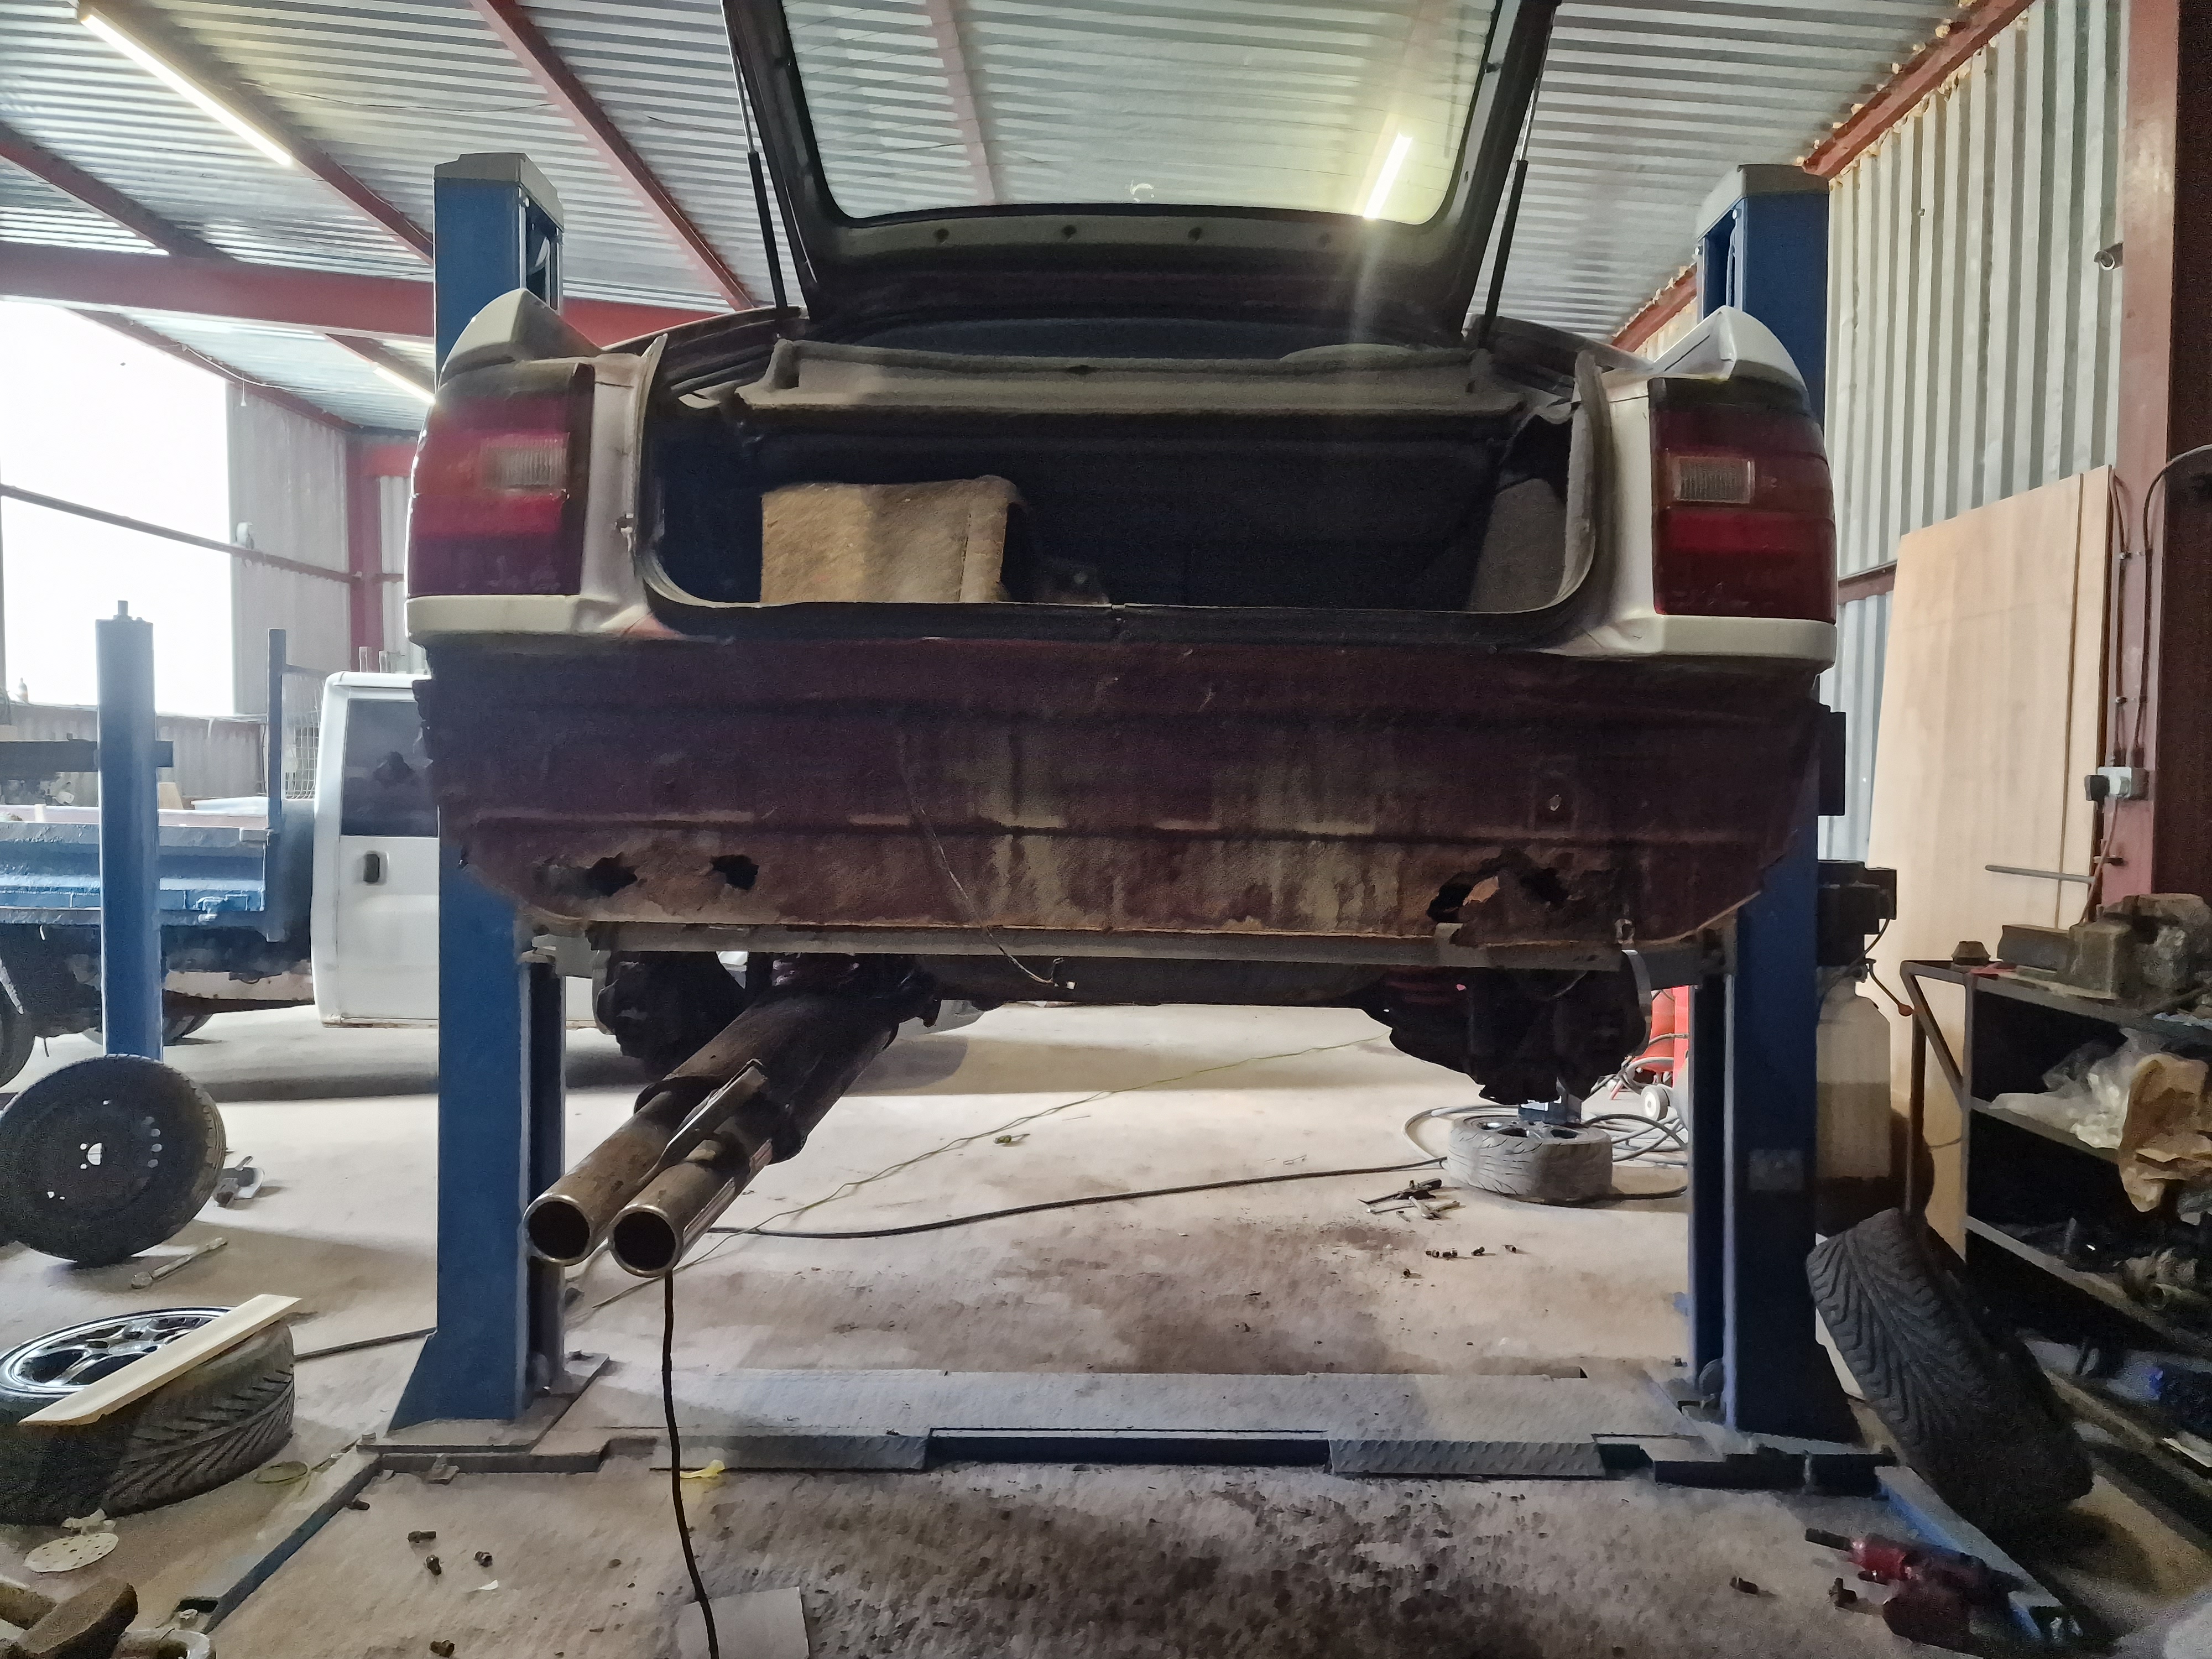
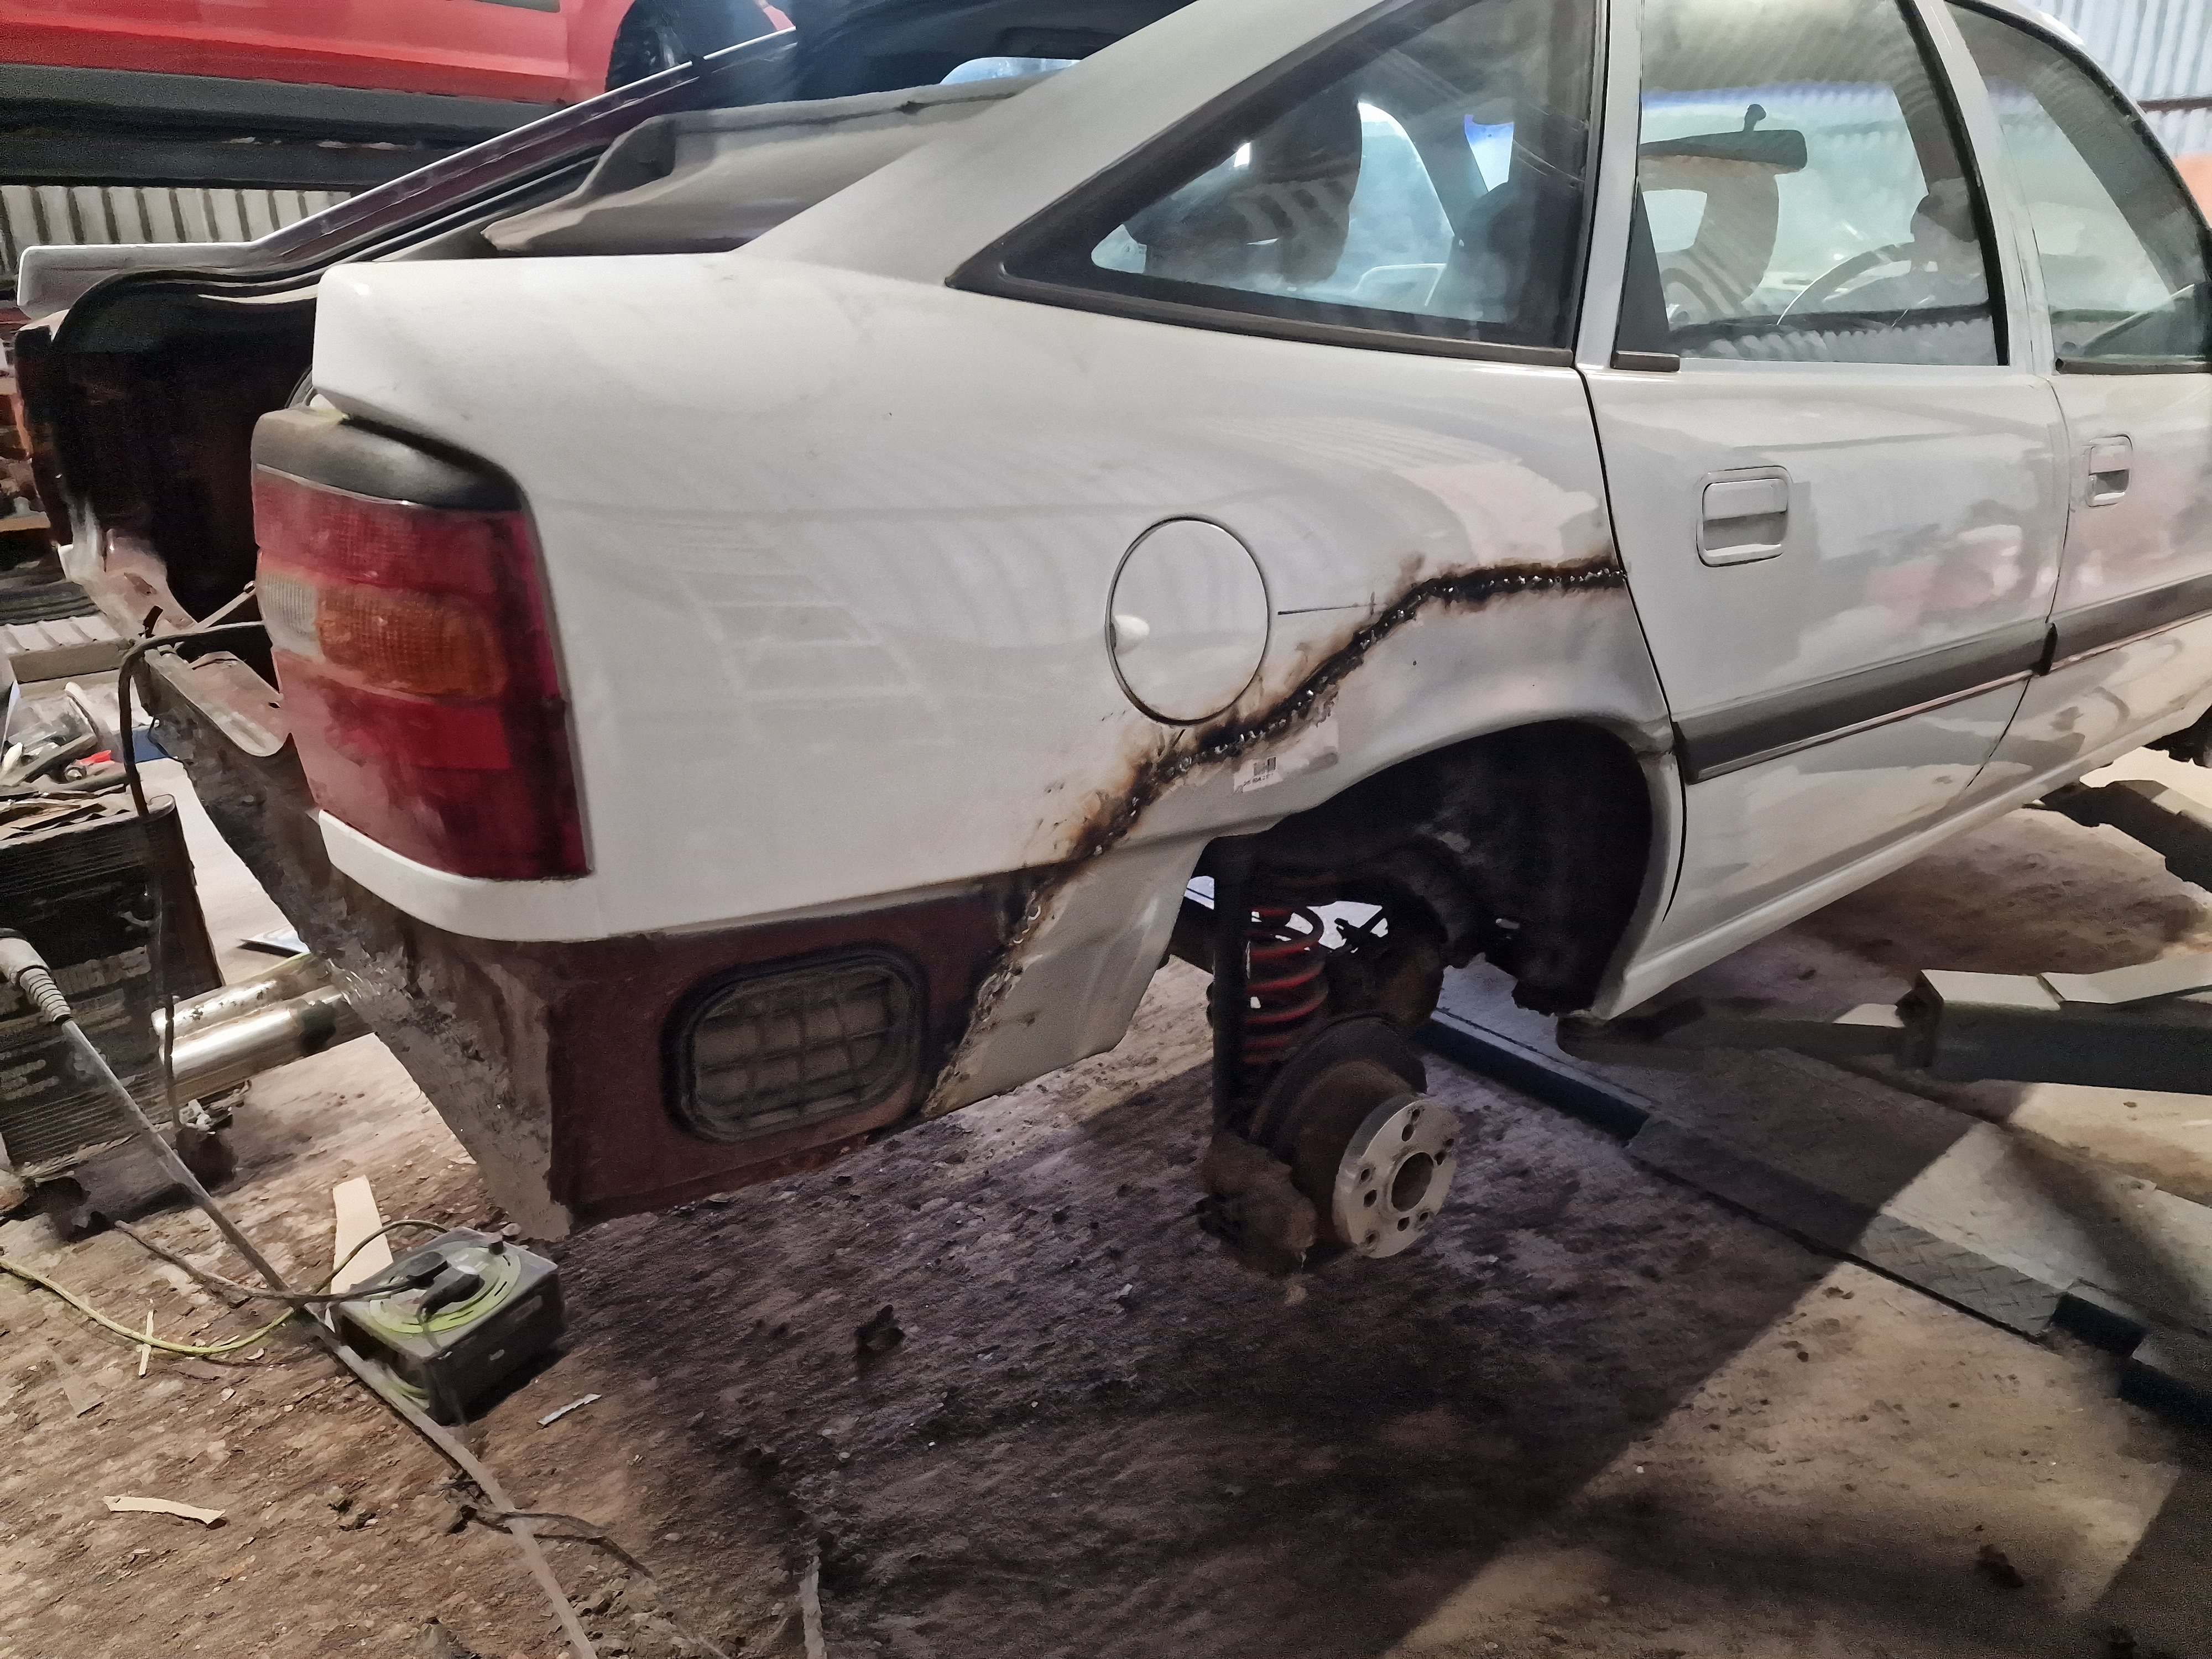
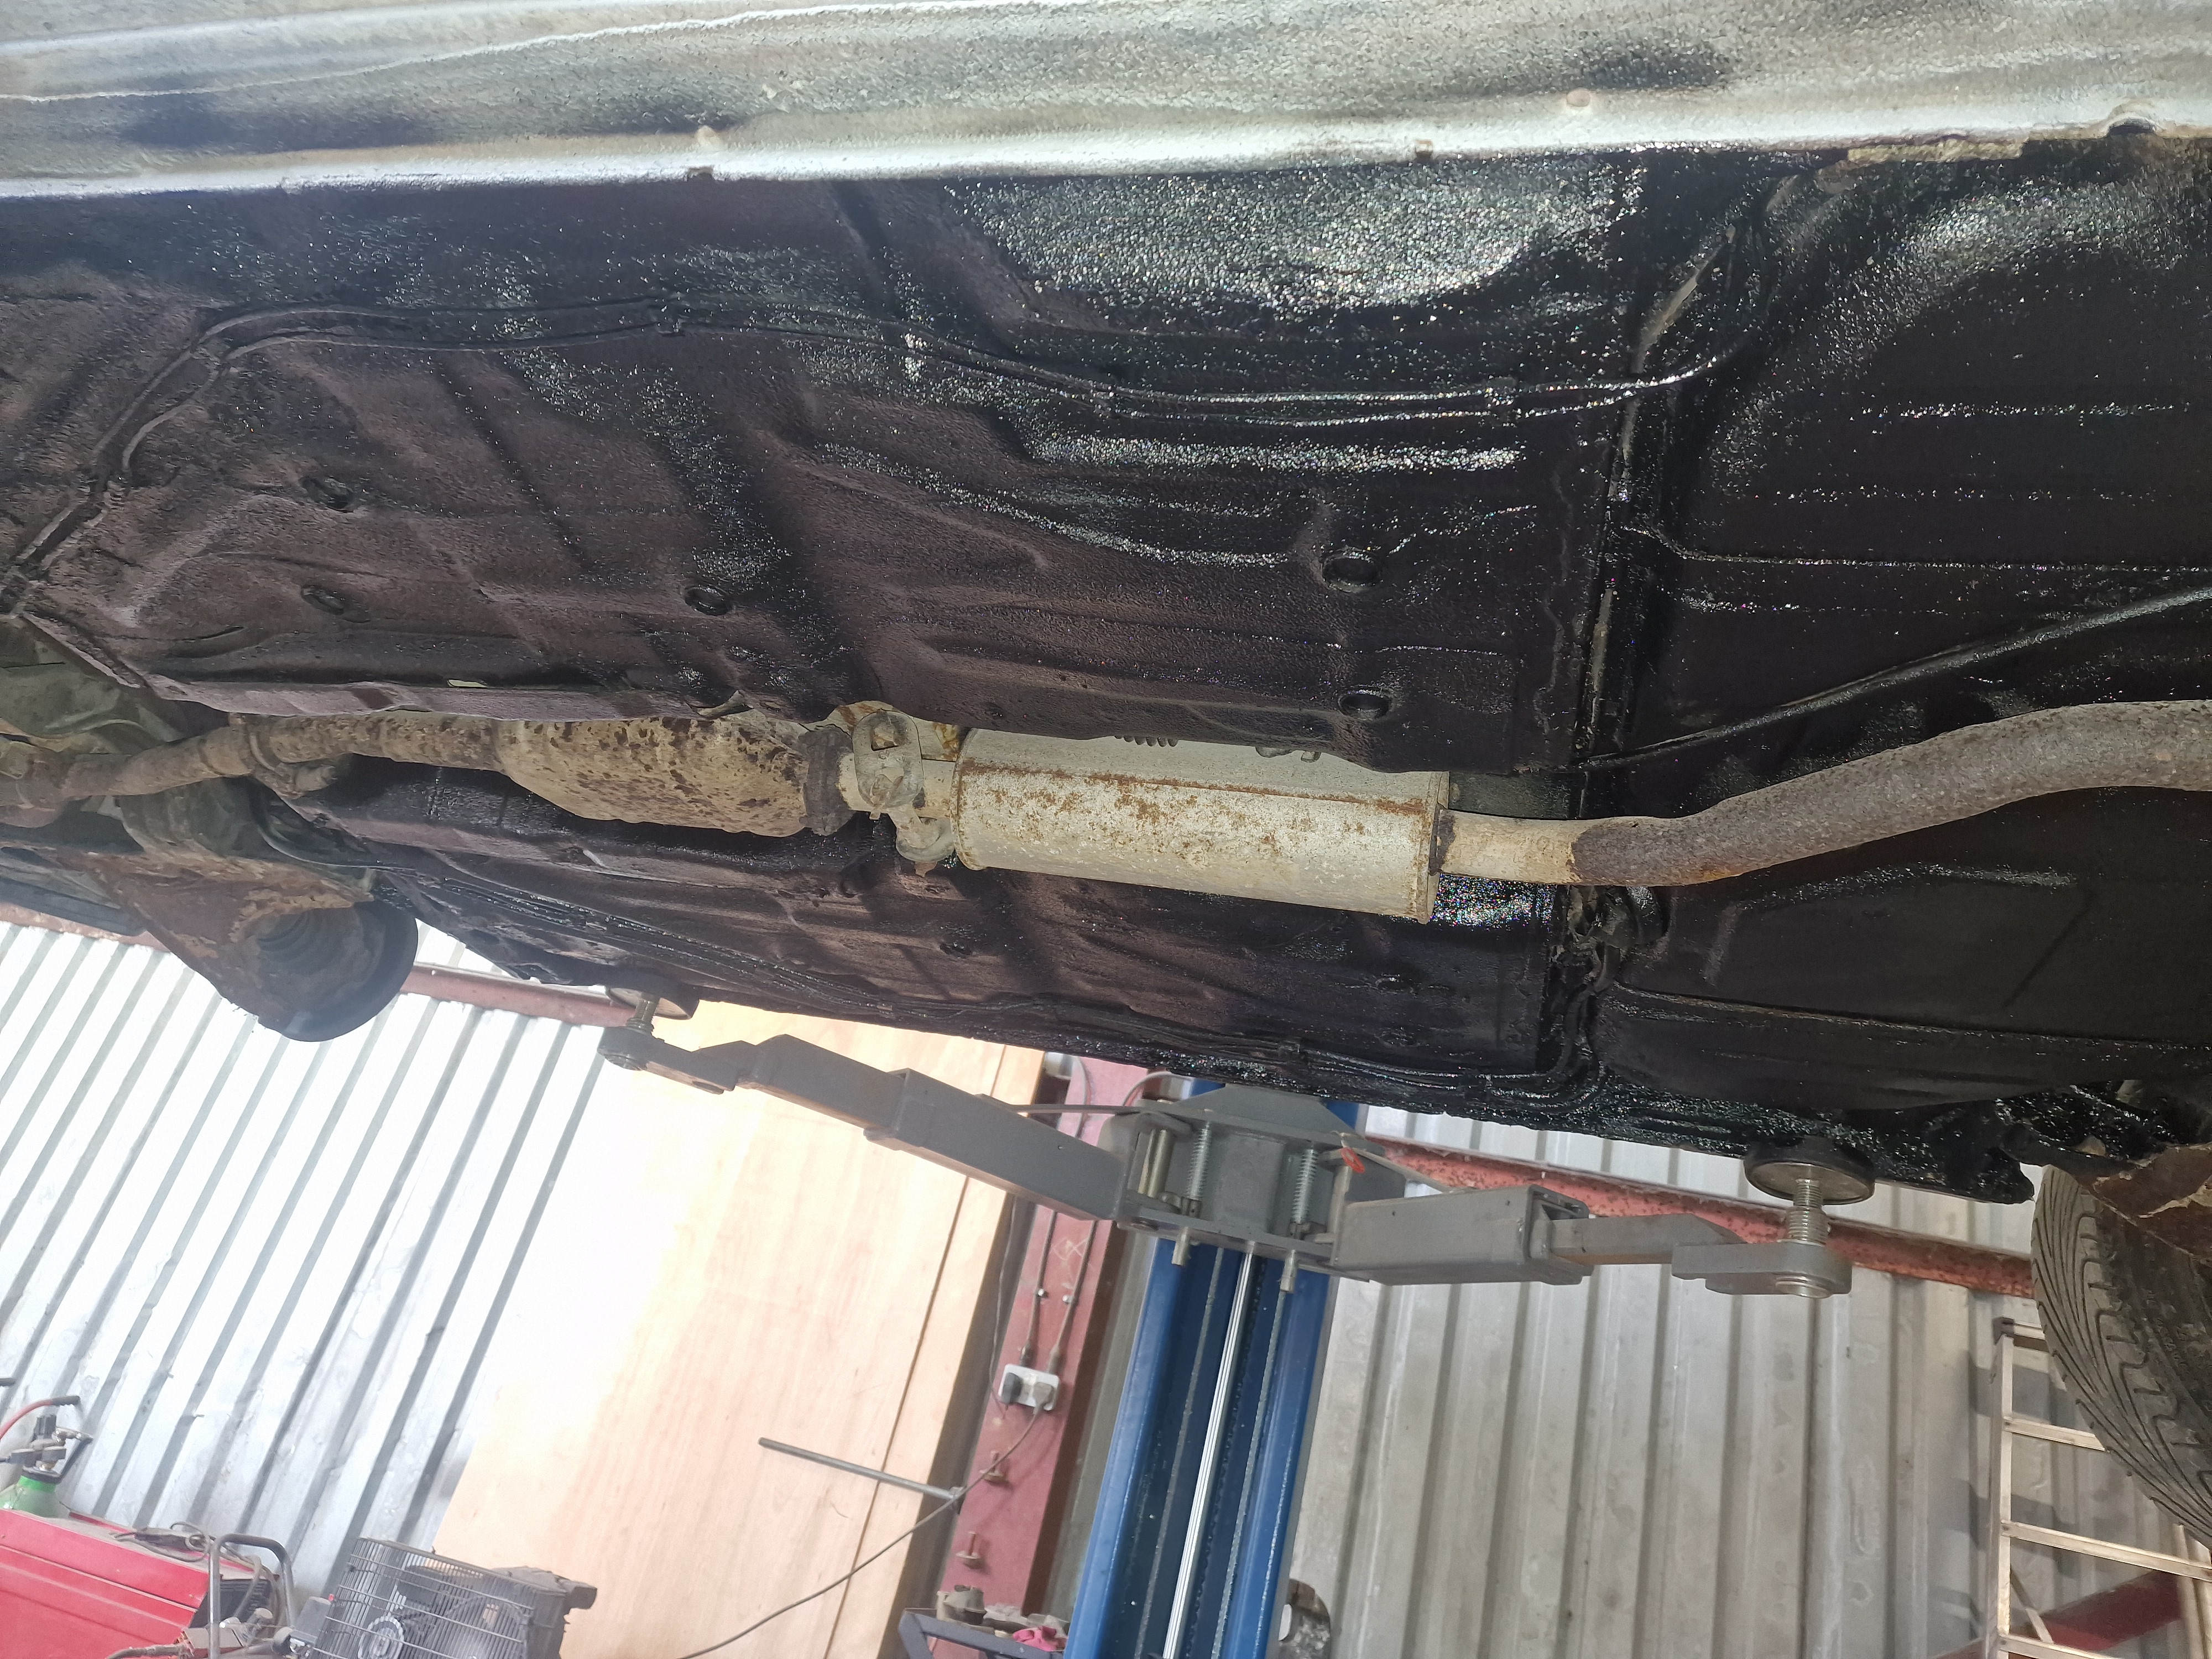
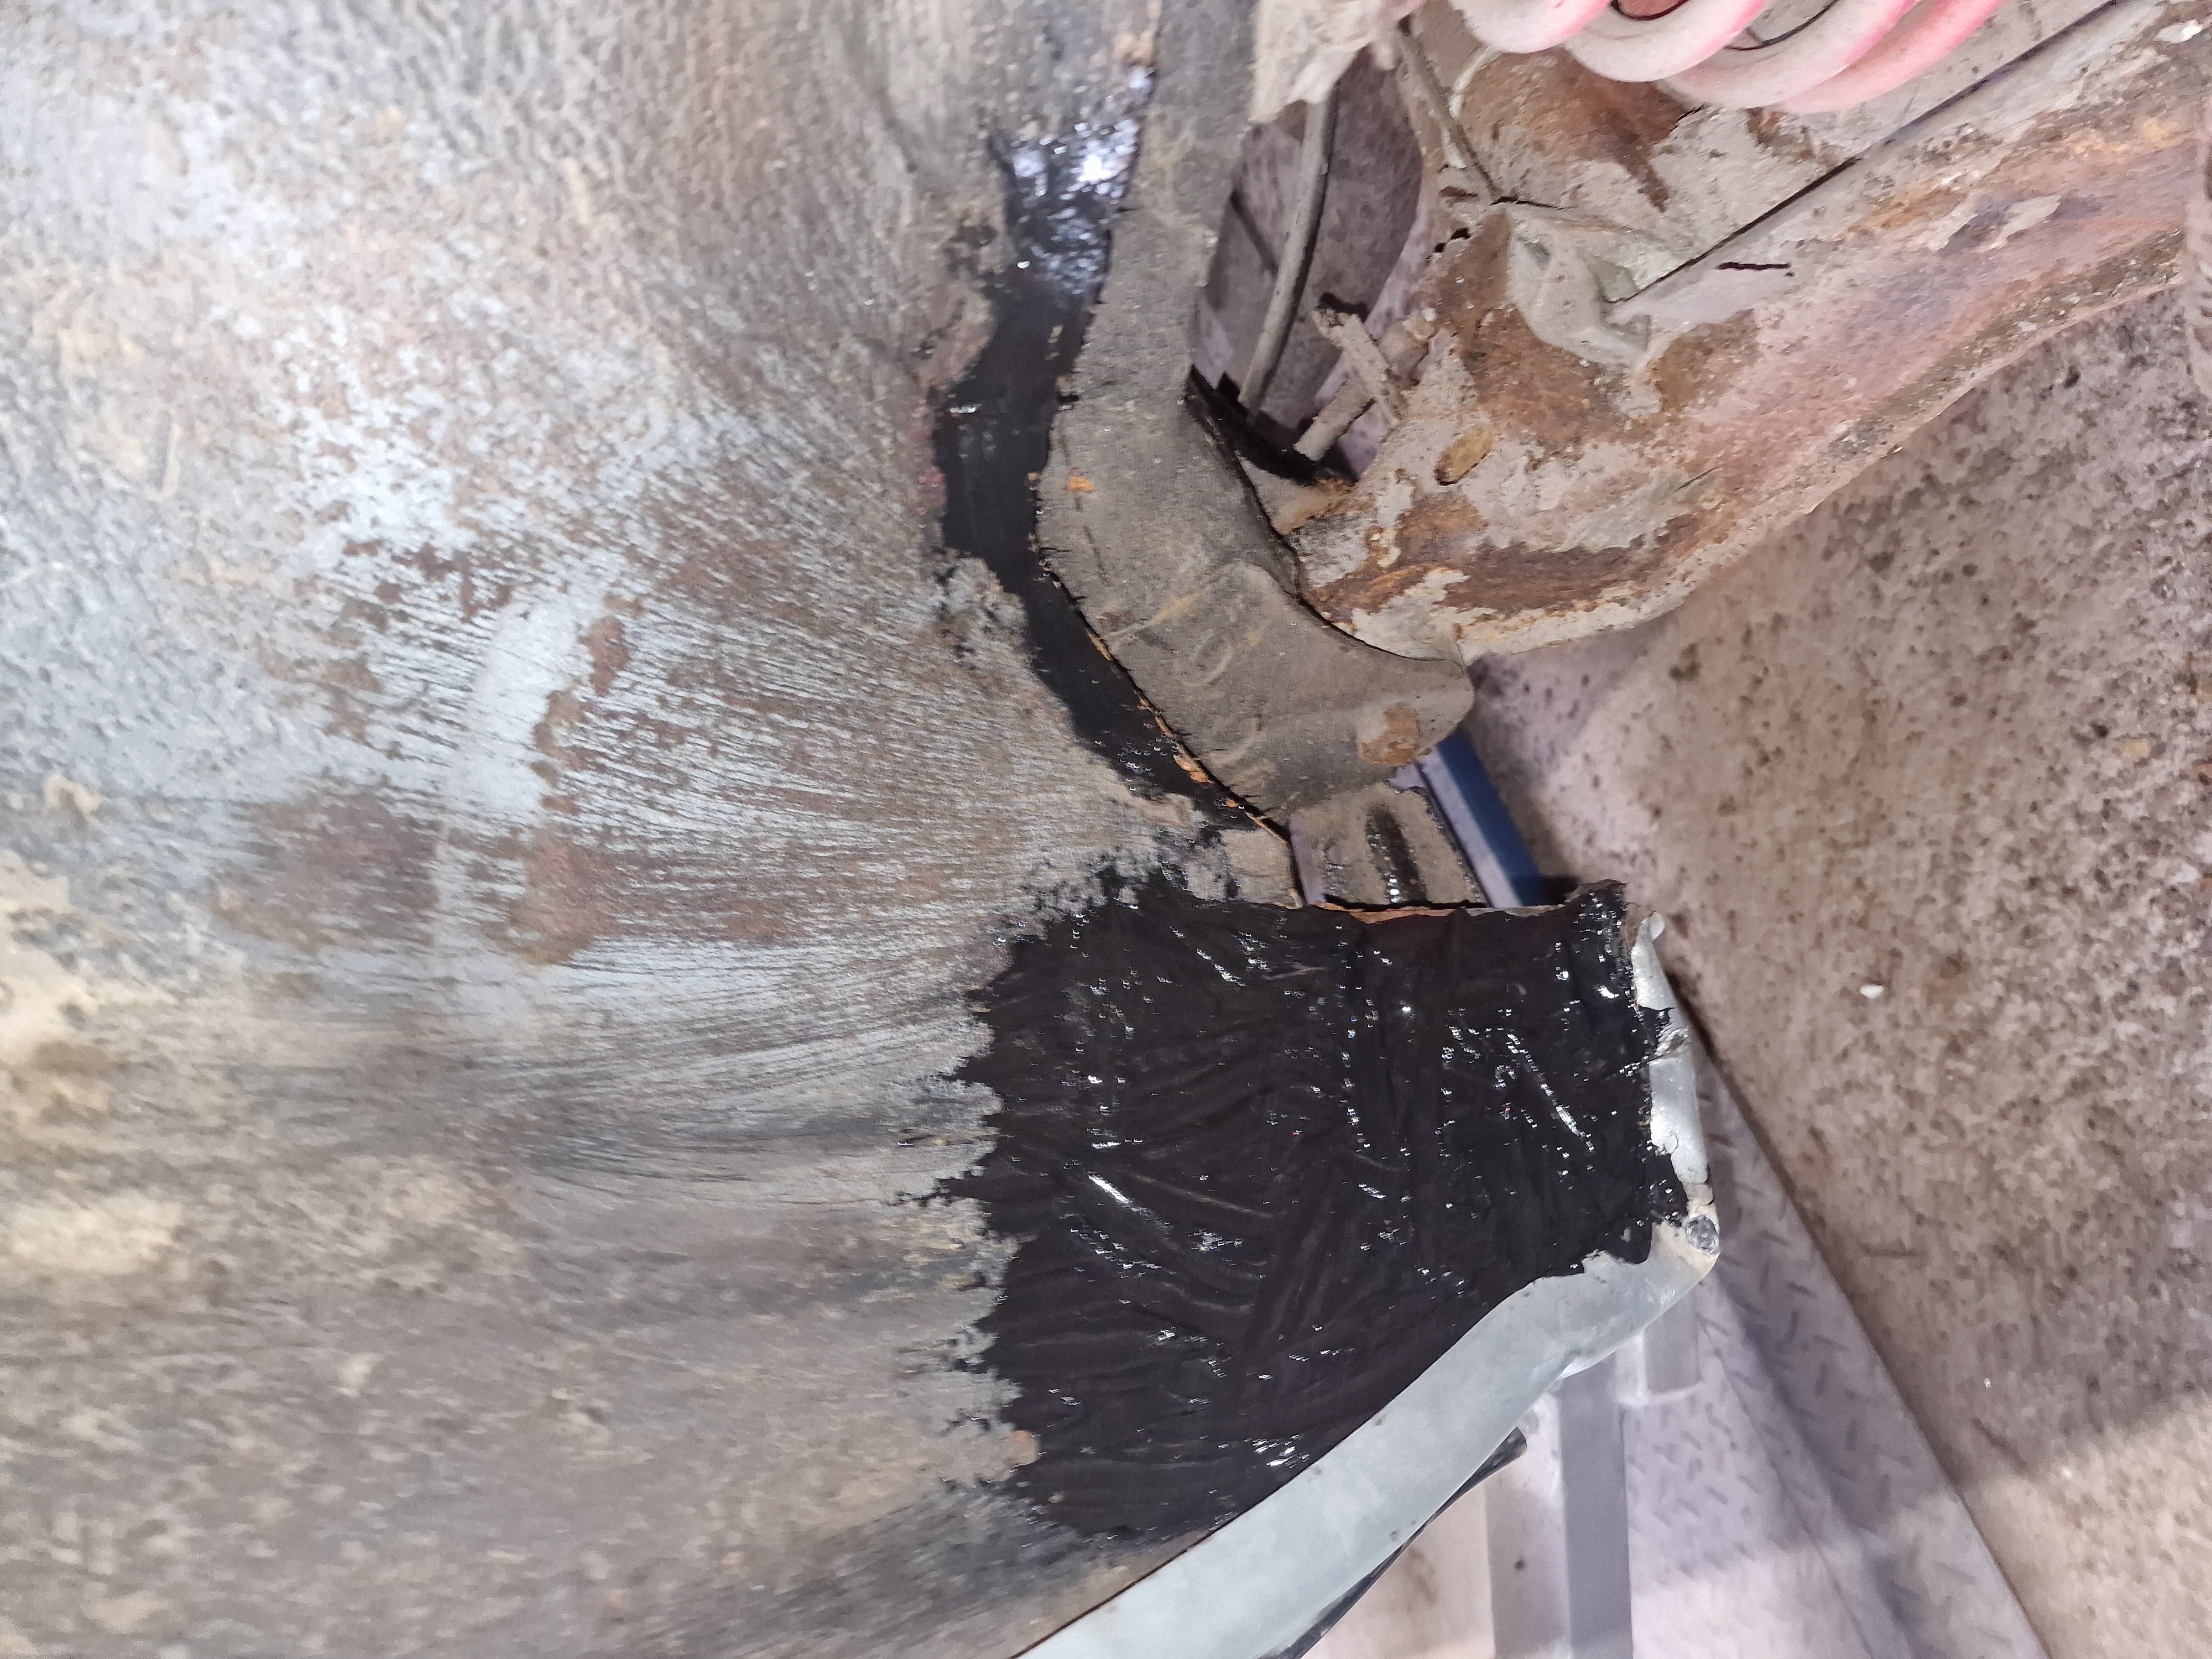
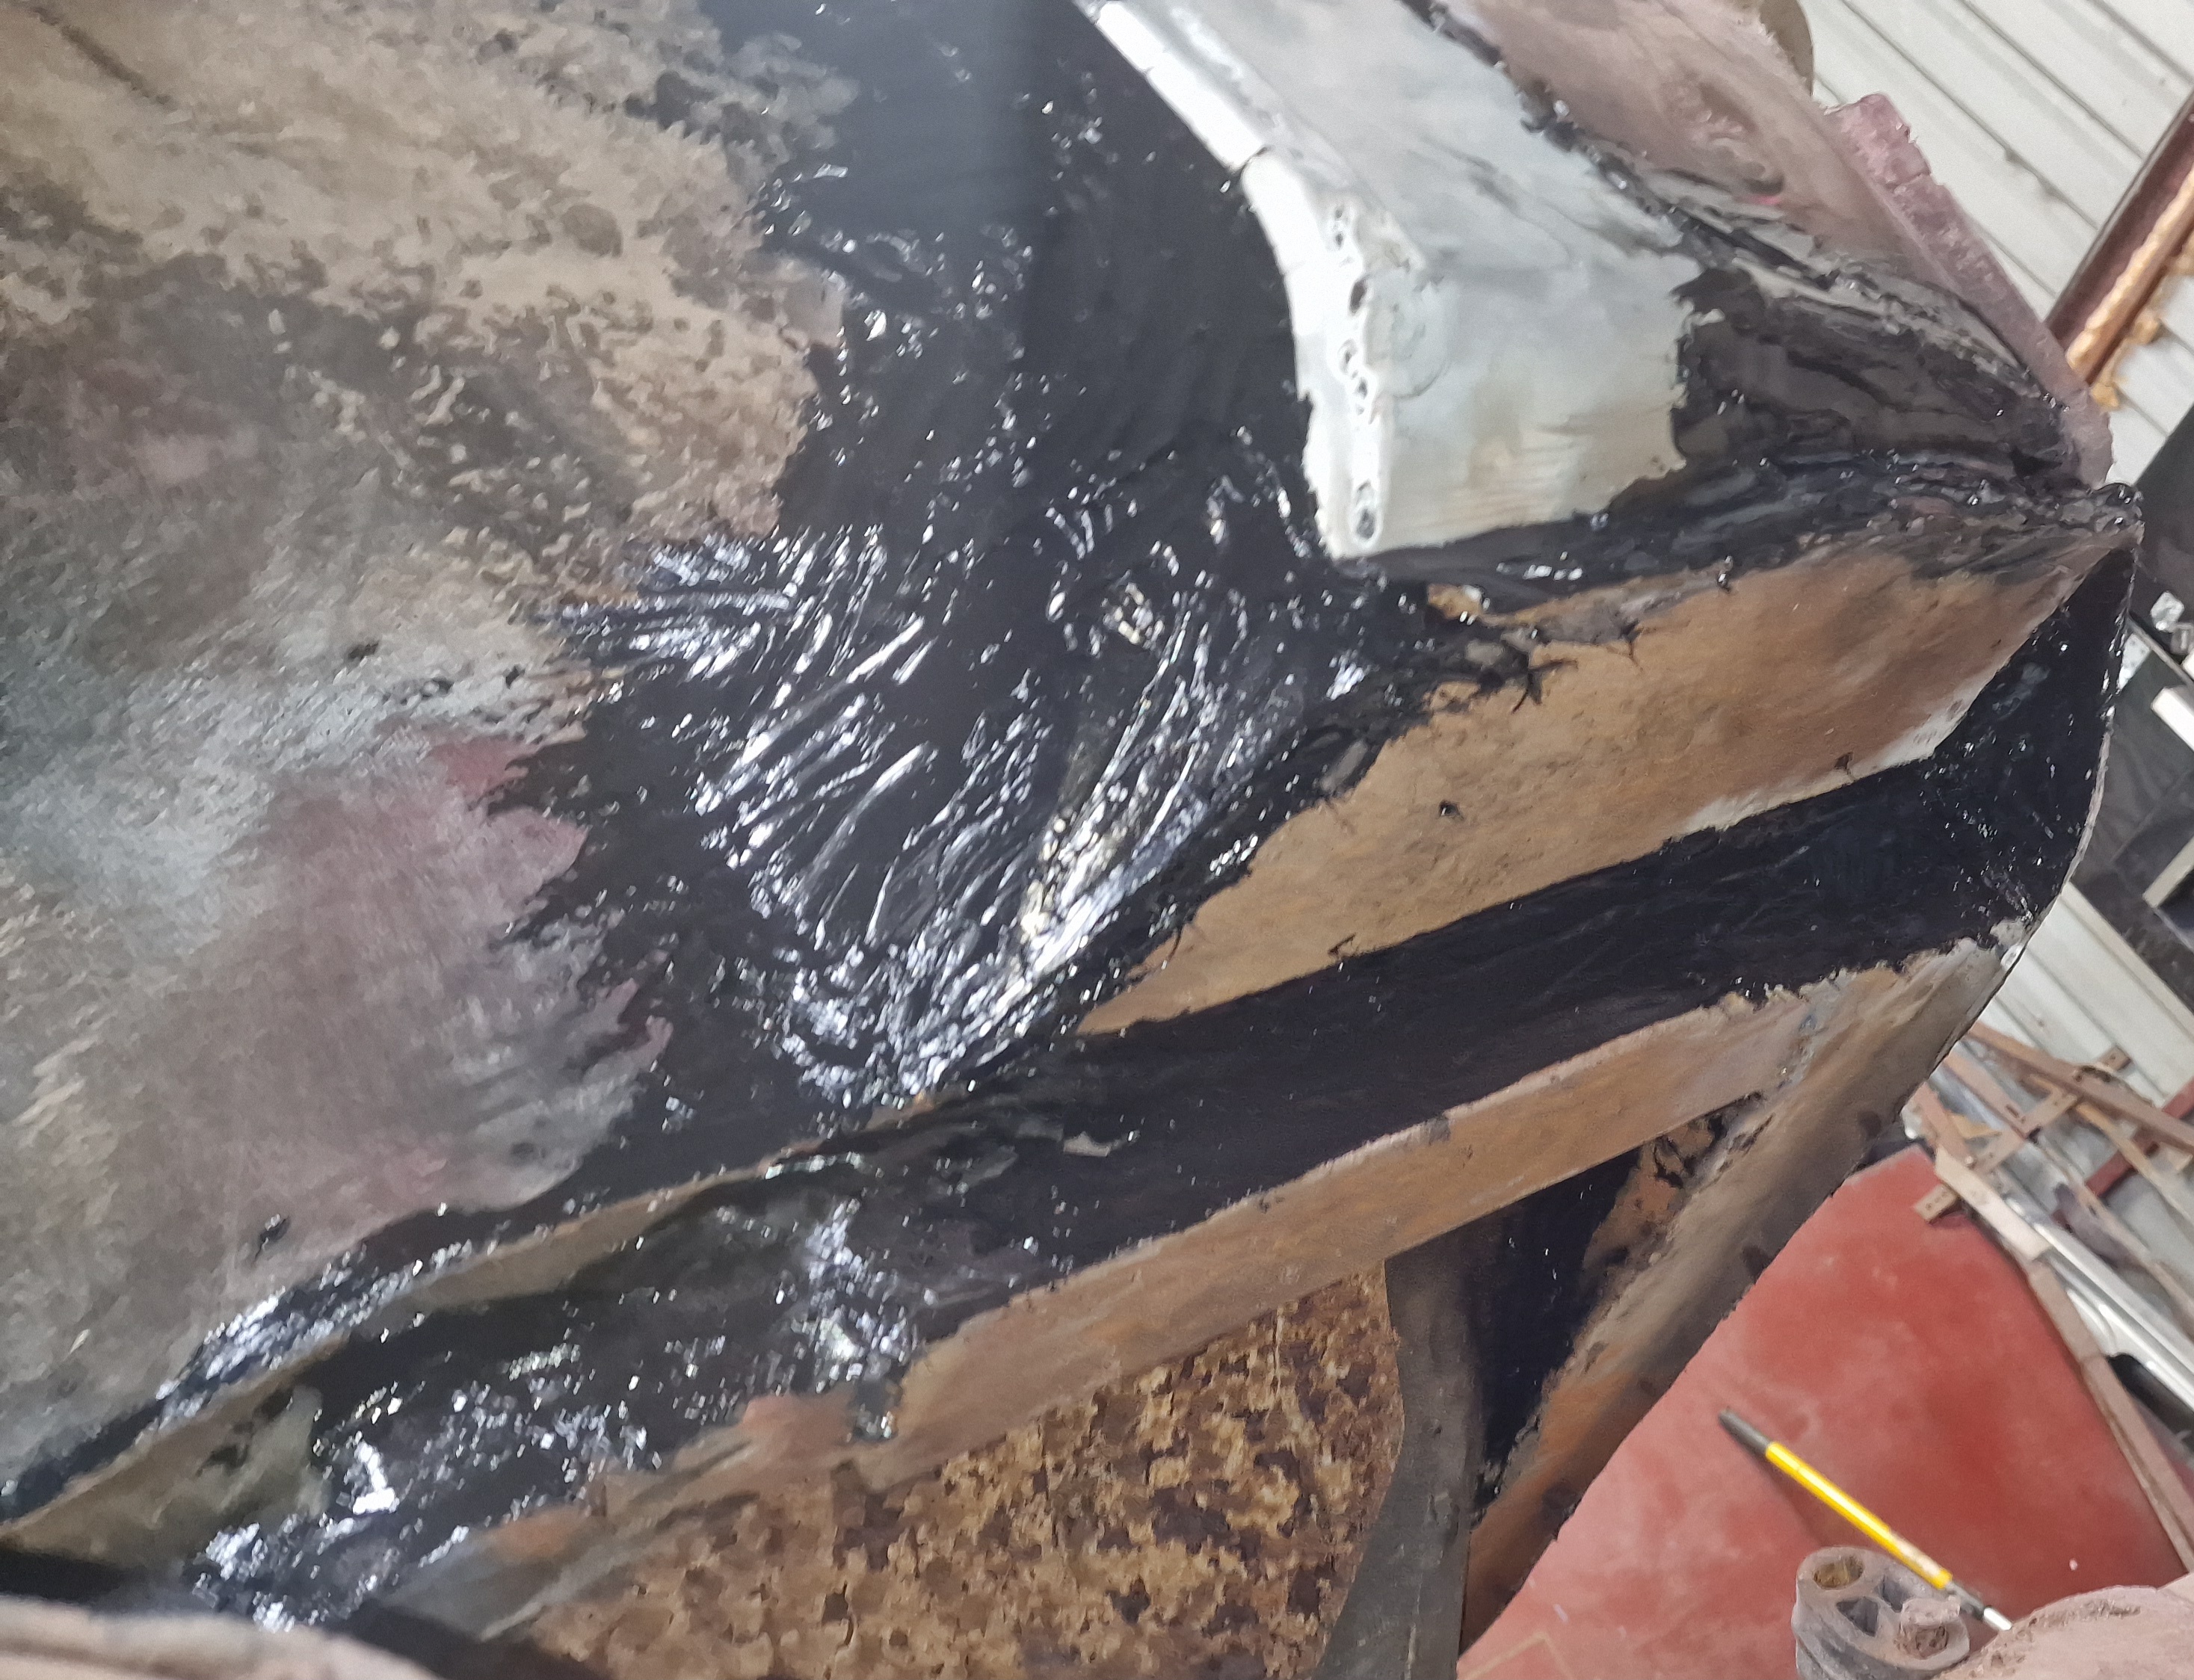
Rear crossmember and chassis leg rot:
 Cavy updates by Sean Boyle, on Flickr
 Cavy updates by Sean Boyle, on Flickr
 Cavy updates by Sean Boyle, on Flickr
 Cavy updates by Sean Boyle, on Flickr
During:
 20230925_172308 by Sean Boyle, on Flickr
Boot floor corner before:
 Boot floor by Sean Boyle, on Flickr
During:
 Boot floor by Sean Boyle, on Flickr
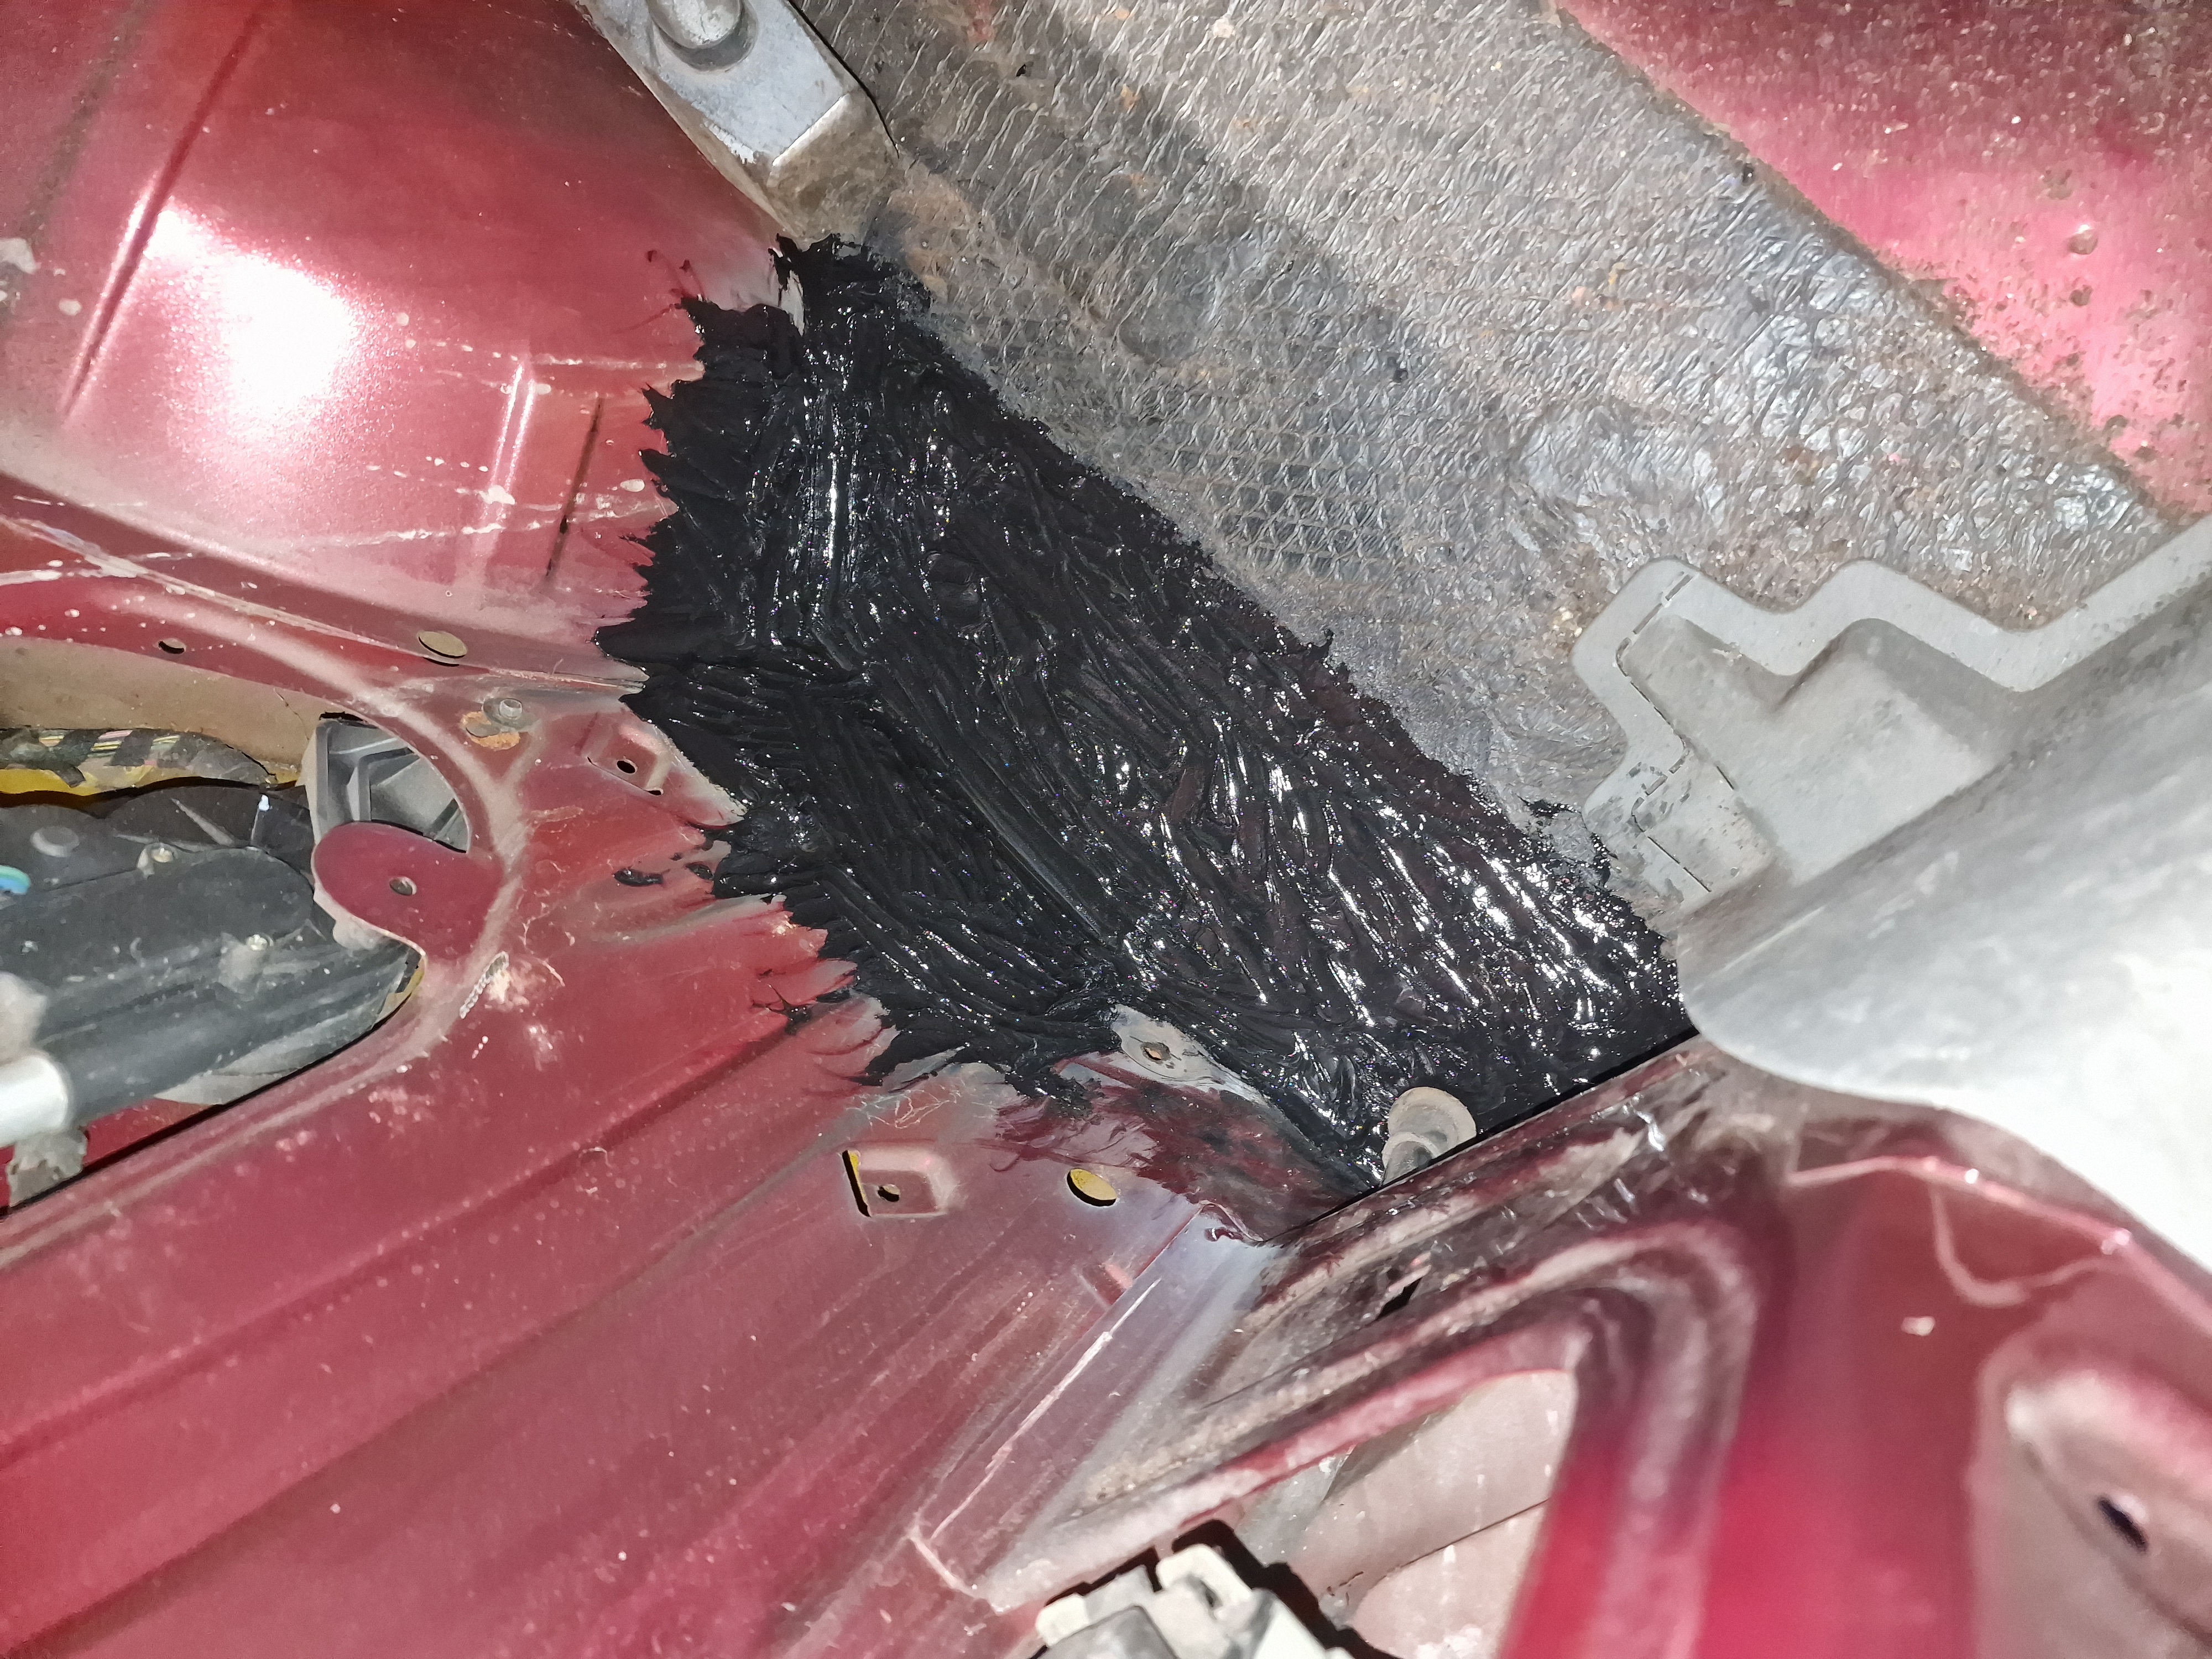
After welding and tigersealed:
 Boot floor by Sean Boyle, on Flickr
Cavy updates by Sean Boyle, on FlickrCavy updates by Sean Boyle, on FlickrCavy updates by Sean Boyle, on FlickrCavy updates by Sean Boyle, on FlickrDuring:
20230925_172308 by Sean Boyle, on FlickrBoot floor corner before:
Boot floor by Sean Boyle, on FlickrDuring:
Boot floor by Sean Boyle, on FlickrAfter welding and tigersealed:
Boot floor by Sean Boyle, on FlickrRe: 1993 'L' Cavalier Project, 2.0 GLS AUTO, My 4th Cavalier
Rot behind rear bumper before:
 Crossmember and arch by Sean Boyle, on Flickr
I made up a repair panel in 2 pieces this all tied into the repair work done under the car:
 Crossmember and arch by Sean Boyle, on Flickr
All finished and tigersealed:
 Crossmember and arch by Sean Boyle, on Flickr
Crossmember and arch by Sean Boyle, on FlickrI made up a repair panel in 2 pieces this all tied into the repair work done under the car:
Crossmember and arch by Sean Boyle, on FlickrAll finished and tigersealed:
Crossmember and arch by Sean Boyle, on FlickrRe: 1993 'L' Cavalier Project, 2.0 GLS AUTO, My 4th Cavalier
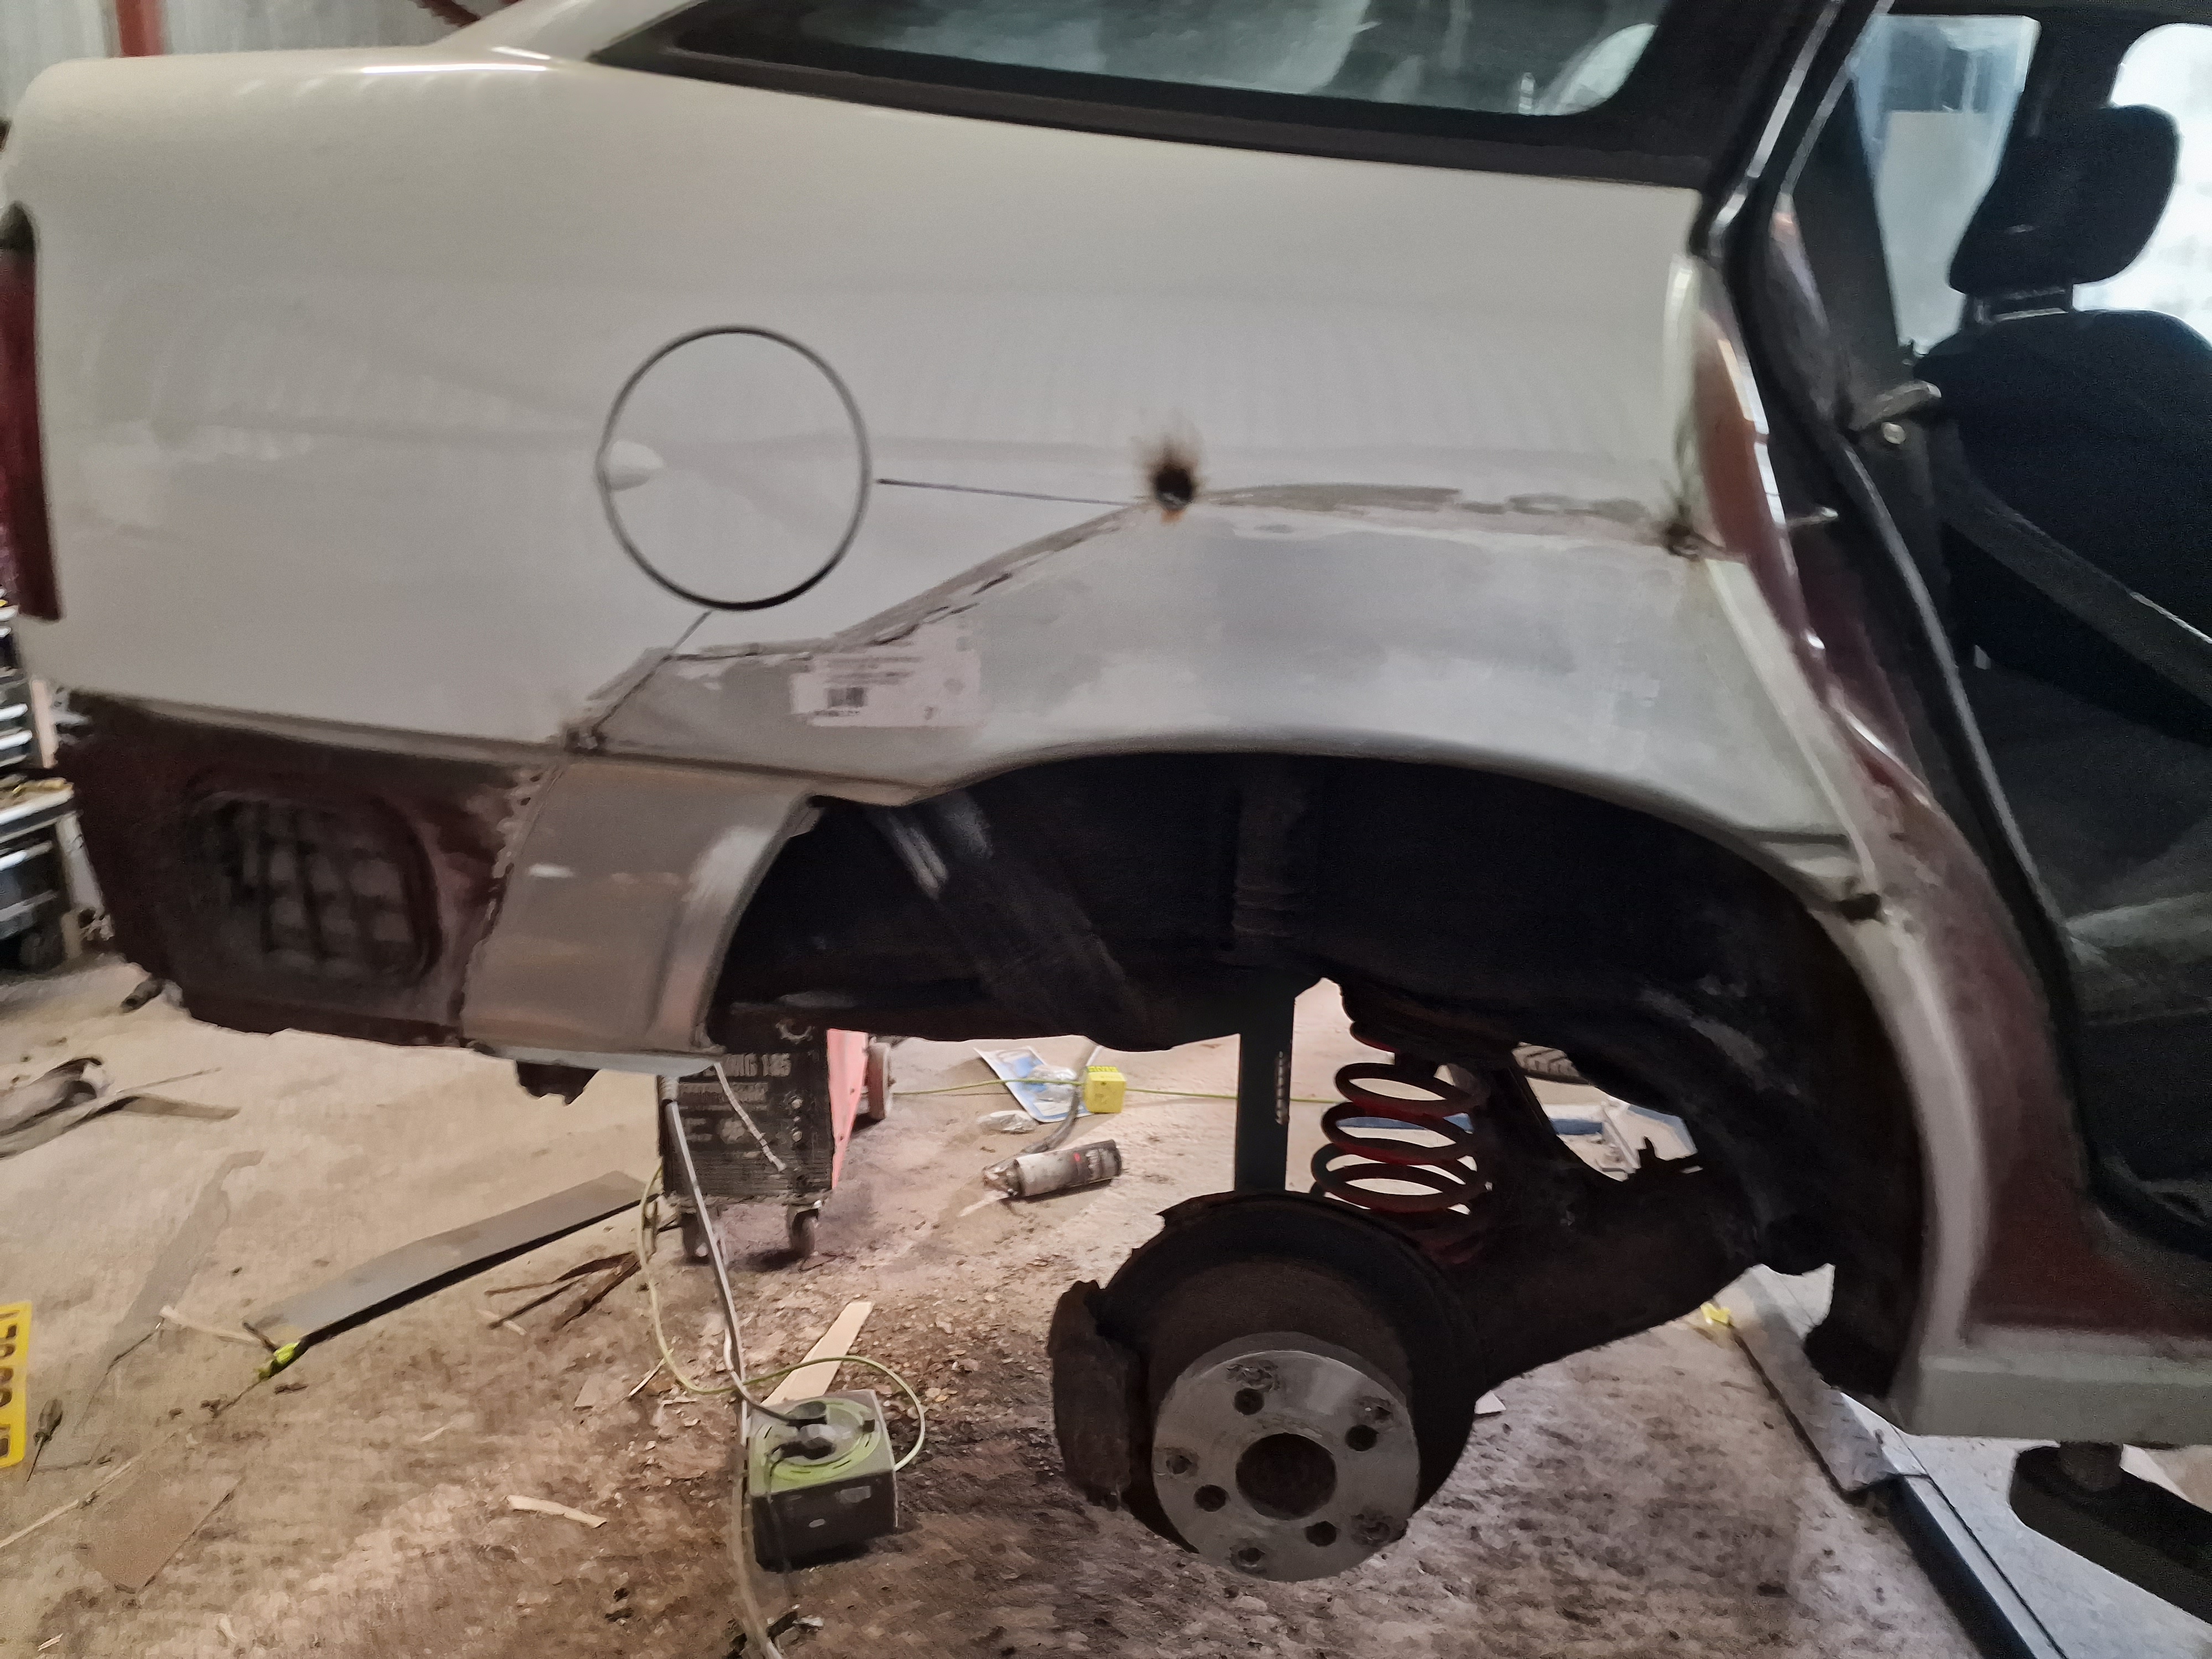
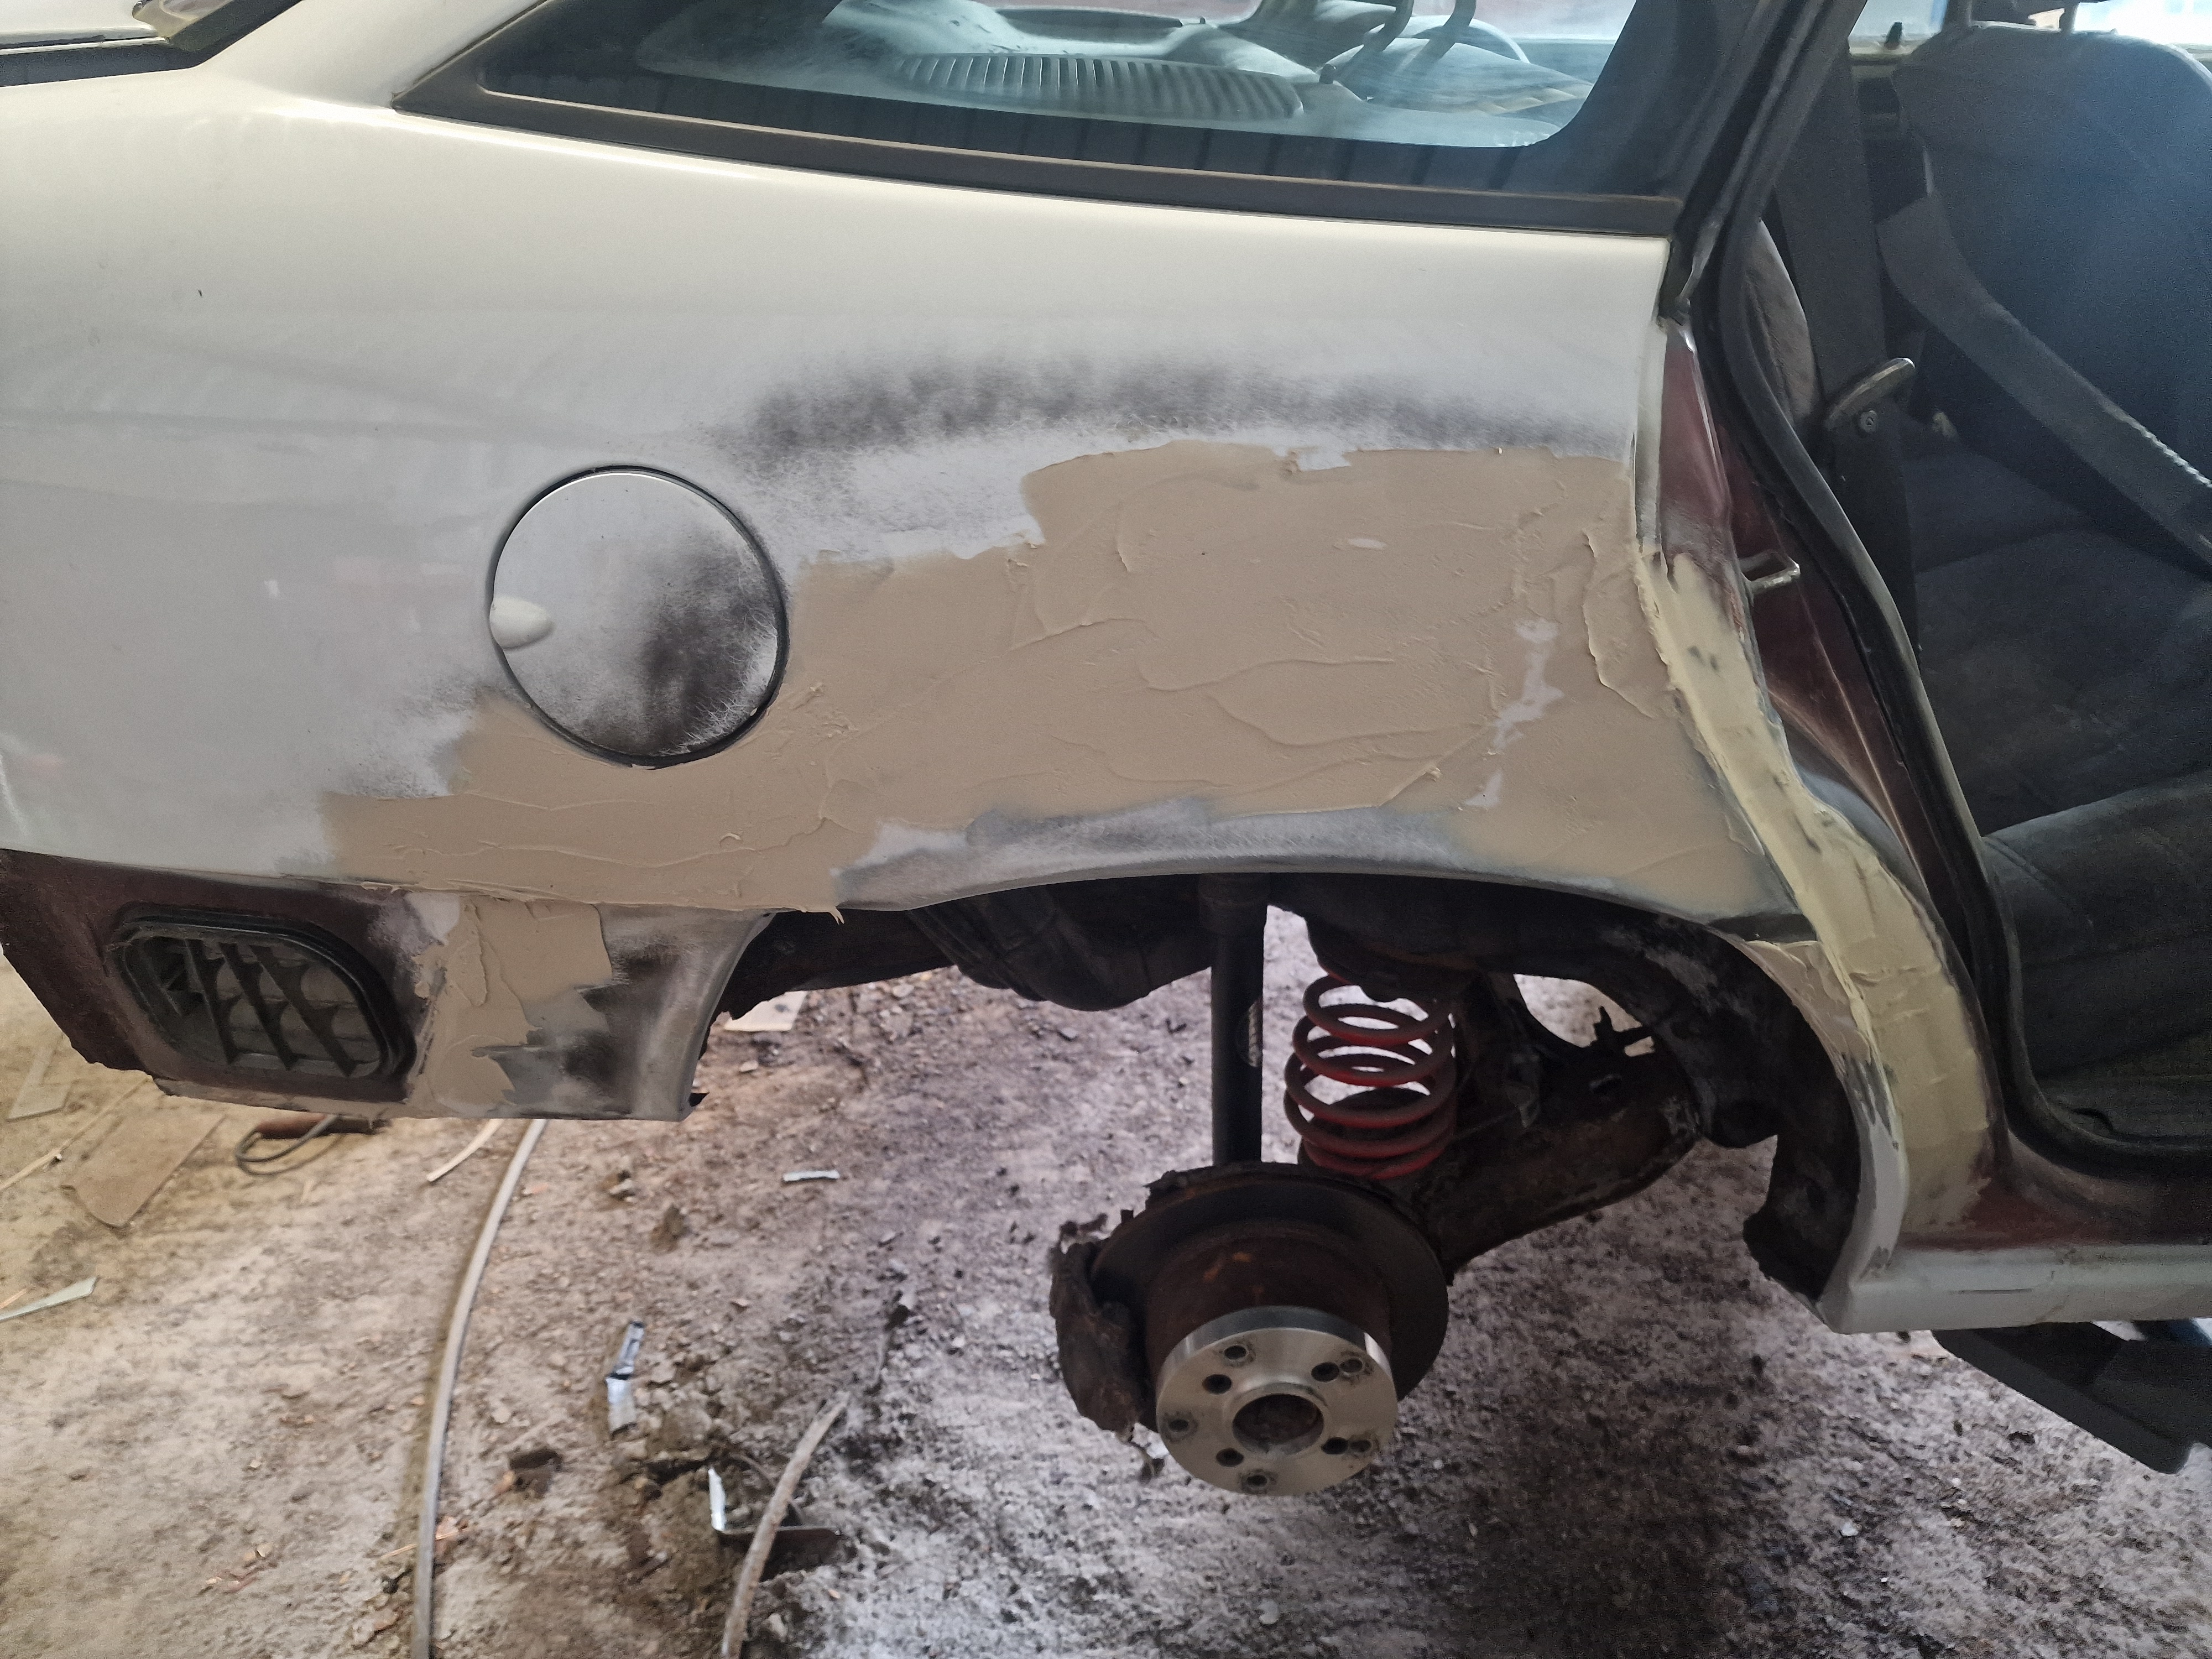
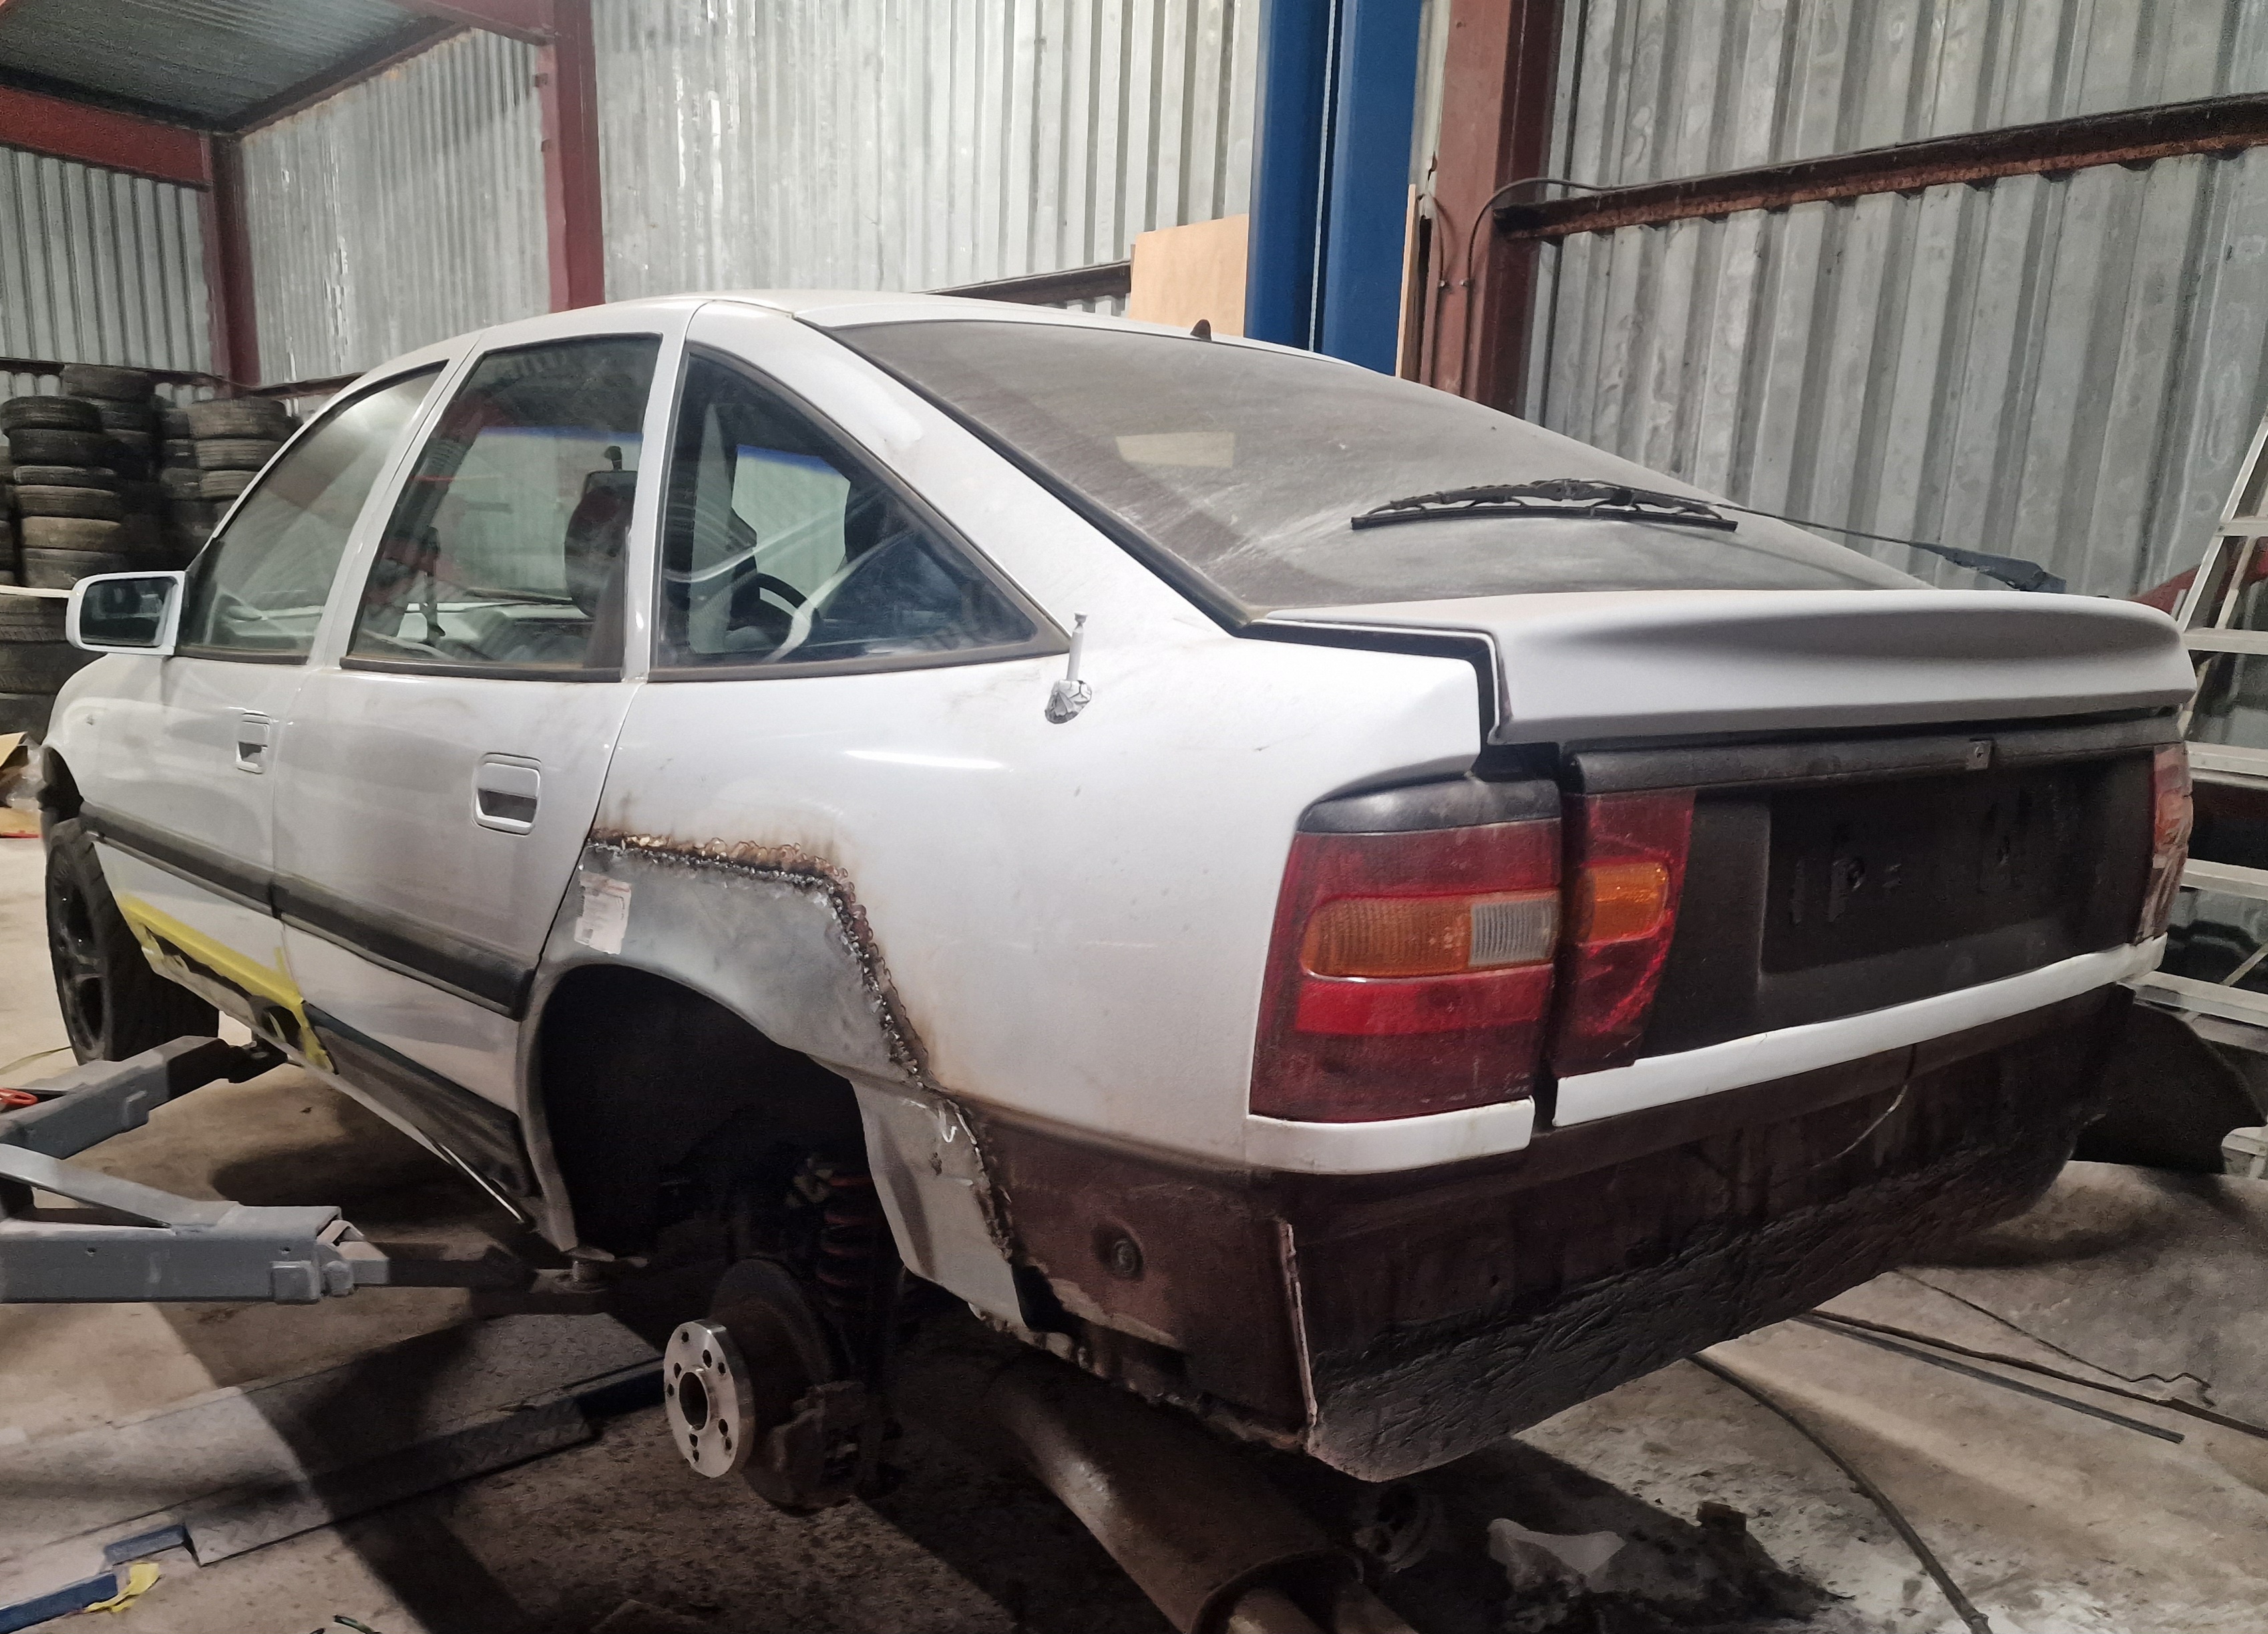
Passenger rear arch before:
 20230925_111754 by Sean Boyle, on Flickr
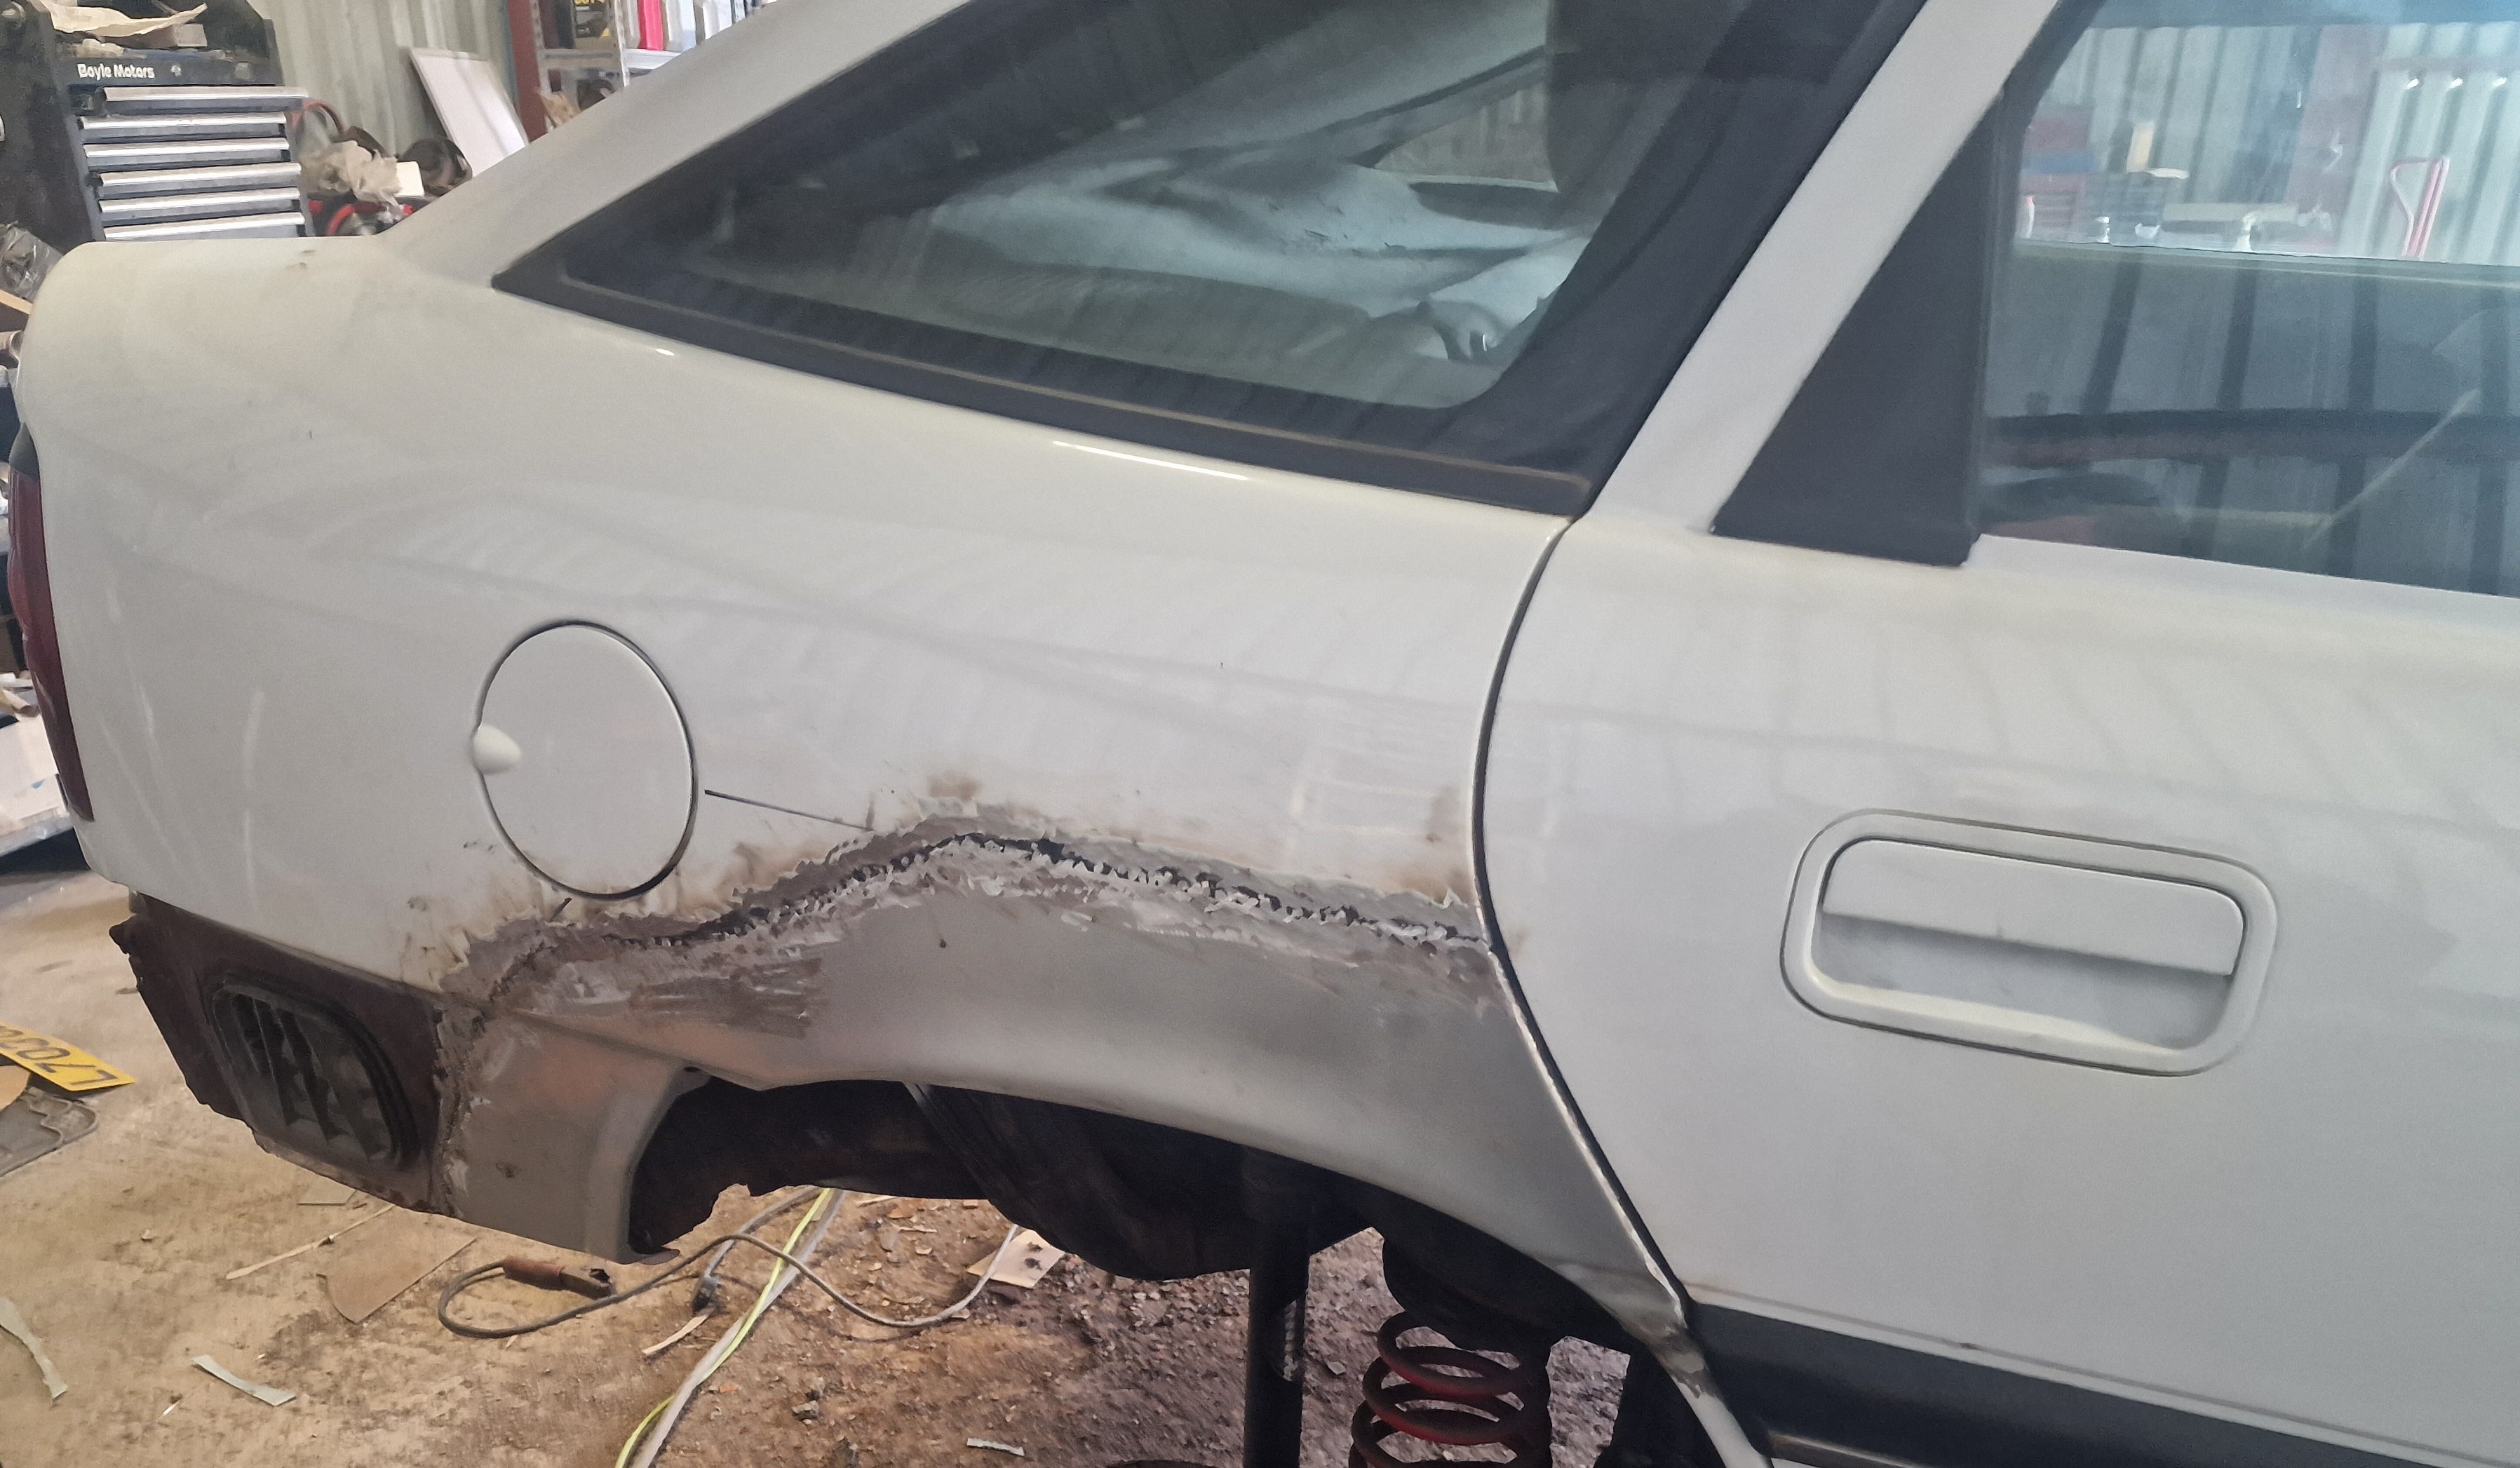
Drivers rear arch before:
 20230925_111802 by Sean Boyle, on Flickr
Whilst the rear bumper was off I got started on the drivers wheel arch repair panel:
 Crossmember and arch by Sean Boyle, on Flickr
 Crossmember and arch by Sean Boyle, on Flickr
 Crossmember and arch by Sean Boyle, on Flickr
20230925_111754 by Sean Boyle, on FlickrDrivers rear arch before:
20230925_111802 by Sean Boyle, on FlickrWhilst the rear bumper was off I got started on the drivers wheel arch repair panel:
Crossmember and arch by Sean Boyle, on FlickrCrossmember and arch by Sean Boyle, on FlickrCrossmember and arch by Sean Boyle, on FlickrRe: 1993 'L' Cavalier Project, 2.0 GLS AUTO, My 4th Cavalier
First door strip tigersealed on:
 20230926_142156 by Sean Boyle, on Flickr
Floor undersealed, no holes so nice and straight forward:
 20230925_110913 by Sean Boyle, on Flickr
20230926_142156 by Sean Boyle, on FlickrFloor undersealed, no holes so nice and straight forward:
20230925_110913 by Sean Boyle, on FlickrRe: 1993 'L' Cavalier Project, 2.0 GLS AUTO, My 4th Cavalier
Started again today on the OSR arch repair panel, got it ground back and then finished the last few welds left to do on it before applying multiple layers of fillers:
 Drivers rear arch by Sean Boyle, on Flickr
1st fill:
 Osr arch repair by Sean Boyle, on Flickr
Last fill:
 Osr arch repair by Sean Boyle, on Flickr
After that I have moved onto dolphin glaze filler:
 Osr arch repair by Sean Boyle, on Flickr
Other update so far is the second door strip has been tigersealed on:
 Drivers rear arch by Sean Boyle, on Flickr
In preparation of the Porsche split rims and for future wheel options ive also rolled the inside lip of the arch to hopefully avoid any rubbing on the wheels:
 Rolled arch by Sean Boyle, on Flickr
Drivers rear arch by Sean Boyle, on Flickr1st fill:
Osr arch repair by Sean Boyle, on FlickrLast fill:
Osr arch repair by Sean Boyle, on FlickrAfter that I have moved onto dolphin glaze filler:
Osr arch repair by Sean Boyle, on FlickrOther update so far is the second door strip has been tigersealed on:
Drivers rear arch by Sean Boyle, on FlickrIn preparation of the Porsche split rims and for future wheel options ive also rolled the inside lip of the arch to hopefully avoid any rubbing on the wheels:
Rolled arch by Sean Boyle, on FlickrRe: 1993 'L' Cavalier Project, 2.0 GLS AUTO, Restoration Work Begins
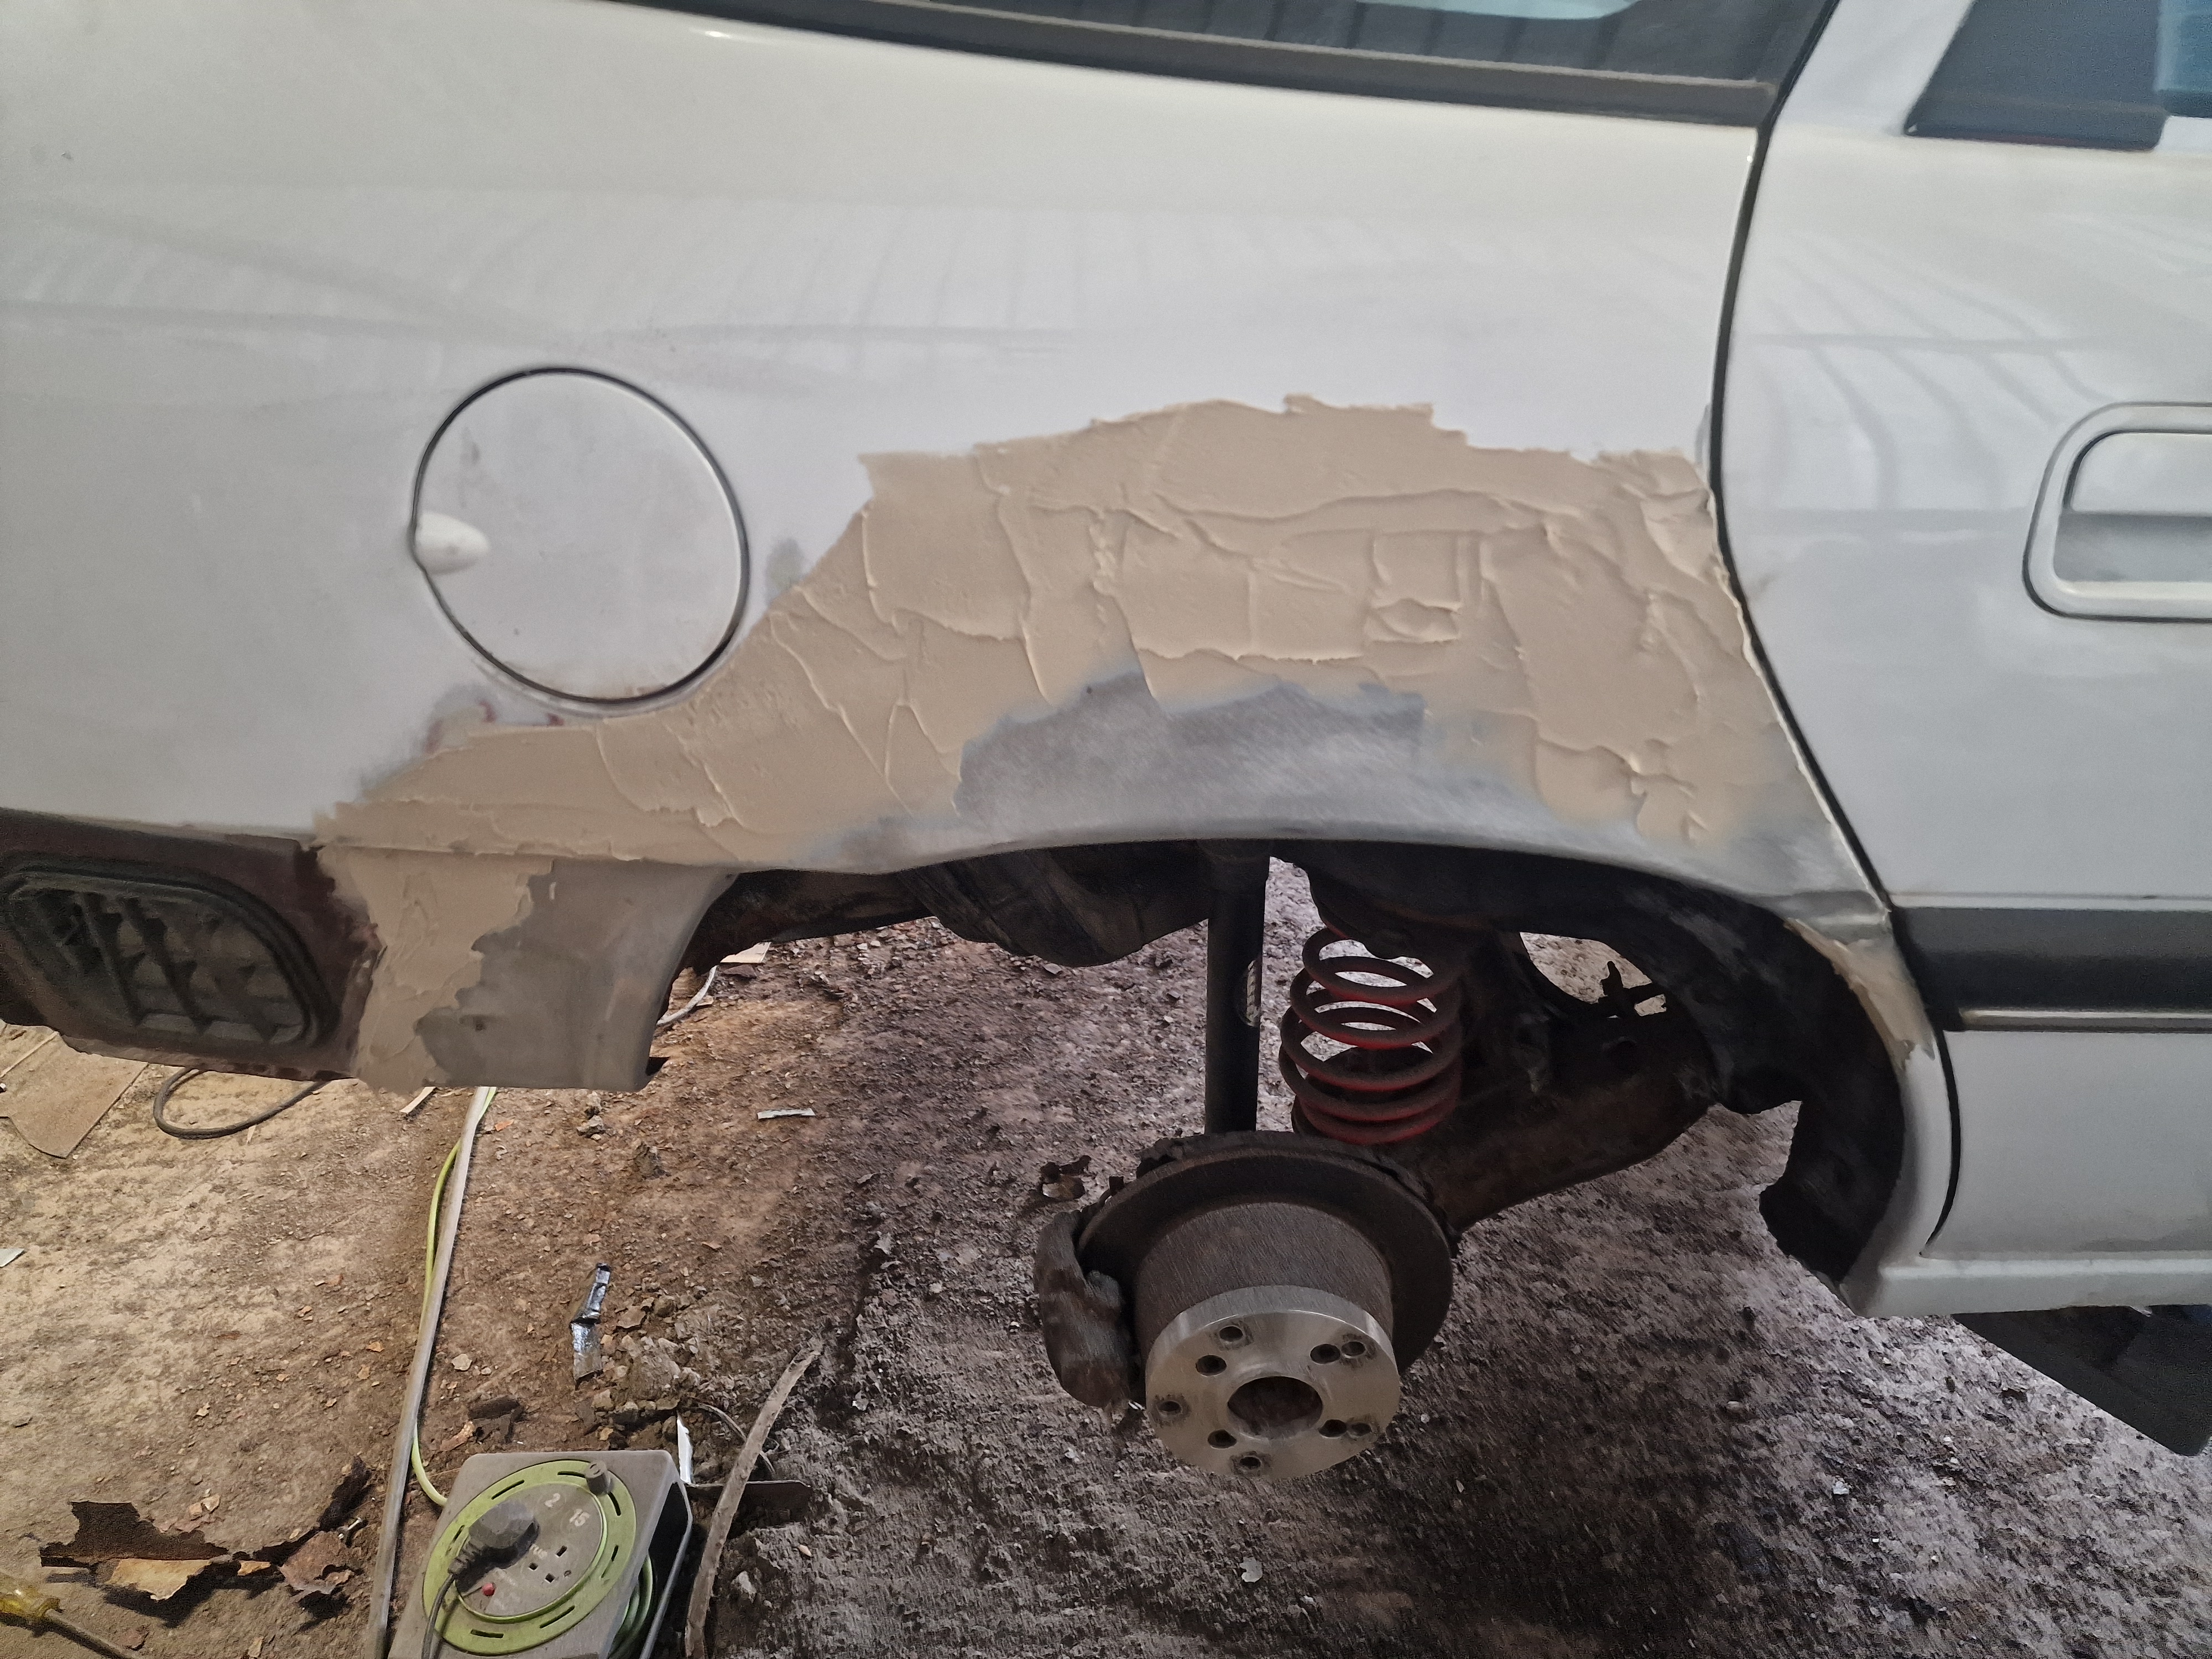
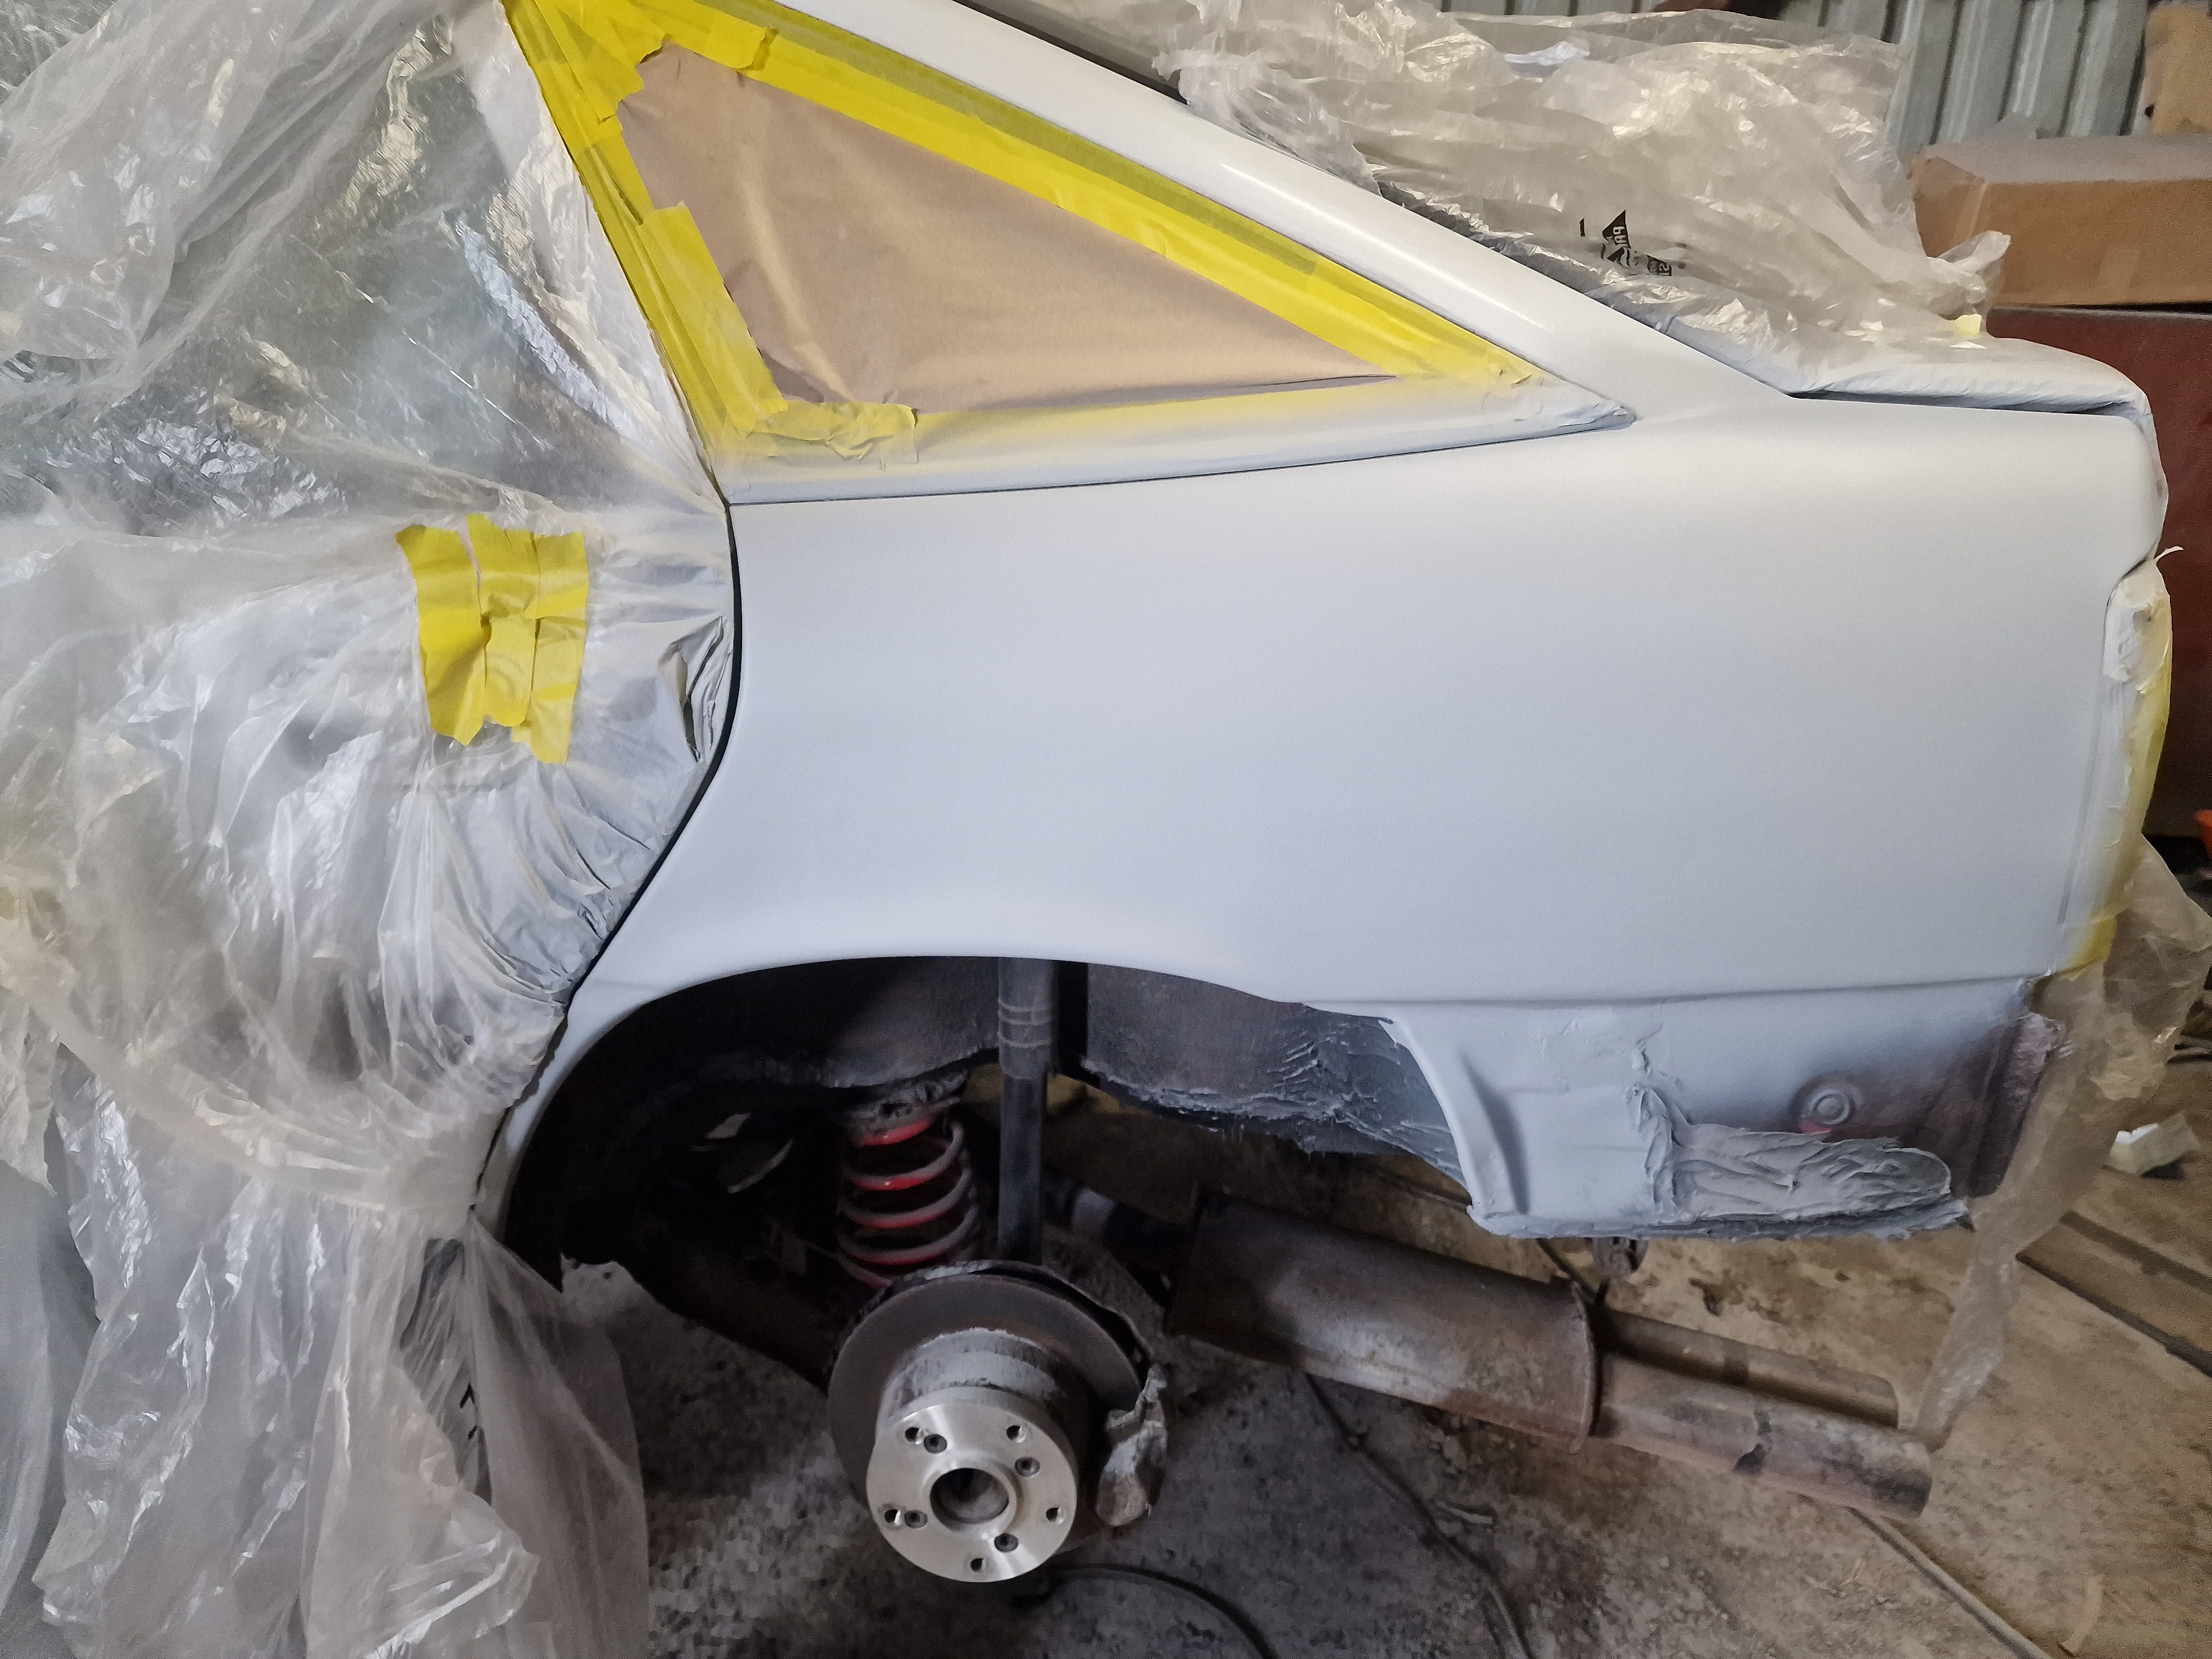
Tonight I am at the point where the osr is almost finished repairs and now into its 1st coat of primer:
 20230927_164222 by Sean Boyle, on Flickr
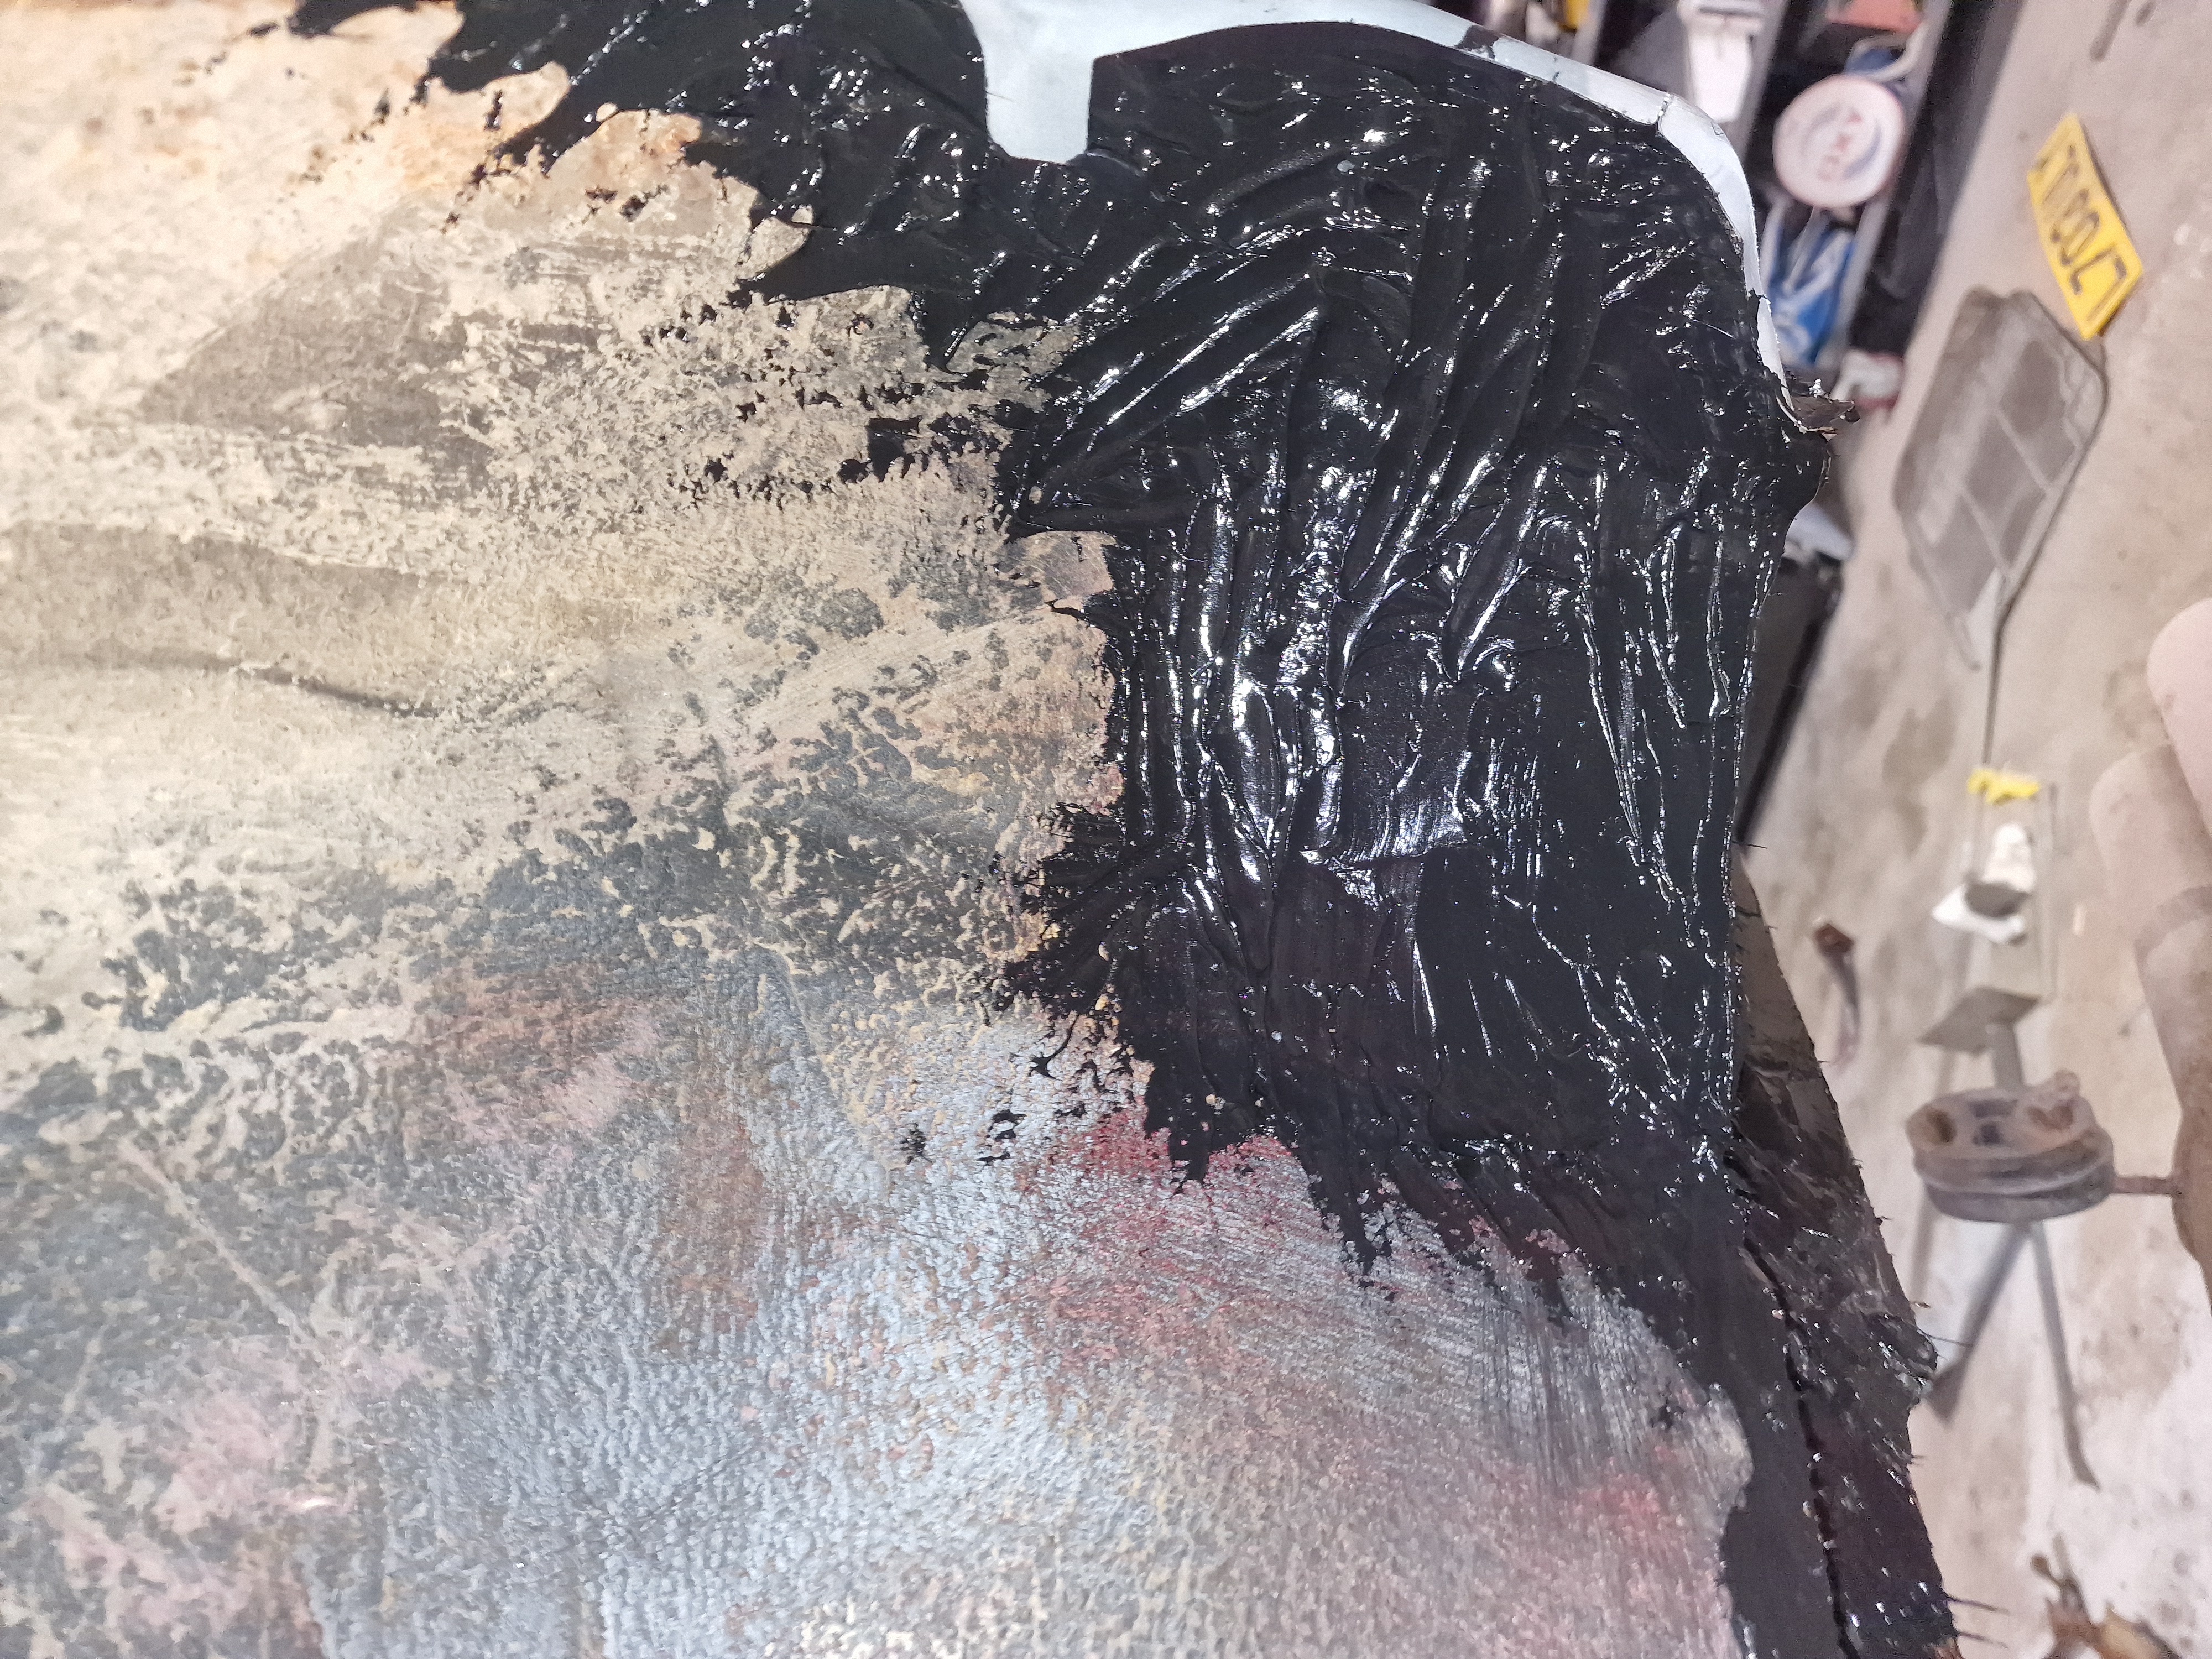
I've stone chipped the underneath of the arch and also all the area behind the bumper and moved onto the passenger side:
 20230927_172859 by Sean Boyle, on Flickr
I will have a few patches of welding to do tomorrow morning in the bumper area and inside the passenger arch but its almost all solid metal now:
 20230927_204022 by Sean Boyle, on Flickr
 20230927_203957 by Sean Boyle, on Flickr
20230927_164222 by Sean Boyle, on FlickrI've stone chipped the underneath of the arch and also all the area behind the bumper and moved onto the passenger side:
20230927_172859 by Sean Boyle, on FlickrI will have a few patches of welding to do tomorrow morning in the bumper area and inside the passenger arch but its almost all solid metal now:
20230927_204022 by Sean Boyle, on Flickr20230927_203957 by Sean Boyle, on Flickr-
thomas
- Registered user
- Posts: 236
- Joined: Sat Dec 31, 2011 11:18 pm
- Location: Roxburghshire, Scotland
Re: 1993 Cavalier Project, 2.0 GLS AUTO, Restoration Work Begins
Some pace, I'm dizzy.
Rear-quarters look very tidy work, un-distorted, minimal filler. Might sink a bit, need a few more coats, some time to pass, more flatting, some depth of primer, to come up to the level of the surrounding top layer, factory primers, then the red, the clear, the white.
Rear-crossmember looks past gone, a new panel there looks the only way, unless something can be knocked-up in one big piece.
My last Cav had a patch or two needed there, but it was a trifle compared to that. Brave man. Good luck.
Must confess I liked the red more than the white, though that might be only temporary, and it could grow on me.
--
Cav 1994 1.8LSi 5-dr Jungle Green Pearl: Daily.
Cav 1994 1.8LSi 5-dr Jungle Green Pearl: Daily.
Re: 1993 Cavalier Project, 2.0 GLS AUTO, Restoration Work Begins
Thanks Thomas, once the passenger side arch is finished I'll be giving it 5-6 coats of 2k high build primer then blocking it flat so hoping it will be pretty straight by then.thomas wrote: ↑Wed Sep 27, 2023 9:37 pm Some pace, I'm dizzy.
Rear-quarters look very tidy work, un-distorted, minimal filler. Might sink a bit, need a few more coats, some time to pass, more flatting, some depth of primer, to come up to the level of the surrounding top layer, factory primers, then the red, the clear, the white.
Rear-crossmember looks past gone, a new panel there looks the only way, unless something can be knocked-up in one big piece.
My last Cav had a patch or two needed there, but it was a trifle compared to that. Brave man. Good luck.
Must confess I liked the red more than the white, though that might be only temporary, and it could grow on me.
I've repaired the rear cross member already will get pics of it tomorrow only bit left to make on it is the exhaust rubber mount.
I can only have it on the ramp again for a short period so had to get all the welding done in 2 days.
The white was just temporary as I had loads of it on the shelf.
The plan now is once the repairs are all finished to respray it metallic black. I chose LC9Z Black Magic its a VW / Audi / Porsche paint code and one of my favourite blacks to paint.
I ordered the paint for it today so hopefully it will be painted next week all going well.
-
thomas
- Registered user
- Posts: 236
- Joined: Sat Dec 31, 2011 11:18 pm
- Location: Roxburghshire, Scotland
Re: 1993 Cavalier Project, 2.0 GLS AUTO, Restoration Work Begins
Black yes, that gets my vote, I can picture it shiny black already, think it'll suit the side-skirts and stuff, blend them in.
It's just a too loud a white you have at moment, for daylight hours.
It's just a too loud a white you have at moment, for daylight hours.
--
Cav 1994 1.8LSi 5-dr Jungle Green Pearl: Daily.
Cav 1994 1.8LSi 5-dr Jungle Green Pearl: Daily.
Re: 1993 Cavalier Project, 2.0 GLS AUTO, Restoration Work Begins
Today I started work again on the Cavalier with the intention of having all the welding finished up on the rear. First up was patching the passenger rear inside arch and tying in all the repairs on each part together underneath and the panel behind the bumper needed a patch of welding too.
Inside welding:
 20230928_115108 by Sean Boyle, on Flickr
Tigersealed:
 20230928_123855 by Sean Boyle, on Flickr
Other side:
 20230928_115116 by Sean Boyle, on Flickr
 20230928_123849 by Sean Boyle, on Flickr
Bumper panel:
 20230928_121603 by Sean Boyle, on Flickr
 20230928_123904 by Sean Boyle, on Flickr
Underneath now the crossmember and floor is repaired:
 20230928_123927 by Sean Boyle, on Flickr
 20230928_123912 by Sean Boyle, on Flickr
Inside welding:
20230928_115108 by Sean Boyle, on FlickrTigersealed:
20230928_123855 by Sean Boyle, on FlickrOther side:
20230928_115116 by Sean Boyle, on Flickr20230928_123849 by Sean Boyle, on FlickrBumper panel:
20230928_121603 by Sean Boyle, on Flickr20230928_123904 by Sean Boyle, on FlickrUnderneath now the crossmember and floor is repaired:
20230928_123927 by Sean Boyle, on Flickr20230928_123912 by Sean Boyle, on FlickrRe: 1993 Cavalier Project, 2.0 GLS AUTO, Restoration Work Begins
Other update today was the aerial, I had asked for help sourcing a rubber for the outside but when I thought to myself that the aerial wasn't working and having the welder set up already I decided to just do a aerial delete.
Before:
 20230928_131237 by Sean Boyle, on Flickr
During:
 20230928_135129 by Sean Boyle, on Flickr
This also was the point that the passenger side went into dolphin glaze:
 20230928_171541 by Sean Boyle, on Flickr
This may seem like a drastic solution but it fixed one of the water leaks, removed the broken aerial and made it that much closer to being ready for a respray.
Before:
20230928_131237 by Sean Boyle, on FlickrDuring:
20230928_135129 by Sean Boyle, on FlickrThis also was the point that the passenger side went into dolphin glaze:
20230928_171541 by Sean Boyle, on FlickrThis may seem like a drastic solution but it fixed one of the water leaks, removed the broken aerial and made it that much closer to being ready for a respray.
Re: 1993 Cavalier Project, 2.0 GLS AUTO, Restoration Work Begins - Black Applied
Yesterday I got 3 coats of 2K High build primer onto the passenger side quarter panel:
 20230929_141247 by Sean Boyle, on Flickr
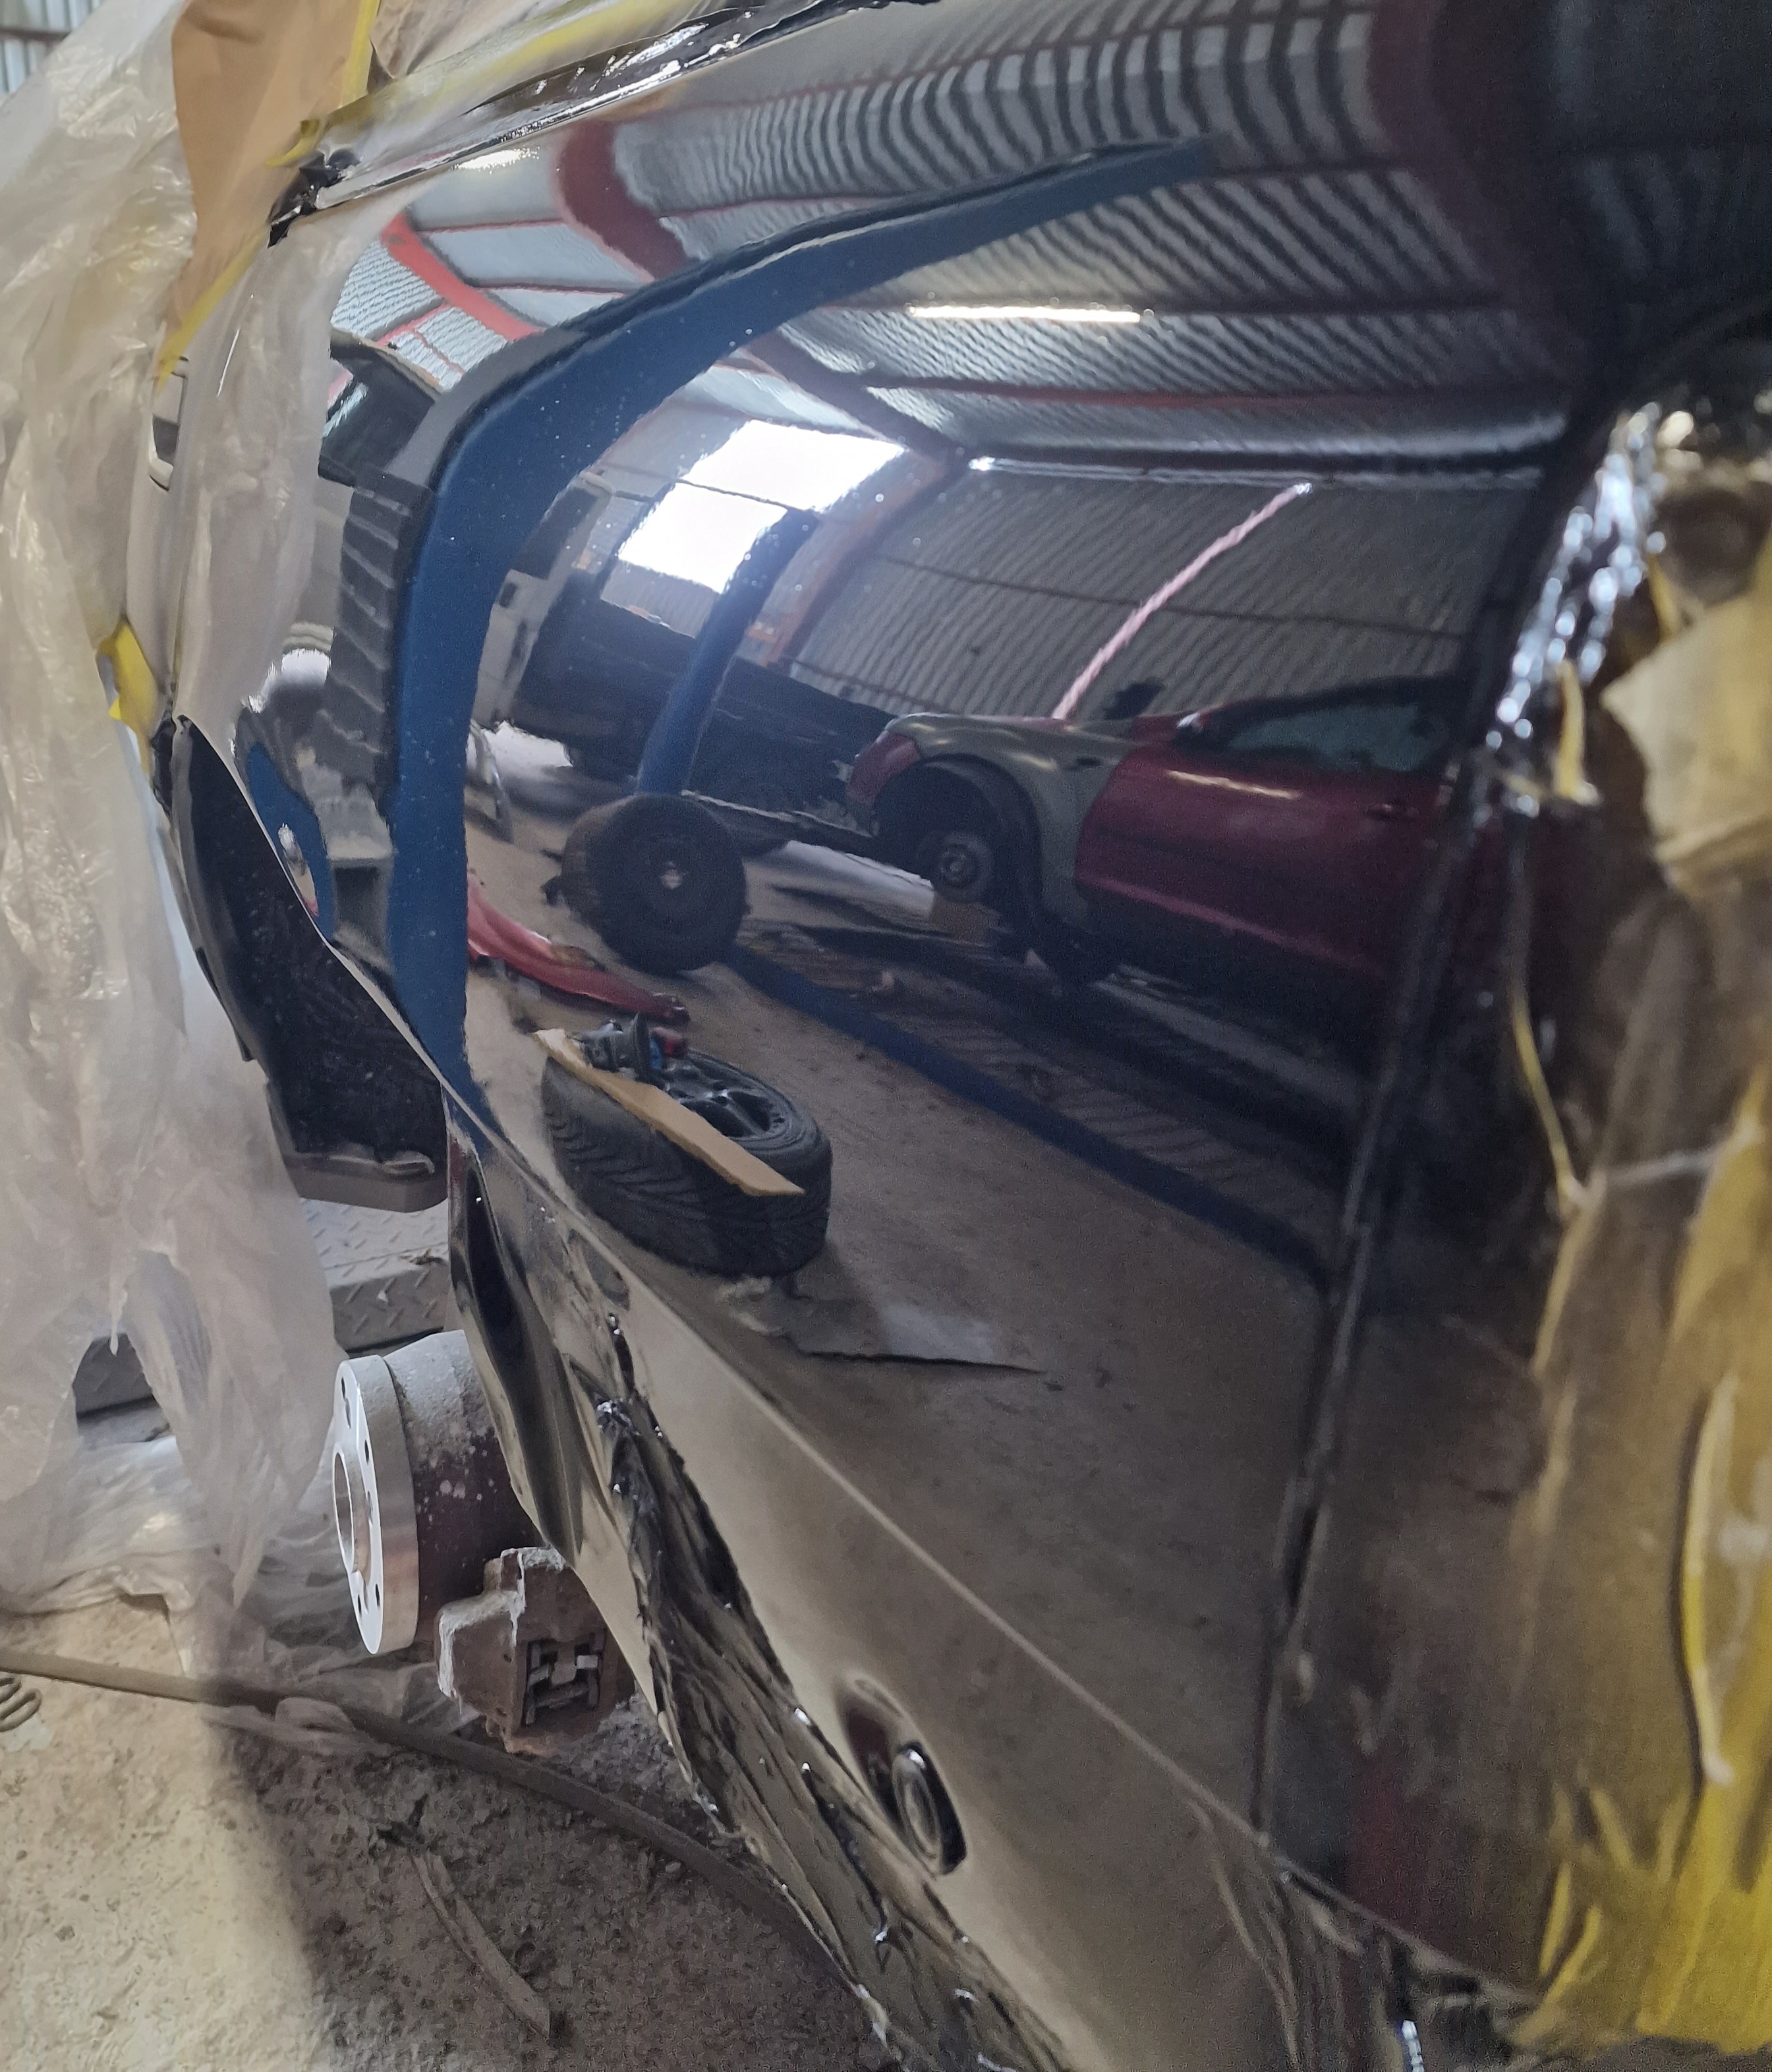
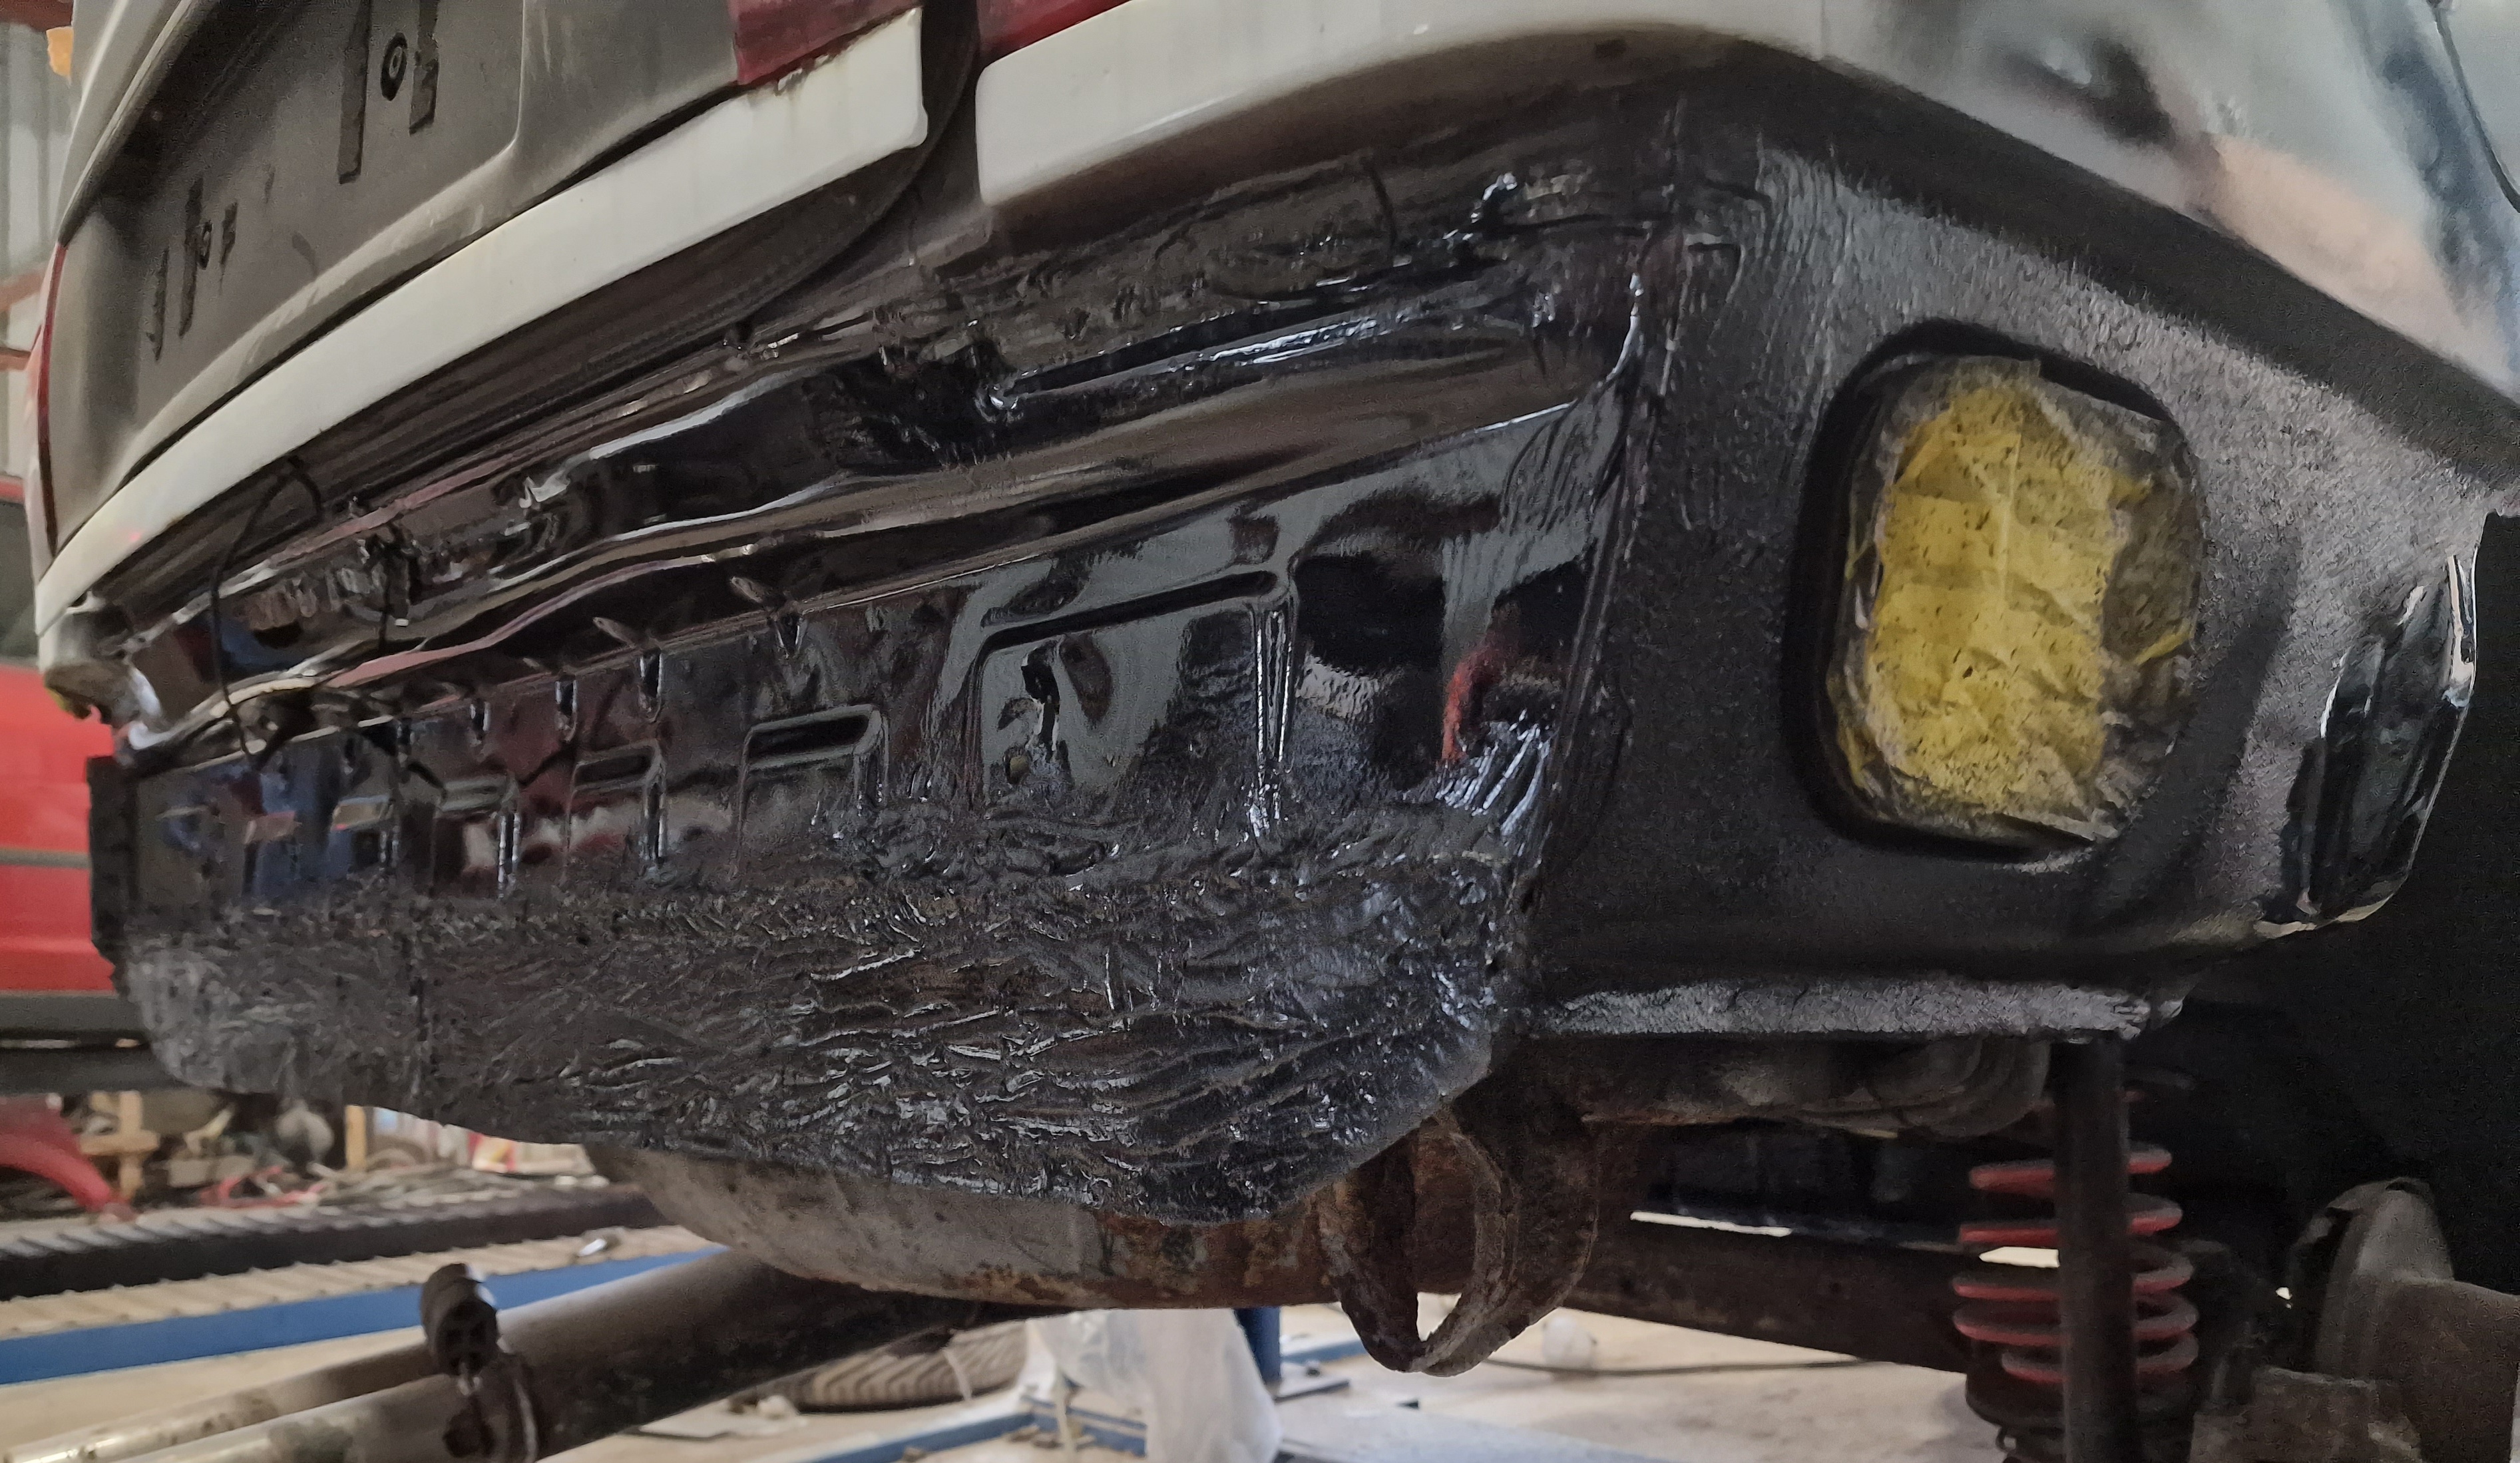
This was then sanded this morning with P320 on a da sander and then I had other panels to paint in the garage in black and decided it would be good time to check how the panel was and sprayed it in black aswell.
This gave me a good idea of where the panel was what was left to do, I also painted the panel behind the bumper / crossmember so its ready now for bumper to go back on once its dry:
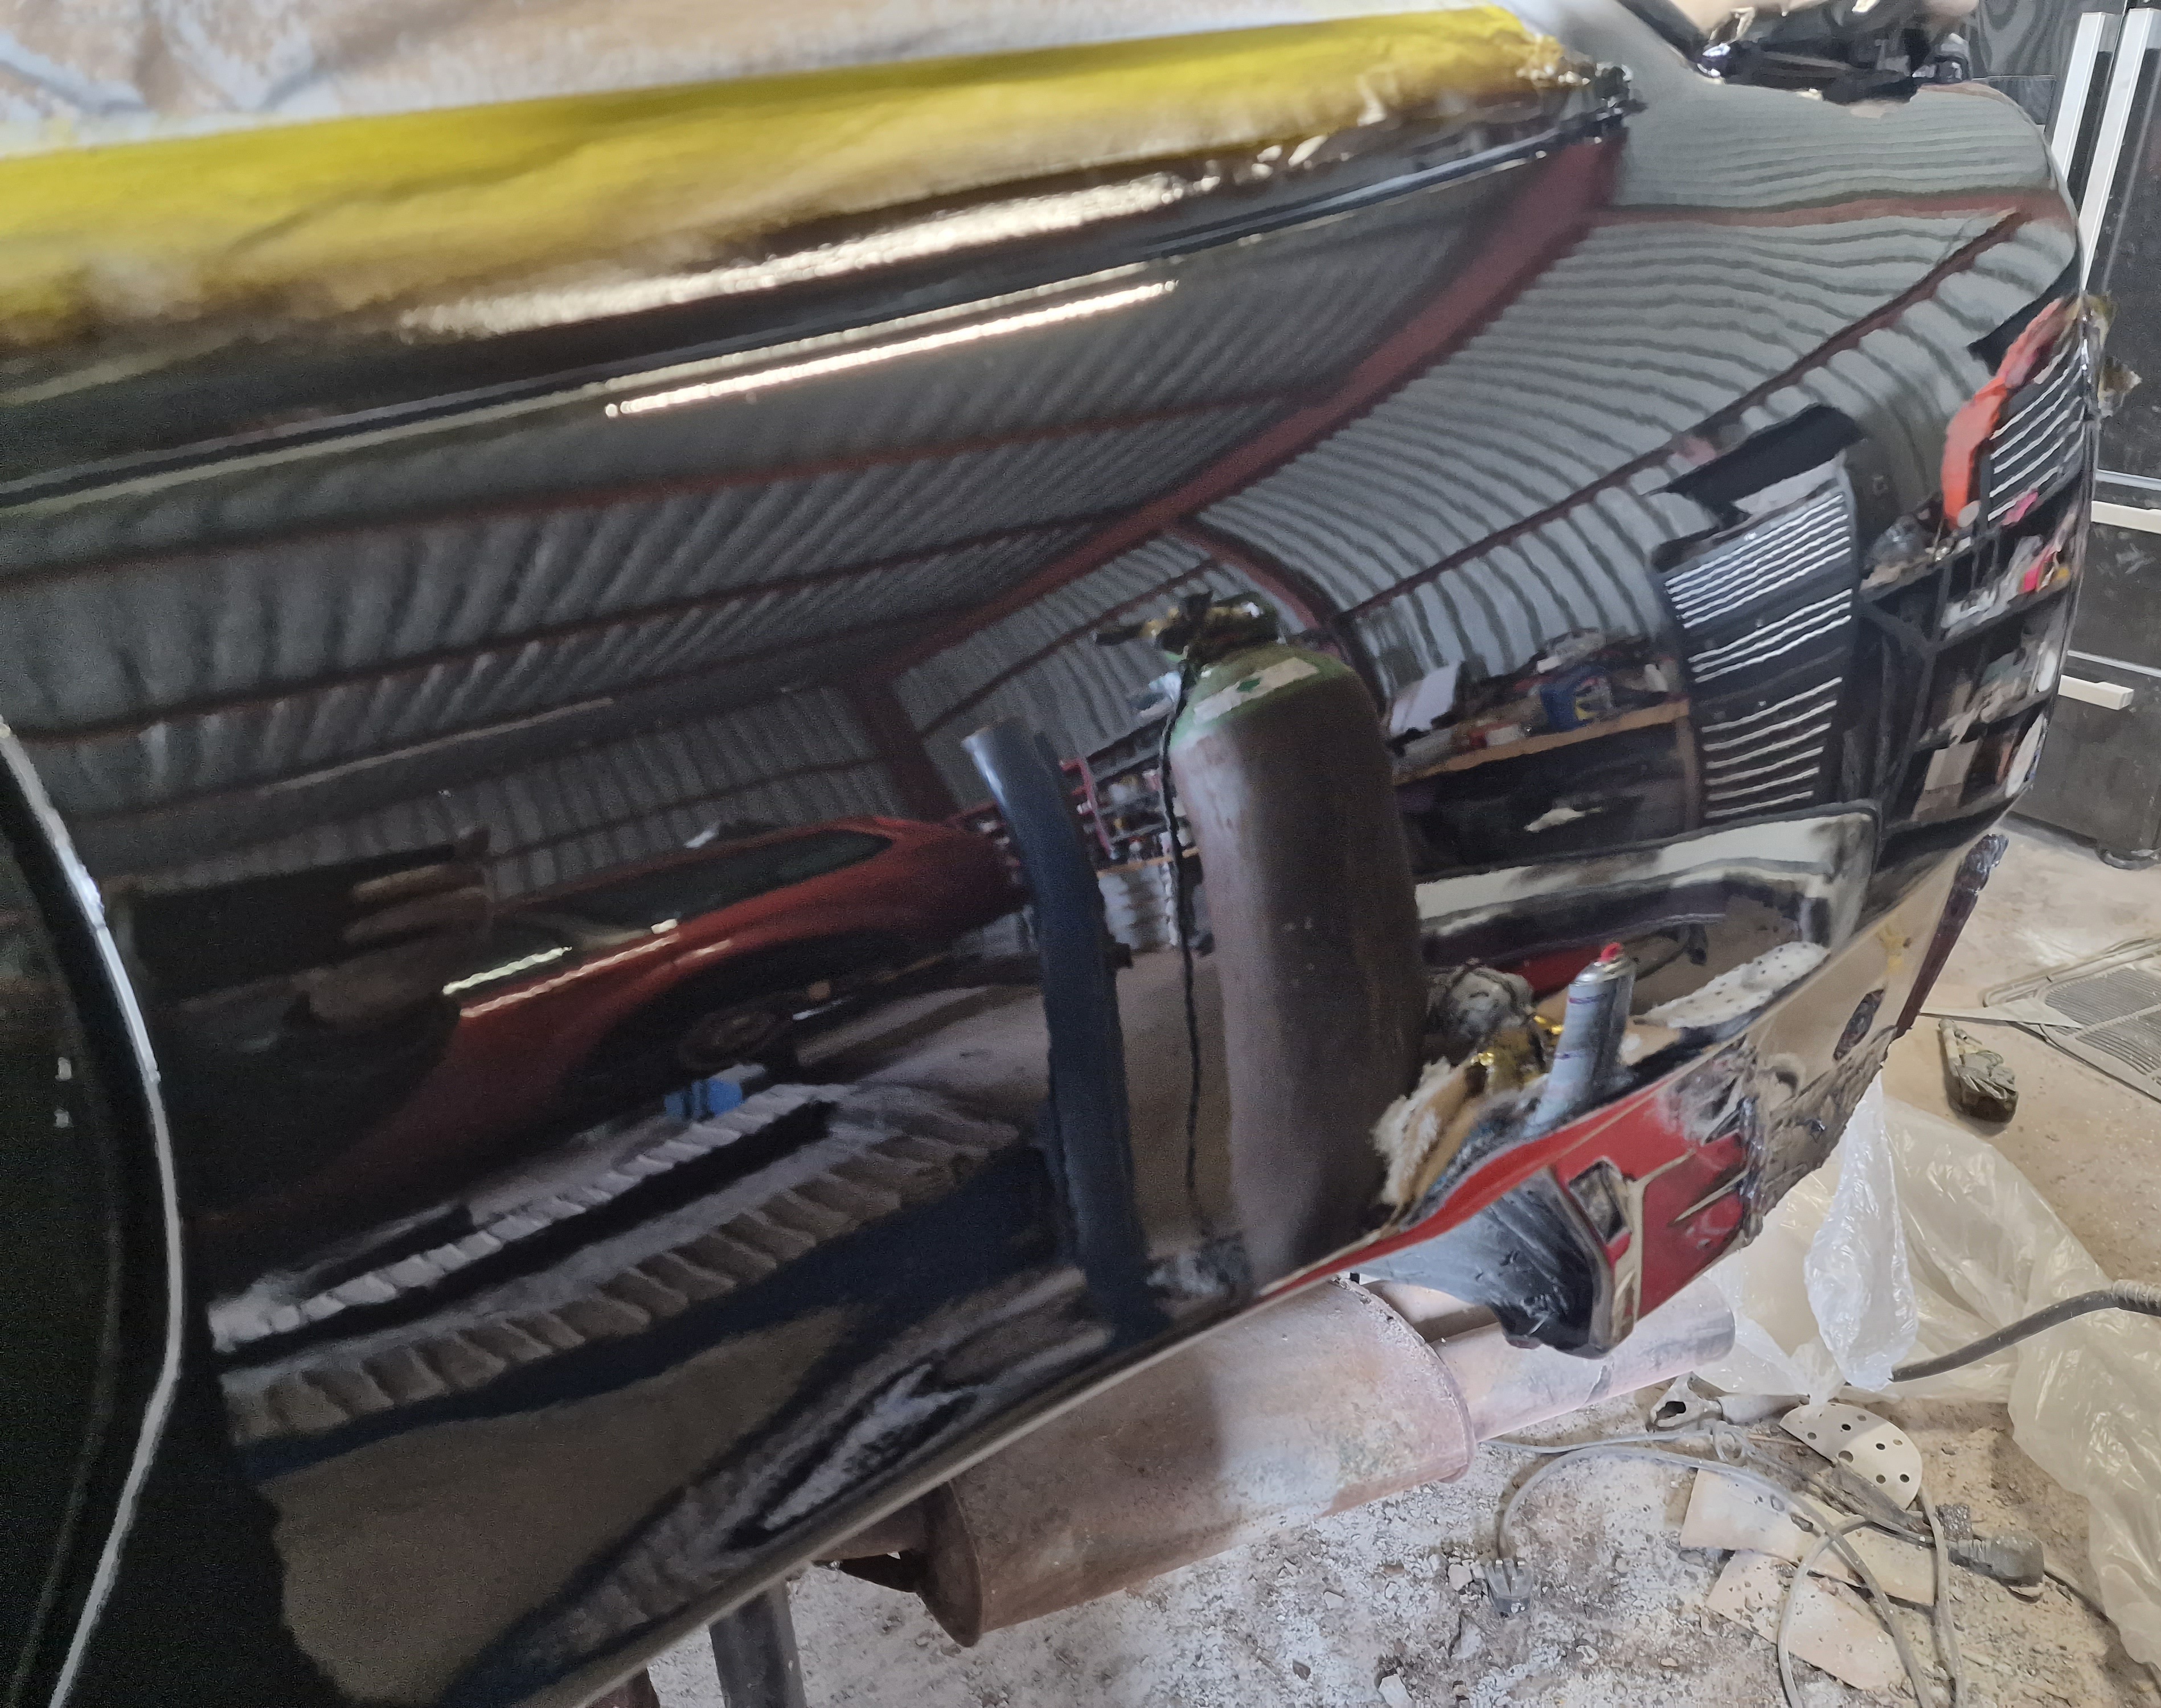 Black by Sean Boyle, on Flickr
 Black by Sean Boyle, on Flickr
 Black by Sean Boyle, on Flickr
 Black by Sean Boyle, on Flickr
 Black by Sean Boyle, on Flickr
I also painted one of the wheels to see how it would look:
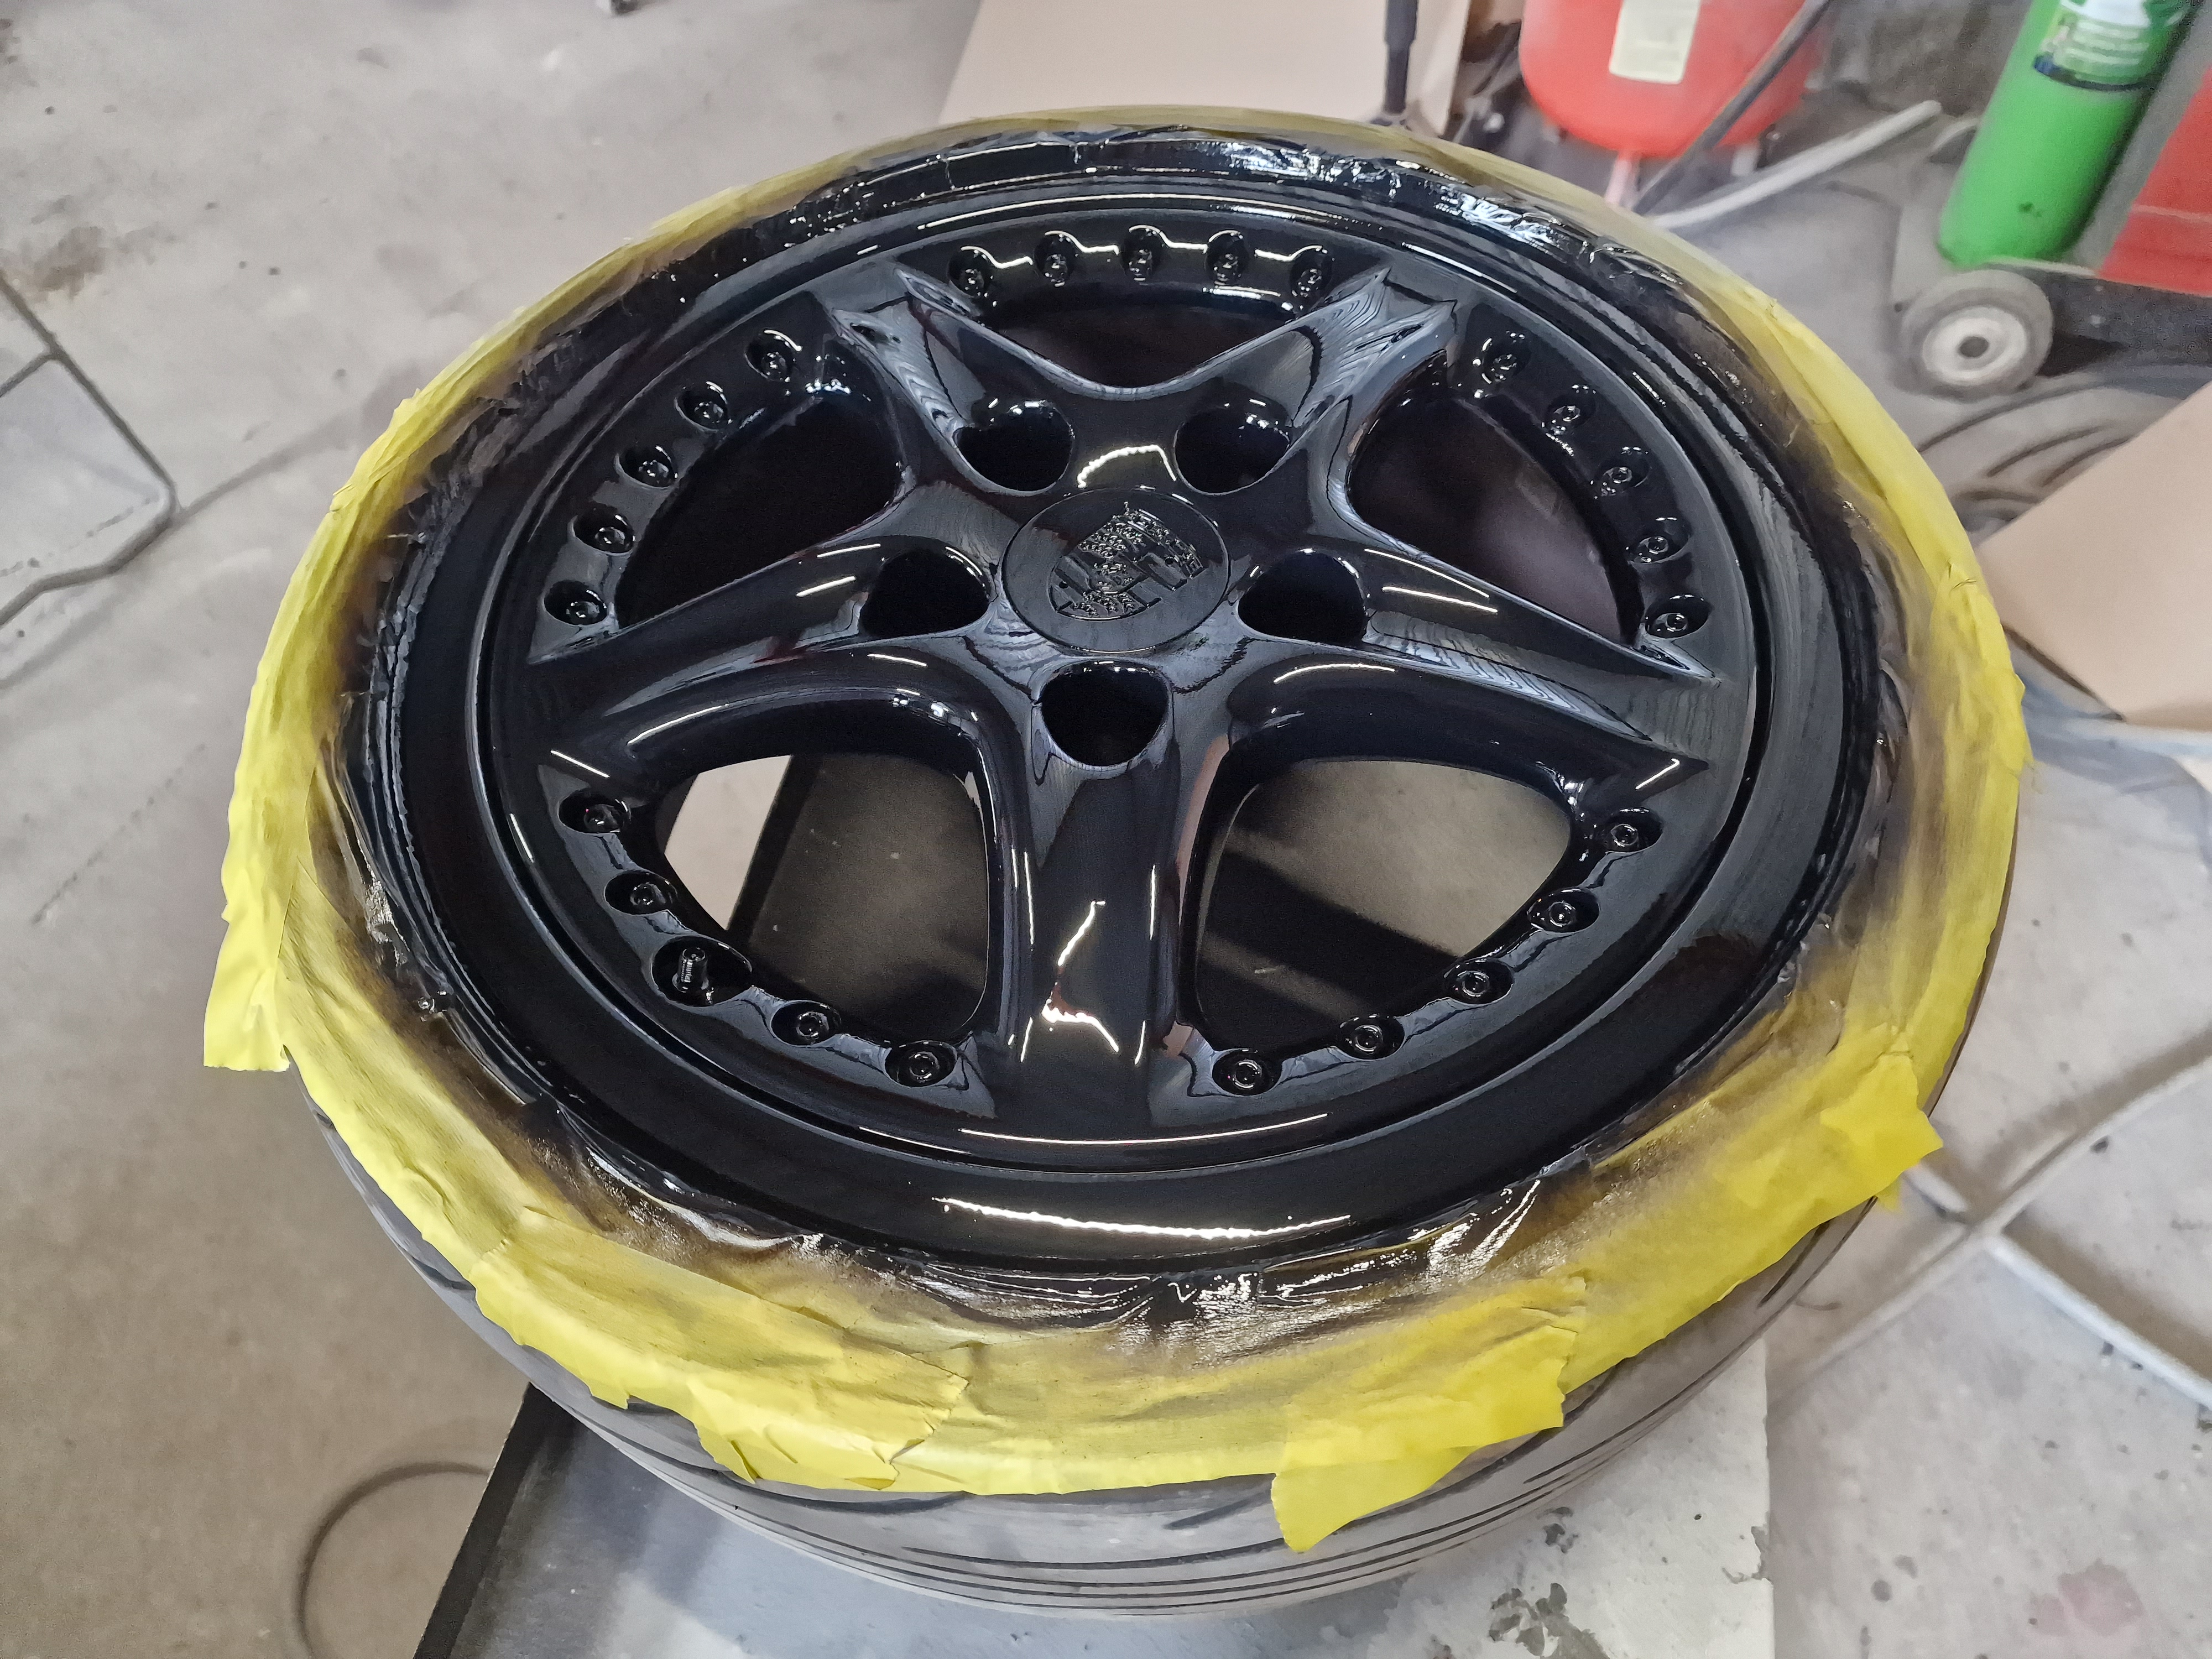 Black by Sean Boyle, on Flickr
This feels like a massive step forward as now the rear crossmember area is completely welded up, both arches are replaced and its now all sealed ready for the bumper to go back on soon and start moving forward.
20230929_141247 by Sean Boyle, on FlickrThis was then sanded this morning with P320 on a da sander and then I had other panels to paint in the garage in black and decided it would be good time to check how the panel was and sprayed it in black aswell.
This gave me a good idea of where the panel was what was left to do, I also painted the panel behind the bumper / crossmember so its ready now for bumper to go back on once its dry:
Black by Sean Boyle, on FlickrBlack by Sean Boyle, on FlickrBlack by Sean Boyle, on FlickrBlack by Sean Boyle, on FlickrBlack by Sean Boyle, on FlickrI also painted one of the wheels to see how it would look:
Black by Sean Boyle, on FlickrThis feels like a massive step forward as now the rear crossmember area is completely welded up, both arches are replaced and its now all sealed ready for the bumper to go back on soon and start moving forward.